Xây dựng ứng dụng phi tập trung (Dapp) với Unity
Bài đăng này đã không được cập nhật trong 6 năm
Trong bài này, chúng ta sẽ tiếp tục xây dựng một dapp (decentralized application) bằng Unity.
Đây sẽ là một ứng dụng mobile.
Note: Hiện giờ Apple Store và Google Play Store đang chưa chấp nhận các dapp mobile do các lý do liên quan đến bảo mật cũng như ảnh hưởng tới hệ thống in-app purchase của họ. Do vậy về mặt thực tiễn, làm dapp với Unity sẽ không giúp bạn có thêm thu nhập từ app store

Đơn giản mình thích thì mình làm thôi!
Source code hoàn chỉnh: https://github.com/dotrungkien/eth-unity-code-base
Các bài viết trước trong chuỗi bài "Xây dựng dapp":
- Plain: https://viblo.asia/p/xay-dung-ung-dung-phi-tap-trung-dapp-gAm5y8LLldb
- Reactjs: https://viblo.asia/p/xay-dung-ung-dung-phi-tap-trung-dapp-voi-reacjs-L4x5x8p15BM
- Vuejs: https://viblo.asia/p/xay-dung-ung-dung-phi-tap-trung-dapp-voi-vuejs-vyDZOaP95wj
- Cocos Creator: https://viblo.asia/p/xay-dung-ung-dung-phi-tap-trung-dapp-voi-cocos-creator-63vKjk2bZ2R
Cài đặt
Chúng ta cần cài đặt truffle để code contract, Unity để code một sample app đơn giản.
truffle
npm install -g truffle
Unity
Download và cài đặt tại đây: https://unity3d.com/get-unity/download
Init project
Ứng dụng của chúng ta sẽ có 2 phần, phần contract và phần game, ta sẽ lần lượt tạo từng folder:
1 - Tạo thư mục gốc của ứng dụng:
mkdir dapp-with-unity && cd dapp-with-unity
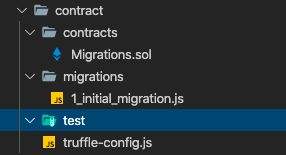
2 - tạo thư mục contract:
mkdir contract && cd contract
3 - init truffle project
truffle init
khi này chúng ta sẽ có được một project để bắt đầu code contract rồi.
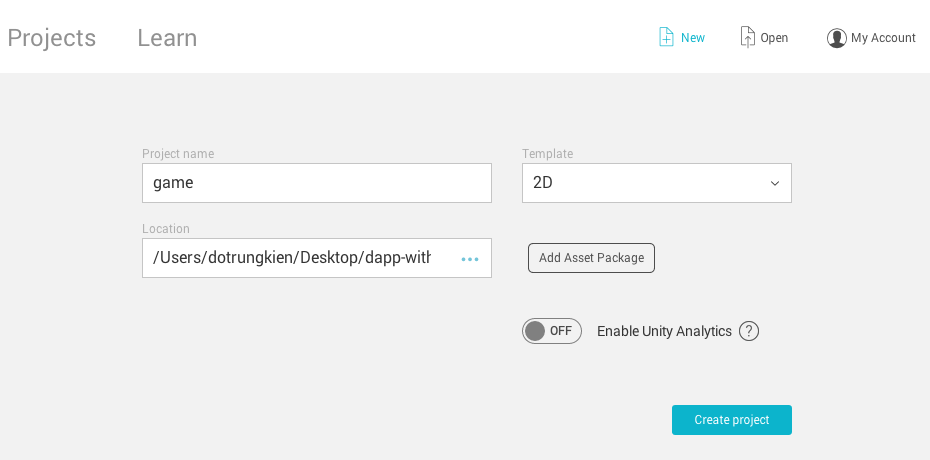
4 - init game project
Ta sẽ khởi động Unity lên và tạo một project mới, đặt tên là game, đặt bên trong thư mục dapp-with-unity
OK ta đã sẵn sàng để vào bước phát triển rồi.
Contract Development
Trong bài này ta sẽ làm một contract vô cùng đơn giản, chỉ có 2 phương thức và 1 biến mà thôi.
Contract
Vào thư mục contracts và tạo một file mới SimpleStore.sol với nội dung như sau:
pragma solidity ^0.5.0;

contract SimpleStore {
  uint256 value;

  event NewValueSet(uint256 indexed _value, address _sender);

  function set(uint256 newValue) public {
    value = newValue;
    emit NewValueSet(value, msg.sender);
  }

  function get() public view returns (uint256) {
    return value;
  }
}
ở đây ta sẽ dùng phiên bản solidity 0.5.0.
Truffle config
tại truffle-config.js ta sẽ config tất cả những thông tin về chain, compiler, accounts...
module.exports = {
  networks: {
    development: {
      host: '127.0.0.1',
      port: 8545,
      network_id: '123456789'
    }
  }
};
Với chain, để đơn giản nhất ta sẽ sử dụng một local chain, chạy bởi ganache-cli.
Chạy local chain
Nếu bạn chưa cài đặt ganache-cli thì hãy tiến hành cài đặt trước.
npm install -g ganache-cli
Ta sẽ chạy một local chain với chain id là 123456789 bằng lệnh:
ganache-cli -i 123456789
Khi này đã có một chain chạy tại địa chỉ http://localhost:8545 và 10 account, mỗi account có 100 ETH như thế này, mỗi account tương ứng với một private key bên dưới.
Available Accounts
==================
(0) 0x7c28281fb4fa65b40e3f47af4f88bfe82224090b
(1) 0x02c5c736031b4fa576cb911ddbb3e55eb741f134
(2) 0x905aef31f11b49923a6c377f83dec84567b90a25
(3) 0x3429059ea3d218c43266998cfed14e7f85f8d372
(4) 0x0ae76d77a96b34aff16f8910078ae2cf4e001768
(5) 0x148ffe781de6676fde20c2c6ff5bb022e80a9748
(6) 0x776be00b63a9d8692c1a4ce4d6baec1101fc913e
(7) 0x977eded9ac70b067c7cb840779ea9f46e8a89afb
(8) 0x01452fe9da1362ab8ace90d87056a4e5cfc22766
(9) 0xb422c3fafc0514cb733f83294d1681d6e3e8fc03

Private Keys
==================
(0) 26b3f59a6fec532ffc45f121bd2ba3c088666a34136669df03b315e938330d58
(1) 57adbbb3ba0aa454b3b85a87a6fc73e5ded11748e9323d0ba3866dca40e2e301
(2) db4093821ee1f362897847ac59851adea4a4aeeba22404321978111a02236174
(3) 3e953bb74802810739dec2df4cf2eb0e36d6ac665836a3c5658e35e4ef64814b
(4) 3ad55f2e89c7fe489a0cc04dd3574df69466656a98e92be78c9599a442370333
(5) ccc5585cbcbb0405fa5ea2aa48775e6ce7f75b819477c51396084b0b5ec3120d
(6) 77cab936b6001ad056cace50db94bacbec066fdf8842dbe598d7f656a18ec620
(7) 718159194d52ca85fad5dcaac0e9a9269994b6e3301cb233e107b4a71403d172
(8) debf1a6e65da5b3314de06dcefb6fec85065c9c74a42a8660a61d6786b322ba7
(9) 4c97648a754569ef7cfbfafeeb3df4213eea2fb8f1ced9ff38ade25e1ad688c5
hãy lưu lại private key đầu tiên để chút nữa ta sẽ sử dụng account tương ứng trong metamask.
Compile và Migration
Ta sẽ tiến hành compile contract để đảm bảo rằng contract của chúng ta không có lỗi:
truffle compile
kết quả
> Compiling ./contracts/Migrations.sol...
> Compiling ./contracts/SimpleStore.sol...
> Writing artifacts to ./../game/assets/Contracts
Để migration contract của chúng ta lên local chain, ta sẽ phải tạo thêm một file migration cho nó.
Trong thư mục migrations tạo thêm file 2_simple_store_migration.js với nội dung như sau:
const SimpleStore = artifacts.require('SimpleStore');

module.exports = function(deployer) {
  deployer.deploy(SimpleStore);
};
Và tiến hành migrate
truffle migrate --network development
kết quả
Starting migrations...
======================
> Network name:    'development'
> Network id:      123456789
> Block gas limit: 6721975


1_initial_migration.js
======================

   Deploying 'Migrations'
   ----------------------
   > transaction hash:    0xaa2af826be86a1561c79bbff42c1c8646921e327609995b486c0b71eb920edc4
   > Blocks: 0            Seconds: 0
   > contract address:    0x6E896215aD8E6c9d335AAc6642747Cfa96b88511
   > account:             0x7c28281Fb4FA65B40E3f47af4F88BFe82224090b
   > balance:             99.99430184
   > gas used:            284908
   > gas price:           20 gwei
   > value sent:          0 ETH
   > total cost:          0.00569816 ETH

   > Saving artifacts
   -------------------------------------
   > Total cost:          0.00569816 ETH


2_simple_store_migration.js
===========================

   Deploying 'SimpleStore'
   -----------------------
   > transaction hash:    0x70d5bfd2b6f35bced155e93422f7f73a04f475f604e158b766421690ee730882
   > Blocks: 0            Seconds: 0
   > contract address:    0xaC78cEE4872Dd65945a22C66DFCB2d55a9cc65DC
   > account:             0x7c28281Fb4FA65B40E3f47af4F88BFe82224090b
   > balance:             99.99139726
   > gas used:            145229
   > gas price:           20 gwei
   > value sent:          0 ETH
   > total cost:          0.00290458 ETH

   > Saving artifacts
   -------------------------------------
   > Total cost:          0.00290458 ETH


Summary
=======
> Total deployments:   2
> Final cost:          0.00860274 ETH
Extract contract ABI
Việc tạo script đọc và xử lý file json với Csharp khá dài nên mình sẽ viết một script js tách luôn ABI và địa chỉ của contract ra một file riêng, để chút nữa trong game ta không phải viết thêm xử lý chỉ việc kéo thả vào trong Unity mà thôi. Easy!
Tạo thư mục scripts, bên trong ta tạo một file extract_abi.js với nội dung sau:
const fs = require('fs');
const path = require('path');
const contracts = path.resolve(__dirname, '../build/contracts/');
const unityAbis = path.resolve(__dirname, '../../game/Assets/Contracts/');

module.exports = function() {
  let builtContracts = fs.readdirSync(contracts);
  builtContracts.forEach(contract => {
    if (contract === 'Migrations.json' || contract === 'SafeMath.json') return;
    console.log('extracting contract ', contract);
    const name = contract.split('.')[0];
    let json = JSON.parse(fs.readFileSync(path.resolve(contracts, contract)));
    let { abi, networks } = json;
    if (!Object.keys(networks).length) return;
    fs.writeFileSync(path.resolve(unityAbis, contract), JSON.stringify(json.abi));
    fs.writeFileSync(path.resolve(unityAbis, name + 'Address.txt'), networks['123456789'].address);
  });
};
Bên game, trong thư mục game/Assets ta sẽ tạo một thư mục Contracts, sau đó quay lại bên contract và chạy lệnh:
truffle exec scripts/extract_abi.js
Khi này nó sẽ sinh ra cho chúng ta thư mục Contracts 2 file: SimpleStore chứa contract ABI và SimpleStoreAddress chứa contract address.

OK vậy là xong phần contract.
Game Development
Hãy mở Unity và chọn project game mà chúng ta vừa tạo.
Project Settings
Vì ta làm ứng dụng mobile, nên việc đầu tiên là ta sẽ switch project sang Android.
Chọn File/Build Settings..., tại cửa sổ build setting, ta chọn Android và nhấn Switch Platform.
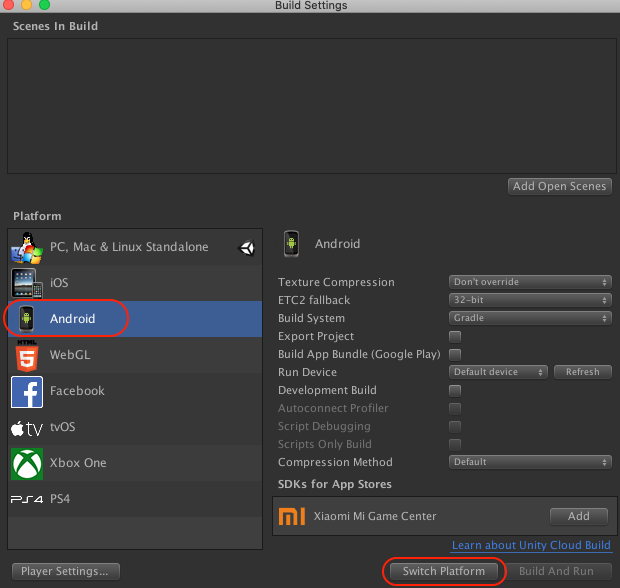
Tiếp tục chọn Player Settings..., hãy đảm bảo Scripting Runtime Version là .Net 4.x Equivalent, và Api Compatibility Level là .Net 4.x

Scene
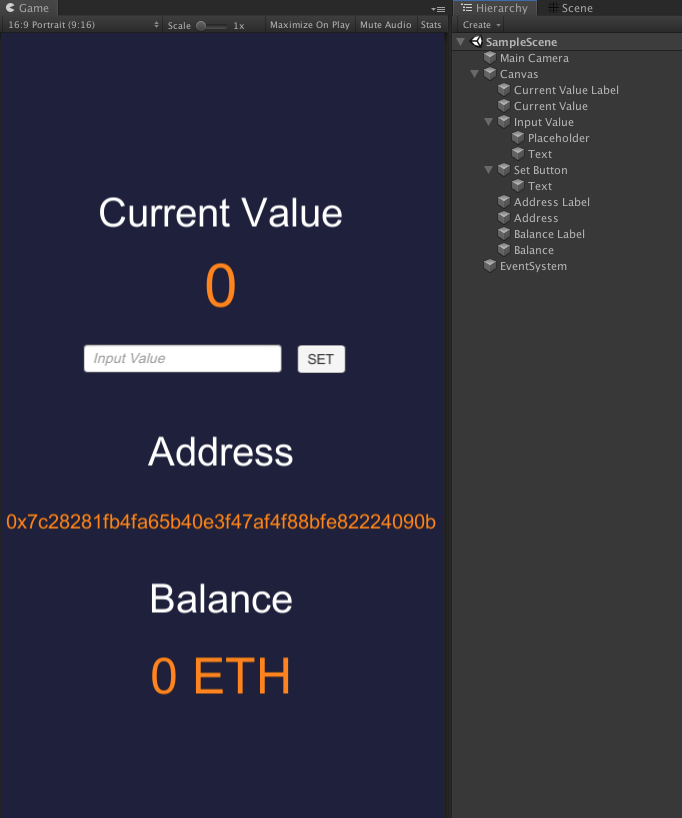
Mở đầu chúng ta sẽ có một scene SampleScene chưa có gì ngoài MainCamera và Event System cả.
Ta lần lượt sẽ tạo các Text cho Value, Address, Balance, một InputField cho giá trị nhập vào, và một Button để set giá trị cho value. Thêm chút màu sắc nếu cần.
Scene sẽ trông như sau:
Nethereum Plugin
Để kết nối với blockchain từ Unity, ta sẽ sử dụng một thư viện của Csharp có tên gọi Nethereum.
Nethereum là một thư viện tích hợp của .Net trên nền tảng Ethereum, dùng để kết nối giữa các client Csharp tới các node trên Ethereum blockchain như Geth, Parity hay Quorum.
Download Nethereum tại đây: https://github.com/Nethereum/Nethereum/releases
Đọc thêm Documentations tại đây: https://nethereum.readthedocs.io/en/latest/unity3d-introduction/
Nethereum có 2 phiên bản: Net461 sử dụng cho các hệ thống .Net 4x trở lên, và Net351 sử dụng cho các hệ thống .Net thấp hơn.
Các phiên bản Unity trước đây sử dụng .Net3.5, nhưng gần đây đã nâng cấp lên sử dụng cả 4.x và 3.5, và trong tương lai sẽ bỏ hoàn toàn phiên bản 3.5, nên chúng ta luôn nên sử dụng các phiên bản 4.x trở lên. Trong bài này cũng vậy, chúng ta sẽ sử dụng phiên bản Net461.
Ta sẽ tạo thư mục Plugins trong thư mục game/Assets và giải nén thư viện đã download về tại đây.

Note: Nếu gặp các lỗi liên quan đến Library/PackageCache/ thì hãy mạnh dạn tắt đi khởi động lại Unity.
Scripts
Tạo thư mục Scripts, bên trong tạo một script SimpleStore.cs với nội dung như sau:
using System;
using System.Numerics;
using System.Collections;
using System.Collections.Generic;
using System.Threading.Tasks;

using UnityEngine;
using UnityEngine.UI;

using Nethereum.Web3;
using Nethereum.Web3.Accounts;
using Nethereum.Contracts;
using Nethereum.ABI.FunctionEncoding.Attributes;
using Nethereum.Signer;
using Nethereum.Hex.HexTypes;

public class SimpleStore : MonoBehaviour
{

    [Header("Deployed contract")]
    public TextAsset contractABI;
    public TextAsset contractAddress;

    public Text currentValueText;
    public Text addressText;
    public Text balanceText;
    public InputField inputValue;

    private HexBigInteger ethBalance;
    private Web3 web3;
    private Account account;
    private string privateKey;
    private string from;
    private Contract contract;

    private HexBigInteger gas = new HexBigInteger(900000);

    private Function getFunction;
    private Function setFunction;

    void Start()
    {
        AccountSetup();
    }

    public void AccountSetup()
    {
        var url = "http://localhost:8545";
        privateKey = "0x26b3f59a6fec532ffc45f121bd2ba3c088666a34136669df03b315e938330d58";
        account = new Account(privateKey);
        from = account.Address;
        web3 = new Web3(account, url);
        StartCoroutine(StatusInterval());
        GetContract();
    }

    IEnumerator StatusInterval()
    {
        while (true)
        {
            UpdateStatus();
            yield return new WaitForSeconds(1f);
        }
    }

    public async Task UpdateStatus()
    {
        uint newValFromContract = await GetValue();
        currentValueText.text = "" + newValFromContract;
        var newBalance = await web3.Eth.GetBalance.SendRequestAsync(from);
        ethBalance = newBalance;
        decimal ethBalanceVal = Web3.Convert.FromWei(ethBalance.Value);
        addressText.text = from;
        balanceText.text = string.Format("{0:0.00} ETH", ethBalanceVal);
    }

    public void OnSetValue()
    {
        var newValue = inputValue.text;
        try
        {
            int intValue = Int32.Parse(newValue);
            SetValue(intValue);
        }
        catch (FormatException)
        {
            Debug.LogError("Unable to parse input!");
        }
    }

    void GetContract()
    {
        string abi = contractABI.ToString();
        string address = contractAddress.ToString();
        contract = web3.Eth.GetContract(abi, address);

        getFunction = contract.GetFunction("get");
        setFunction = contract.GetFunction("set");
    }

    public async Task<uint> GetValue()
    {
        var value = await getFunction.CallAsync<uint>();
        return value;
    }

    public async Task<string> SetValue(int value)
    {
        var receipt = await setFunction.SendTransactionAndWaitForReceiptAsync(from, gas, new HexBigInteger(0), null, value);
        Debug.LogFormat("tx: {0}", receipt.TransactionHash);
        return receipt.TransactionHash;
    }
}
Giải thích
- đầu tiên ta sẽ khai báo các Text, InputField và Button mà ta đã tạo ra ở bên trên, ở đây đáng chú ý là ta sẽ có 2 biến
TextAsset, dùng để lưu trữ ABI và contract address mà ta đã tạo ra từ trước.
public TextAsset contractABI;
public TextAsset contractAddress;

public Text currentValueText;
public Text addressText;
public Text balanceText;
public InputField inputValue;
- ở bài viết này, chúng ta sẽ sử dụng trực tiếp account đầu tiên sinh ra bởi
ganache-cli. Trên thực tế, chúng ta nên làm thêm chức năng sinh private-key mới cho người dùng, hoặc cho phép người dùng nhập vào mnemonic hay private để import account đã có của họ.
public void AccountSetup()
{
    var url = "http://localhost:8545";
    privateKey = "0x26b3f59a6fec532ffc45f121bd2ba3c088666a34136669df03b315e938330d58";
    account = new Account(privateKey);
    from = account.Address;
    web3 = new Web3(account, url);
    StartCoroutine(StatusInterval());
    GetContract();
}
- sau đó cứ mỗi giây, chúng ta lại update lại trạng thái của ứng dụng, như
valuehaybalancecủa account.
public async Task UpdateStatus()
{
    uint newValFromContract = await GetValue();
    currentValueText.text = "" + newValFromContract;
    var newBalance = await web3.Eth.GetBalance.SendRequestAsync(from);
    ethBalance = newBalance;
    decimal ethBalanceVal = Web3.Convert.FromWei(ethBalance.Value);
    addressText.text = from;
    balanceText.text = string.Format("{0:0.00} ETH", ethBalanceVal);
}
- phần định nghĩa contract, ta sẽ sử dụng ABI và contract address để tạo ra contract instance, đồng thời implement các hàm
GetValuevàSetValuetương ứng với các hàmgetvàsettrongSimpleStore.solcontract
void GetContract()
{
    string abi = contractABI.ToString();
    string address = contractAddress.ToString();
    contract = web3.Eth.GetContract(abi, address);

    getFunction = contract.GetFunction("get");
    setFunction = contract.GetFunction("set");
}

public async Task<uint> GetValue()
{
    var value = await getFunction.CallAsync<uint>();
    return value;
}

public async Task<string> SetValue(int value)
{
    var receipt = await setFunction.SendTransactionAndWaitForReceiptAsync(from, gas, new HexBigInteger(0), null, value);
    Debug.LogFormat("tx: {0}", receipt.TransactionHash);
    return receipt.TransactionHash;
}
- khi ta bấm
Setbutton, thì đầu tiên ta sẽ check xem giá trị trong input field có phải dạng int hay không, sau đó mới gọi hàm từ smart contract.
public void OnSetValue()
{
    var newValue = inputValue.text;
    try
    {
        int intValue = Int32.Parse(newValue);
        SetValue(intValue);
    }
    catch (FormatException)
    {
        Debug.LogError("Unable to parse input!");
    }
}
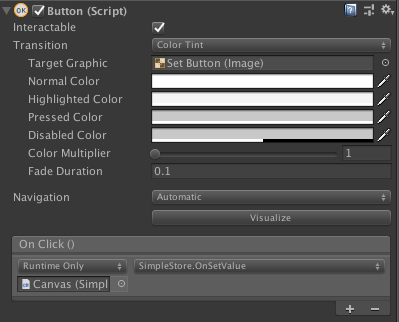
ok script đã sẵn sàng, quay trở lại scene, add script SimpleStore vào object Canvas, sau đó kéo các biến cần thiết từ scene vào trong script SimpleStore component:

tiếp theo tạo Click Event cho SET button, sử dụng hàm callback là OnSetValue:
Test game
Khi ta mới vào, giá trị của value là 0:

set thử một giá trị xem sao, ví dụ 321, và chờ chút, giá trị sẽ được cập nhật thành 321:
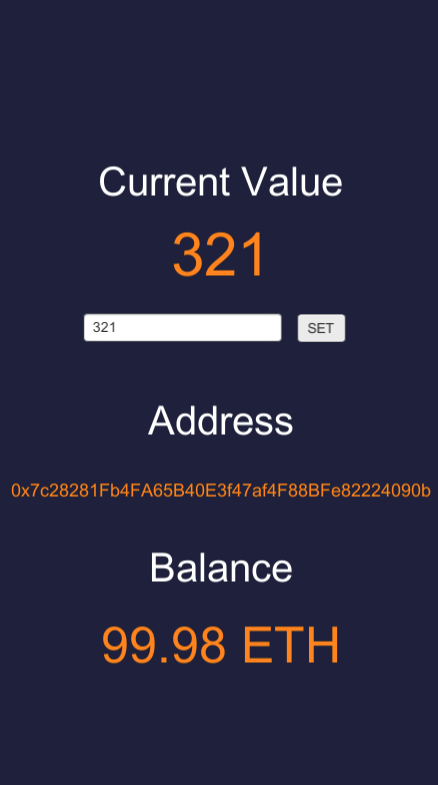
All done!
Kết luận
Vậy là chúng ta đã hoàn thành một ứng dụng vô cùng đơn giản với Unity tích hợp với Ethereum Blockchain rồi.
Dù chức năng chỉ là minimum nhưng ta hoàn toàn có rất nhiều hướng để phát triển. Unity là một engine vô cùng nổi tiếng để làm game, do đó ta có thể xây dựng được các game trên đó rất dễ dàng.
Đồng thời ngoài localchain, bằng cách tương tự, ta cũng có thể deploy và kết nối đến các chain khác như Main chain, Ropsten, Rinkeby, Kovan, Loom, Tomochain...
Nếu các bạn muốn tham khảo một game hoàn chỉnh, các bạn có thể tham khảo sản phẩm Tomo Sheep Fight mình viết trên Tomochain (sản phẩm đã đạt giải Nhì trị giá 1000$ tại Tomochain Dappathon 2019) tại đây:
https://github.com/dotrungkien/TomoSheepFight
Demo:
Enjoy coding!
All rights reserved
