OpenCV: Watermarking image
Bài đăng này đã không được cập nhật trong 6 năm
When you are watching TV, you will see a logo on the top left or right screen. It is used to identify ownership of the copyright of their content which it is called a "digital watermark". An Image Watermarking is the process of hiding digital information into an original image that is to be protected against abuses.
There are two type of image watermarking:
- visible: it is a technique that we embeded a marked text of image on top of the original image where it can be seen by everyone.
- invisible: it is technique that we embedded a marked text, image into the original image where the watermarked image look normal like the original source. However, the marked image can be extrated via its decrypt alogirethm.
Watermarking apllication
Digital watermarking may be applied on applications, such as:
- Copyright identification
- Source tracking (different recipients get differently watermarked content)
- User authentication or fingerprint
- Tamper detection
- Copy protection
Moreover, visible image watermarking can also be use in image manipulation application such as face app, visual makeup app, and more. Therefore, we are going to talk about visible water marking technique and implementing a simple application using watermarking technique.
Visable watermarking algorithm
The algorithm for producing watermarked image fw from an original image f with watermark w is ery simple:
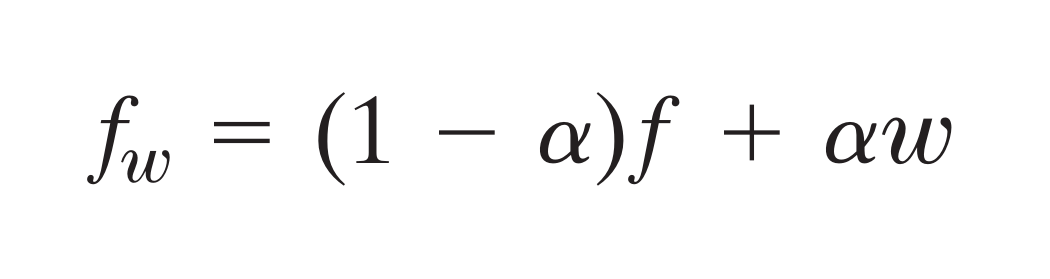
Where α( 0<= α <= 1) is an opacity value of our watermark image on origianal image.
The above is a very simple algorithm for implementing image watermarking from scratch. However, on OpenCV there is build in methods addWeighted which allow us to produce watermarking image with ease.
Syntax: dst=cv.addWeighted(src1, alpha, src2, beta, gamma[, dst[, dtype]])
Implementation
We are going to implement a simple visible watermarking image and video using OpenCV method above. For this implemntation, we are using:
- OpenCV 4.1.0
- Python 3.7.3
- Numpy
- Webcam or Video input
Let's start from implent our core function watermarking where it will take an original image, watermark image, opacity of watermark image and dimiontion of outup watermark image. By first, we rezie its size and then we blend those images together.
import cv2
import numpy as np

def watermarking(original, watermark, alpha = 0.5, width=500, height=500):
  # resize image
  original = cv2.resize(original, (width, height), interpolation = cv2.INTER_AREA)
  (originalHeight, originalWidth) = original.shape[:2]
  original = np.dstack([original, np.ones((originalHeight,originalWidth), dtype="uint8") * 255])

  #Resizing the image
  scale = 10
  rw = int(watermark.shape[1] * scale / 100)
  rh = int(watermark.shape[0] * scale / 100)
  dim = (rw,rh)
  watermarked = cv2.resize(watermark, dim, interpolation = cv2.INTER_AREA)
  (wH, wW) = watermarked.shape[:2]

  #Blending
  overlay = np.zeros((originalHeight, originalWidth, 4), dtype="uint8")
  overlay[10:10 + wH, 10:10 + wW] = watermarked
  final = original.copy()
  return cv2.addWeighted(overlay,0.5,final,1.0,0,final)
Once our core function complete, we can write code for watermark on image with ease.
import cv2
import numpy as np
from watermarking import watermarking
image = cv2.imread("20190929_135314.jpg")
watermark = cv2.imread("sun-bear.png", cv2.IMREAD_UNCHANGED)
# Showing the result
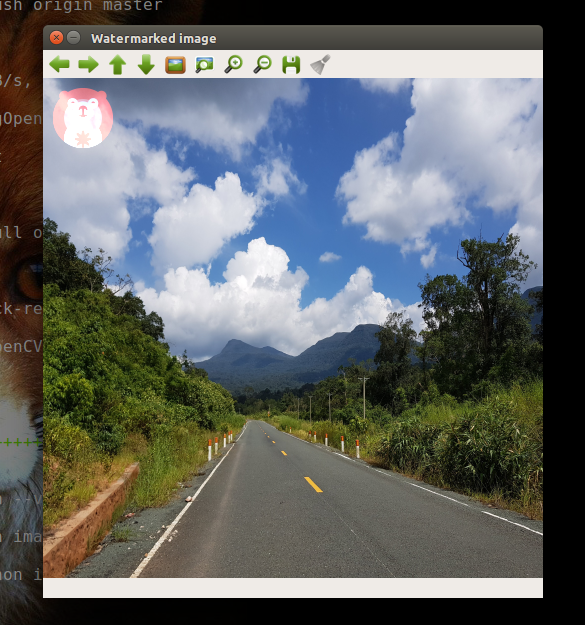
final = watermarking(image, watermark)
cv2.imshow("Watermarked image",final)
cv2.waitKey(0)
cv2.destroyAllWindows()
python image_watermarking.py
Next, we can also apply watermark image on video stream and let's name our stream "Sun TV" where we will add our Bear logo in the coner of our video stream.
from imutils.video import VideoStream
import imutils
import time
import cv2
from watermarking import watermarking

print("[INFO] camera sensor warming up...")
vs = VideoStream(0).start()
time.sleep(2.0)
watermark = cv2.imread("sun-bear.png", cv2.IMREAD_UNCHANGED)
# loop over the frames from the video stream
while True:
  # grab the frame from the threaded video stream, resize it to
  # have a maximum width of 400 pixels, and convert it to
  # grayscale
  frame = vs.read()
  frame = imutils.resize(frame, height=500)
  h,w = frame.shape[:2]

  # show the frame
  final = watermarking(frame, watermark, width=w, height=h)
  cv2.imshow("Original", frame)
  cv2.imshow("Sun TV", final)

  key = cv2.waitKey(1) & 0xFF

  # if the `q` key was pressed, break from the loop
  if key == ord("q"):
    break

# do a bit of cleanup
cv2.destroyAllWindows()
vs.stop()
python video_watermarking.py
Resources
- Rafael C G,Ricard E W. 2008.Digital Image Processing(3rd ed). page: 614
- Source code: https://github.com/RathanakSreang/ImageWatermarkingOpenCV
- https://en.wikipedia.org/wiki/Digital_watermarking
- http://digitalwatermarkingalliance.org/digital-watermarking-works/
- https://www.pyimagesearch.com/2016/04/25/watermarking-images-with-opencv-and-python/
- https://docs.opencv.org/2.4/doc/tutorials/core/adding_images/adding_images.html#adding-images
- https://www.life2coding.com/how-to-add-logo-or-image-watermark-on-images-with-opencv-python/
- https://www.codespeedy.com/watermark-image-using-opencv-in-python/
Future works
An Understanding the image watermarking is very essential for every CV developer and researcher because it serves as core component for us to implement many image processing applications to base on it. Moreover, there are many new applications that we apply a visible watermarking technique to the real world problems such as a virtual makeup application where we can embed and preset image on human faces. Now it's up to you to further apply the technique for your future applications and I cannot wait to heard it from you.
All rights reserved
