Terraform Series - Bài 14 - Automating Terraform with Gitlab CI
Bài đăng này đã không được cập nhật trong 2 năm
Link bài viết gốc: Bài 14 - Xây dựng CI/CD cho Terraform với Gitlab CI
Chào các bạn tới với series về Terraform, ở bài trước chúng ta đã tìm hiểu về Ansible với Terraform. Ở bài này chúng ta sẽ tìm hiểu về cách sử dụng Gitlab CI để thiết lập CI/CD cho infrastructure trên AWS.
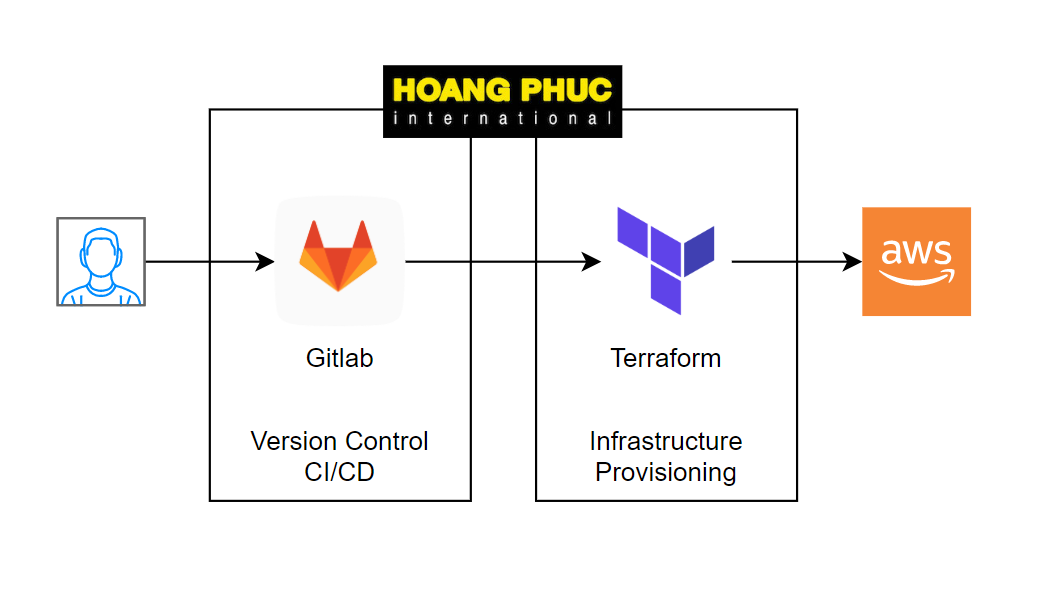
Gitlab CI là một tính năng rất tuyệt vời của Gitlab, nó hỗ trợ ta rất nhiều use cases về CI/CD.
Implement GitLab CI
Để làm được bài này thì yêu cầu mọi người cần có tài khoản gitlab trước nhé. Ở bài này chúng ta sẽ làm một ví dụ đơn giản là tạo EC2 trên AWS thông qua Gitlab CI. Ok, giờ ta bắt đầu nào.
Bước đầu tiên, các bạn cần tạo gitlab repository để chứa code của ta, repository của ta sẽ có các file như sau:
.gitlab-ci.ymlmain.tfvariables.tf
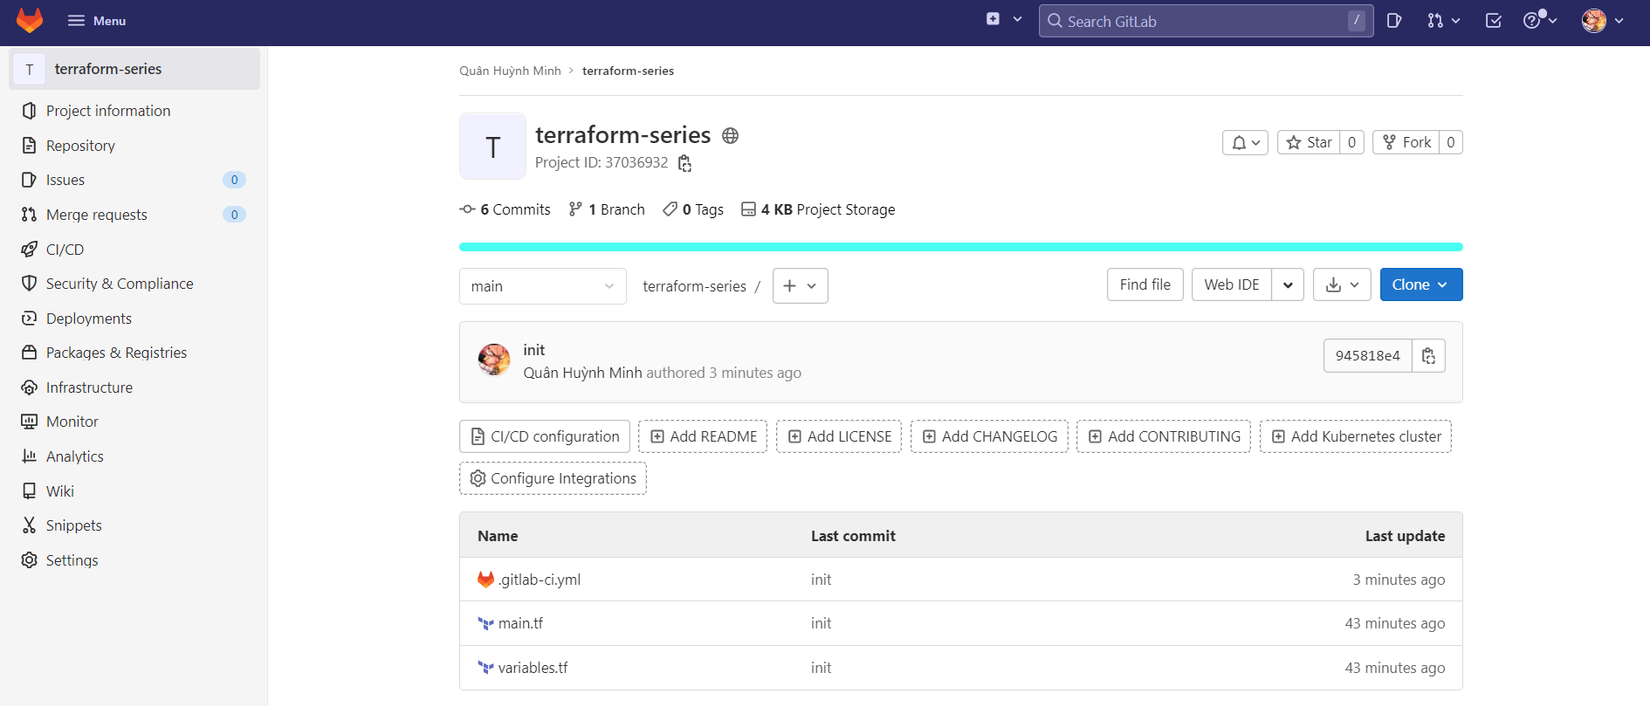
Code của file variables.tf và main.tf.
variable "region" {
  default = "us-west-2"
}

variable "instance_type" {
  default = "t3.micro"
}
provider "aws" {
  region = var.region
}

data "aws_ami" "ami" {
  most_recent = true

  filter {
    name   = "name"
    values = ["amzn2-ami-hvm-2.0.*-x86_64-gp2"]
  }

  owners = ["amazon"]
}

resource "aws_instance" "server" {
  ami           = data.aws_ami.ami.id
  instance_type = var.instance_type

  tags = {
    Name = "Server"
  }
}
Ở trên là đoạn code đơn giản dùng để tạo EC2 trên AWS. File quan trọng mà ta cần tìm hiểu ở bài này là file .gitlab-ci.yml, đây là file chứa các câu lệnh để ta thực hiện CI/CD.
stages:
  - plan
  - apply

image:
  name: hashicorp/terraform
  entrypoint:
    - "/usr/bin/env"
    - "PATH=/usr/local/sbin:/usr/local/bin:/usr/sbin:/usr/bin:/sbin:/bin"

cache:
  paths:
    - .terraform.lock.hcl
    - terraform.tfstate

before_script:
  - terraform init

plan:
  stage: plan
  script:
    - terraform plan -out "planfile"
  artifacts:
    paths:
      - planfile

apply:
  stage: apply
  script:
    - terraform apply -input=false "planfile"
  dependencies:
    - plan
  when: manual
Toàn bộ docs của file .gitlab-ci.yml ở đây link này nhé https://docs.gitlab.com/ee/ci/yaml, mình sẽ giải thích một số phần quan trọng của file .gitlab-ci.yml ở trên.
Init
Đầu tiên là phần định nghĩa cho toàn bộ Job trong CI/CD của ta là sẽ dùng image hashicorp/terraform để chạy các câu lệnh terraform.
image:
  name: hashicorp/terraform
  entrypoint:
    - "/usr/bin/env"
    - "PATH=/usr/local/sbin:/usr/local/bin:/usr/sbin:/usr/bin:/sbin:/bin"
Tiếp theo là phần init provider trước khi ta chạy các câu lệnh plan và apply.
before_script:
  - terraform init
Plan
Sau khi thực hiện init provider thì tiếp theo ta sẽ chạy câu lệnh plan để review các resource mà ta sẽ tạo ra.
plan:
  stage: plan
  script:
    - terraform plan -out "planfile"
  artifacts:
    paths:
      - planfile
Phần artifacts là ta dùng để output ra các file mà ta cần truyền từ job sang qua job khác, ở trên ta lưu toàn bộ review mà in ra từ câu lệnh plan vào file planfile, và ta dùng artifacts để truyền nó qua job tiếp theo.
Apply
Cuối cùng là phần apply để ta tạo resource.
apply:
  stage: apply
  script:
    - terraform apply -input=false "planfile"
  dependencies:
    - plan
  when: manual
Vì apply là phần quan trọng, nên ta thêm cho nó thuộc tính when: manual. Thuộc tính này sẽ báo cho Gitlab CI biết là đoạn job này ta cần phải tự bấm trước khi nó chạy.
Cache
Và để cache lại terraform state, ta dùng thuộc tính cache.paths.
cache:
  paths:
    - .terraform.lock.hcl
    - terraform.tfstate
Note: lưu ý là khi làm thực, ta nên sử dụng S3 backend để lưu terraform state chứ dừng dùng cache nhé. Các bạn xem bài S3 backend để hiểu rõ hơn Bài 7 - Terraform Backend: S3 Standard Backend.
Execute gitlab CI
Ok, giờ các bạn commit và push code lên trên gitlab, sau đó bật qua menu CI/CD thì sẽ thấy pipeline của ta đang chạy.
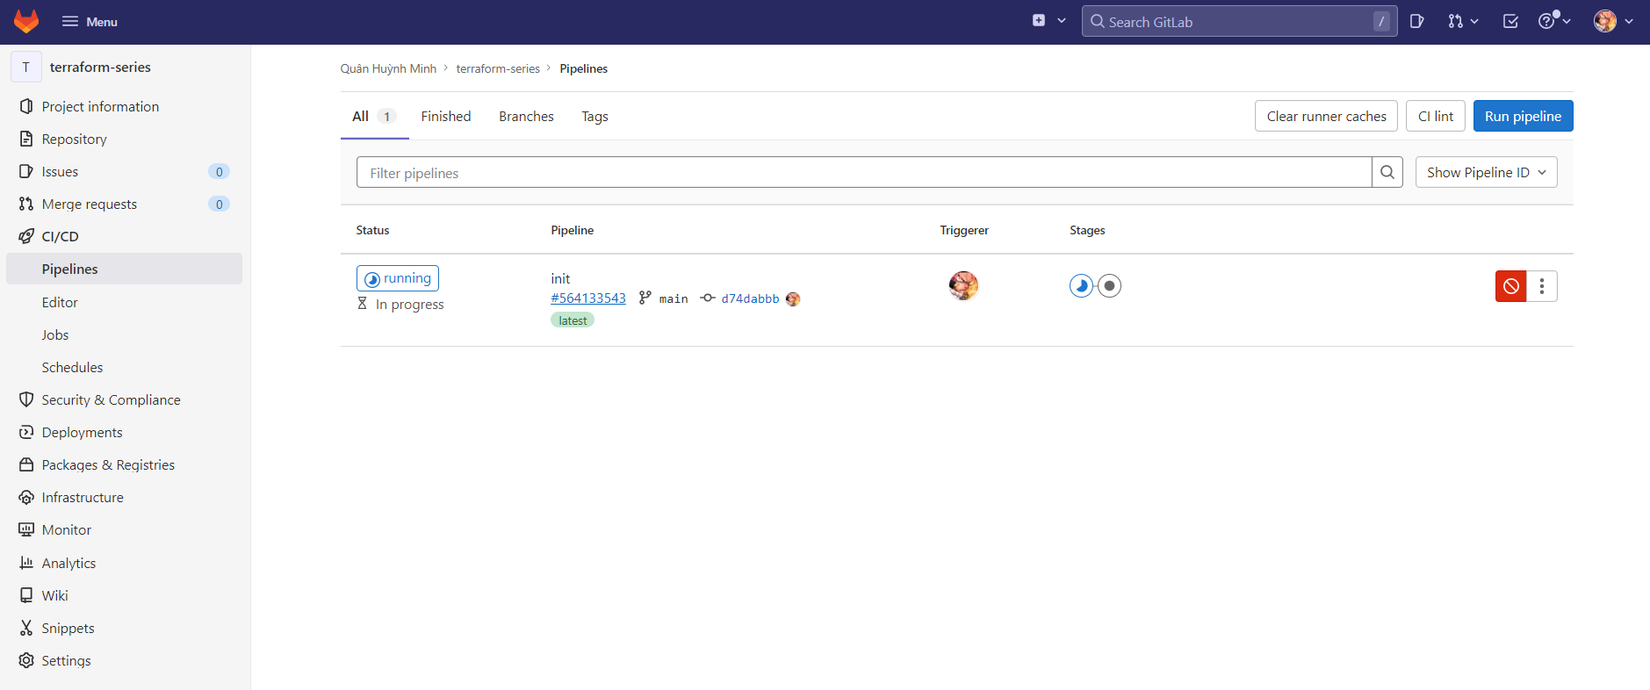
Nhưng ta sẽ thấy pipeline của ta bị failed, ta bấm qua tab Job để kiểm tra log tại sao nó bị failed.
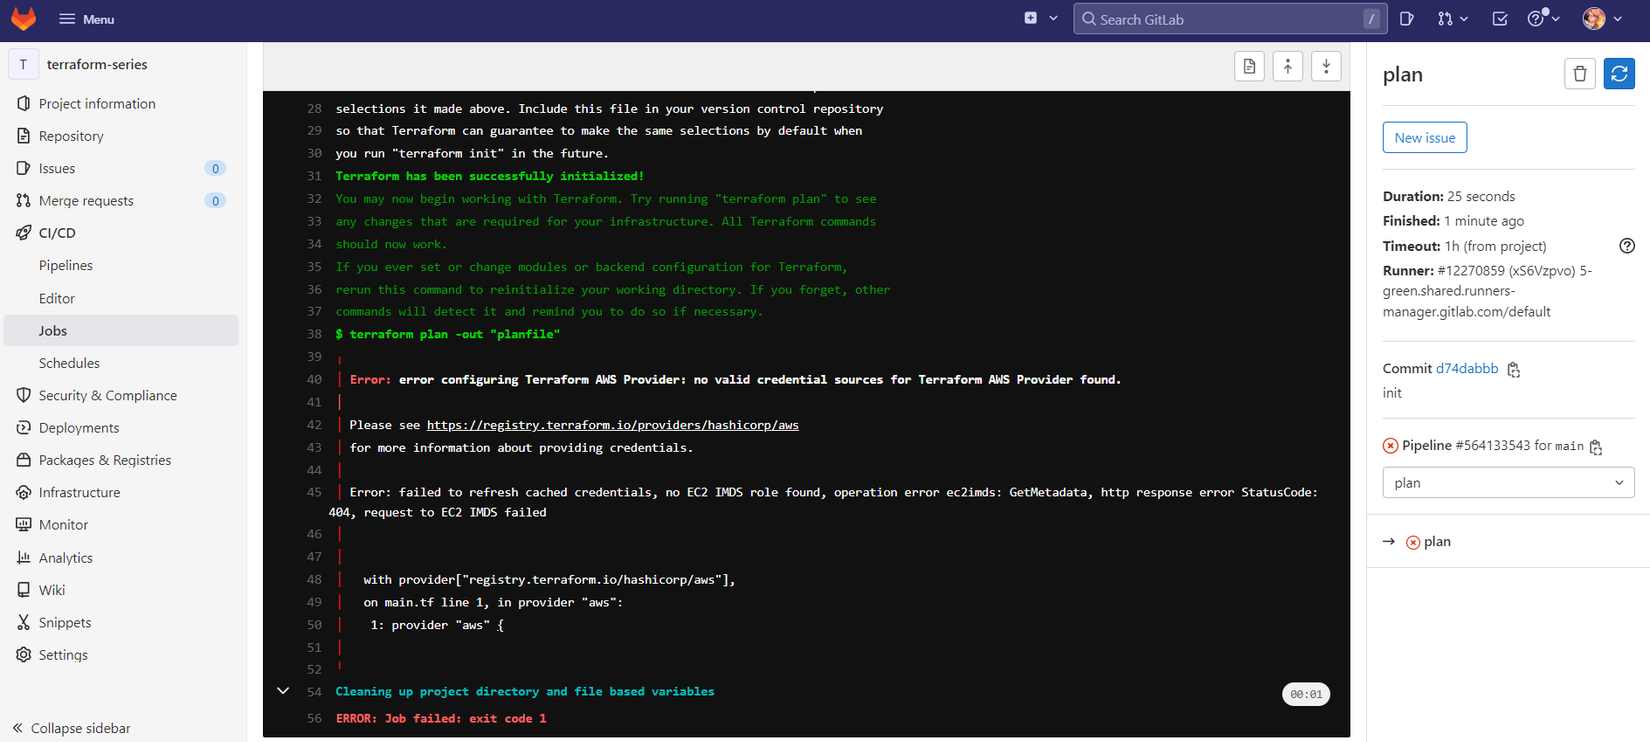
Đây là log mà gitlab CI in ra.
$ terraform plan -out "planfile"
╷
│ Error: error configuring Terraform AWS Provider: no valid credential sources for Terraform AWS Provider found.
│
│ Please see https://registry.terraform.io/providers/hashicorp/aws
│ for more information about providing credentials.
│
│ Error: failed to refresh cached credentials, no EC2 IMDS role found, operation error ec2imds: GetMetadata, http response error StatusCode: 404, request to EC2 IMDS failed
│
│
│   with provider["registry.terraform.io/hashicorp/aws"],
│   on main.tf line 1, in provider "aws":
│    1: provider "aws" {
│
╵
Lỗi này là do ta chưa cấu hình credentials của AWS cho Terraform, các bạn tạo IAM user với quyền là Administrator, hướng dẫn ở đây https://docs.aws.amazon.com/IAM/latest/UserGuide/getting-started_create-admin-group.html. Sau đó ta tạo access key và secret key cho IAM user ta vừa tạo, lấy giá trị đó cấu hình vào hai biến environment là AWS_ACCESS_KEY_ID và AWS_SECRET_ACCESS_KEY.
Tiếp theo ta bật qua menu Settings -> CI/CD, ta kéo xuống phần Variables và thêm vào hai biến trên.
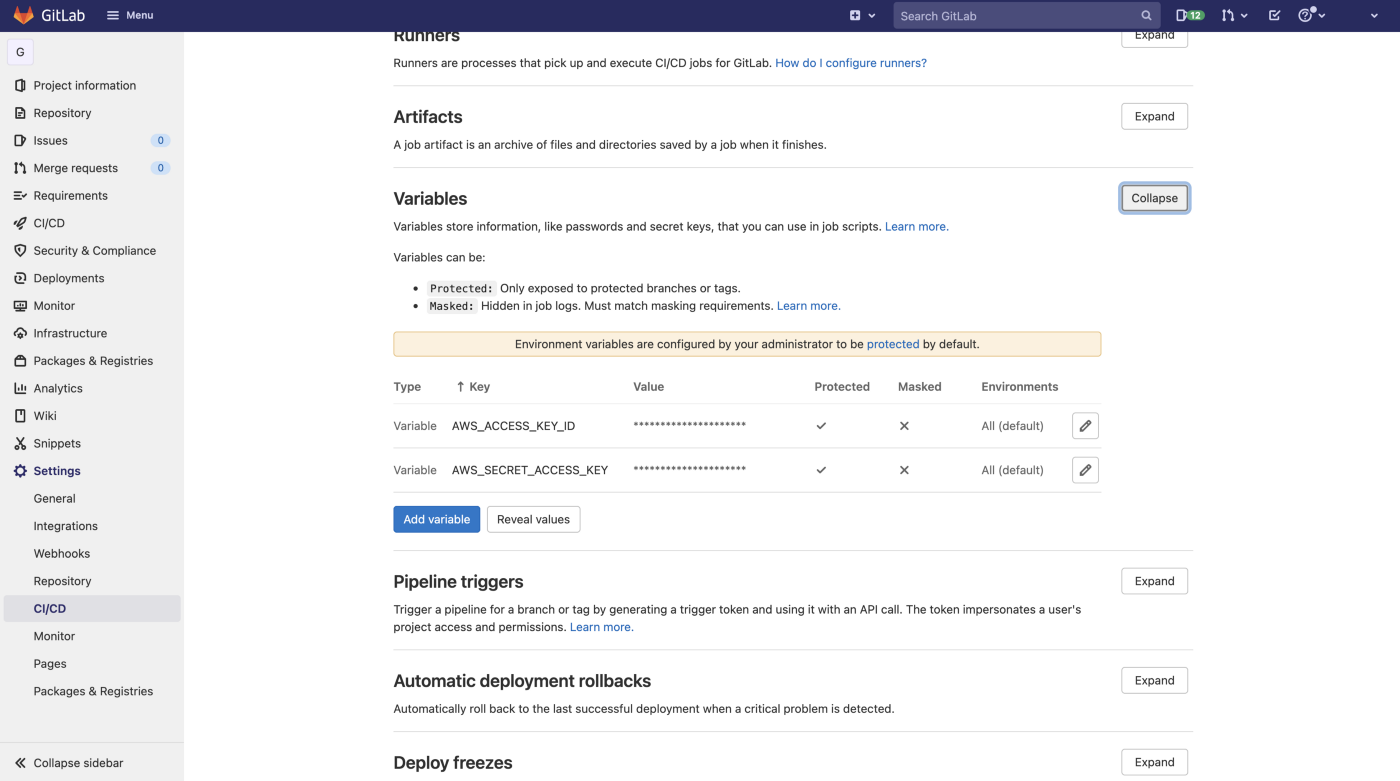
Ok, giờ ta chạy lại pipeline và ta sẽ thấy nó chạy thành công, kiểm tra log để coi các resource mà Terraform sẽ tạo. Tiếp theo là bước apply, lúc này ta sẽ thấy Job của ta đang ở chế độ manual và chờ ta tự bấm.

Ta kích hoạt gitlab CI bằng tay để nó chạy phần apply, sau đó ta sẽ thấy nó chạy thành công.
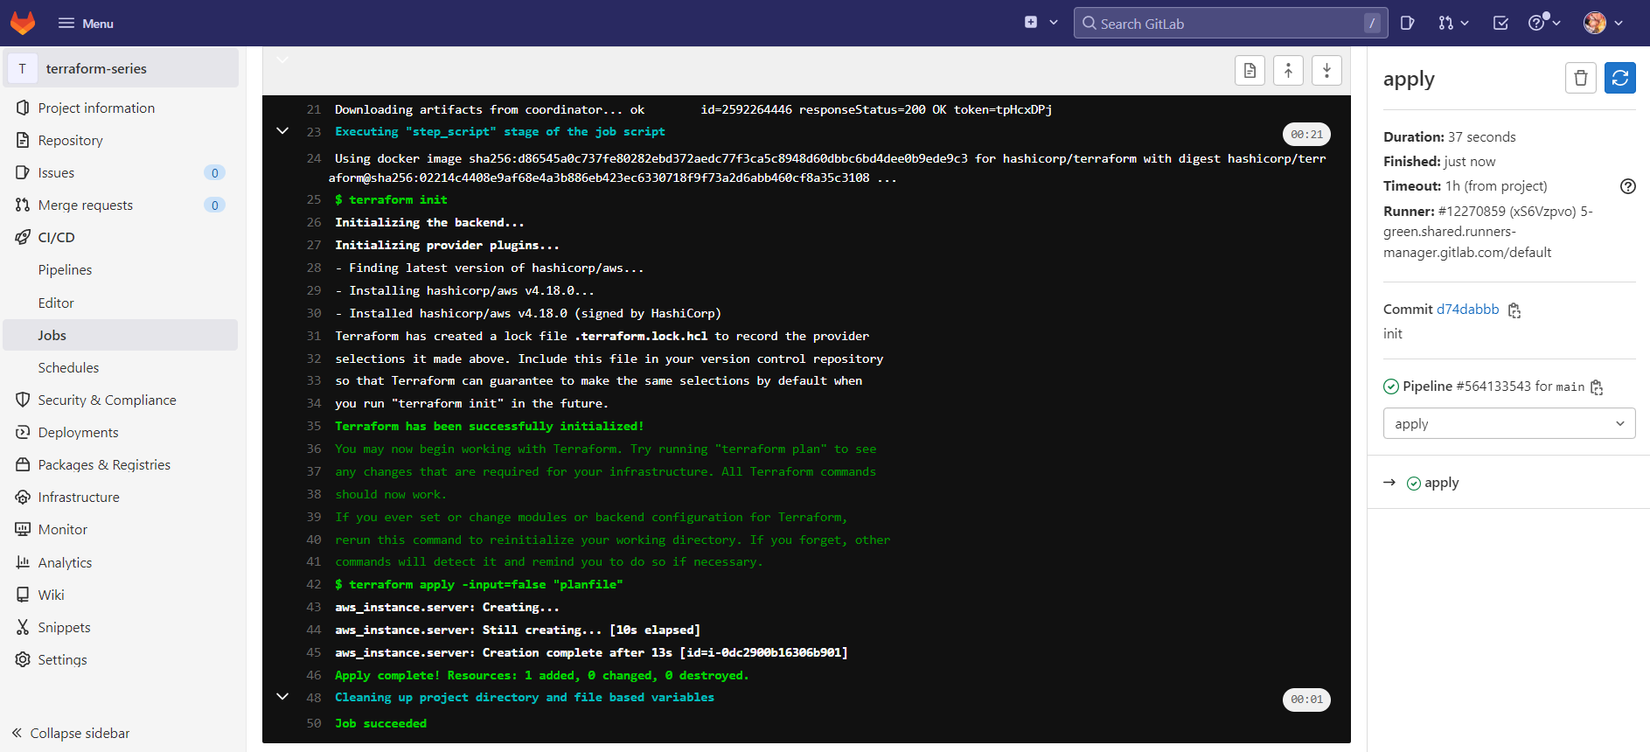
Kiểm tra trên AWS Console bạn sẽ thấy EC2 ta vừa tạo ra. Ok, vậy là ta đã implement Gitlab CI với Terraform thành công.
How to organize environment
Thông thường khi ta làm thực tế, ta sẽ chia một repo ra làm nhiều branch khác nhau, và tương ứng với từng branch thì ta sẽ deploy nó lên một môi trường cụ thể.
Ví dụ, ta có hai môi trường là dev và pro, branch dev ta sẽ triển khai infrastructure cho môi trường dev, và branch pro ta sẽ deploy lên môi trường pro. Vậy thì với Terraform ta sẽ làm công việc đó như thế nào?
Terraform workspaces
Workspaces là một tính năng của Terraform cho phép ta lưu nhiều terraform state file khác nhau trên cùng một configuration code. Có nghĩa là ta chỉ cần dùng một source code để triển khai infrastructure lên nhiều môi trường khác nhau, thay vì với mỗi môi trường ta lại phải tạo một source code cho nó.
Và mỗi workspace sẽ sử dụng biến variable khác nhau để tạo nên các infrastructure khác nhau, đó là lý do tại sao ta nên sử dụng variable cho các thuộc tính mà nó có thể thay đổi tùy thuộc vào môi trường khác nhau.
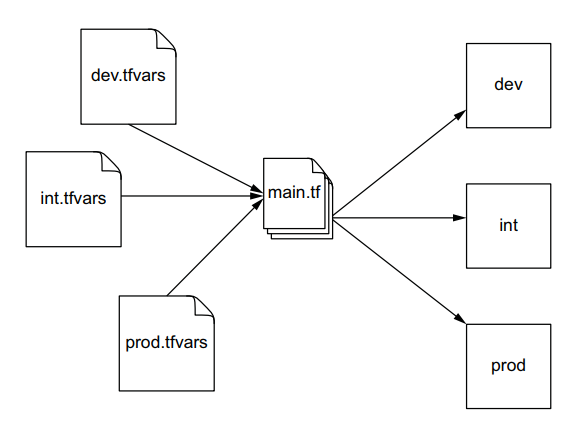
Ví dụ ở trên.
resource "aws_instance" "server" {
  ami           = data.aws_ami.ami.id
  instance_type = var.instance_type

  tags = {
    Name = "Server"
  }
}
Thay vì fix cứng giá trị instance_type thì ta nên đặt nó vào trong variable, với môi trường dev thì ta chỉ cần instance_type cỡ t3.micro (2 vCPU 1 GiB), còn pro thì ta cần tới t3.small (2 vCPU 2 GiB) chẳng hạn.
Workspaces
Thật ra khi ta chạy câu lệnh terraform init thì nó đã tạo cho ta một workspace tên là default, các bạn chạy câu lệnh sau để liệt kê toàn bộ workspace hiện tại ra.
terraform workspace list
* default
Để tạo một workspace mới ta chạy câu lệnh terraform workspace new <name>, ví dụ tạo workspace dev và pro.
terraform workspace new dev
terraform workspace new pro
Sau khi ta chạy hai câu lệnh trên xong, ta chạy lại câu lệnh workspace list thì ta sẽ thấy bây giờ có tới 3 workspace.
terraform workspace list
* default
  dev
  pro
Bạn để ý là khi ta chạy câu lệnh new xong, terraform sẽ sinh ra cho ta một folder là terraform.tfstate.d, bên trong đó sẽ có hai sub folder là dev và pro.
.
├── main.tf
├── terraform.tfstate.d
│   ├── dev
│   └── pro
└── variables.tf
Hai sub folder đó là nơi mà terraform sẽ lưu state cho các workspace khác nhau của ta.
Để switch qua lại giữa các workspace, ta dùng câu lệnh select, ví dụ như sau.
terraform workspace select dev
Switched to workspace "dev".
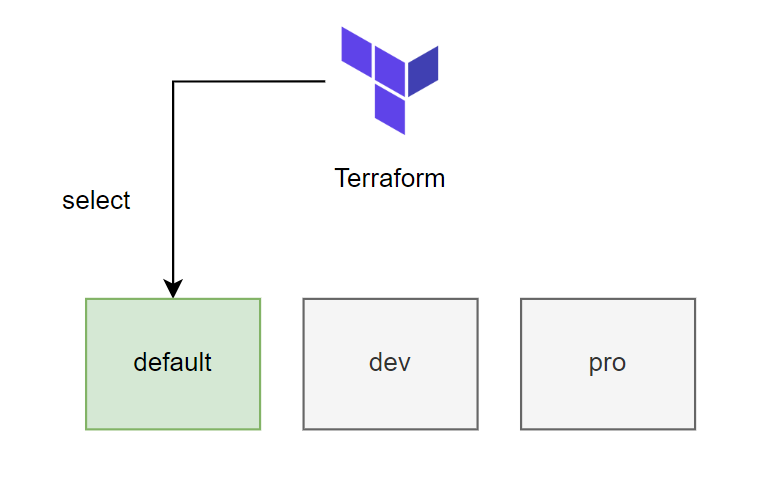
Sau khi tổ chức workspace xong thì ta làm sao để apply được chính xác variable cho từng môi trường cụ thể?
Multiple environments
Ta có thể làm việc đó bằng cách khi ta chạy apply thì ta truyền thêm option -var-file vào, ví dụ.
terraform apply -var-file=dev.tfvars -auto-approve
Implement Gitlab CI
Ok, bây giờ ta sẽ implement multi environments với Gitlab CI, trước tiên các bạn tạo thêm hai branch dev và pro.
Quan trọng: nhớ cấu hình cho hai branch dev và pro là protected.
Sau đó ta tạo thêm một folder tên là env, sau đó tạo hai file dev.tfvars và pro.tfvars để chứa biến cho từng môi trường.
region        = "us-west-2"
instance_type = "t3.micro"
region        = "ap-southeast-1"
instance_type = "t3.small"
Với môi trường dev ta sẽ tạo EC2 ở region us-west-2 và với instance_type là t3.micro. CÒn với môi trường pro ta sẽ tạo ở region ap-southeast-1 và với instance_type là t3.small.
Tiếp theo để có thể push được hai sub folder rỗng trong terraform.tfstate.d lên git, ta thêm file .gitkeep vào hai sub folder đó. Cấu trúc folder của ta hiện tại như sau.
.
├── .gitlab-ci.yml
├── env
│   ├── dev.tfvars
│   └── pro.tfvars
├── main.tf
├── terraform.tfstate.d
│   ├── dev
│   │   └── .gitkeep
│   └── pro
│       └── .gitkeep
└── variables.tf
Sau đó ta cập nhật lại file .gitlab-ci.yml như sau.
stages:
  - plan
  - apply

image:
  name: hashicorp/terraform
  entrypoint:
    - "/usr/bin/env"
    - "PATH=/usr/local/sbin:/usr/local/bin:/usr/sbin:/usr/bin:/sbin:/bin"

cache:
  paths:
    - .terraform.lock.hcl
    - terraform.tfstate.d/*

before_script:
  - terraform init
  - terraform workspace select $CI_COMMIT_REF_NAME

plan:
  stage: plan
  script:
    - terraform plan -var-file=env/$CI_COMMIT_REF_NAME.tfvars -out "planfile"
  artifacts:
    paths:
      - planfile
  only:
    - dev
    - pro

apply:
  stage: apply
  script:
    - terraform apply -input=false "planfile"
  dependencies:
    - plan
  when: manual
  only:
    - dev
    - pro
Giờ thì khi bạn merge code vào branch dev thì gitlab CI sẽ chạy và deploy infrastructure cho môi trường dev, tương tự cho môi trường pro.

Nhắc lại: lưu ý là khi làm thực, ta nên sử dụng S3 backend để lưu terraform state chứ đừng dùng cache nhé :))).
Oke, vậy là ta đã implement Terraform multi environments với Gitlab CI thành công 😁. Mình đã chia hai phần ra thành hai repo gitlab khác nhau để các bạn có thể dễ dàng tham khảo.
- https://gitlab.com/hoalongnatsu/terraform-series
- https://gitlab.com/hoalongnatsu/terraform-series-workspace
Github của toàn bộ series https://github.com/hoalongnatsu/terraform-series.
Kết luận
Vậy là ta đã tìm hiểu xong về cách dùng gitlab CI với Terraform, gitlab CI là một công cụ CI/CD rất phổ biến và cũng được sử dụng rất nhiều khi làm CI/CD cho Terraform. Nếu có thắc mắc hoặc cần giải thích rõ thêm chỗ nào thì các bạn có thể hỏi dưới phần comment.
DevOps VN
Học DevOps tại các trung tâm uy tín.
Kiến thức dinh dưỡng IT.
Ủng hộ trang tại đây.
All rights reserved