Ruby: Sử dụng FCM để push notification đến Android, iOS
Bài đăng này đã không được cập nhật trong 7 năm
Giới thiệu
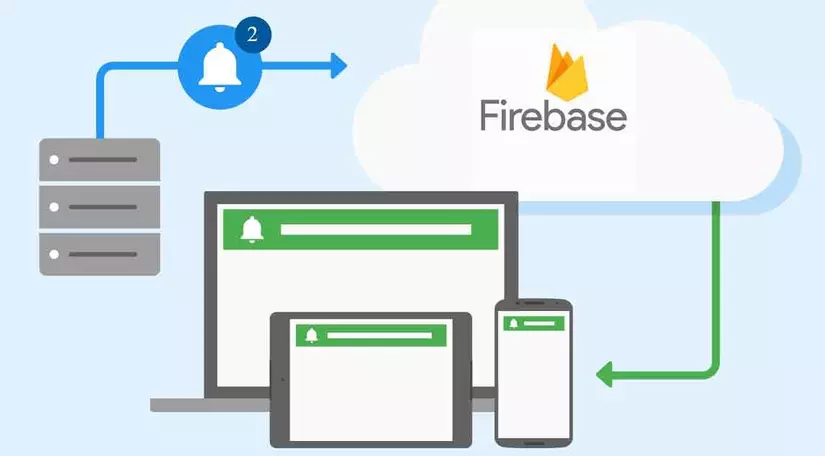
Push notification là một tính năng rất phổ biến trong việc phát triển app di động hiện nay. Có rất nhiều cơ chế để gửi push notification, trong bài viết này chúng ta sẽ tìm hiểu về Firebase Cloud Messaging (FCM), 1 dịch vụ hoàn toàn miễn phí của Google.
Cách thức hoạt động
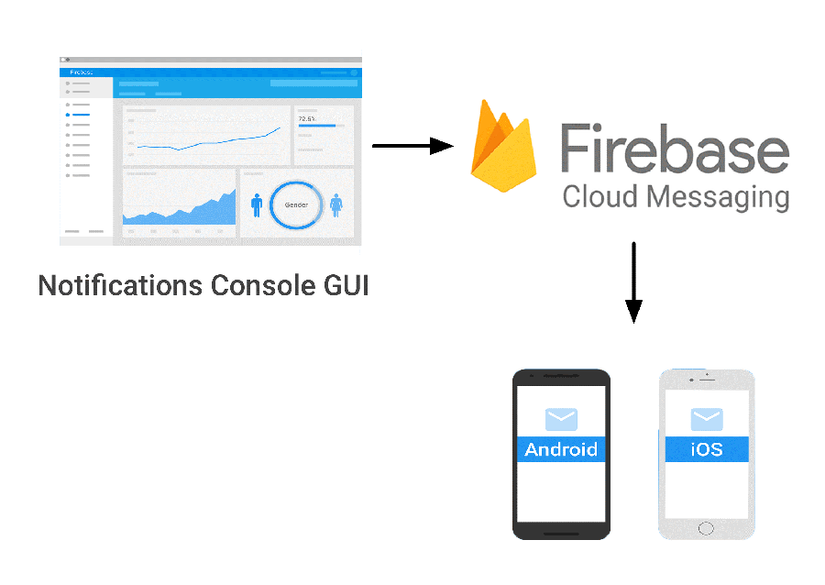
Mình sẽ giải thích đơn giản:
- Khi thiết bị của user cài app thì sẽ gửi yêu cầu lên Firebase Cloud Server để xin token, tạm gọi là device token.
- Firebase Server sau khi nhận request sẽ trả về 1 token, token này là duy nhất cho mỗi thiết bị.
- Server thực hiện lưu token này xuống database sao cho không trùng nhau.
- Service của server gửi token này + gói tin cần truyền cho Firebase.
- Firebase kiểm tra (check token các thứ...) rồi thực hiện gửi đến device đã đăng kí với token đó.
Xong!
Các bước thực hiện
1. Đăng kí tài khoản trên https://firebase.google.com
2. Tạo 1 project mới
Project này sẽ là trung gian nhận/gửi gói tin của các chúng ta.
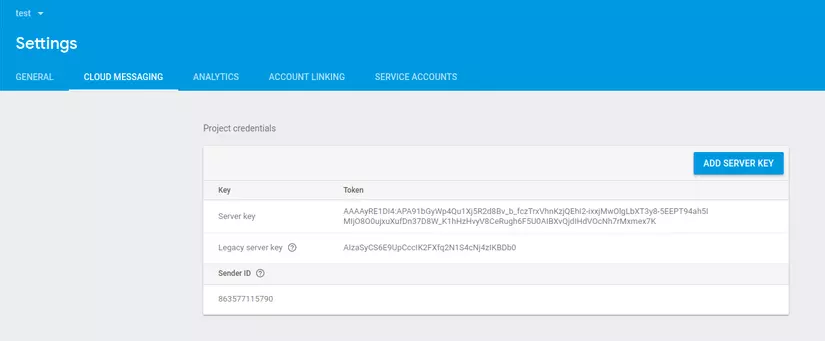
Phần Settings, chuyển sang tab Cloud Messaging, ở đây sẽ có Server key dùng cho các thủ tục credential, cần lưu ý key này.
3. Build client
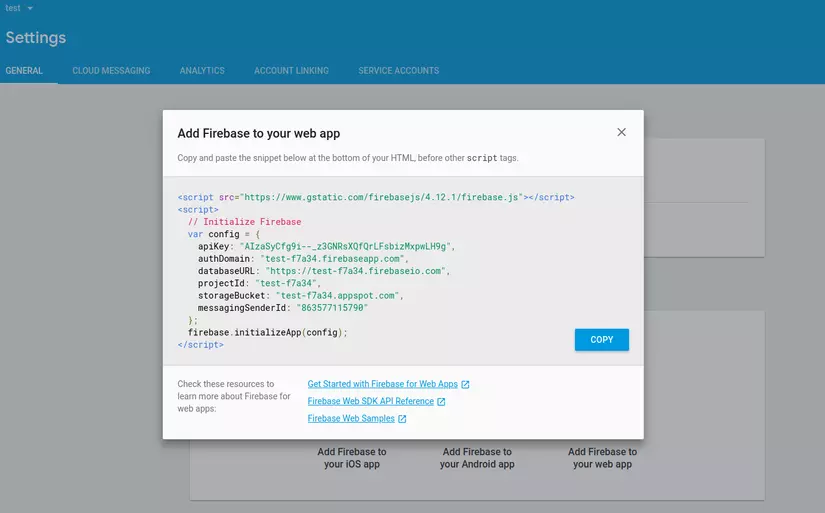
Tab General, mục Your apps, bạn cần tạo 1 client để test việc nhận thông báo, việc này các bạn sẽ tự làm. Ở trong bài viết này, mình đã build sẵn 1 Web app để test, các bạn có thể follow theo các bước hướng dẫn rất chi tiết trên Firebase để tự build client cho mình.
Chú ý phần script nhúng vào app sẽ bao gồm các thông số của Project
Đây là demo web client mình đã build thử, với Android và iOS tương tự, giao diện trang web client sẽ như thế này:
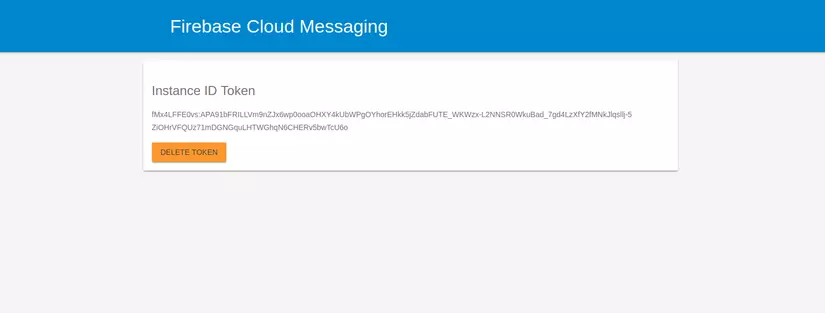
Ở đây client mình đã tự generate ra Token, mình chỉ cần lưu token này vào database rồi sử dụng sau, hoặc có thể gọi trực tiếp (chi tiết bên dưới)
4. Xây dựng service cho việc gửi thông báo
Sau khi build được client, việc tiếp theo là viết service ở server thôi  Ở đây ta sẽ dùng Rails. Bắt đầu nào:
Ở server, ta sẽ dùng gem fcm có sẵn:
#gemfile
gem "fcm"
Chạy bundle install.
Đảm bảo bạn đã có 1 bảng để lưu device_token nhận được từ Firebase rồi nha. Trong bảng device_tokens này chỉ cần lưu user_id và device_token là đủ. Bảng này đặt quan hệ belongs_to với bảng users.
#user.rb:
has_many :device_tokens, dependent: :destroy
#device_token.rb:
  belongs_to :user
  validates :device_token, presence: true, uniqueness: true
Ta sẽ tạo 1 service, đặt tên là push_notification_service.rb.
Khai báo các thuộc tính cần có:
def initialize(message = nil, to = nil, notification_type = 'default', options = nil)
   self.message = message
   self.to = to
   self.notification_type = notification_type
   self.options = options
end
- message: nội dung gói tin
- to: người nhận
- type: loại thông báo
- options: các tùy chọn kèm theo
Hàm gửi:
Đầu tiên cần khởi tạo một class FCM mới với server key mình đã nói ở bước 2 (nên cho vào biến môi trường)
fcm = FCM.new(ENV["SERVER_KEY"])
**Định dạng gói tin: **
Sẽ có dạng như bên dưới :
   message = {
      data: {
          alert: self.message,
          sound: 'default'
        },
      notification_type: self.notification_type
    }
Ở đây ta đã có device_token của user, các bạn có thể lấy thông qua to chính là user ở trên.
registration_ids = self.to.device_tokens.try(:pluck, :device_token)
Gem fcm đã cung cấp sẵn 1 hàm send rất tiện, bạn có thể đọc trên đây để biết thêm.
fcm.send(registration_ids, message) if registration_ids.present?
Gom lại nào:
def deliver
  fcm = FCM.new(ENV["SERVER_KEY"])
  message = {
     data: {
         message: self.message,
         sound: 'default'
       },
     notification_type: self.notification_type
   }

   registration_ids = self.to.device_tokens.try(:pluck, :device_token)

   fcm.send(registration_ids, message) if registration_ids.present?
end
OK, cơ bản là đã xong, giờ test thôi :v
Test thử nào
Token mình đã có sẵn ở trên và update vào User.first
user_id: 1
device_token: "fMx4LFFE0vs:APA91bFRILLVm9nZJx6wp0ooaOHXY4kUbWPgOYhorEHkk5jZdabFUTE_WKWzx-L2NNSR0WkuBad_7gd4LzXfY2fMNkJlqsllj-5ZiOHrVFQUz71mDGNGquLHTWGhqN6CHERv5bwTcU6o"
rails c
[1] pry(main)> pusher = PushNotificationService.new("hello world", User.find(1), 'default')
[2] pry(main)> pusher.deliver
=> {:body=>
  "{\"multicast_id\":6376897082082744799,\"success\":1,\"failure\":0,\"canonical_ids\":0,\"results\":[{\"message_id\":\"0:1522720038494785%2fd9afcdf9fd7ecd\"}]}",
 :headers=>
  {"content-type"=>["application/json; charset=UTF-8"],
   "date"=>["Tue, 03 Apr 2018 01:47:18 GMT"],
   "expires"=>["Tue, 03 Apr 2018 01:47:18 GMT"],
   "cache-control"=>["private, max-age=0"],
   "x-content-type-options"=>["nosniff"],
   "x-frame-options"=>["SAMEORIGIN"],
   "x-xss-protection"=>["1; mode=block"],
   "server"=>["GSE"],
   "alt-svc"=>
    ["hq=\":443\"; ma=2592000; quic=51303432; quic=51303431; quic=51303339; quic=51303335,quic=\":443\"; ma=2592000; v=\"42,41,39,35\""],
   "accept-ranges"=>["none"],
   "vary"=>["Accept-Encoding"],
   "connection"=>["close"]},
 :status_code=>200,
 :response=>"success",
 :canonical_ids=>[],
 :not_registered_ids=>[]}
Và kết quả đây:
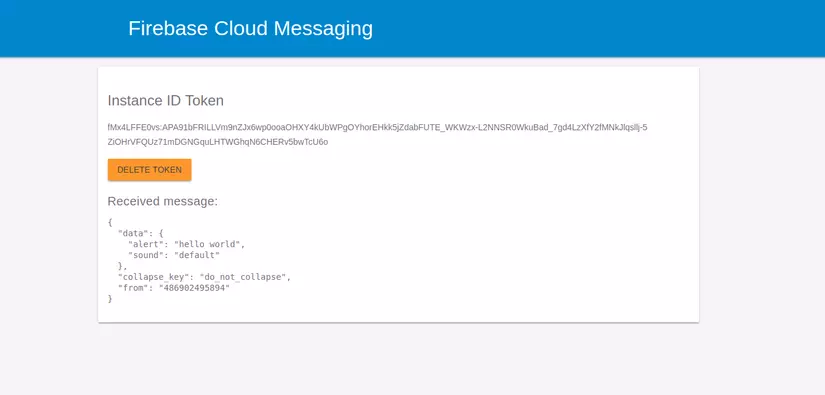
Thành công!
All rights reserved