Push notification vào máy IOS dùng react native và OneSignal
Bài đăng này đã không được cập nhật trong 8 năm
Bài trước mình có giới thiệu về cách push notification vào máy android sử dụng react native và onesignal (onesignal android). Trong bài này mình sẽ nói tiếp về cách sử dụng onesignal đối mới máy ios. Dưới đây là các bước cần thiết để push notification vào máy ios.
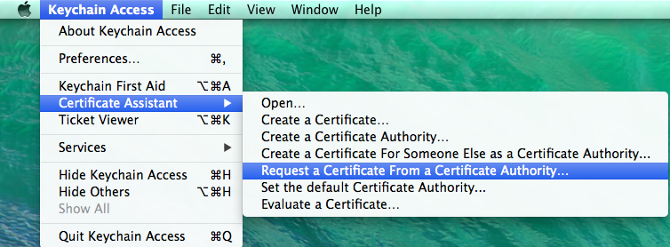
1. Tạo Certificate Request
- Mở máy Mac OS của bạn và tìm từ
Keychain Access - Chọn
Keychain Access>Certificate Assistant>Request a Certificate From a Certificate Authority...
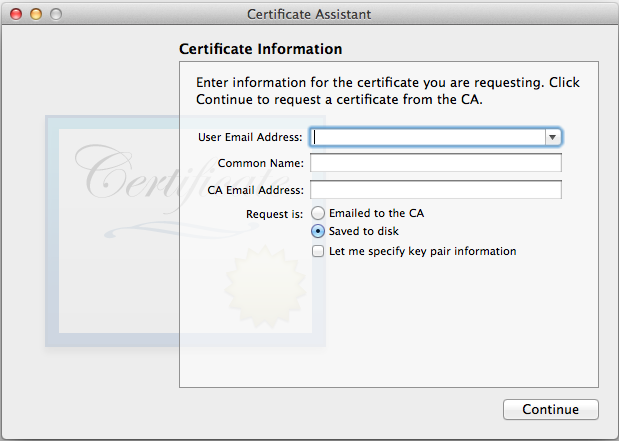
- Nhập các thông tin , chọn
saved to diskxong bấmcontinuevào lưu vào máy
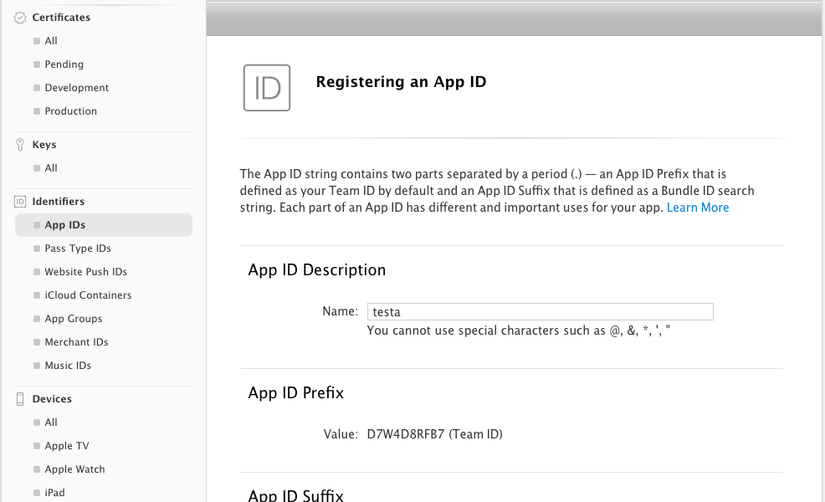
2. Enable Push Notifications và apply Certification Request để generate Certificate
- Login vào apple developer và tạo mới App IDs nếu chưa có.
- Tạo IOS certificate và chọn
Apple Push Notification service SSL (Sandbox & Production)rồi chọn continue
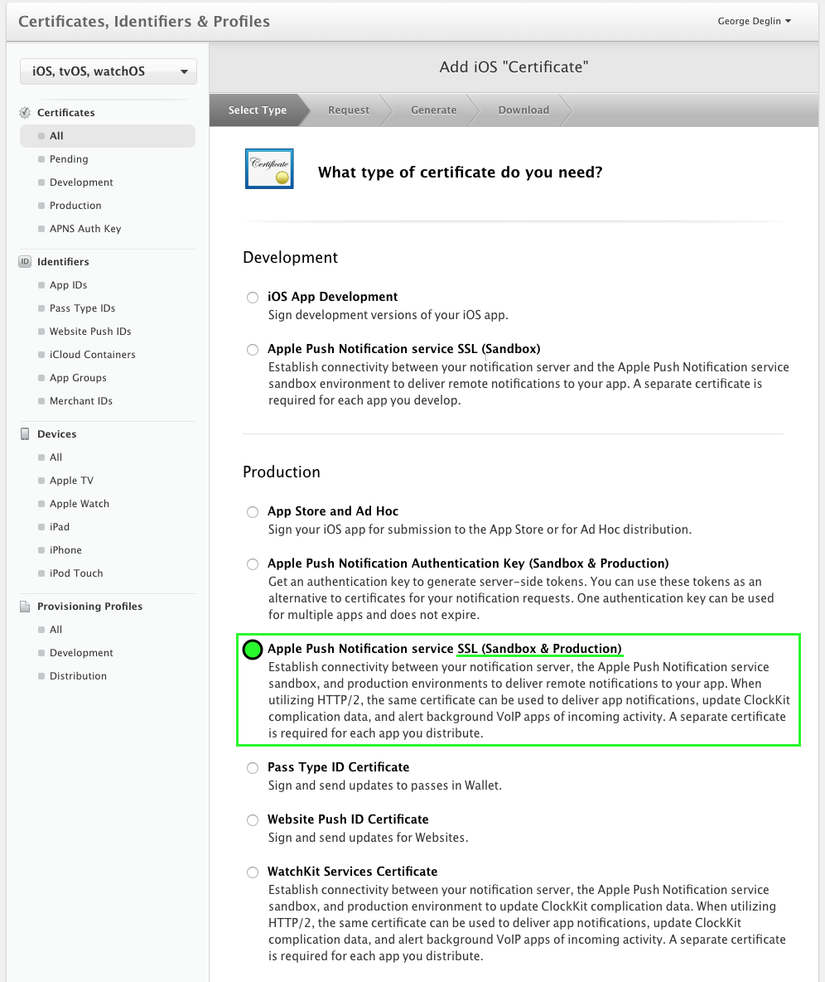
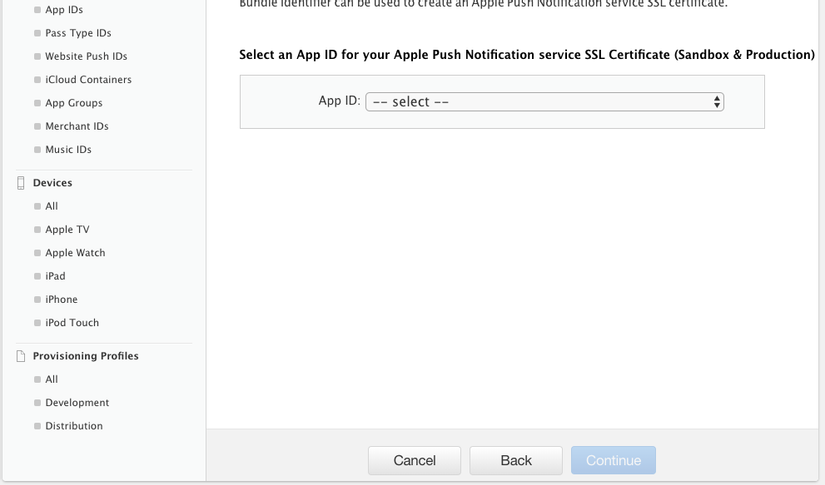
- Chọn App ID vừa tạo ở trên xong click continue
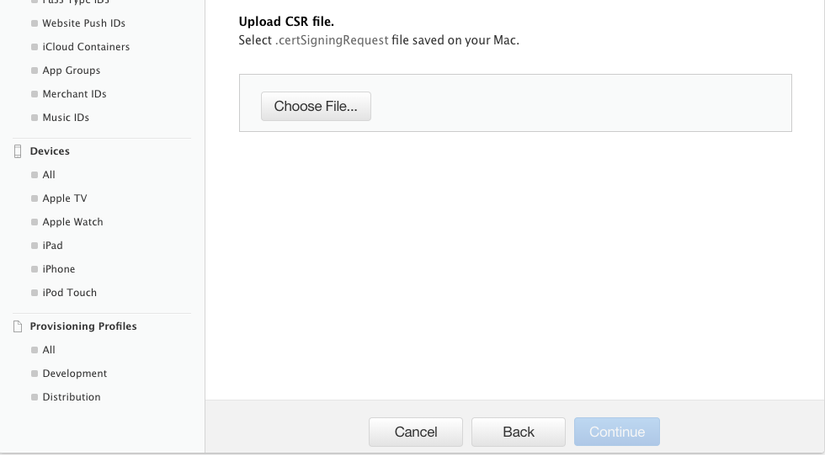
- "Choose File..." chọn file certSigningRequest bạn đã tạo và lưu trong máy của bạn ở bước 1
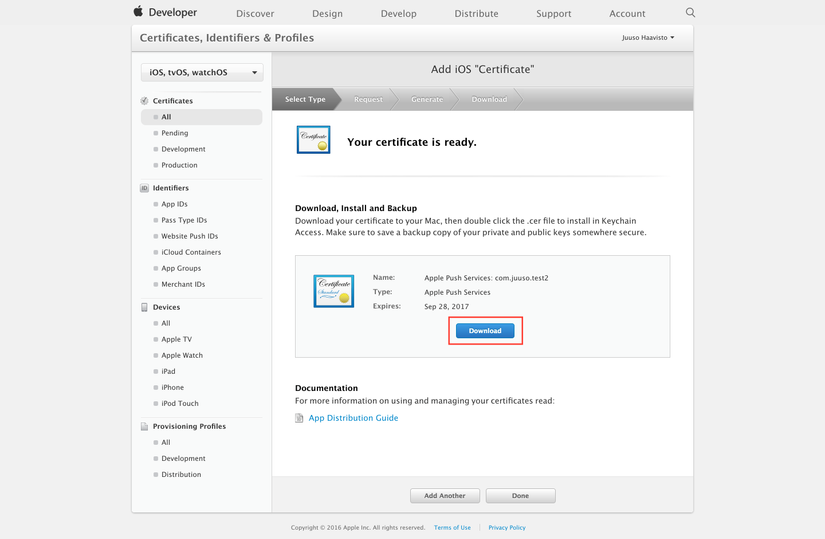
- Download Apple certificate vào trong máy của bạn
3. Creating Private Key
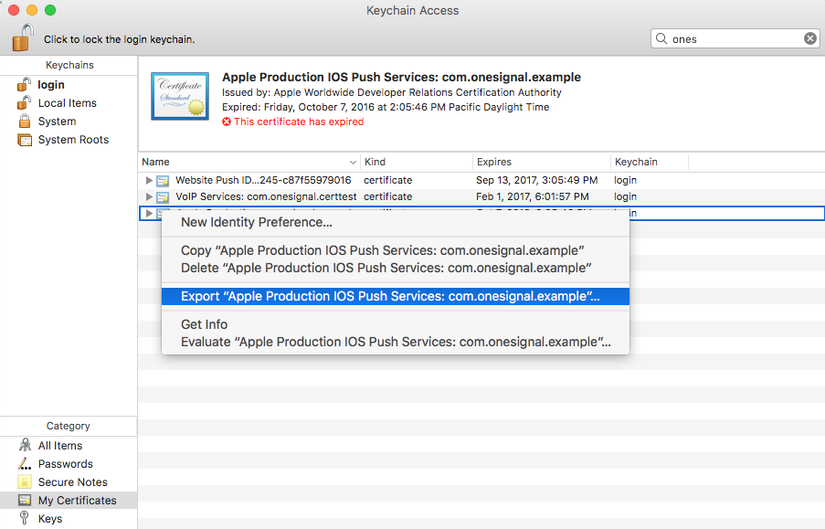
- Double click trên file vừa download ở bước 2
- Chọn
Login=> certificate của bạn =>Export
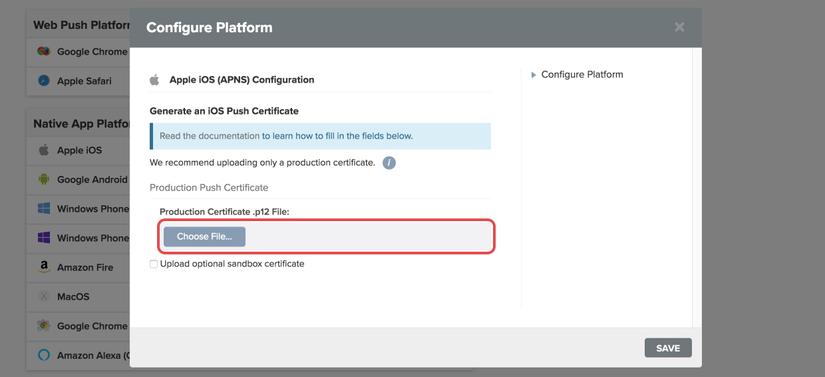
4. Upload Push Certificate to OneSignal
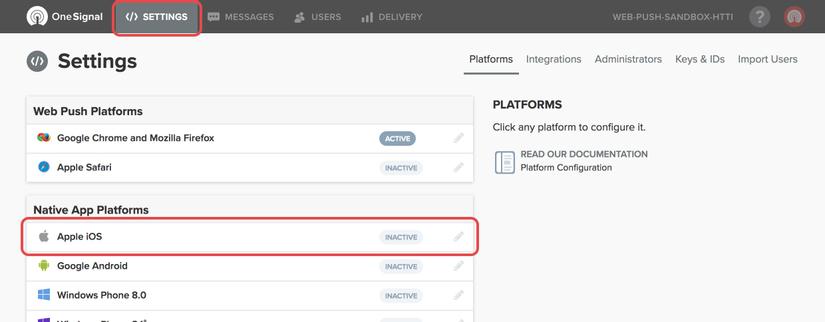
- Vào onesignal và chọn App của bạn => "App Settings" => edit "Apple IOS"
- chọn .p12 file và chọn save
5. iOS Installation
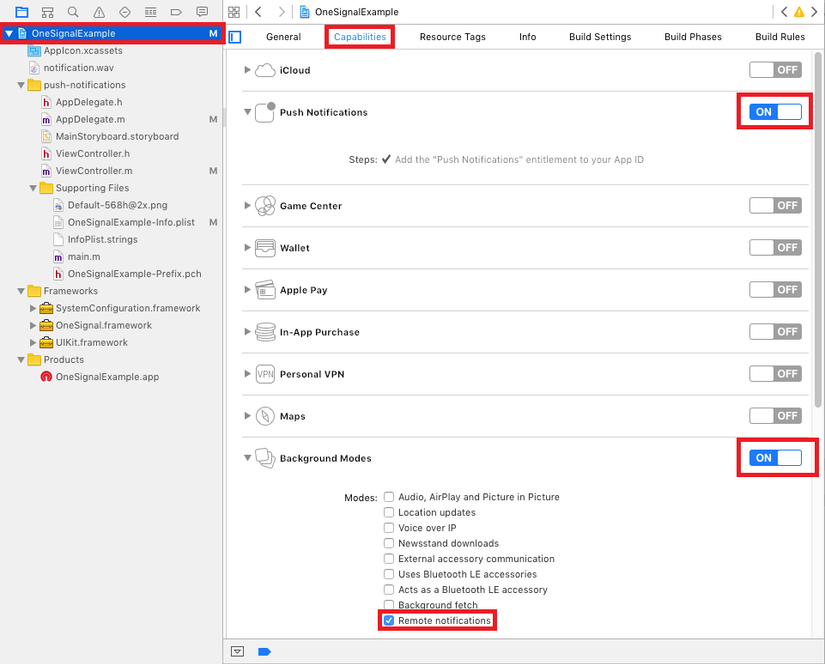
- Enable "Push Notifications", "Background Modes", "Remote notifications"
- Build Settings => search "Header Search Paths" => thêm
$(SRCROOT)/../node_modules/react-native-onesignal/iosvà set recursive - Thêm code vào AppDelegate.h
#import <RCTOneSignal.h>
//...
@property (strong, nonatomic) RCTOneSignal* oneSignal;
- Thêm code vào AppDelegate.m
@synthesize oneSignal = _oneSignal;
#...
self.oneSignal = [[RCTOneSignal alloc] initWithLaunchOptions:launchOptions
                                                               appId:@"YOUR_ONESIGNAL_APP_ID"];
6. Cách sử dụng
Trong index.js
import React, { Component } from 'react';
import OneSignal from 'react-native-onesignal';

export default class App extends Component {

    componentWillMount() {
        OneSignal.addEventListener('received', this.onReceived);
        OneSignal.addEventListener('opened', this.onOpened);
        OneSignal.addEventListener('ids', this.onIds);
    }

    componentWillUnmount() {
        OneSignal.removeEventListener('received', this.onReceived);
        OneSignal.removeEventListener('opened', this.onOpened);
        OneSignal.removeEventListener('ids', this.onIds);
    }

    onReceived(notification) {
        console.log("Notification received: ", notification);
    }

    onOpened(openResult) {
      console.log('Message: ', openResult.notification.payload.body);
      console.log('Data: ', openResult.notification.payload.additionalData);
      console.log('isActive: ', openResult.notification.isAppInFocus);
      console.log('openResult: ', openResult);
    }

    onIds(device) {
		console.log('Device info: ', device);
    }
}
Tài liệu tham khảo:
https://medium.com/differential/react-native-push-notifications-with-onesignal-9db6a7d75e1e https://documentation.onesignal.com/v5.0/docs/react-native-sdk-setup
All rights reserved
