Android Firebase App Distribution using gradle
Bài đăng này đã không được cập nhật trong 3 năm
Phần tiếp theo trong seri "Cải thiện code base cho android project", mình sẽ chia sẻ cho bạn cách upload apk tự động lên firebase app distribution bằng gradle task.
Set up your Android project
1. Tạo Firebase project
Để thực hiện thêm Firebase vào project android của bạn khá đơn giản, chi tiết tất cả các bước bạn có tham khảo 3 step đầu tiên từ link chính chủ Firebase.
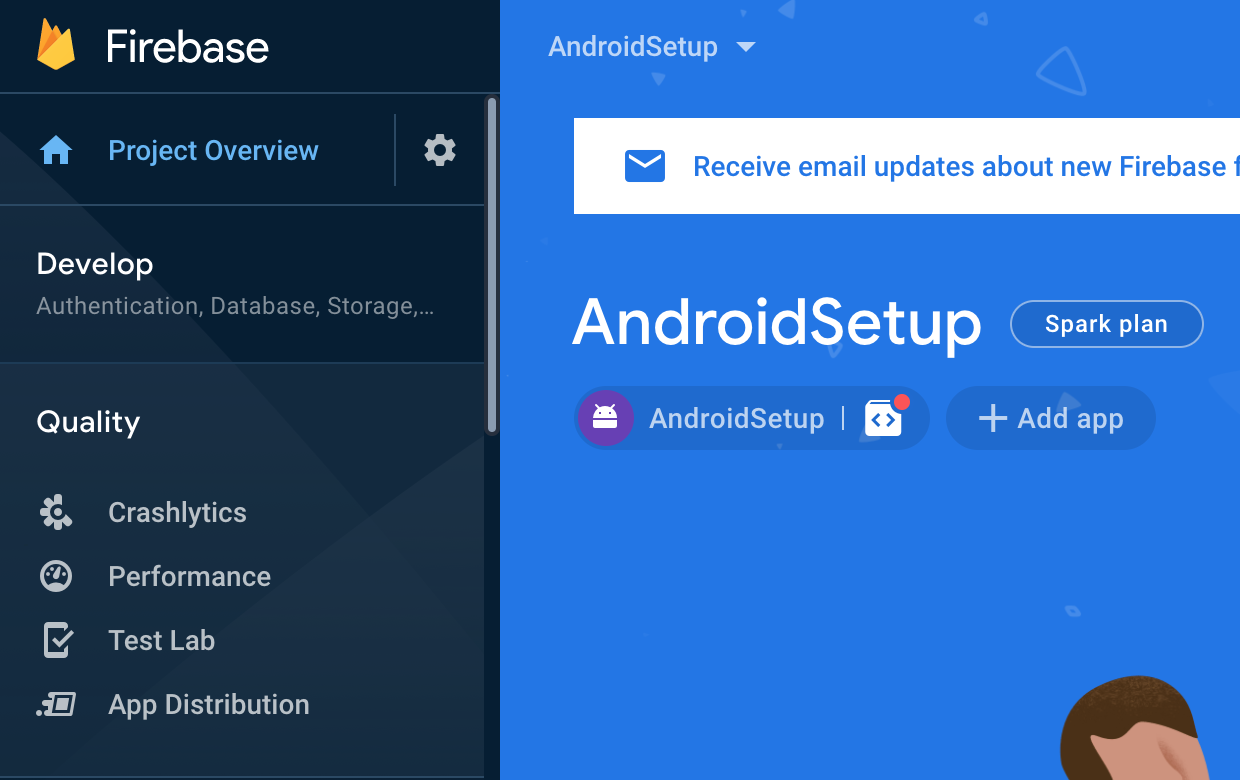
Các điểm cần lưu ý:
Package namephải là package name chính xác (case-sensitive) của project của bạn, lưu ý thêm prefix hoặc surfix của các flavor nếu có khai báo. Nếu đăng kí sai, bạn chỉ có thể xoá firebase project và tạo lại vì không thể thay đổi sau khi đã đăng ký.- Nếu có nhiều Flavor (develop, staging, product) thì phải đăng kí đủ.
Lưu ý: có thể các flavor chung 1 firebase project hoặc tách riêng từng firebase project tuỳ vào mục đích và yêu cầu của dự án.
- Tải
google-services.jsonfile vào các thư mục flavor tương ứng (tham khảo các bước tiếp theo). - Nếu có nhiều project/flavor, từng bước phải chú ý project/flavor được chọn phải đúng với project đang setup.
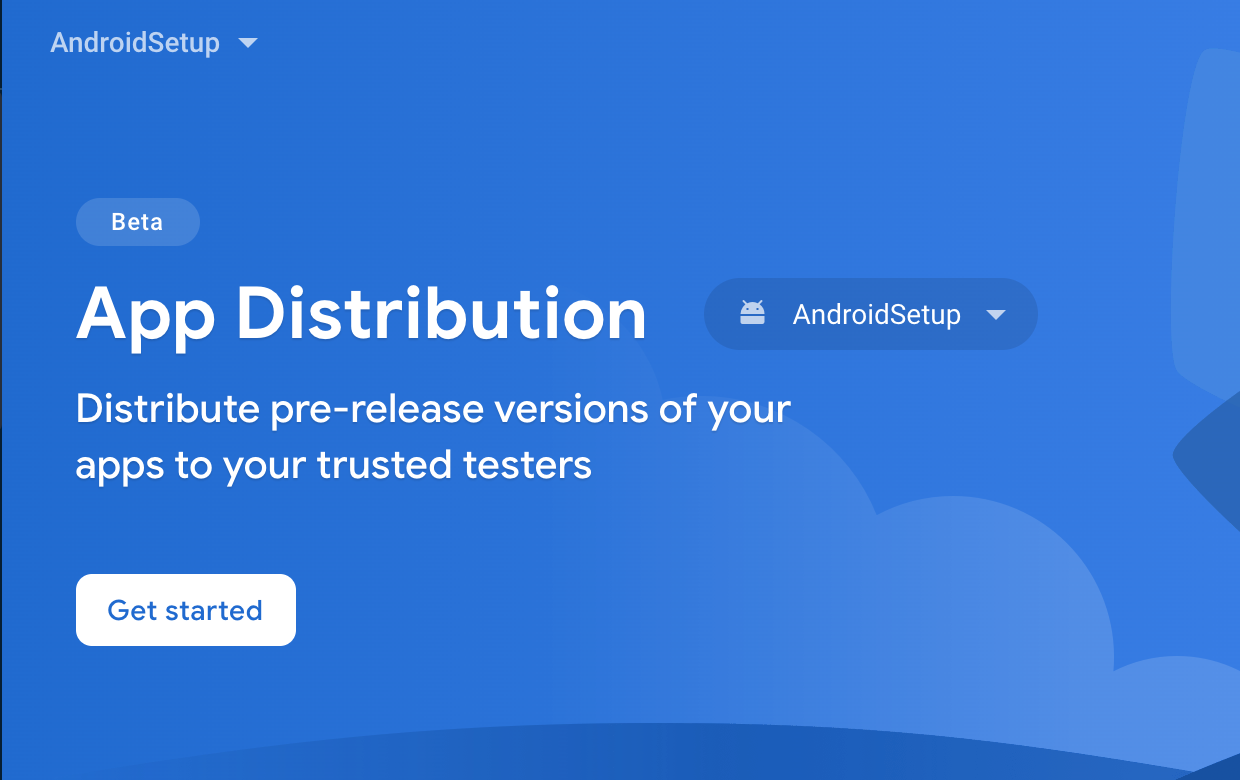
Bước tiếp theo, chọn Quality > App Distribution > Get Started để enable firebase app distribution
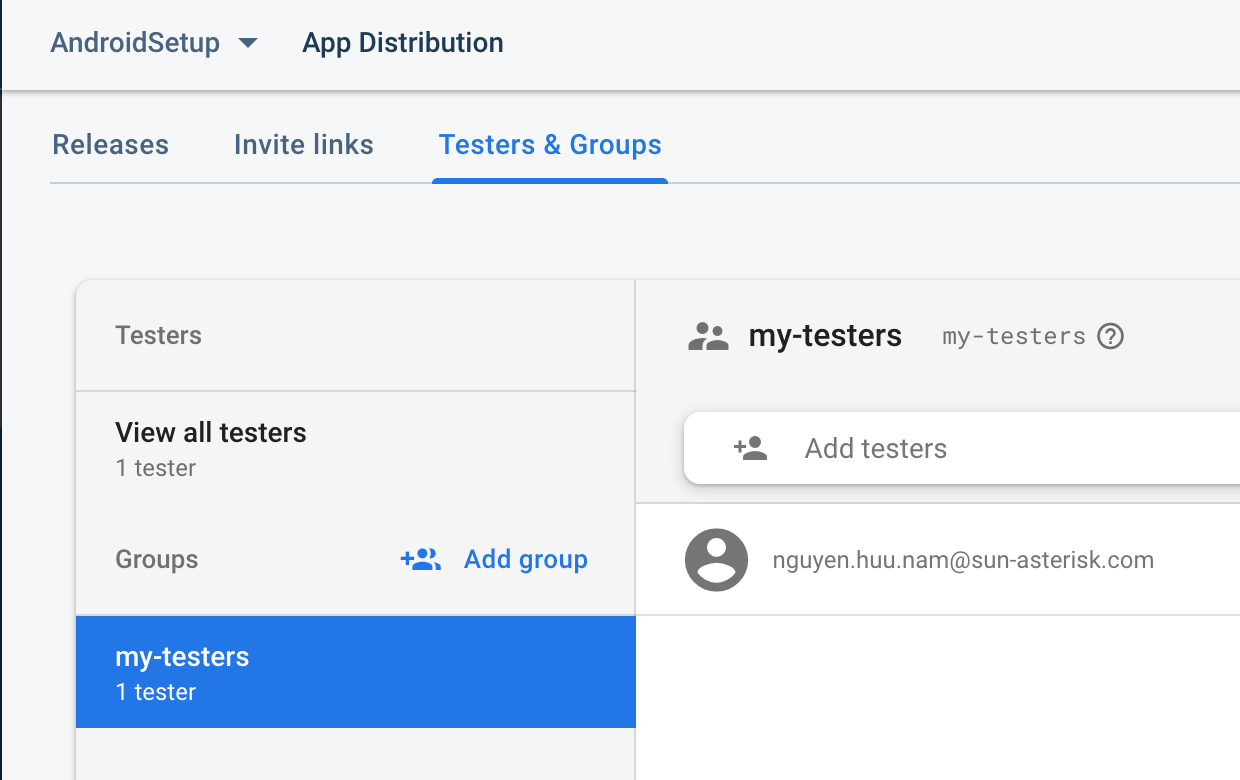
Sau cùng, tạo group testers chứa những email của tester sẽ được tham gia test dự án
2. Thêm Firebase App Distribution Gradle plugin
Nếu bạn viết theo Groovy, tham khảo chi tiết tại đây. Mình sẽ hướng dẫn thêm phần Kotlin DSL.
- Khai báo dependency.
// file buildSrc/Config.kt
object Versions {
    const val firebase_distribution_plugin = "2.0.1"
    ...
}
object ClassPaths {
    const val firebase_distribution_plugin = "com.google.firebase:firebase-appdistribution-gradle:${Versions.firebase_distribution_plugin}"
}

object Plugins {
    const val firebase_distribution = "com.google.firebase.appdistribution"
}
- File build.gradle level project.
buildscript {
    repositories {
        google()
        jcenter()
    }
    dependencies {
        classpath(ClassPaths.android_gradle_plugin)
        classpath(ClassPaths.kotlin_gradle_plugin)
        classpath(ClassPaths.firebase_distribution_plugin)
    }
    ...
}
- File build.gradle level app (app/build.gradle.kts)
plugins {
    id(Plugins.androidApp)
    id(Plugins.firebase_distribution)
    // other plugins
}
Authenticate with Firebase
Để thực hiện distribute firebase tự động bạn cần cung cấp cơ chế authenticate cho gradle task. Có 3 cách:
1. Sign in to your Google Account via the Gradle plugin
2. Use Firebase service account credentials
3. Sign in to Firebase using the Firebase CLI
Trong 3 cách này thì cách số 1 bạn phải làm thủ công, cách số 3 mình sẽ để các bạn thử sức, mình sẽ chỉ cách số 2.
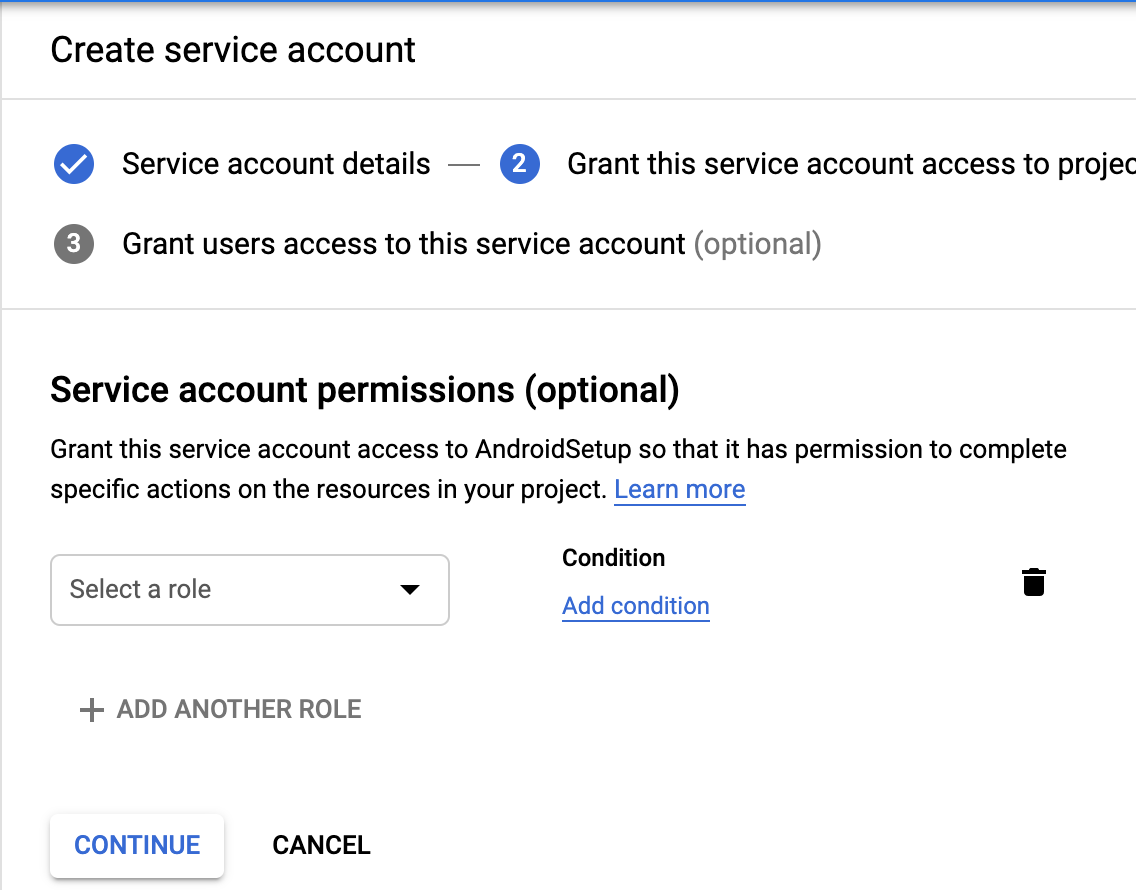
- Trên Google Cloud Platform console, chọn project của bạn và tạo mới một service account (
CREATE SERVICE ACCOUNTbutton).
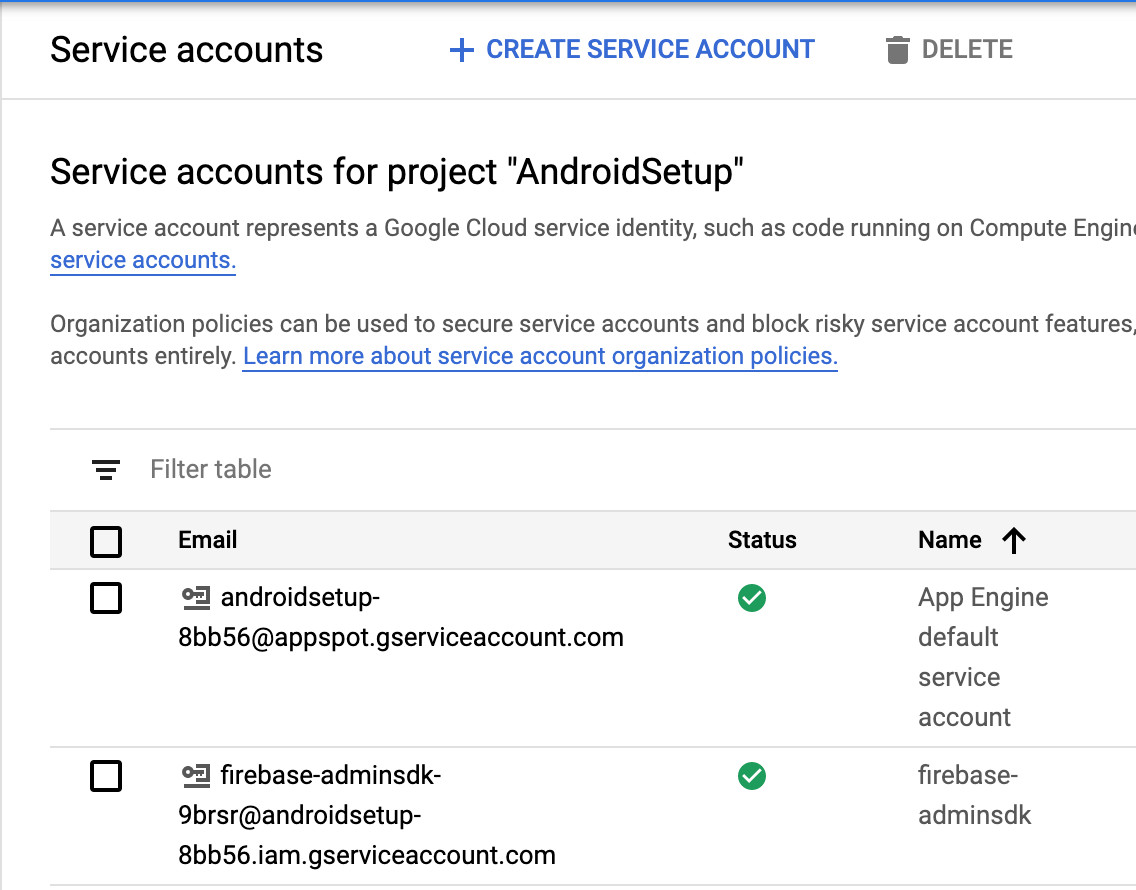
- Chọn role là
Firebase App Distribution Admin
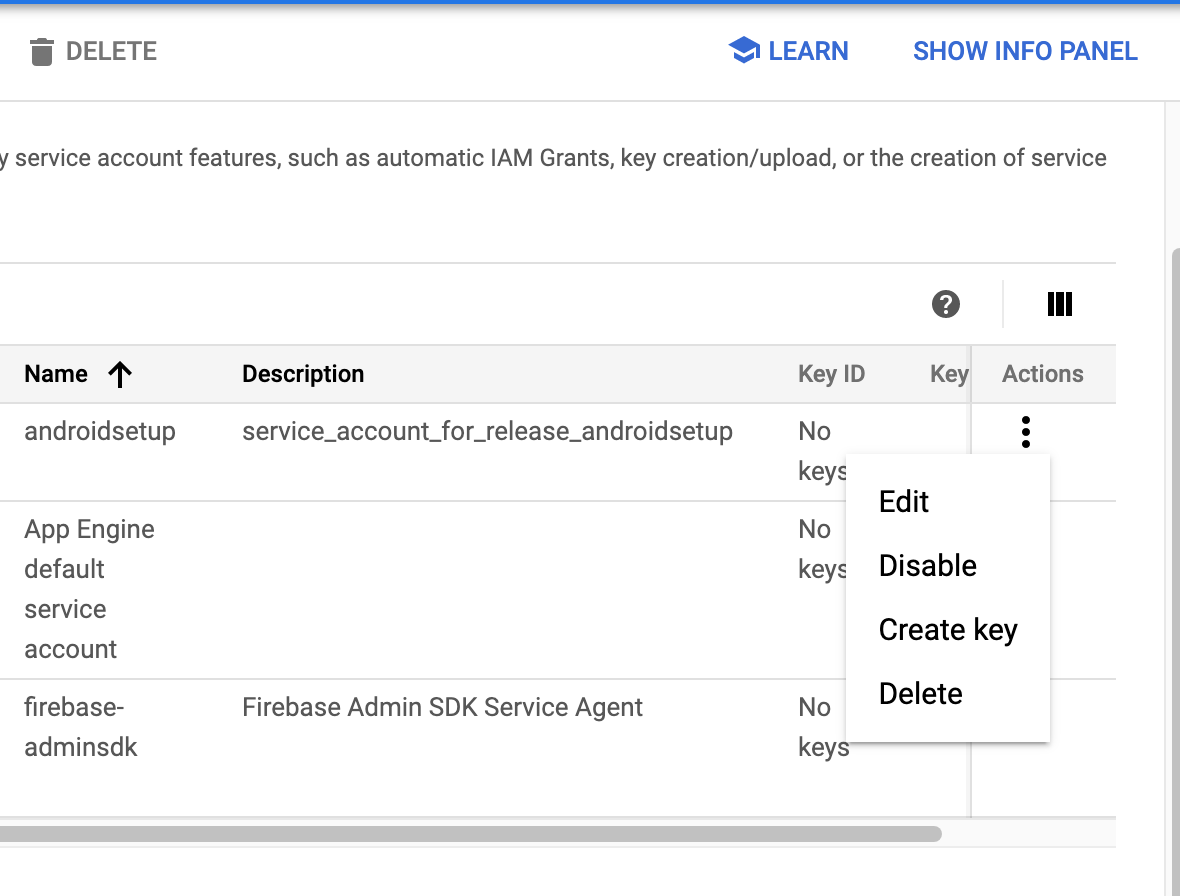
- Tạo một
private json keyvà cất key này cẩn thận vì nó được cấp quyền admin có thể access được App Distribution trên Firebase project của bạn.
Ok, đến đây tạm xong bước chuẩn bị cho authenticate vào firebase project.
Configure your distribution properties
1. Tạo task cho distribution
NOTE: Bước quan trọng là cần ẩn đi các thông tin mật tránh leak lên github hoặc nơi chứa code, thêm các dòng sau vào .gitignore
# ignore to upload keystore & private firebase key file
*.jks
androidsetup-private-key.json # private json key bạn tạo ở bước Authenticate with Firebase
- Tạo thư mục
distribution. - Tạo 1
keystorefile chuẩn bị cho việc build app (Ex:dev_keystore.jks). - Tạo file
distribution.gradle.ktsđể tạo các task release tương ứng.
tasks.register("distributeDevelopRelease", Exec::class) {
    workingDir = rootDir
    commandLine = "./gradlew assembleDevelopRelease appDistributionUploadDevelopRelease".split(" ")
}
// Add similar task for production, staging... if have
Các điểm lưu ý:
distributeDevelopReleaselà tên task, tuỳ ý bạn đặt.assembleDevelopReleaselà build apk command với cú phápassemble[Flavor][BuildType], Ví dụ nếu bạn muốn buildstaging debugthì lệnh sẽ làassembleStagingDebug...appDistributionUploadDevelopReleaselà lệnh upload apk lên firebase với cú pháp tương tựappDistributionUpload[Flavor][BuildType].
- Tạo file
keystore.propertiesđể chứa thông tin liên quan đến keystore. File này bạn nên để như bên dưới và upload lên git chỉ lần đầu tiên. Sau đó, không nên upload phần thay đổi lên.
# Make sure these below steps are finished:
# 1. Check keystore + private key in distribution folder
# 2. Fill correct these below info
# 3. Correct versionName and versionCode
# 4. Correct testers group that you want to share.
storeFile=../distribution/name_of_keystore.jks
storePassword=store_password
keyAlias=key_alias
keyPassword=key_password
Mỗi lần build apk chỉ cần thay đổi chính xác các thông tin nêu trên dưới local (không upload phần thay đổi này lên git). Ví dụ:
storeFile=../distribution/dev_keystore.jks
storePassword=Aa@123456
keyAlias=AndroidSetup
keyPassword=Aa@123456
Cấu trúc thư mục distribution của bạn sẽ như sau:
- ProjectFolder
- app
- distribution
- dev_keystore.jks // ignore upload to github
- androidsetup-private-key.json // ignore upload to github
- distribution.gradle.kts // contains task to upload
- keystore.properties // ignore upload change to github
- Tạo thư mục flavor tương ứng. Ví dụ bạn có flavor là develop, staging, production thì sẽ tạo tương ứng 3 thư mục develop, staging, production. Mỗi thư mục sẽ chứa file
google-services.json. - Tạo file release_notes.txt tương ứng ở mỗi thư mục. File này sẽ chứa tất cả các thay đổi so với version trước đó của bạn.
Cấu trúc thư mục của bạn sẽ như sau:
- ProjectFolder/app/src
- main
- develop
- release_notes.txt
- google-services.json
2. Signing config và register task
Sau khi tạo xong các file cần thiết, giờ là lúc update signing config và register distribution task vào app/build.gradle.kts.
import java.io.FileInputStream
import java.util.*
//...

// Load signing configs for release
val keystorePropertiesFile = rootProject.file("distribution/keystore.properties")
val keystoreProperties = Properties()
keystoreProperties.load(FileInputStream(keystorePropertiesFile))

android {
    compileSdkVersion(Versions.compile_sdk_version)
    // ...

    // Add release keystore info
    // ref: https://developer.android.com/studio/publish/app-signing#secure-shared-keystore
    signingConfigs {
        create("release") {
            storeFile = file(keystoreProperties["storeFile"] as Any)
            storePassword = keystoreProperties["storePassword"] as? String
            keyAlias = keystoreProperties["keyAlias"] as? String
            keyPassword = keystoreProperties["keyPassword"] as? String
        }
    }
    buildTypes {
        getByName("release") {
            isMinifyEnabled = true
            isShrinkResources = true
            proguardFiles(
                getDefaultProguardFile("proguard-android.txt"),
                file("proguard-rules.pro")
            )
            signingConfig = signingConfigs.getByName("release")
        }
    }

    flavorDimensions("default")
    productFlavors {
        create("develop") {
            manifestPlaceholders = mapOf("applicationName" to "@string/app_name_dev")
            // setup release note and group of testers
            // ref: https://firebase.google.com/docs/app-distribution/android/distribute-gradle?authuser=1#step_3_configure_your_distribution_properties
            firebaseAppDistribution {
                appId = "1:578593782165:android:a7777d0c48a2b35aac5e9c" // firebase project appid, có thể xem trên firebase project hoặc mobilesdk_app_id key trong google-service.json
                releaseNotesFile = "app/src/develop/release_notes.txt" // release note của develop flavor
                groups = "my-testers" // Tester group của dự án
                serviceCredentialsFile = "distribution/androidsetup-private-key.json" // file private key tạo ở bước 3.
            }
        }
        // other flavor
    }
}
Test the distribution
Sau khi setup thành công, bạn có thể test việc upload apk lên firebase bằng lệnh dưới. distributeDevelopRelease là tên task bạn tạo ở trên
./gradlew distributeDevelopRelease
Summary
OK, như vậy là mình đã hướng dẫn các bạn upload apk tự động bằng gradle task. Hy vọng sẽ tăng một chút năng suất và chất lượng cho dự án bạn đang tham gia.
Tham khảo thêm:
All rights reserved