How to create and publish a ruby gem
Bài đăng này đã không được cập nhật trong 4 năm
I assume that the viewer of this post know about what is a gem. Here first I will create a hello world gem manually, then I will present the way how can also create a ruby gem using bundler. The gem we will create here is named “ruby_gem_demo”
Structure of a gem: Each gem has a name, version and platform. Inside the gem there are the following components:
- Code
- Documentation
- Gemspec
Each gem has the same standard structure of the code organization.
- The lib directory contains the code for the gem
- The test or spec directory contains tests, depending on which test framework the developer uses
- A gem usually has a Rakefile, which the rake program uses to automate tests, generate code, and perform other tasks.
- This gem also includes an executable file in the bin directory, which will be loaded into the user’s PATH when the gem is installed.
- Documentation is usually included in the README and inline with the code. When you install a gem, documentation is generated automatically for you. Most gems include RDoc documentation, but some use YARD docs instead.
- The final piece is the gemspec, which contains information about the gem. The gem’s files, test information, platform, version number and more are all laid out here along with the author’s email and name.
The gemspec: The gemspec specifies the information about a gem such as its name, version, description, authors and homepage. Here is the example of our gemspec file. Required gemspec attributes: You can’t build a gem without the following gemspec attributes. Following are the required gemspec attributes:
- Files: Files included in the gem
- Name: The name of the gem
- Summary: A summary of the gem description
- Version: The version of the gem
You can know more about the gemspec attributes by visiting the link http://guides.rubygems.org/specification-reference/
Naming your gem: First you have to create a unique name for your gem. If give a name that is already exist in the rubygem.org, you will not be able to publish your gem. Before you select a name, search your selected name in the rubygem.org and github. Secondly, if a class or module has multiple words, use underscores to separate them. This matches the file user will require. For example:
| GEM NAME | REQUIRE STATEMENT | MAIN CLASS OR MODULE |
|---|---|---|
| ruby_parser | require 'ruby_parser' | RubyParser |
| rdoc-data | require 'rdoc/data' | RDoc::Data |
You can see more about it on the following link http://guides.rubygems.org/name-your-gem/ Start creating the gem: Enough abstract discussion. Now we will create a gem manually. Create a folder named “ruby_gem_demo”. Inside this directory create two files named ruby_gem_demo.gemspec and ruby_gem_demo.rb like as follows.

Code for your gem package is placed within the lib directory. The convention is to have one ruby file with the same name as your gem and this file will be loaded when the user will require our gem “ruby_gem_demo”. That one file is responsible for setting up your gem code and API.
Write some code inside the ruby_gem_demo.rb to print the hello world
class RubyGemDemo
  def self.hi
    puts "Hello world! This is my first ruby gem"
  end
end
As we mentioned earlier, the gemspec defines what’s in the gem, who made it, and the version of the gem. It’s also your interface to RubyGems.org. Place the following information in the gemspec file
Gem::Specification.new do |s|
 s.name        = 'ruby_gem_demo'
 s.version     = '0.0.1'
 s.date        = '24-12-2017'
 s.summary     = "Print hello world"
 s.description = "A simple hello world gem"
 s.authors     = ["Md. Mahmudur Rahman"]
 s.email       = 'mailtommrr@gmail.com'
 s.files       = ["lib/ruby_gem_demo.rb"]
 s.homepage    =
   'http://rubygems.org/gems/ruby_gem_demo'
 s.license       = 'MIT'
end
After you have created a gemspec, now you can build your gem and test it locally whether it’s working or not by using the following command
gem build gem_name.gemspec
When you run the command(for our case, gem build ruby_gem_demo.gemspec), it will show the following output. Please note the last line. The command creates a file with the name ruby_gem_demo-0.0.1.gem in the project directory.

To test your first gem locally, first install it using the bundle command
gem install ./ruby_gem_demo-0.0.1.gem
You will see a new gem named ruby_gem_demo installed.

Now require and run the gem from the interactive ruby console.
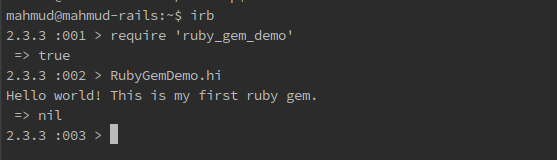
Excellent! We created a new ruby gem.
Publish your gem: We need to publish it now on the ruby gem.org. First create an account in the https://rubygems.org/ . To push the gem in the rubygems.org, you need to download the api key to setup your computer or you can copy the curl command from your ruby gem account by navigating there https://rubygems.org/profile/edit
-> curl -u mahmud https://rubygems.org/api/v1/api_key.yaml > ~/.gem/credentials; chmod 0600 ~/.gem/credentials
-> gem push ruby_gem_demo-0.0.1.gem
Navigate to the https://rubygems.org/ site and search your pushed gem named “ruby_gem_demo.
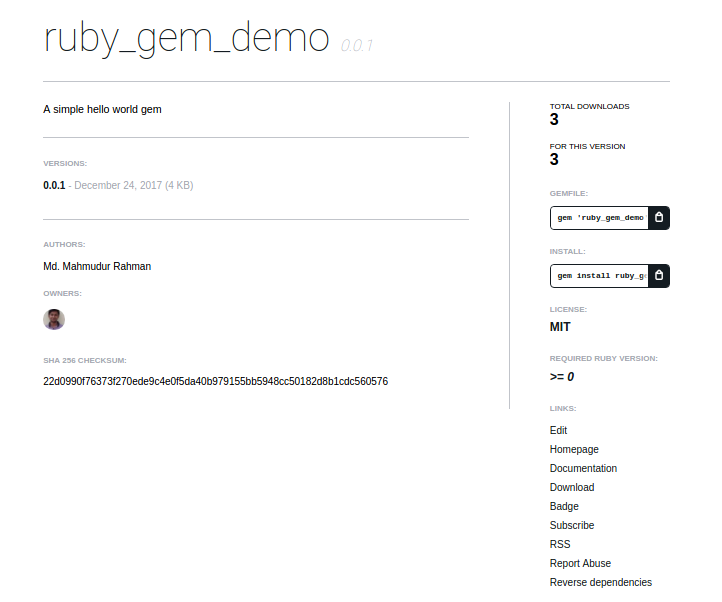
That’s great! You can install and use this hello world gem in your rails project using bundler. You can use bundler to create a ruby gem. It generates the required file for you. You don’t need to create the required files manually.
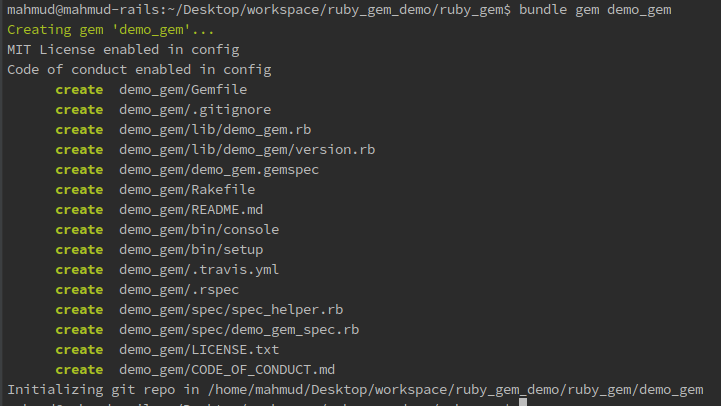
It will create a Gemfile, which is where we can say our dependencies or use other libraries for our gem.
It created a rake file which is similar to seed make file which allows you to run various task really easily for example may be you want to generate some test file for testing run test, you can write a rake task to do that.
The files generated are:
-
**Gemfile: **Used to manage gem dependencies for our library’s development. This file contains a gemspec line meaning that Bundler will include dependencies specified in demo_gem.gemspec too.
-
Rakefile: Requires Bundler and adds the build, install and release Rake tasks by way of calling Bundler::GemHelper.install_tasks. The build task will build the current version of the gem and store it under the pkg folder, the install task will build and install the gem to our system (just like it would do if we gem install‘d it) and release will push the gem to Rubygems for consumption by the public.
-
CODE_OF_CONDUCT.md: Provides a code of conduct that you expect all contributors to your gem to follow. Will only be included if you chose to have it included.
-
**LICENSE.txt: **Includes the MIT license. Will only be included if you chose to have it included.
-
.gitignore: (only if we have Git). This ignores anything in the pkg directory (generally files put there by rake build), anything with a .gem extension and the .bundle directory.
-
**demo_gem.gemspec:**The Gem Specification file. This is where we provide information for Rubygems’ consumption such as the name, description and homepage of our gem. This is also where we specify the dependencies our gem needs to run.
-
lib/demo_gem.rb: The main file to define our gem’s code. This is the file that will be required by Bundler (or any similarly smart system) when our gem is loaded. This file defines a module which we can use as a namespace for all our gem’s code. It’s best practice to put our code in…
-
lib/demo_gem: here. This folder should contain all the code (classes, etc.) for our gem. The lib/demo_gem.rb file is there for setting up our gem’s environment, whilst all the parts of it go in this folder. If our gem has multiple uses, separating this out so that people can require one class/file at a time can be really helpful.
-
lib/demo_gem/version.rb: Defines a DemoGem module and in it, a VERSION constant. This file is loaded by the demo_gem.gemspec to specify a version for the gem specification. When we release a new version of the gem we will increment a part of this version number to indicate to Rubygems that we’re releasing a new version.
That’s all about creating and publishing a ruby gem. Next post I will discuss about documenting, building and testing of a gem.
All rights reserved
