CRUD với Rails và React (p1)
Bài đăng này đã không được cập nhật trong 5 năm
Giới thiệu
Khi tìm hiểu một ngôn ngữ hay một framework mới, cá nhân mình thấy cách tiếp cận tốt nhất là làm một app có đủ chức năng CRUD. Vậy trong bài viết này, hãy cùng mình viết 1 ứng dụng Rails có sử dụng React làm front end có các chức năng CRUD nhé.
Khởi tạo ứng dụng Rails
Bắt đầu với câu lệnh quen thuộc để tạo một ứng dụng rails:
rails new fruits-app
Sau đó thêm gem gem 'react-rails' vào thư mục Gemfile và chạy lệnh bundle install
Tiếp theo chạy lệnh rails g react:install. Câu lệnh này sẽ
- Thêm một vài thư viện Reactjs
//= requiresvào file application.js - Thêm thư mục
components/cho React components Các bạn có thể xem chi tiết hơn tại đây Tiếp theo hãy thêm mộtmodelcó tên làFruit. Ứng dụng này sẽ chỉ làm việc với mộtmodelnày
rails g model Fruit name:string description:text
Trong file db/seed.rb thêm vào nội dung sau:
fruits = ['Mango', 'Pineapple', 'Passion fruit', 'Dragonfruit']
fruits.each{|fruit| Fruit.create(name: fruit, description: "I am a delicious #{fruit}.")}
Sau đó chạy lệnh rails db:migrate db:seed để khởi tạo database và tạo dữ liệu
Thế là xong phần chuẩn bị môi trường và dữ liệu.
Controller
Trước tiên, trong file app/controllers/application_controller.rb chúng ta thêm dòng sau:
class ApplicationController < ActionController::Base
 protect_from_forgery with: :null_session
end
để hiểu rõ hơn về hàm protect_from_forgery các bạn có thể xem thêm bài viết này
Ứng dụng của chúng ta dựa trên API do đó, cấu trúc thư mục controller cần tuân theo quy ước không gian tên như sau: app/controllers/api/v1.
Việc tạo phiên bản cho API có nghĩa là các thay đổi có thể được thực hiện trong tương lai mà không làm hỏng phiên bản gốc cụ thể ở đây là v1.
Chúng ta sẽ tạo 1 file trong thư mục app/controllers/api/v1 có tên là fruits_controller.rb. Trong file này chúng ta sẽ viết code để tạo các phương thức CRUD cơ bản.
class Api::V1::FruitsController < ApplicationController
  def index
    render json: Fruit.all
  end

  def create
    fruit = Fruit.create fruit_params
    render json: fruit
  end

  def destroy
    Fruit.destroy params[:id]
  end

  def update
    fruit = Fruit.find params[:id]
    fruit.update_attributes fruit_params
    render json: fruit
  end

  private

  def fruit_params
    params.require(:fruit).permit(:id, :name, :description)
  end
end
Vì ứng dụng dùng API nên các kết quả trả về sẽ có dạng JSON.
Routing
Khi một HTTP Request được gửi đến từ trình duyệt, nó cần phải biết nên chạy ở controller nào với action nào, chúng ta cần thêm các router.
Trong file config/routes.rb chúng ta thêm các router cần thiết
Rails.application.routes.draw do
  namespace :api do
    namespace :v1 do
     resources :fruits, only: [:index, :create, :destroy, :update]
    end
  end
end
Khởi động server bằng lệnh rails s sau đó truy cập vào đường dẫn http://localhost:3000/api/v1/fruits.json. Bạn sẽ thấy toàn bộ dữ liệu đã tạo ở file db/seed.rb được hiển thị dưới dạng JSON.
[
    {"id":1,"name":"Mango","description":"I am a delicious Mango.","created_at":"2020-11-19T03:42:03.593Z","updated_at":"2020-11-19T03:42:03.593Z"},
    {"id":2,"name":"Pineapple","description":"I am a delicious Pineapple.","created_at":"2020-11-19T03:42:03.619Z","updated_at":"2020-11-19T03:42:03.619Z"},
    {"id":3,"name":"Passion fruit","description":"I am a delicious Passion fruit.","created_at":"2020-11-19T03:42:03.638Z","updated_at":"2020-11-19T03:42:03.638Z"},
    {"id":4,"name":"Dragonfruit","description":"I am a delicious Dragonfruit.","created_at":"2020-11-19T03:42:03.654Z","updated_at":"2020-11-19T03:42:03.654Z"}
]
Bây giờ chúng ta tạo thêm 1 controller nữa có tên là Home. Chúng ta tạo controller này theo thư mục: app/controllers/home_controller.rb. Controller này sẽ chỉ có trang index để hiển thị nội dung trang web của chúng ta
class HomeController < ApplicationController
  def index
  end
end
Trong file routes.rb, thêm routes sau:
root to: 'home#index'
Để tạo thêm phần view cho trang index, tạo thư mục home trong folder app/views và thêm file index.html.erb vào đó, ta sẽ có cây thư mục: app/views/home/index.html.erb.
File này sẽ chỉ chứa 1 dòng code:
<%= react_component 'Main' %>
react_component là một view helper được sinh ra bởi gem 'react-rails'. Phương thức react_component lấy tên component làm đối số thứ nhất và prop là đối số thứ hai.
Tạo React component
Tạo một file có tên _main.js.jsx theo đường dẫn app/assets/javascripts/components/_main.js.jsx. Và thêm nội dung sau:
const Main = (props) => {
    return(
      <div>
        <h1>Fruits are great!</h1>
      </div>
    )
}
Khởi động lại server và truy cập vào đường dẫn localhost:3000 và nhận thành quả nào. Trang web được hiện lên với dòng chữ "Fruits are great!"
Hiển thị toàn bộ dữ liệu ở file seed.rb
Tạo thêm 1 component để hiển thị dữ liệu. Tạo 1 component mới theo đường dẫn app/assets/javascripts/components/_all_fruits.js.jsx
và đặt tên component là AllFruits, thêm đoạn code sau
class AllFruits extends React.Component {
render(){
  return(
    <div>
      <h1>To do: List of fruits</h1>
    </div>
    )
  }
}
Và gọi component này bên trong Main component (app/assets/javascripts/components/main.js.jsx) chúng ta đã viết lúc nãy.
const Main = (props) => {
    return(
      <div>
        <h1>Fruits are great!</h1>
        <AllFruits />
      </div>
    )
}
Tiếp theo, trong file _all_fruits.js.jsx ta sẽ hiển thị tất cả data thông qua API. Ở đây sẽ tạo một state là một mảng rỗng cho AllFruits component, sau đó sẽ dùng hàm setState() để update lại state rỗng vừa tạo.
Chúng ta sẽ dùng 2 hàm constructor và componentDidMount() để xử lý việc tạo state và lấy dữ liệu từ API
class AllFruits extends React.Component {

  constructor(props) {
    super(props);
    this.state = {
      fruits: []
    };
  }
  componentDidMount(){
    fetch('/api/v1/fruits.json')
      .then((response) => {return response.json()})
      .then((data) => {this.setState({ fruits: data }) });
  }
  render(){
    return(
      <div>
        <h1>To do: List of fruits</h1>
      </div>
     )
   }
}
Cuối cùng viết lại phần render() của AllFruits component để hiển thị các attributes của list data chúng ta vừa lấy được.
render(){
 var fruits = this.state.fruits.map((fruit) => {
  return(
   <div key={fruit.id}>
    <h3>{fruit.name}</h3>
    <p>{fruit.description}</p>
   </div>
  )
 })
 return(
  <div>
   {fruits}
  </div>
 )
}
** Chú ý, khi hiển thị dữ liệu, cần thêm 1 thuộc tính là fruit.id trong thẻ div. Việc này nhằm mục đích tham chiếu đến các object cụ thể phục vụ cho việc sửa, xóa dữ liệu sau này
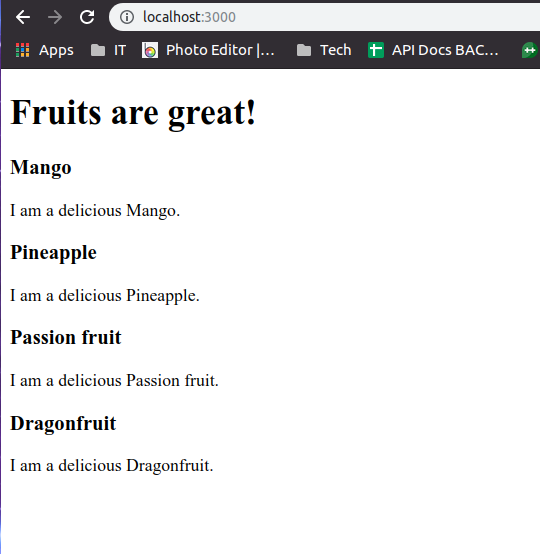
Truy cập lại trang http://localhost:3000/ ta sẽ được kết quả
CRUD
Create a new fruit
Trước khi đi vào bước để tạo một fruit mới, hãy sửa lại cấu trúc component 1 chút. Chúng ta sẽ thêm một component có tên là Body và chuyển toàn bộ constructor, state cũng như hàm
componentDidMount() từ AllFruits component vào Body component. Và gọi AllFruits component vào trong Body component
Tạo 1 file _body.js.jsx trong thư mục /app/assets/javascripts/components
class Body extends React.Component {
constructor(props) {
    super(props);
    this.state = {
      fruits: []
    };
  }
componentDidMount(){
    fetch('/api/v1/fruits.json')
      .then((response) => {return response.json()})
      .then((data) => {this.setState({ fruits: data }) });
  }
render(){
    return(
      <div>
        <AllFruits fruits={this.state.fruits} />
      </div>
    )
  }
}
Update lại AllFruits component như sau:
const AllFruits = (props) => {
var fruits = props.fruits.map((fruit) => {
    return(
      <div key={fruit.id}>
        <h1>{fruit.name}</h1>
        <p>{fruit.description}</p>
      </div>
    )
  })
return(
      <div>
        {fruits}
      </div>
    )
}
Lúc này, AllFruits component sẽ trở thành một stateless components.
Chúng ta cũng cần update lại Main component
const Main = (props) => {
    return(
      <div>
        <h1>Fruits are great!</h1>
        <Body />
      </div>
    )
}
Thay vì gọi AllFruits component ta sẽ gọi Body component
AllFruits component được render từ Body component và fruits được truyền từ Body component vào AllFruits component như một prop.
Truy cập lại trang http://localhost:3000/ ta vẫn sẽ nhân được kết quả là 1 danh sách các fruits
Bây giờ chúng ta sẽ thêm một form để tạo ra các bản ghi mới.
Tạo 1 file _new_item.js.jsx trong thư mục /app/assets/javascripts/components có nội dung:
const NewFruit = (props) => {
  let formFields = {}

  return(
    <form>
     <input ref={input => formFields.name = input} placeholder='Enter the name of the item'/>
     <input ref={input => formFields.description = input} placeholder='Enter a description' />
     <button>Submit</button>
    </form>
  )
}
ref = {input => formFields.name = input} sẽ cho phép lấy giá trị đầu vào và lưu trữ các đầu vào trong một object formFields và truyền đến các component liên quan sau này.
NewFruit component sẽ được gọi trong Body component, F5 lại trình duyệt, ta được kết quả như sau:
 Bước tiếp theo chúng ta sẽ xử lý để khi ấn submit, 1 bản ghi mới sẽ được tạo ra.
Trong
Bước tiếp theo chúng ta sẽ xử lý để khi ấn submit, 1 bản ghi mới sẽ được tạo ra.
Trong Body component chúng ta sẽ thêm 1 function handleFormSubmit (), function này sẽ nhận attribute name và description của form dưới dạng đối số. function handleFormSubmit () sẽ được truyền tới
AllFruits component như một prop
class Body extends React.Component {
constructor(props) {
  ...
  this.handleFormSubmit = this.handleFormSubmit.bind(this)
}
handleFormSubmit(name, description){
    console.log(name, description)
}
componentDidMount(){
   ...
  }
render(){
    return(
      <div>
        <NewFruit handleFormSubmit={this.handleFormSubmit}/>
        <AllFruits fruits={this.state.fruits}  />
      </div>
    )
  }
}
Trong NewFruit component chúng ta cần thêm logic để xử lý sự kiện onSubmit.
const NewFruit = (props) => {

    let formFields = {}

    return(
      <form onSubmit={ (e) => {
            e.preventDefault();
            props.handleFormSubmit(
              formFields.name.value,
              formFields.description.value
            );
            e.target.reset();}
        }>
        <input ref={input => formFields.name = input} placeholder='Enter the name of the item'/>
        <input ref={input => formFields.description = input} placeholder='Enter a description' />
        <button>Submit</button>
      </form>
    )
}
Quay lại với Body component và hoàn thành việc xử lý thêm 1 bản ghi mới
class Body extends React.Component {
  constructor(props) {
    super(props);
    this.state = {
      fruits: []
    };
    this.handleFormSubmit = this.handleFormSubmit.bind(this)
    this.addNewFruit = this.addNewFruit.bind(this)
  }
  handleFormSubmit(name, description){
    let body = JSON.stringify({fruit: {name: name, description:   description} })
  fetch('http://localhost:3000/api/v1/fruits', {
      method: 'POST',
      headers: {
        'Content-Type': 'application/json'
      },
      body: body,
    }).then((response) => {return response.json()})
    .then((fruit)=>{
      this.addNewFruit(fruit)
    })

  }
  addNewFruit(fruit){
    this.setState({
      fruits: this.state.fruits.concat(fruit)
    })
  }
componentDidMount(){
    fetch('/api/v1/fruits.json')
      .then((response) => {return response.json()})
      .then((data) => {this.setState({ fruits: data }) });
  }
render(){
    return(
      <div>
        <NewFruit handleFormSubmit={this.handleFormSubmit}/>
        <AllFruits fruits={this.state.fruits}  />
      </div>
    )
  }
}
Ở đây, trong function handleFormSubmit() chúng ta dùng fetch() để gửi một method POST đến controller fruits_controller và action là create với data là dữ liệu lấy từ form.
Sau đó chúng ta gọi thêm function addNewFruit() với đầu vào là bản ghi vừa lấy tạo, function addNewFruit() sau đó sẽ sử dụng hàm setState() để thêm bản ghi vừa tạo vào biến fruits (biến này chứa toàn bộ dữ liệu các bản ghi trong database)
Biến fruits được cập nhật đồng nghĩa với màn hình hiển thị của chúng ta cũng sẽ hiển thị bản ghi mới chúng ta vừa tạo ra thông qua AllFruit component.
Kết luận
Trên đây là phần 1 của bài viêt CRUD với Rails và React, ở bài viết tiếp theo mình sẽ thêm các action còn lại: Sửa, Xóa bản ghi. Bài viết còn nhiều thiếu sót, mong mọi người thông cảm. Cám ơn mọi người đã đọc bài viết của mình.
All rights reserved
