Triển khai QR code với ASP.NET
Bài đăng này đã không được cập nhật trong 7 năm
Giới thiệu
QRCode là một thư viện rất phổ biến được viết bằng C#. Ở bài viết này mình sẽ triển khai thư viện QRCode để tạo mã QR bằng ứng dụng được viết bằng ASP.NET. Ở đây mình sẽ sử dụng C#. Mình sẽ triển khai QRCode theo 3 cách:
- Tạo mã QR bằng hình ảnh hình ảnh Bitmap cho một văn bản bất kỳ.
- Tạo tệp mã QR (.qrr) cho bất kỳ văn bản nào và sau đó lưu các tệp này trong ứng dụng.
- Đọc và hiển thị tất cả các tệp mã QR (.qrr)
1. Tạo mã QR bằng hình ảnh hình ảnh Bitmap cho một văn bản bất kỳ.
Tạo 1 Controller có tên QRCoderController trong thư mục Controller.Controller có tên QRCoderController sẽ được tạo và nó sẽ chỉ có một phương thức có tên Index.
public IActionResult Index()
{
    return View();
}
Sau đó thêm các thư viện sau trong QRCoderController
using System;
using System.Collections.Generic;
using System.Drawing;
using System.IO;
using Microsoft.AspNetCore.Mvc;
using QRCoder;
Tiếp theo, trong action Index viết như sau:
[HttpPost]
public IActionResult Index(string qrText)
{
    QRCodeGenerator qrGenerator = new QRCodeGenerator();
    QRCodeData qrCodeData = qrGenerator.CreateQrCode(qrText, QRCodeGenerator.ECCLevel.Q);
    QRCode qrCode = new QRCode(qrCodeData);
    Bitmap qrCodeImage = qrCode.GetGraphic(20);
    return View(BitmapToBytes(qrCodeImage));
}
trong hàm Index ta truyền vào một tham số qrText. Nó chứa văn bản được nhập trong View. Văn bản này sau đó sẽ được chuyển thành hình ảnh Bitmap.
đoạn code này sẽ thực hiện điều đó:
QRCodeGenerator qrGenerator = new QRCodeGenerator();
QRCodeData qrCodeData = qrGenerator.CreateQrCode(qrText, QRCodeGenerator.ECCLevel.Q);
QRCode qrCode = new QRCode(qrCodeData);
Bitmap qrCodeImage = qrCode.GetGraphic(20);
Đối tượng QRCode qrCode được định nghĩa để gọi một hàm gọi là BitmapToBytes(). Vai trò của chức năng này là chuyển đổi hình ảnh Bitmap thành Byte[].
Sau đó thêm đoạn code bên dưới vào trong QRCoderController:
private static Byte[] BitmapToBytes(Bitmap img)
{
    using (MemoryStream stream = new MemoryStream())
    {
        img.Save(stream, System.Drawing.Imaging.ImageFormat.Png);
        return stream.ToArray();
    }
}
Cuối cùng ta tạo View cho hàm Index trong thư mục Views/QRCodevà thêm vào đó đoạn code sau:
@model Byte[]
@{
    Layout = null;
}
<!DOCTYPE html>
<html>
<head>
<meta name="viewport" content="width=device-width" />
<title>Implementing QRCoder in ASP.NET Core - Create QR Code</title>
</head>
<body>
  <div class="container">
    <div id="content">
      <h1>Implementing QRCoder in ASP.NET Core - Create QR Code</h1>
      <h2>
        <a href="http://www.yogihosting.com/category/aspnet-core/">Read the tutorial on YogiHosting » </a>
      <button id="reset" onclick="location=''">Reset »</button>
      </h2>
      <div id="viewContent">
        @using (Html.BeginForm(null, null, FormMethod.Post))
        {
          <table>
            <tbody>
              <tr>
                <td>
                  <label>Enter text for creating QR Code</label>
                </td>
                <td>
                  <input type="text" name="qrText" />
                </td>
              </tr>
              <tr>
                <td colspan="2">
                  <button>Submit</button>
                </td>
              </tr>
            </tbody>
          </table>
        }
      </div>

      @{
        if (Model != null)
        {
          <h3>QR Code Successfully Generated</h3>
          <img src="@String.Format("data:image/png;base64,{0}", Convert.ToBase64String(Model))" />
        }
      }
    </div>
  </div>
</body>
</html>
sau đó thêm vào đoạn css sau:
body {
background: #111 no-repeat;
background-image: -webkit-gradient(radial, 50% 0, 150, 50% 0, 300, from(#444), to(#111));
}
h1, h2, h3 {
text-align: center;
color: #FFF;
margin: 5px 0;
}
h1 {
font-size: 30px;
}
h2 a {
font-size: 25px;
color: #0184e3;
text-decoration: none;
}
h3 {
font-size: 23px;
border-bottom: solid 3px #CCC;
padding-bottom: 10px;
}
h3 a {
color: #00e8ff;
text-decoration: none;
}
h3 a:hover, h2 a:hover {
text-decoration: underline;
}
.container {
width: 800px;
margin: auto;
color: #FFF;
font-size: 25px;
}
.container #content {
border: dashed 2px #CCC;
padding: 10px;
}
#reset {
padding: 5px 10px;
background: #4CAF50;
border: none;
color: #FFF;
cursor: pointer;
}
#reset:hover {
color: #4CAF50;
background: #FFF;
}
#viewContent table {
width: 100%;
}
#viewContent table tr {
height: 80px;
background: darkcyan;
}
#viewContent table tr td {
width: 50%;
padding-left: 5px;
}
Khi Mã QR được tạo bằng bởi hàm Index. Mảng dữ liệu sẽ được trả về Views sau đó hình ảnh bitmap sẽ được hiển thị theo đoạn code dưới đây:
@{
  if (Model != null)
  {
    <h3>QR Code Successfully Generated</h3>
    <img src="@String.Format("data:image/png;base64,{0}", Convert.ToBase64String(Model))" />
  }
}
Chạy chương trình
Khởi động chương trình sau đó truy cập đường dẫn sau: http://localhost:50755/QRCoder để gọi hàm Index trong controller QRCoderController
Trong ô input, nhập vào một đoạn text và nhấp vào nút submit để tạo hình ảnh Bitmap Mã QR.

2. Tạo tệp mã QR (.qrr) cho bất kỳ văn bản nào và sau đó lưu các tệp này trong ứng dụng.
Bạn cũng có thể tạo các tệp Mã QR cho một văn bản và lưu nó trong trang web của bạn. Những tập tin này có phần mở rộng .qrr.
Để thực hiện cách này, trong controller QRCoderController, bạn thêm một hàm sau:
public IActionResult GenerateFile()
{
   return View();
}

[HttpPost]
public IActionResult GenerateFile(string qrText)
{
  QRCodeGenerator qrGenerator = new QRCodeGenerator();
  QRCodeData qrCodeData = qrGenerator.CreateQrCode(qrText,   QRCodeGenerator.ECCLevel.Q);
  string fileGuid = Guid.NewGuid().ToString().Substring(0, 4);
  qrCodeData.SaveRawData("wwwroot/qrr/file-" + fileGuid + ".qrr", QRCodeData.Compression.Uncompressed);
  QRCodeData qrCodeData1 = new QRCodeData("wwwroot/qrr/file-" + fileGuid + ".qrr", QRCodeData.Compression.Uncompressed);
  QRCode qrCode = new QRCode(qrCodeData1);
  Bitmap qrCodeImage = qrCode.GetGraphic(20);
  return View(BitmapToBytes(qrCodeImage));
}
[HttpPost] của phương thức này tạo các tệp Mã QR trong folder wwwroot/qrr. Đoạn code thực hiện việc này là:
QRCodeGenerator qrGenerator = new QRCodeGenerator();
QRCodeData qrCodeData = qrGenerator.CreateQrCode(qrText, QRCodeGenerator.ECCLevel.Q);
string fileGuid = Guid.NewGuid().ToString().Substring(0, 4);
qrCodeData.SaveRawData("wwwroot/qrr/file-" + fileGuid + ".qrr", QRCodeData.Compression.Uncompressed);
Khi tệp .qrr được tạo thì ta chỉ cần đọc nó trên trang web của mình. Sau đó, ta chuyển đổi nó thành dạng Bitmap và cuối cùng gửi hình ảnh sang cho Views. Đoạn code để thực hiện việc này là:
QRCodeData qrCodeData1 = new QRCodeData("wwwroot/qrr/file-" + fileGuid + ".qrr", QRCodeData.Compression.Uncompressed);
QRCode qrCode = new QRCode(qrCodeData1);
Bitmap qrCodeImage = qrCode.GetGraphic(20);
return View(BitmapToBytes(qrCodeImage));
Tiếp theo, gọi hàm GenerateFile() bên trong thư mục Views/QRCoder và thêm đoạn mã sau vào đó:
@model Byte[]
@{
Layout = null;
}
<!DOCTYPE html>
<html>
<head>
<meta name="viewport" content="width=device-width" />
<title>Implementing QRCoder in ASP.NET Core - Create QR Code File</title>
</head>
<body>
<div class="container">
<div id="content">
<h1>Implementing QRCoder in ASP.NET Core - Create QR Code File</h1>
<h2>
<a href="http://www.yogihosting.com/category/aspnet-core/">Read the tutorial on YogiHosting » </a>
<button id="reset" onclick="location=''">Reset »</button>
</h2>
<div id="viewContent">
@using (Html.BeginForm(null, null, FormMethod.Post))
{
<table>
<tbody>
<tr>
<td>
<label>Enter text for creating QR File</label>
</td>
<td>
<input type="text" name="qrText" />
</td>
</tr>
<tr>
<td colspan="2">
<button>Submit</button>
</td>
</tr>
</tbody>
</table>
}
</div>
@{
if (Model != null)
{
<h3>QR Code file Successfully Generated</h3>
<img src="@String.Format("data:image/png;base64,{0}", Convert.ToBase64String(Model))" />
}
}
</div>
</div>
</body>
</html>
Đoạn code trên cũng giống với phần Views của hàm Index và hoạt động giống như vậy.
Truy cập địa chỉ sau để xem phần code ta vừa thêm vào Views http://localhost:50755/QRCoder/GenerateFile
3. Đọc và hiển thị tất cả các tệp mã QR (.qrr)
Ta cũng có thể đọc tất cả các tệp .qrr được lưu trong trang web. Thêm vào controller QRCoderController hàm tên là ViewFile với nội dung:
public IActionResult ViewFile()
{
  List<KeyValuePair<string, Byte[]>> fileData=new List<KeyValuePair<string, byte[]>>();
  KeyValuePair<string, Byte[]> data;
  string[] files = Directory.GetFiles("wwwroot/qrr");
  foreach (string file in files)
  {
    QRCodeData qrCodeData = new QRCodeData(file, QRCodeData.Compression.Uncompressed);
    QRCode qrCode = new QRCode(qrCodeData);
    Bitmap qrCodeImage = qrCode.GetGraphic(20);
    Byte[] byteData = BitmapToBytes(qrCodeImage);
    data = new KeyValuePair<string, Byte[]>(Path.GetFileName(file), byteData);
    fileData.Add(data);
  }
  return View(fileData);
}
Trong hàm trên, ta đọc tệp được đặt trong thư mục chứa file .qrr bằng đoạn code:
Directory.GetFiles("wwwroot/qrr")
Sau đó, ta thêm từng tệp qrr và đặt tên trong một list List<KeyValuePair<string, Byte[]>>. Sau đó trả list các file qrr này ra Views bằng ở cuối hàm return View(fileData);
Cuối cùng tạo một file views có tên ViewFile trong thư mục Views/QRCode với nội dung:
@model List<KeyValuePair<string, Byte[]>>
@{
Layout = null;
}
<!DOCTYPE html>
<html>
<head>
<meta name="viewport" content="width=device-width" />
<title>Implementing QRCoder in ASP.NET Core - View QR Code Files</title>
</head>
<body>
<div class="container">
<div id="content">
<h1>Implementing QRCoder in ASP.NET Core - View QR Code Files</h1>
<h2>
<a href="http://www.yogihosting.com/category/aspnet-core/">Read the tutorial on YogiHosting » </a>
<button id="reset" onclick="location=''">Reset »</button>
</h2>
<div id="viewContent">
<table>
<tbody>
@foreach (KeyValuePair<string, Byte[]> k in Model)
{
<tr>
<td>
<img src="@String.Format("data:image/png;base64,{0}", Convert.ToBase64String(k.Value))" />
<span>@k.Key</span>
</td>
</tr>
}
</tbody>
</table>
</div>
</div>
</div>
</body>
</html>
Thêm một chút css cho file views trên
body {
background: #111 no-repeat;
background-image: -webkit-gradient(radial, 50% 0, 150, 50% 0, 300, from(#444), to(#111));
}
h1, h2, h3 {
text-align: center;
color: #FFF;
margin: 5px 0;
}
h1 {
font-size: 30px;
}
h2 a {
font-size: 25px;
color: #0184e3;
text-decoration: none;
}
h3 {
font-size: 23px;
border-bottom: solid 3px #CCC;
padding-bottom: 10px;
}
h3 a {
color: #00e8ff;
text-decoration: none;
}
h3 a:hover, h2 a:hover {
text-decoration: underline;
}
.container {
width: 800px;
margin: auto;
color: #FFF;
font-size: 25px;
}
.container #content {
border: dashed 2px #CCC;
padding: 10px;
}
#reset {
padding: 5px 10px;
background: #4CAF50;
border: none;
color: #FFF;
cursor: pointer;
}
#reset:hover {
color: #4CAF50;
background: #FFF;
}
#viewContent table {
width: 100%;
}
#viewContent table tr {
height: 80px;
background: darkcyan;
}
#viewContent table tr td {
width: 50%;
padding-left: 5px;
}
#viewContent table tr td img {
width: 150px;
}
#viewContent table tr td span {
display: block;
}
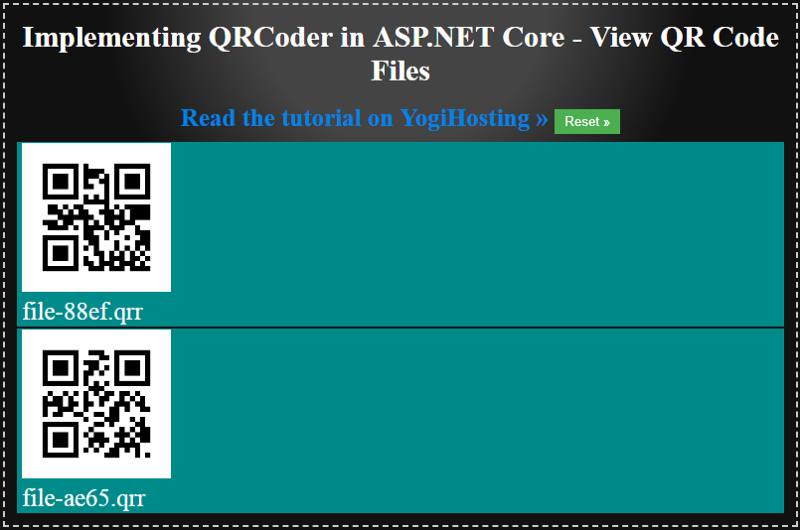
File View trên hiển thị tất cả các file qrr dưới dạng hình ảnh Bitmap trong thẻ <table>. Đoạn code sau sẽ thực hiện việc đó:
<table>
  <tbody>
    @foreach (KeyValuePair<string, Byte[]> k in Model)
    {
      <tr>
        <td>
          <img src="@String.Format("data:image/png;base64,{0}", Convert.ToBase64String(k.Value))" />
         <span>@k.Key</span>
        </td>
      </tr>
    }
  </tbody>
</table>
Chạy chương trình
Khởi động server và truy cập đường dẫn : http://localhost:50755/QRCoder/ViewFile để gọi hàm ViewFile() ta viết ở trên. Ta sẽ thấy mọi file qrr đã lưu trong trang web
Các bạn có thể tham khảo toàn bộ code tại đây
Tổng kết
Trên đây mình đã giới thiệu với các bạn cách để tạo một mã QR trên web bằng ngôn ngữ C#. Hy vọng mọi người thích bài viết này.
Cám ơn mọi người đã đọc bài viết của mình
Nguồn
All rights reserved
