Tự tạo một Seek Button sử dụng SwiftUI
Bài đăng này đã không được cập nhật trong 5 năm
Giới thiệu
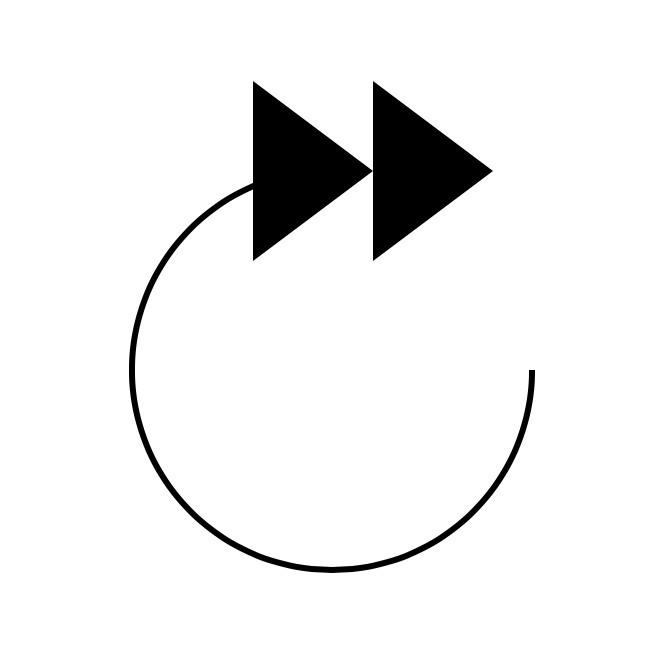
Trong bài viết này, ta sẽ từng bước tạo ra một Seek Button sử dụng SwiftUI, có thiết kế như hình dưới đây
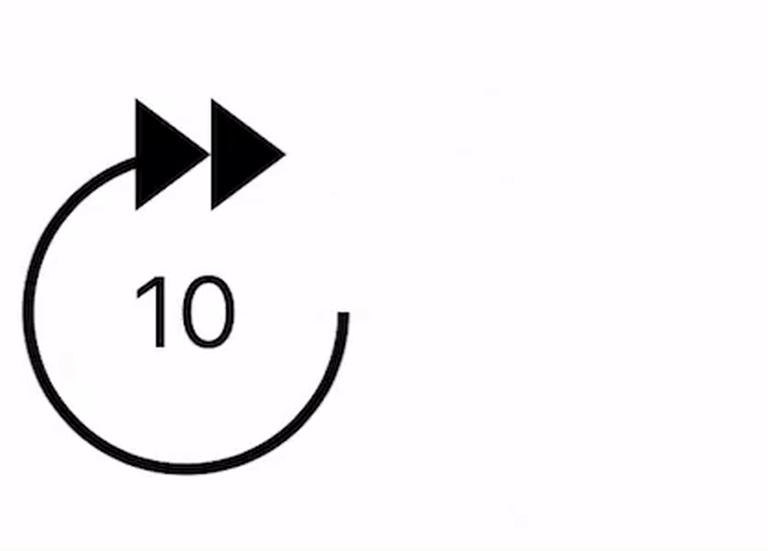
Nút bấm dạng này hay xuất hiện trong các ứng dụng chơi nhạc hoặc video. Ví dụ như trong ứng dụng Netflix, khi người dùng bấm vào nút này thanh progress bar sẽ tăng lên 10s.
Nội dung bài viết sẽ tâp trung vào các điểm sau:
- Các bước cơ bản xây dựng giao diện sử dụng SwiftUI
- Sử dụng các hiệu ứng cơ bản của SwiftUI
Phân tích các thành phần UI cơ bản
Ta có thể chia Seek Button thành các 4 phần như sau:
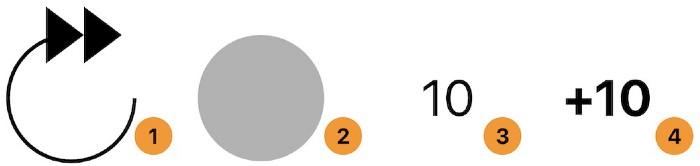
- Rounded arrow view
- Hình nền của Rounded arrow view
- Duration Label
- Accumulation Label
Phân tích mã nguồn
SeekButton.swift
Ta sẽ tạo SeekButton struct để biểu diễn đối tượng Seek Button
Trong file SeekButton.swift ta sẽ thêm thuộc tính action chính là closure chứa xử lý khi người dùng bấm vào Seek Button
var action: (Int) -> Void
RoundArrow
Đối tượng RoundArrow được biểu diễn bởi struct RoundArrow
extension SeekButton {
    fileprivate struct RoundArrow: Shape {
        func path(in rect: CGRect) -> Path {
            var path = Path()
            let w = rect.size.width
            let h = rect.size.height

            path.addArc(center: CGPoint(x: w * 0.5,
                                        y: h * 0.5),
                        radius: h * 0.5,
                        startAngle: Angle(degrees: 0),
                        endAngle: Angle(degrees: 270),
                        clockwise: false)

            return path
        }
    }
}
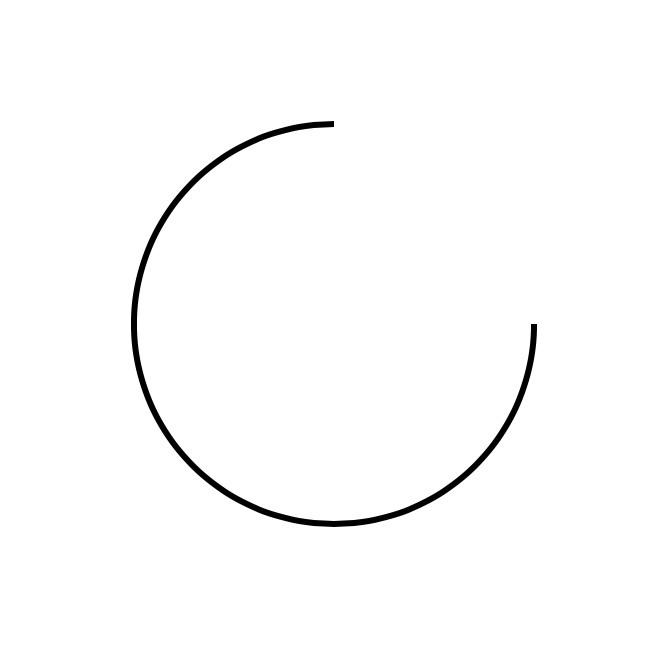
RoundArrow đơn giản là vẽ một cung tròn từ góc 0 sang góc 270 theo chiều kim đồng hồ.
RoundArrowHead
Đối tượng RoundArrowHead được biểu diễn bởi struct RoundArrowHead
fileprivate struct RoundArrowHead: Shape {
    func path(in rect: CGRect) -> Path {
        var path = Path()
        let w = rect.size.width
        let arrowHead = w * 0.3
        let x = w * 0.6

        for i in 0..<2 {
            path.move(to: CGPoint(x: x + CGFloat(i) * arrowHead, y: 0.0))
            path.addLines([
                CGPoint(x: x - arrowHead + CGFloat(i) * arrowHead, y: -arrowHead * 0.75),
                CGPoint(x: x - arrowHead + CGFloat(i) * arrowHead, y: arrowHead * 0.75),
                CGPoint(x: x + CGFloat(i) * arrowHead, y: 0.0)
            ])
            path.closeSubpath()
        }

        return path
    }
}
Ta sẽ tiến hành vẽ 2 hình tam giác liền ngay sau cung tròn ở góc 270 độ
RoundedArrowBackground
Tương tự 2 đối tượng trên ta tiến hành tạo một Shape struct RoundedArrowBackground
fileprivate struct RoundArrowBackground: Shape {
    func path(in rect: CGRect) -> Path {
        var path = Path()
        let w = rect.size.width
        let h = rect.size.height

        path.addArc(center: CGPoint(x: w * 0.5,
                                    y: h * 0.5),
                    radius: h * 0.5,
                    startAngle: Angle(degrees: 0),
                    endAngle: Angle(degrees: 360),
                    clockwise: false)

        return path
    }
}
Đối tượng được tạo ra bời một cung tròn được vẽ từ góc 0 đến góc 360
ScalableText
ScalableText được sử dụng để hiển thị số giây sẽ cộng thêm khi người dùng bấm SeekButton. Kích thước của text sẽ thay đổi dựa kích thước của SeekButton, chính vì vậy ta sẽ cần có 2 thuộc tính:
- string
- fontWeight
private struct ScalableText: View {
    var string: String
    var fontWeight: Font.Weight = .regular

    var body: some View {
        GeometryReader { geometry in
            Text(self.string)
                .font(
                    .system(size: geometry.size.width * 0.4)
                )
                .fontWeight(self.fontWeight)
        }
    }
}
Hiệu ứng chuyển động của RoundedArrow
Theo như thiết kê, phần cung tròn và arrow sẽ có hiệu ứng chuyển động một góc 20 độ ngược chiều kim đồng hồ, kết hợp với hiệu ứng mờ của phần nền. Ta sẽ có đoạn chương trình như sau:
var body: some View {
    ZStack {
        // Arrow
        Group {
            RoundArrowBackground()
                .fill()
                .opacity(backgroundOpacity)
            RoundArrow()
                .stroke(lineWidth: 3)
            RoundArrowHead()
                .fill()
        }
        .rotationEffect(rotation)

        // Duration label
        ScalableText(string: "\(interval)")

        ScalableText(string: "+\(interval)", fontWeight: .bold)
            .opacity(0.0)
    }
    .contentShape(Rectangle())
    .onTapGesture {
        self.animateArrowAndBackground()
        self.action(interval)
    }
}

private func animateArrowAndBackground() {
    // Arrow and background animate out
    withAnimation(.easeInOut(duration: 0.1)) {
        rotation = .degrees(20)
        backgroundOpacity = 0.3
    }

    // Arrow and background animate in
    withAnimation(Animation.easeInOut(duration: 0.1).delay(0.1)) {
        rotation = .zero
        backgroundOpacity = 0.0
    }
}
Hiệu ứng cho Duration Label
Ta sẽ thêm một thuộc tính state durationLabelOpacity để lưu lại trạng thái animation của Duration Label. Lúc này chương trình sẽ có dạng như sau:
var body: some View {
    ZStack {
        Group {
            RoundArrowBackground()
                .fill()
                .opacity(backgroundOpacity)
            RoundArrow()
                .stroke(lineWidth: 3)
            RoundArrowHead()
                .fill()
        }
        .rotationEffect(rotation)

        // Duration label
        ScalableText(string: "\(interval)")
            .opacity(durationLabelOpacity)

        ScalableText(string: "+\(interval)", fontWeight: .bold)
            .opacity(0.0)
    }
    .contentShape(Rectangle())
    .onTapGesture {
        self.animateArrowAndBackground()
        self.animateDurationLabel()
        self.action(interval)
    }
}


 private func animateDurationLabel() {
        // Reset the value
        durationLabelOpacity = 1.0

        // Duration label animation
        withAnimation(.easeInOut(duration: 0.1)) {
            durationLabelOpacity = 0.0
        }
    }
Hiệu ứng của Accumulation Label
Hiệu ứng của đoạn text này sẽ thay đổi theo chuyển động theo phương ngang,
private struct ScalableText: View {
    var string: String
    var fontWeight: Font.Weight = .regular
    var xOffset: CGFloat = 0


    var animatableData: CGFloat {
        get { return xOffset }
        set { xOffset = newValue }
    }
    var body: some View {
        GeometryReader { geometry in
            Text(self.string)
                .font(.system(size: geometry.size.width * 0.4))
                .fontWeight(self.fontWeight)
                .offset(x: self.xOffset * geometry.size.width/44.0, y: 0.0)
        }
    }
}
Ta sẽ cần phải thêm thuộc tính xOffset, giá trị này cũng sẽ thay đổi dựa trên kích thước của Seek Button
@State private var rotation: Angle = .zero
 @State private var backgroundOpacity: Double = 0.0
 @State private var durationLabelOpacity: Double = 1.0
 @State private var xOffset: CGFloat = 0.0
 @State private var accumulationLabelOpacity: Double = 0.0

 var body: some View {
     ZStack {
         Group {
             RoundArrowBackground()
                 .fill()
                 .opacity(backgroundOpacity)
             RoundArrow()
                 .stroke(lineWidth: 3)
             RoundArrowHead()
                 .fill()
         }
         .rotationEffect(rotation)

         // Duration label
         ScalableText(string: "\(interval)")
             .opacity(durationLabelOpacity)

         ScalableText(string: "+\(interval)", fontWeight: .bold, xOffset: xOffset)
             .opacity(accumulationLabelOpacity)
     }
     .contentShape(Rectangle())
     .onTapGesture {
         self.animateArrowAndBackground()
         self.animateDurationLabel()
         self.animateAccumulationLabel()
         self.action(interval)
     }
 }

private func animateAccumulationLabel() {
 // Reset the labels animation values
 accumulationLabelOpacity = 0
 xOffset = 0.0

 // Fade in
 withAnimation(.easeInOut(duration: 0.1)) {
     accumulationLabelOpacity = 1.0
 }

 // Animate out offset
 withAnimation(Animation.timingCurve(0.0, 0.0, 0.2, 1.0, duration: 0.35)) {
     xOffset = 80
 }

 // Fade out
 withAnimation(Animation.timingCurve(0.0, 0.0, 0.2, 1.0, duration: 0.45).delay(0.5)) {
     accumulationLabelOpacity = 0.0
 }
}
Accessibility
Ta sẽ cần thêm một số thuộc tính Accessibility cho Seek Button bằng các đoạn code sau:
- accessibility(label:) sẽ cung cấp thông tin VoiceOver mô tả chức năng của Seek Button
- accessibility(addTraits:) sẽ khởi tạo giá trị cho thuộc tính .isButton
var body: some View {
    ZStack {
        Group {
            RoundArrowBackground()
                .fill()
                .opacity(backgroundOpacity)
            RoundArrow()
                .stroke(lineWidth: 3)
            RoundArrowHead()
                .fill()
        }
        .rotationEffect(rotation)

        // Duration label
        ScalableText(string: "\(interval)")
            .opacity(durationLabelOpacity)

        ScalableText(string: accumulationString, fontWeight: .bold, xOffset: xOffset)
            .opacity(accumulationLabelOpacity)
    }
    .accessibility(label: Text("Forward \(interval) seconds"))
    .accessibility(addTraits: .isButton)
    .accessibilityAction { self.performTap() }
    .contentShape(Rectangle())
    .onTapGesture { self.performTap() }
}
Như vậy ta đã hoàn tất các bước để xây dựng một SeekButton đơn giản bằng SwiftUI
Nguồn tham khảo
All rights reserved
