Tổ chức TableView một cách hiệu quả trong iOS
Bài đăng này đã không được cập nhật trong 5 năm
Giới thiệu
TableView là một trong những component sử dụng phổ biến trong các ứng dụng iOS. Trong bài viết này ta sẽ phân tích và từng bước để tổ chức Table View một cách hiệu quả để dễ dàng bảo trì và áp dụng được nhiều yêu cầu khác nhau về dữ liệu.
Giả sử ta cần xây dựng một TableView với nhiều kiểu cell khác nhau, giống như hình dưới đây:

Với yêu cầu như sau:
- Dữ liệu hiển thị sẽ được lấy thông qua lời gọi API
- Không hiển thị các section không có dữ liệu
Ta sẽ chọn mô hình MVVM cho ví dụ của bài viết này. Với MVVM ta sẽ dễ dàng tách biệt View và nghiệp vụ của bài toán. Trong ví dụ này ta sẽ tạo một TableView với 3 kiểu cell khác nhau:
- Cell chỉ có label
- Cell gồm ảnh và label
- Cell có chức năng mở rộng
![]()

Bước 1: Tạo mới ViewController và Storyboard
Đầu tiên ta sẽ tạo một Storyboard cho dynamic TableView, và thêm TableView vào trong UIViewController.
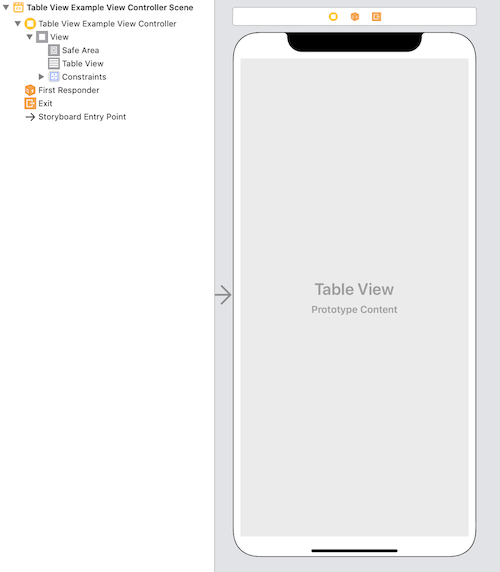
Khi đó code của ViewController sẽ có dạng như sau:
class TableViewExampleViewController: UIViewController {
   @IBOutlet weak var tableView: UITableView?

   override func viewDidLoad() {
      super.viewDidLoad()
   }
}
Bước 2: Tạo protocol cho TableViewCell và TableViewCellModel
Ta sẽ tạo 2 protocol cho:
- Cho TableView cell
- Cho TableView cell ViewModel
Ta sẽ tạo protocol TableViewCellViewModelProtocol cho ViewCell model. Biến cellIdentifier sẽ được dùng để phân biệt giữa các loại cell.
protocol TableViewCellModelProtocol {
   var cellIdentifier: String { get }
}
Tiếp đó ta tạo protocol TableViewCellProtocol cho ViewCell. Protocol này có phương thức populate được dùng để lấy dữ liệu bên trong TableViewCell
protocol TableViewCellProtocol {
   func populate(with data: TableViewCellModelProtocol)
}
Bước 3: Tạo TableViewCell và TableViewCellViewModel
Ta sẽ tiến hành tạo 3 TableView cell và hiển thị dữ liệu dựa trên ViewModel.
Loại 1: TableView cell chỉ có label
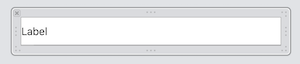
ViewModel sẽ có thuộc tính sau:
- cellIdentifier
- title
struct TableViewCellWithLabelModel: TableViewCellModelProtocol {
   var cellIdentifier: String = "TableViewCellWithLabel"
   var title: String

init(title: String) {
      self.title = title
   }
}
ViewCell sẽ có dạng như sau:
class TableViewCellWithLabel: UITableViewCell {
   @IBOutlet weak var titleLabel: UILabel!
}
extension TableViewCellWithLabel: TableViewCellProtocol {
   func populate(with data: TableViewCellModelProtocol) {
      if let data = data as? TableViewCellWithLabelModel {
         titleLabel.text = data.title
      }
   }
}
Loại 2: TableViewCell gồm ảnh và label
Trong cell sẽ gồm 1 ảnh và 1 label như hình dưới.
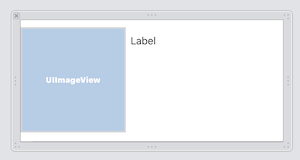
Cell model sẽ có dạng như sau:
struct TableViewCellWithImageAndLabelModel: TableViewCellModelProtocol {
var cellIdentifier: String = "TableViewCellWithImageAndLabel"
   var imageName: String
   var title: String
init(title: String, imageName: String) {
      self.title = title
      self.imageName = imageName
   }
}
Cell View sẽ có dạng như sau:
class TableViewCellWithImageAndLabel: UITableViewCell {
   @IBOutlet weak var titleLabelView: UILabel!
   @IBOutlet weak var leadingImageView: UIImageView!
}
extension TableViewCellWithImageAndLabel: TableViewCellProtocol {
   func populate(with data: TableViewCellModelProtocol) {
      if let data = data as? TableViewCellWithImageAndLabelModel {
         titleLabelView.text = data.title
         leadingImageView.image = UIImage(named: data.imageName)
      }
   }
}
Loại 3: Cell có chức năng mở rộng
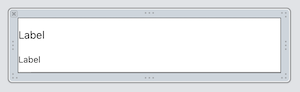
Cell model sẽ có dạng như sau:
struct TableViewExpandableCellModel: TableViewCellModelProtocol {
   var cellIdentifier: String = "TableViewExpandableCell"
   var title: String
   var description: String
   var isExpanded: Bool
init(with title: String, description: String, isExpanded: Bool =    false) {
      self.title = title
      self.description = description
      self.isExpanded = isExpanded
   }
}
Cell View sẽ có dạng như sau:
class TableViewExpandableCell: UITableViewCell {
   @IBOutlet weak var descriptionLabel: UILabel!
   @IBOutlet weak var titleLabel: UILabel!
}
extension TableViewExpandableCell: TableViewCellProtocol {
   func populate(with data: TableViewCellModelProtocol) {
      if let data = data as? TableViewExpandableCellModel {
         descriptionLabel.text = data.description
         titleLabel.text = data.title
         descriptionLabel.isHidden = !data.isExpanded
      }
   }
}
Bước 4: Tạo ViewModel cho UIViewController
ViewModel cho UIViewController sẽ gồm 2 chức năng chính:
- Cập nhật dữ liệu cho TableView
- Cập nhật dữ liệu cho một dòng
typealias TableViewModelOutput = (TableViewExampleViewModel.Output) -> ()
struct TableViewExampleViewModel {
var output: TableViewModelOutput?
mutating func viewModelDidLoad() {
output?(.reloadData)
   }
enum Output {
      case reloadData
      case reloadRowAt(index: Int)
   }
}
Ta sẽ sử dụng một mảng của đối tượng TableViewCellModelProtocol để lưu trữ nội dung và xử lý của từng dòng trong bảng
var items: [TableViewCellModelProtocol] = [//Set data based on your need]
var numberOfItems: Int {
   return items.count
}
func getItem(at index: Int) -> TableViewCellModelProtocol {
   return items[index]
}
mutating func didTapItem(at index: Int) {
   if var viewModel = getItem(at: index) as?TableViewExpandableCellModel {
      viewModel.isExpanded = !viewModel.isExpanded
      items[index] = viewModel
   }
 output?(.reloadRowAt(index: index))
}
Khi đó dữ liệu trong bảng sẽ được khởi tạo như sau:
mutating func viewModelDidLoad() {
   items = [
      TableViewCellWithLabelModel(title: "I am a simple title label cell"),
TableViewExpandableCellModel(with: "I am a simple expandable cell", description: "Lorem Ipsum is simply dummy text of the printing and typesetting industry."),
TableViewCellWithImageAndLabelModel(title: "I am a simple Image Title cell", imageName: "sampleImage")
   ]
   ...
   //We can call output to reload TableView Data
}
Bước 5: Kết hợp TableView delegate và DataSource
Bước này ta sẽ tiến hình khởi tạo Delegate và DataSource cho bảng.
@IBOutlet weak var tableView: UITableView? {

didSet {
setupTableView()
}
}
private func setupTableView() {
tableView.delegate = self
tableView.dataSource = self
func registerNib() {
tableView.register(nibName: "TableViewExpandableCell")
tableView.register(nibName: "TableViewCellWithImageAndLabel")
tableView.register(nibName: "TableViewCellWithLabel")
}
registerNib()
}
Tiến đến ta sẽ viết các hàm thực thi cho các closure trong ViewModel đã được định nghĩa ở bước 4:
//Bind ViewController with ViewModel
extension TableViewExampleViewController {
   func bindViewModel() {
      viewModel.output = { output in
         switch output {
         case .reloadData:
            self.tableView.reloadData()
         case .reloadRowAt(let index):
            self.tableView.reloadRows(at: [IndexPath(row: index, section: 0)], with: .automatic)
         }
      }
   }
}
Cuối cùng ta sẽ thực thi các phương thức của UITableViewDelegate và DataSource để trả về nội dung các cell mong muốn.
//Tableview delegate and datasource methods
extension TableViewExampleViewController: UITableViewDelegate, UITableViewDataSource {
func tableView(_ tableView: UITableView, numberOfRowsInSection section: Int) -> Int {
   return viewModel.numberOfItems
   }
func tableView(_ tableView: UITableView, cellForRowAt indexPath: IndexPath) -> UITableViewCell {
      let cellModel = viewModel.getItem(at: indexPath.row)
let cell = tableView.dequeueReusableCell(withIdentifier:    cellModel.cellIdentifier) as? TableViewCellProtocol
cell?.populate(with: cellModel)
      return cell as? UITableViewCell ?? UITableViewCell()
   }
func tableView(_ tableView: UITableView, didSelectRowAt indexPath: IndexPath) {
      viewModel.didTapItem(at: indexPath.row)
   }
}
Khi đó table của chúng ta sẽ hoạt động như hình dưới đây

Nguồn tham khảo
All rights reserved
