iOS 13 - Hướng dẫn tích hợp Sign in With Apple trong ứng dụng iOS.
Bài đăng này đã không được cập nhật trong 6 năm
Giới thiệu
Trong sự kiện WWDC vừa rồi, Apple cũng đã giới thiệu một tính năng mới là Sign in With Apple, nó cho phép bạn đăng nhập vào các ứng dụng bằng tài khoản Apple ID, cũng tương tự như các nút đăng nhập bằng Facebook hay Google mà các ứng dụng khác đang dùng. Apple hướng đến mục tiêu là không cần nhớ nhiều password và hơn nữa đó chính là tính riêng tư của người dùng được đặt lên trên hàng đầu, có thể bảo vệ dữ liệu người dùng tốt hơn. Vậy cách thức thực hiện tính năng này trên iOS 13 sẽ là như nào, hôm nay tôi cùng các bạn sẽ thực hiện nó.
Thực hiện Sign in With Apple trong iOS app
1. Configure Project
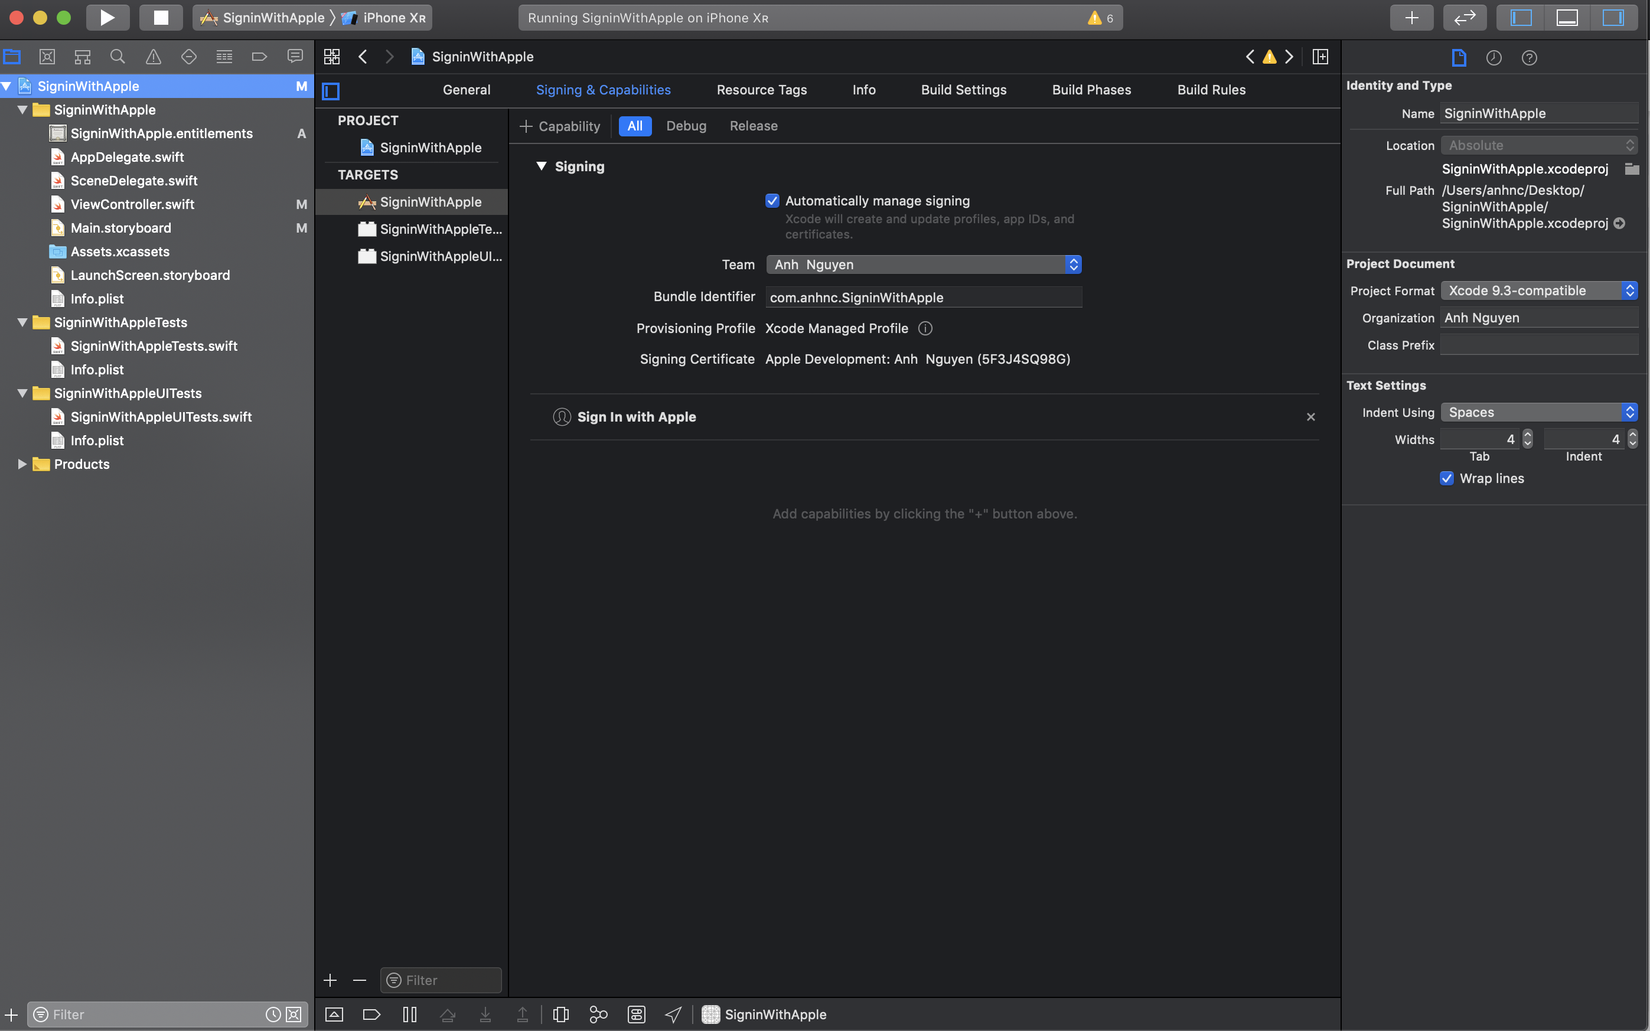
Trước tiên chúng ta tạo một project mới và setup development team ở trong tab* Signing & Capabilities * và Xcode sẽ tự động tạo một provisioning profile.

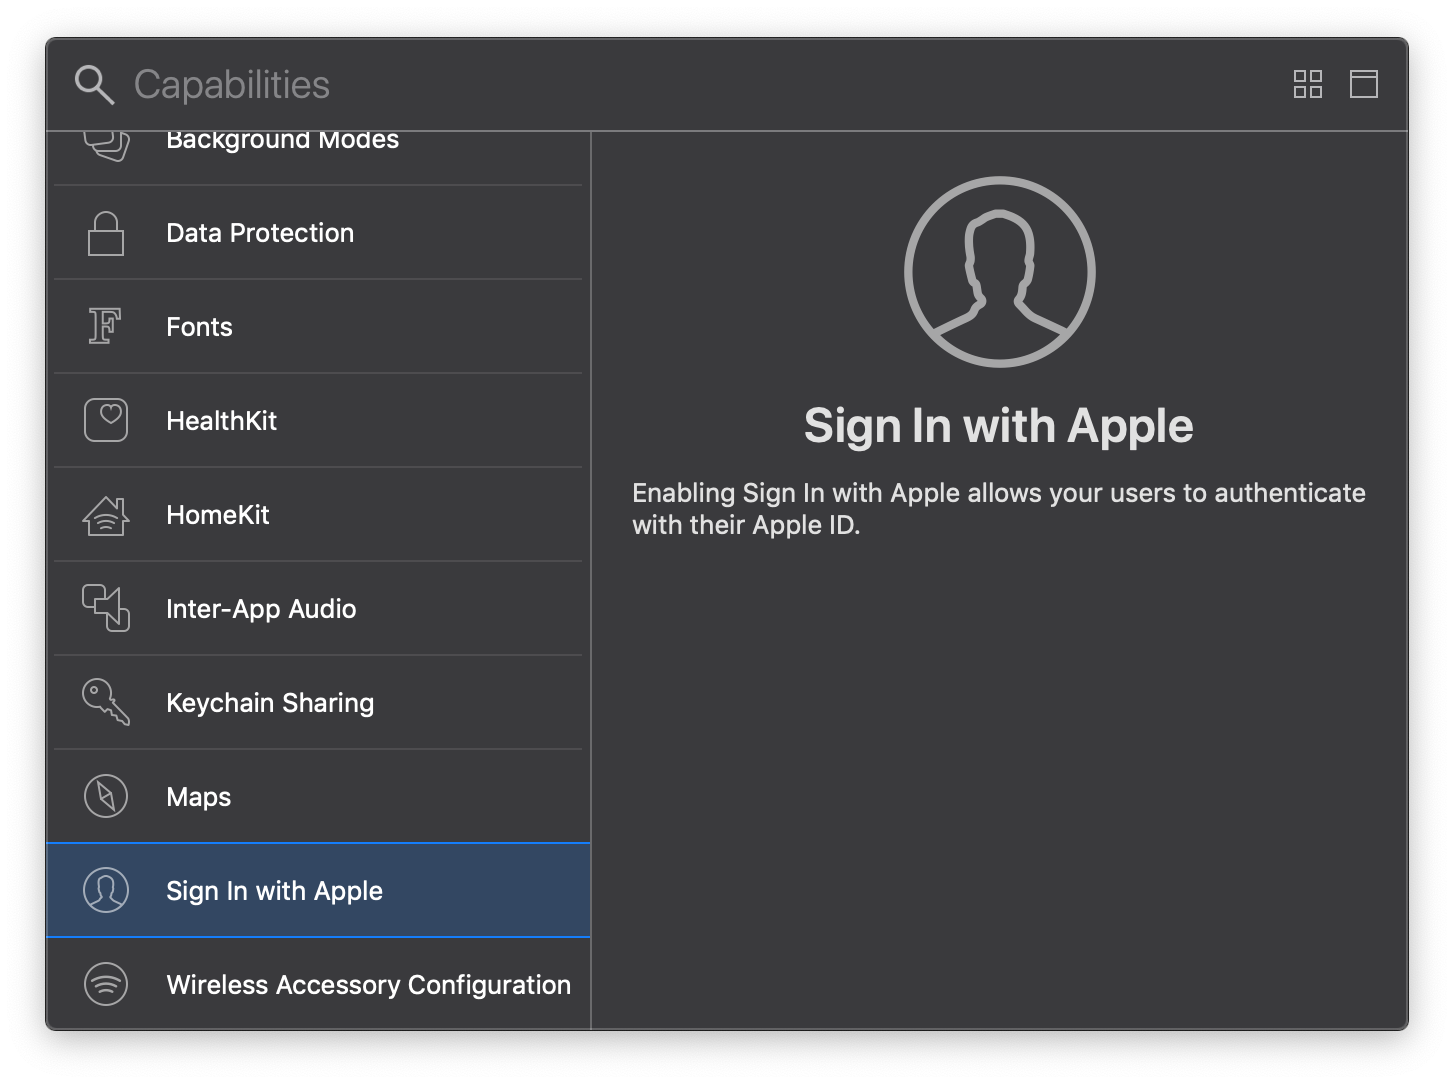
- Thêm Sign In With Apple vào trong project

2. Add Apple LogIn Button
Trong ViewController, chúng ta thêm Apple Login Button có tên ASAuthorizationAppleIDButton được cung cấp bởi framework AuthenticationServices:
let authorizationButton = ASAuthorizationAppleIDButton()
        authorizationButton.addTarget(self, action: #selector(handleLogInWithAppleIDButtonPress), for: .touchUpInside)
        authorizationButton.frame = CGRect(x: 16, y: 250, width: 380, height: 46)
        view.addSubview(authorizationButton)
3. Handle Login Button Press
@objc
    private func handleLogInWithAppleIDButtonPress() {
        let appleIDProvider = ASAuthorizationAppleIDProvider()
        let request = appleIDProvider.createRequest()
        request.requestedScopes = [.fullName, .email]

        let authorizationController = ASAuthorizationController(authorizationRequests: [request])
        authorizationController.delegate = self
        authorizationController.presentationContextProvider = self
        authorizationController.performRequests()
    }
Chúng ta cần sử dụng một provider (ASAuthorizationAppleIDProvider) để tạo 1 request (ASAuthorizationAppleIDRequest), mà sau đó chúng ta khởi tạo một controller (ASAuthorizationController) thực hiện request.
4. Handle ASAuthorizationController Delegate and Presentation Context
extension ViewController: ASAuthorizationControllerDelegate, ASAuthorizationControllerPresentationContextProviding {
    func authorizationController(controller: ASAuthorizationController, didCompleteWithAuthorization authorization: ASAuthorization) {
        if let appleIDCredential = authorization.credential as? ASAuthorizationAppleIDCredential {
            let userIdentifier = appleIDCredential.user
            let userFirstName = appleIDCredential.fullName?.givenName
            let userLastName = appleIDCredential.fullName?.familyName
            let userEmail = appleIDCredential.email
        }
    }

    func authorizationController(controller: ASAuthorizationController, didCompleteWithError error: Error) {
    }

    func presentationAnchor(for controller: ASAuthorizationController) -> ASPresentationAnchor {
        return self.view.window!
    }
}
Chúng ta sẽ handle việc Sign In With Apple thành công hay lỗi trong ASAuthorizationControllerDelegate.


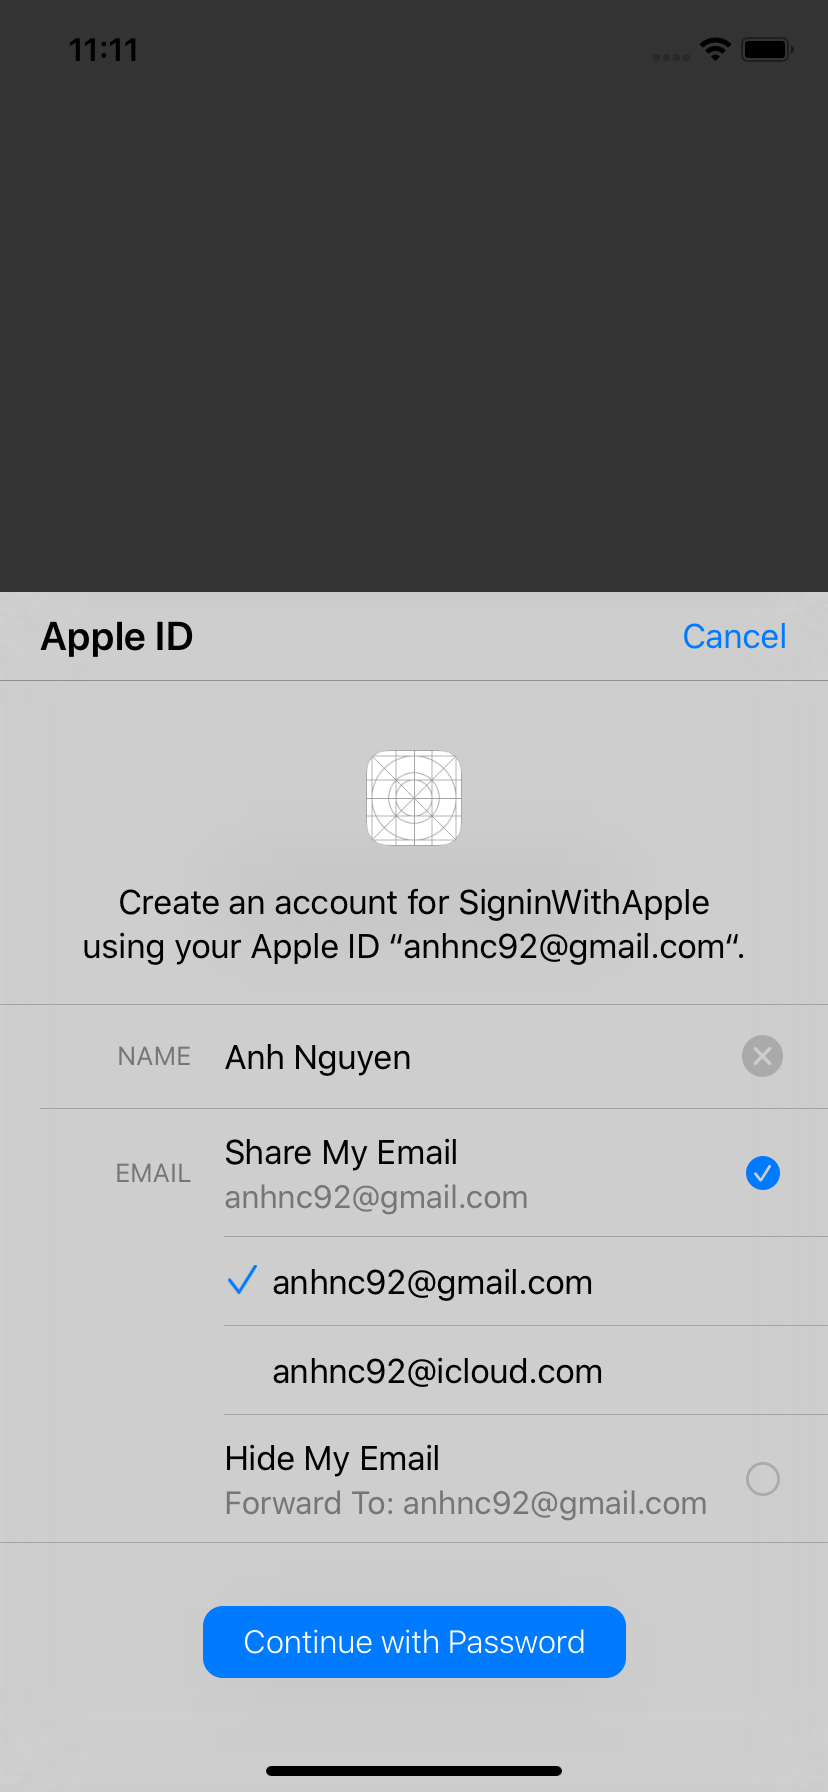
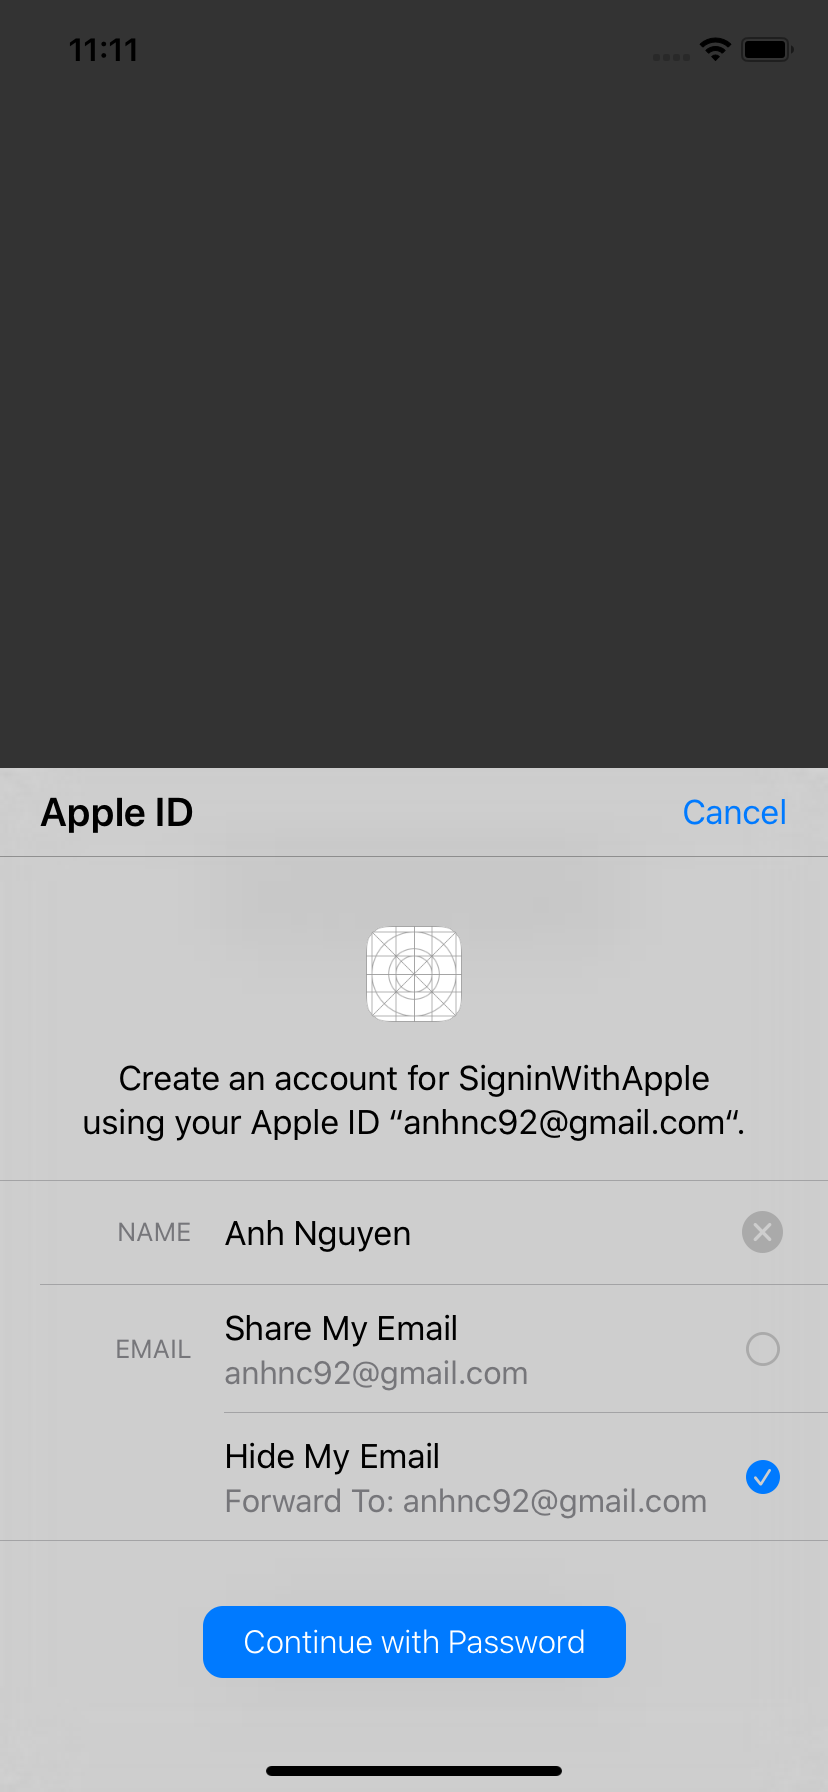
Sau khi click vào button Sign In With Apple, thì lúc này chúng ta sẽ có 2 lựa chọn sử dụng email của Apple ID hoặc sử dụng email ẩn danh Apple sẽ sinh ra random cho chúng ta để ta thực hiện việc Sign In vào hệ thống của ứng dụng. Ở đây ví dụ tôi test case sử dụng email Random khi việc Sign In With Apple thành công nó sẽ trả về userIdentifier = 001092.d7fd03fa74fe442d8e23d5bbfa330ef8.1604 và một email = wtjpjtf5rt@privaterelay.appleid.com, thông tin email của chúng ta hoàn toàn được bảo vệ. Và điều đặc biệt ở đây, khi bạn sử dụng email ẩn danh kia đăng kí account với ứng dụng, tất cả các email gửi về email đó sẽ đều foward đến email thật của chúng ta, thật vi diệu phải không nào!
Kết luận
Theo mình, Apple giới thiệu tính năng này thực sự rất hay và hữu ích khi ngoài kia thông tin của chúng ta có thể đang bị nắm bắt bởi bất cứ hệ thống nào mà chúng ta thực hiện việc Sign In qua các Social network khác, điều đó thực sự tiềm ẩn những nguy cơ rò rỉ thông tin. Và sắp tới khi iOS 13 chính thức phát hành, chắc đại đa số app của chúng ta sẽ phải update mới thêm tính năng Sign In With Apple rồi. Hi vọng bài viết này sẽ hữu ích đến các bạn.
All rights reserved