[iOS] Authenticate Using Apple with Firebase
Bài đăng này đã không được cập nhật trong 6 năm
Giới thiệu
Trong bài viết trước, tôi cùng với các bạn tìm hiểu cách cách hợp đăng nhập sử dụng bằng Apple ID trong ứng dụng iOS. Và mới đây, Firebase của Google đã có phiên bản beta support cho Sign in With Apple trong Firrebase Authentication, và trong bài viết này chúng ta sẽ cùng nhau thực hiện cách config và implement Authenticate Using Apple on iOS sử dụng Firebase nhé.
Authenticate Using Apple on iOS With Firebase
Before you begin
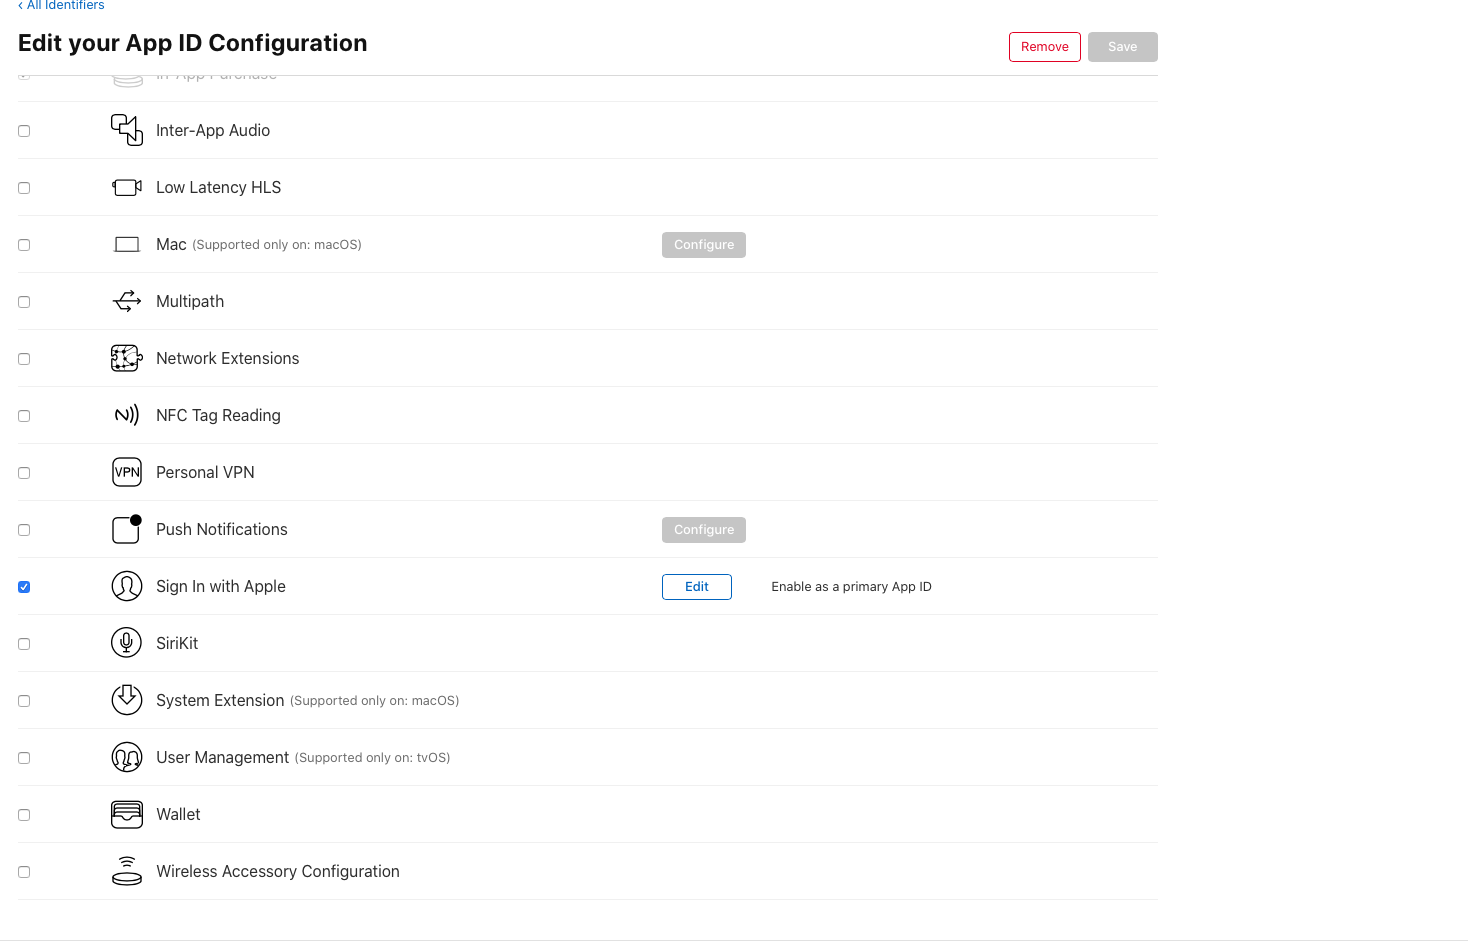
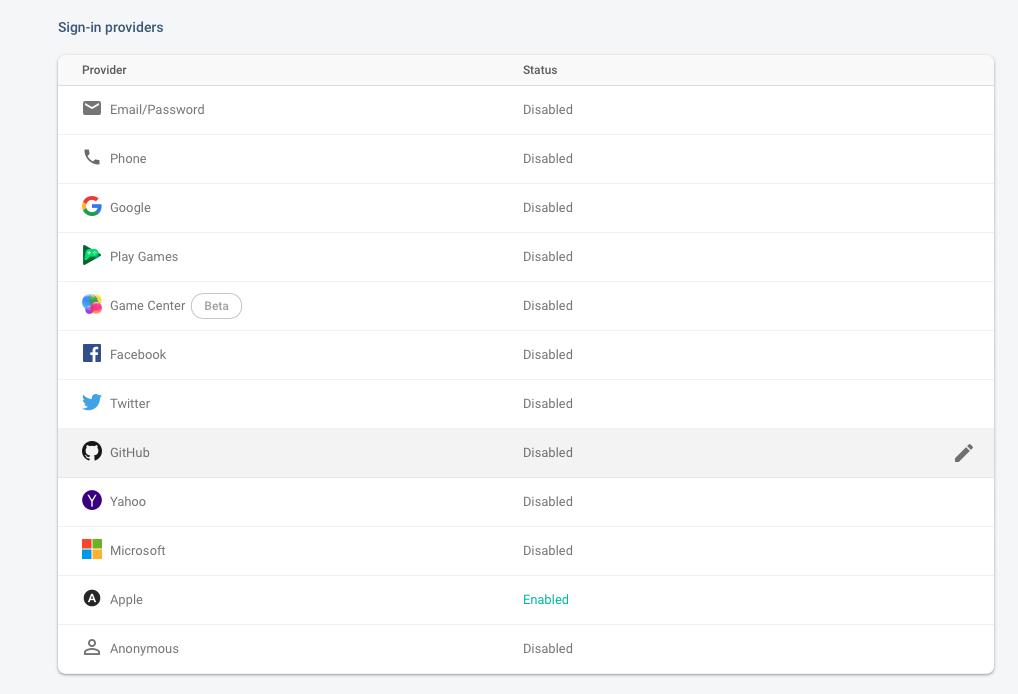
Để sử dụng việc đăng nhập sử dụng Apple, đầu tiên chúng ta phải config Sign In with Apple trên site Apple's developer, sau đó phải enable sign-in with Apple trong Firebase project của bạn.
Sign in with Apple and authenticate with Firebase
Các bạn xem lại bài viết và tạo project tương tự như thế.
Để authenticate với 1 Apple account, đầu tiên sử dụng AuthenticationServices framework để đăng nhập user vào Apple account, sau đó sử dụng ID token từ response của Apple để tạo Firebase AuthCredential object:
Generate randomNonceString:
extension ViewController {
    // Adapted from https://auth0.com/docs/api-auth/tutorials/nonce#generate-a-cryptographically-random-nonce
    private func randomNonceString(length: Int = 32) -> String {
        precondition(length > 0)
        let charset: Array<Character> =
            Array("0123456789ABCDEFGHIJKLMNOPQRSTUVXYZabcdefghijklmnopqrstuvwxyz-._")
        var result = ""
        var remainingLength = length

        while remainingLength > 0 {
            let randoms: [UInt8] = (0 ..< 16).map { _ in
                var random: UInt8 = 0
                let errorCode = SecRandomCopyBytes(kSecRandomDefault, 1, &random)
                if errorCode != errSecSuccess {
                    fatalError("Unable to generate nonce. SecRandomCopyBytes failed with OSStatus \(errorCode)")
                }
                return random
            }

            randoms.forEach { random in
                if length == 0 {
                    return
                }

                if random < charset.count {
                    result.append(charset[Int(random)])
                    remainingLength -= 1
                }
            }
        }

        return result
    }
}
Create Sign in With Apple Button:
private func configSigninWithAppleButton() {
        let authorizationButton = ASAuthorizationAppleIDButton()
        authorizationButton.addTarget(self, action: #selector(handleLogInWithAppleIDButtonPress), for: .touchUpInside)
        authorizationButton.frame = CGRect(x: 16, y: 250, width: 380, height: 46)
        view.addSubview(authorizationButton)
    }

        @objc
    private func handleLogInWithAppleIDButtonPress() {
        startSignInWithAppleFlow()
    }

func startSignInWithAppleFlow() {
        let nonce = randomNonceString()
        currentNonce = nonce
        let appleIDProvider = ASAuthorizationAppleIDProvider()
        let request = appleIDProvider.createRequest()
        request.requestedScopes = [.fullName, .email]
        request.nonce = sha256(nonce)

        let authorizationController = ASAuthorizationController(authorizationRequests: [request])
        authorizationController.delegate = self
        authorizationController.presentationContextProvider = self
        authorizationController.performRequests()
    }

    private func sha256(_ input: String) -> String {
        let inputData = Data(input.utf8)
        let hashedData = SHA256.hash(data: inputData)
        let hashString = hashedData.compactMap {
            return String(format: "%02x", $0)
        }.joined()

        return hashString
    }
Handle ASAuthorizationControllerDelegate:
extension ViewController: ASAuthorizationControllerDelegate {
    func authorizationController(controller: ASAuthorizationController, didCompleteWithAuthorization authorization: ASAuthorization) {
        if let appleIDCredential = authorization.credential as? ASAuthorizationAppleIDCredential {
            guard let nonce = currentNonce else {
                fatalError("Invalid state: A login callback was received, but no login request was sent.")
            }
            guard let appleIDToken = appleIDCredential.identityToken else {
                print("Unable to fetch identity token")
                return
            }
            guard let idTokenString = String(data: appleIDToken, encoding: .utf8) else {
                print("Unable to serialize token string from data: \(appleIDToken.debugDescription)")
                return
            }
            // Initialize a Firebase credential.
            let credential = OAuthProvider.credential(withProviderID: "apple.com",
                                                      idToken: idTokenString,
                                                      rawNonce: nonce)
            // Sign in with Firebase.
            Auth.auth().signIn(with: credential) { (authResult, error) in
                if error != nil {
                    // Error. If error.code == .MissingOrInvalidNonce, make sure
                    // you're sending the SHA256-hashed nonce as a hex string with
                    // your request to Apple.
                    print(error?.localizedDescription)
                    return
                }
                // User is signed in to Firebase with Apple.
                // ...
                print("Signed in") // Sign in with Apple And Authenticate with Firebase Successfully
            }
        }
    }

    func authorizationController(controller: ASAuthorizationController, didCompleteWithError error: Error) {
        // Handle error.
        print("Sign in with Apple errored: \(error)")
    }
}
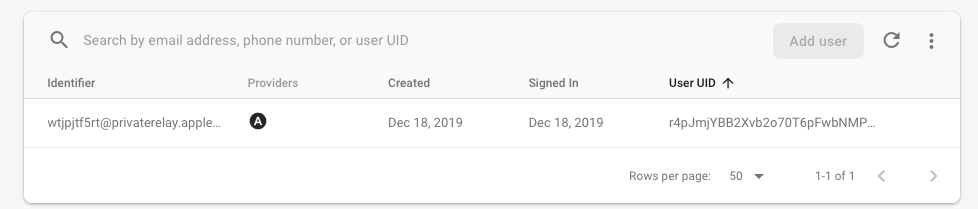
Sau khi Sign in with Apple And Authenticate with Firebase thành công, trên Firebase Authentication sẽ thấy đăng kí 1 email với định dạng xxxxxxx@privaterelay.apple.com. Và hệ thống hoàn toàn không thể biết email thật của user, đảm bảo sự an toàn tối đa cho người dùng.
Kết luận
Trên đây chúng ta cùng nhau tìm hiểu và thực hiện một ví dụ đơn giản để thực hiện việc Sign in with Apple và Authenticate với Firebase, chúng ta cùng nhau chờ đợi bản release cuối cùng và có thể apply vào project của mình. Cám ơn các bạn đã đọc bài viết
Tham khảo: Firebase
All rights reserved
