Speech to Text - Tạo subtitle tự động cho video
Bài đăng này đã không được cập nhật trong 2 năm
Chắc hẳn đã có đôi lần bạn tìm thấy một video trên mạng nói về đúng vấn đề mà mình đang quan tâm nhưng hơi buồn là khả năng nghe tiếng anh của bạn không được tốt nên nhiều khi làm cho việc tìm kiếm trước đó trở nên vô nghĩa. Giá như video đó có thêm phần subtile thì tốt biết mấy. Còn nếu như nó không có thì chúng ta sẽ tự tạo cho nó vậy.
Speach To Text là gì
Đây là dịch vụ chuyển đổi âm thanh giọng nói thành văn bản được hỗ trợ bởi Google, Azure (Microsoft) hay Apple. Tuy nhiên với một tài khoản free thì Azure của Microsoft hỗ trợ cho chúng ta tốt hơn cả. Vì thế trong bài viết này mình sẽ hướng dẫn các bạn sử dụng Nodejs để tạo ra một ứng dụng tự động tạo subtitle cho video nhé. Nào bắt đầu thôi !
Tạo tài khoản Azure
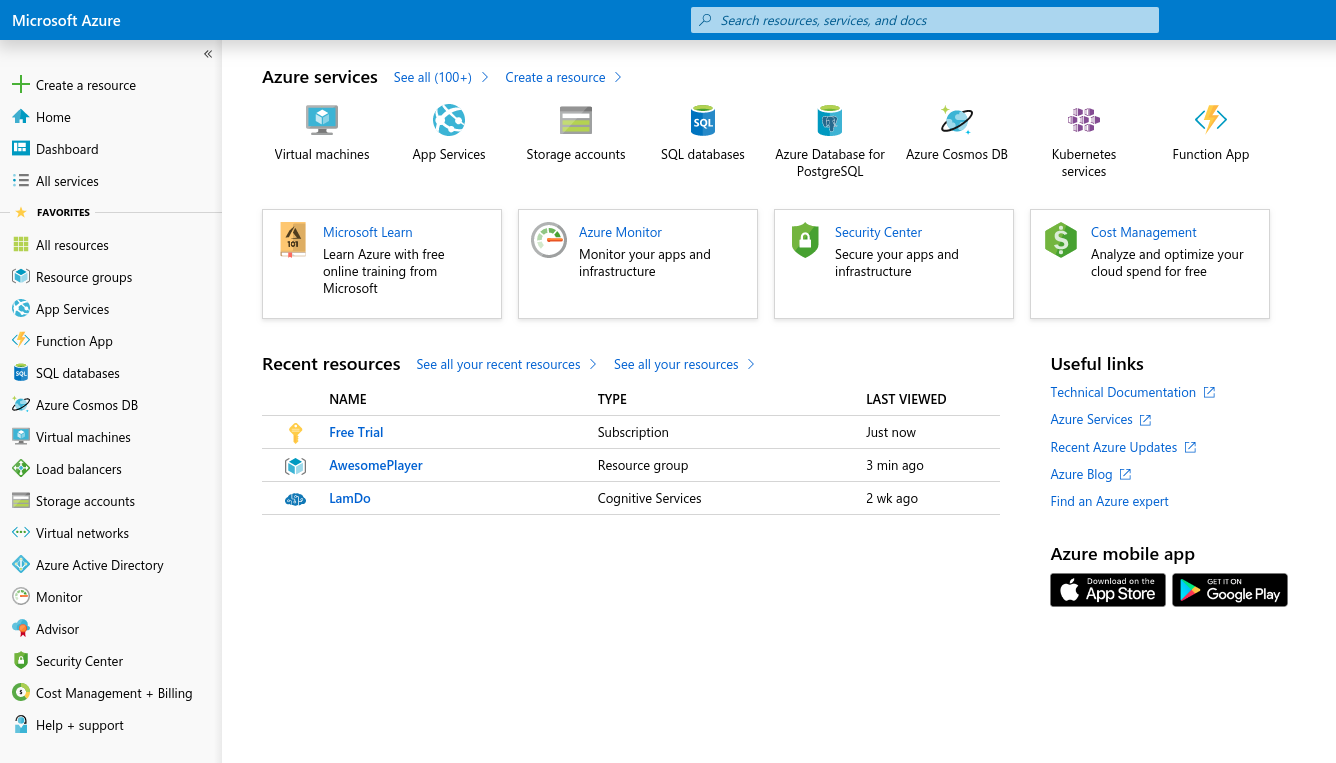
Các bạn có thể vào đây để tạo tài khoản Azure, nếu có mastercard thì sẽ được hỗ trợ tốt hơn. Đây là mà hình dashboard sau khi đã đăng kí thành công tài khoản Azure.

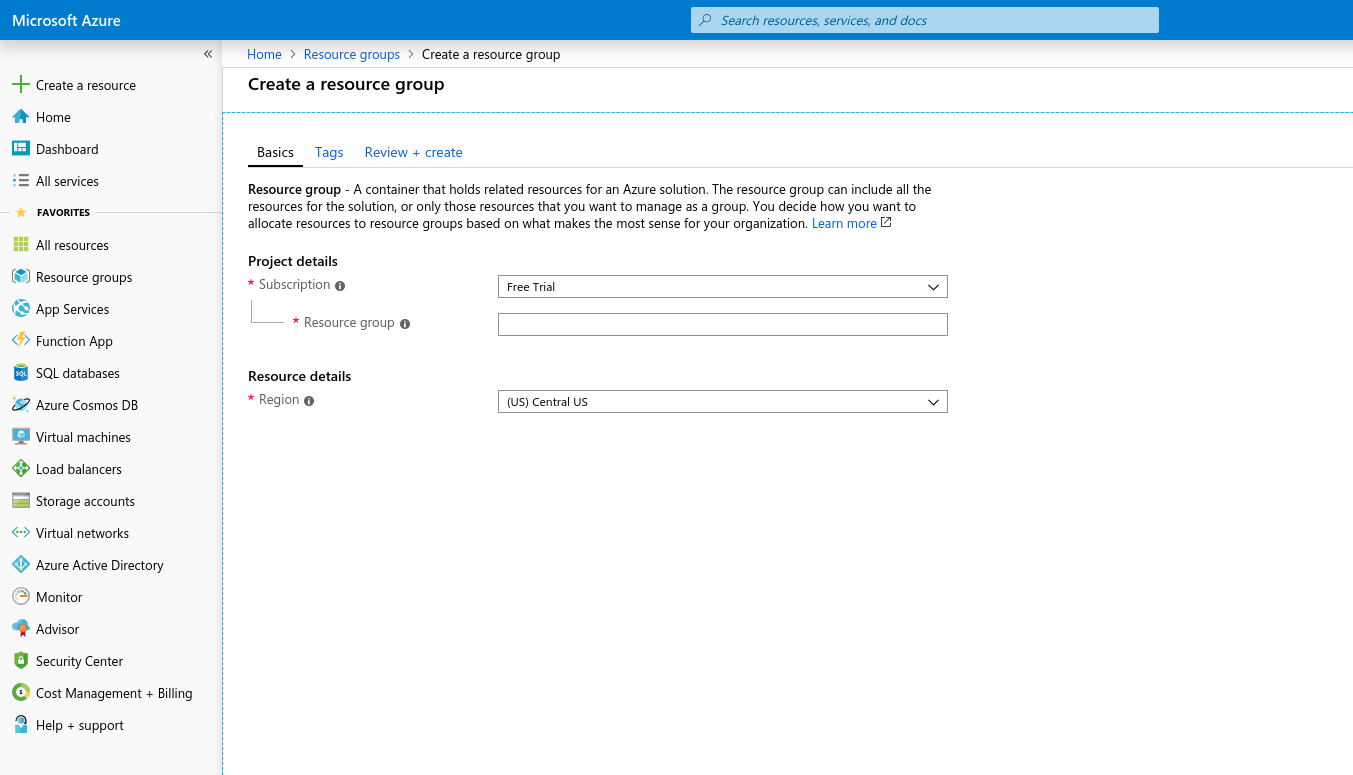
Các bạn vào phần Resource groups và tạo mới một subcription

Với mỗi một subcription đăng ký chúng ta sẽ được cung cấp subscription key, đây là thứ chung ta cần để có thể sử dụng được SDK mà Azure cung cấp.
Xây dựng ứng dụng
Chúng ta sẽ tạo ra 4 service tương ứng với 4 bước mà chúng ta cần phải làm để có thể tạo được subtitle cho video. Và cuối cùng, trong routes/transcriptions.js chúng ta sẽ gọi chúng ra như thế này:
const express = require('express')
const router = express.Router()
const Uploader = require('../services/uploader')
const Converter = require('../services/converter')
const Transcription = require('../services/transcription')
const Subtitle = require('../services/subtitle')

router.post('/transcriptions', async (req, res) => {
  Uploader.saveFile(req, res)
    .then(filename => Converter.videoToAudio(filename))
    .then(filename => Transcription.speechToText(filename))
    .then(result => Subtitle.write(result))
    .then(subtitle => res.send({subtitle: subtitle}))
})

module.exports = router
Toàn bộ source code mình có để trên github. Các bạn có thể vào đây để xem chi tiết hơn.
Bước 1: Thực hiện lưu lại video được gửi lên từ phía client
Tương tự như việc xử lý upload file trong Nodejs. Chúng ta sẽ xử dụng formidable để lưu video vào thư mục đã được định sẵn ở trong config.uploadDir.
const path = require('path')
const fs = require('fs')
const formidable = require('formidable')
const config = require('../config')

class Uploader {
  constructor() {}
}

Uploader.form = new formidable.IncomingForm()
Uploader.form.multiples = false
Uploader.form.keepExtensions = true
Uploader.form.uploadDir = config.uploadDir
Uploader.form.maxFileSize = 200 * 1024 * 1024;

Uploader.saveFile = function(req, res) {

  fs.existsSync(config.uploadDir) || fs.mkdirSync(config.uploadDir)

  this.form.onPart = (part) => {
    if (!part.filename || part.mime.match(/audio\/|video\//)) {
      this.form.handlePart(part)
    } else {
      res.send({error: 'File type not allowed'})
    }
  }

  this.form.parse(req)

  this.form.on('fileBegin', (field, file) => {
    file.path = file.path.replace('upload_', '')
  })

  this.form.on('error', function(error) {
    res.send({error: error})
  })

  return new Promise((resolve, reject) => {
    this.form.on('file', (name, file) => {
      resolve(path.basename(file.path))
    })
  })
}

module.exports = Uploader
Để ý rằng config.uploadDir là thư mục chúng ta sử dụng để lưu video cũng như các file kết quả khác trong quá trình thực hiện. Sau khi thực hiện xong việc lưu video vào thư mục định trước, service Uploader sẽ trả về tên video để chuyển sang bước 2.
Bước 2: Convert video sang audio
Mặc định, SDK của Azure chỉ chấp nhận đầu vào là một mono audio có định dạng .wav. Chúng ta sử dụng ffmpeg để thực hiện việc chuyển đổi này:
const ffmpegPath = require('@ffmpeg-installer/ffmpeg').path;
const ffmpeg = require('fluent-ffmpeg');
const crypto = require('crypto')
const fs = require('fs')
const config = require('../config')

ffmpeg.setFfmpegPath(ffmpegPath);

class Converter {
  constructor() {}
}

Converter.videoToAudio = function(videoName) {
  const videoPath = config.uploadDir + videoName
  const audioName = crypto.randomBytes(16).toString("hex") + ".wav"
  const audioPath = config.uploadDir + audioName

  return new Promise((resolve, reject) => {
    ffmpeg(videoPath).withNoVideo().outputFormat('wav').audioChannels(1)
      .audioBitrate(128).audioFrequency(16000).save(audioPath)
      .on('end', () => {
        resolve(audioName)
        fs.unlinkSync(videoPath)
      })
  })
}

module.exports = Converter
Service Converter sẽ nhận đầu vào là tên video và chuyển đổi nó sang một audio có các thông số theo yêu cầu của Azure. Sau quá trình xử lý, chúng ta sẽ trả về tên của audio để dùng nó cho các bước tiếp theo. Đồng thời sẽ xóa video này đi vì lúc này nó không còn cần thiết nữa.
Bước 3: Chuyển đổi audio thành văn bản
Để sử dụng SDK của Azure, chúng ta chạy lệnh sau để cài đặt:
npm install microsoft-cognitiveservices-speech-sdk
Nói qua một chút về quá trình chuyển đổi này, mỗi một audio sẽ được chia ra thành các khoảng thời gian từ 15 đến 30s. Kết quả trả về của một đoạn sẽ phụ thuộc vào đoạn đằng trước và đằng sau nó. Lý do cho điều này là để tránh mất mát dữ liệu cũng như việc tạo ra các văn bản phù hợp với ngữ cảnh hơn. Service Transcription sẽ nhận vào tên của audio và thực hiện việc chuyển đổi. YOUR_SERVICE_REGION và YOUR_SUBSCRIPTION_KEY các bạn có thể tìm nó ở mục Overview trong phần thông tin chi tiết của subscription mà bạn đã đăng ký.
const fs = require('fs')
const sdk = require('microsoft-cognitiveservices-speech-sdk')
const config = require('../config')

class Transcription {
  constructor() {}
}

Transcription.serviceRegion = 'YOUR_SERVICE_REGION'
Transcription.subscriptionKey = 'YOUR_SUBSCRIPTION_KEY'

Transcription.speechToText = function(filename, language = 'en-US') {
  const filePath = config.uploadDir + filename
  const pushStream = sdk.AudioInputStream.createPushStream()

  fs.createReadStream(filePath)
    .on('data', function(arrayBuffer) {
      pushStream.write(arrayBuffer.buffer)
    })
    .on('end', function() {
      pushStream.close()
    })

  const audioConfig = sdk.AudioConfig.fromStreamInput(pushStream)
  const speechConfig = sdk.SpeechConfig.fromSubscription(
    this.subscriptionKey,
    this.serviceRegion
  )

  speechConfig.speechRecognitionLanguage = language

  const recognizer = new sdk.SpeechRecognizer(speechConfig, audioConfig)

  recognizer.startContinuousRecognitionAsync()

  return new Promise((resolve, reject) => {
    let result = []

    recognizer.recognized = (r, event) => {
      result.push(JSON.parse(event.privResult.privJson))
    }

    recognizer.sessionStopped = () => {
      resolve(result)
      fs.unlinkSync(filePath)
    }
  })
}

module.exports = Transcription
Kết quả của mỗi đoạn sẽ được trả về trong event recognizer.recognized. Chúng ta sẽ lưu nó vào trong một biến result và trả về để đi đến bước cuối cùng.
Bước 4: Ghi subtitle cho video
Ở bước thứ 3 chúng ta nhận được một mảng data là dữ liệu của các đoạn tương ứng với các khoảng thời gian được tách ra từ audio.
Việc của chúng ta sẽ là đọc và ghi ra một file có định dạng .vtt. Service Subtitle cuối cùng sẽ trả về tên file subttile tương ứng sau khi đã thực hiện xong công việc của mình.
const fs = require('fs')
const crypto = require('crypto')
const config = require('../config')

class Subtitle {
  constructor() {}
}

Subtitle.write = function(subtitle) {
  const fileName = crypto.randomBytes(16).toString("hex") + ".vtt"
  const filePath = config.uploadDir + fileName
  const stream = fs.createWriteStream(filePath)

  return new Promise((resolve, reject) => {
    stream.once('open', function() {
      let duration = 0
      stream.write('WEBVTT')
      subtitle.forEach(sub => {
        let startTime = duration
        duration = duration + sub.Duration

        if(sub.DisplayText) {
          stream.write('\n\n')
          stream.write(timeConvert(startTime) + " --> " + timeConvert(duration))
          stream.write('\n')
          stream.write(sub.DisplayText)
        }
      })
      stream.close()
      resolve(fileName)
    })
  })
}

function timeConvert(time) {
  time = time / 10000000
  var seconds = (time % 60).toFixed(3)
  var minutes = Math.floor(time / 60) % 60
  var hours = Math.floor(time / 3600)

  minutes = minutes < 10 ? `0${minutes}` : minutes
  seconds = seconds < 10 ? `0${seconds}` : seconds
  hours = hours < 10 ? `0${hours}` : hours

  return `${hours}:${minutes}:${seconds}`
}

module.exports = Subtitle
Kiểm tra trong thư mục config.uploadDir chúng ta sẽ thấy có một file định dạng .vtt, mở nó lên để xem chúng ta đã nhận được những gì nhé.
Conclusion
Vừa rồi mình đã giới thiệu về dịch vụ Speech To Text và ứng dụng nó vào việc tự động tạo subtitle cho video. SDK của Azure còn hỗ trợ việc chuyển đổi âm thanh giọng nói từ ngôn ngữ này sang văn bản của ngôn ngữ khác và ngược lại. Rất may mắn là nó có hỗ trợ cả tiếng việt, các bước thực hiện cũng tương tự như ở trên chỉ khác ở phần setting thông số đầu vào và đầu ra trong cho SDK. Không chỉ tạo subtitle cho video, các bạn có thể sử dụng nó vào việc tạo ra một ứng dụng có khả năng điều khiển bằng giọng nói hay nhiều thứ hay ho khác. Mình có demo ứng dụng của mình ở đây, quá trình lấy subtitle mất khá nhiều thời gian nên thường sẽ bị lỗi timeout. Vì vậy các bạn hoàn toàn có thể chạy dưới local của mình để có được kết quả tốt nhất nhé.
All rights reserved