MVVM Application
Bài đăng này đã không được cập nhật trong 4 năm
1. Giới thiệu
Tiếp theo bài viết trước về MVP, tôi sẽ trình bày về mô hình MVVM và áp dụng của nó trong ứng dụng iOS.
MVVM
Tôi biết về mô hình này khi lập trình WPF. MVVM được sáng tạo bởi hai kỹ sư của Microsoft là Ken Cooper và Ted Peters với mục đích làm đơn giản việc lập trình sự kiện của giao diện người dùng dựa trên các tính năng đặc biệt của WPF và Silverlight.
View: Tương tự như trong mô hình MVC, View là phần giao diện của ứng dụng để hiển thị dữ liệu và nhận tương tác của người dùng. Một điểm khác biệt so với các ứng dụng truyền thống là View trong mô hình này tích cực hơn. Nó có khả năng thực hiện các hành vi và phản hồi lại người dùng thông qua tính năng binding, command.
Model: Cũng tương tự như trong mô hình MVC. Model là các đối tượng giúp truy xuất và thao tác trên dữ liệu thực sự.
ViewModel: Lớp trung gian giữa View và Model. ViewModel có thể được xem là thành phần thay thế cho Controller trong mô hình MVC. Nó chứa các mã lệnh cần thiết để thực hiện data binding, command.

MVVM khá tương đồng với MVP:
- MVVM coi view controller như là View
- View và Model không ràng buộc chặt với nhau
View và Model được "bind" với nhau, nghĩa là thay đổi ở Model sẽ được cập nhật ở View và ngược lại.
Binding
Do iOS không hỗ trợ binding nên chúng ta phải chọn một trong các phương án sau:
- Dùng một trong các thư viện binding dựa trên KVO như RZDataBinding hay SwiftBond
- Sử dụng các FRF (functional reactive programming) framework như ReactiveCocoa, RxSwift hay PromiseKit
Trong đó phương án dùng ReactiveCocoa là phương án được nhiều người lựa chọn nhất. Tuy nhiên việc sử dụng FRF framework cho 1 chương trình demo đơn giản thì hơi quá sức. Trong khuôn khổ bài viết này tôi sẽ viết một ứng dụng đơn giản sử dụng mô hình MVVM.
2. Ứng dụng MVVM
Tạo mới dự án
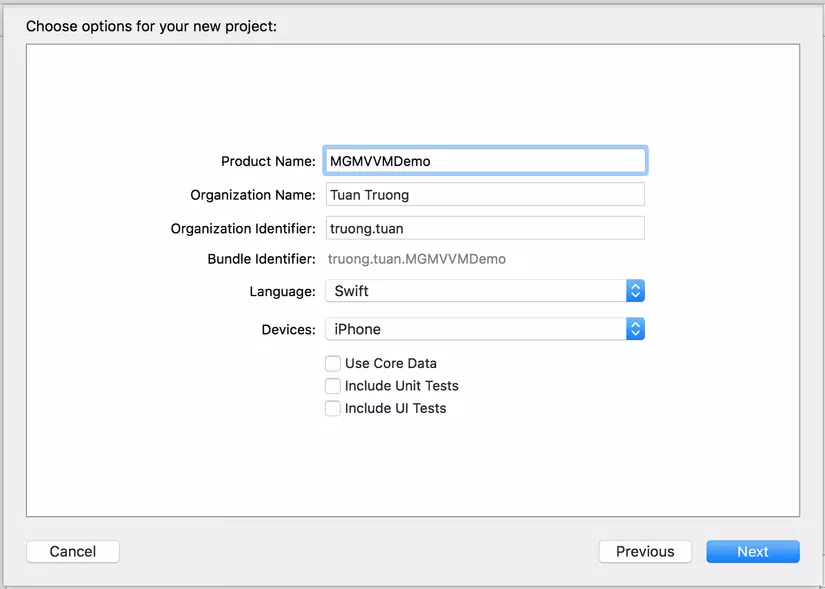
Chúng ta sẽ tạo một project Single View Application mới với các thông số như sau:

Storyboard
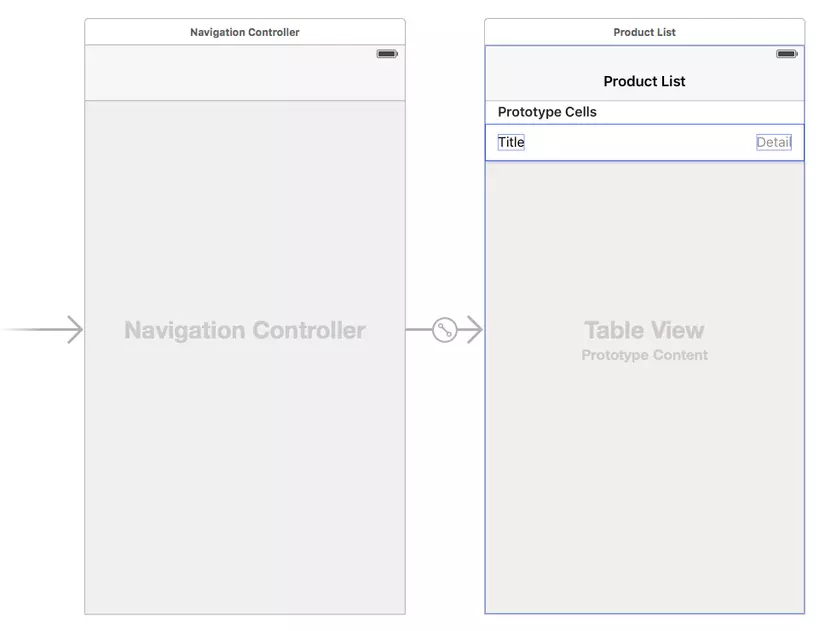
Để đơn giản chúng ta chỉ có một màn hình hiển thị danh sách sản phẩm, sử dụng UITableViewController

Model
Model của chúng ta là sản phẩm:
import UIKit

struct Product {
    var name: String
    var price: Double
}
ViewModel
ViewModel chứa data source cho table view của View và hàm hiển thị danh sách product. Trong ViewModel, hàm event productsDidChange để thông báo cho View mỗi khi data source thay đổi dữ liệu.
protocol ProductListViewModelProtocol: class {
    var products : [Product] { get }
    var productListDataSource: ProductListDataSource! { get set }
    var productsDidChange: ((ProductListViewModelProtocol) -> ())? { get set }
    init(products: [Product])
    func showProductList()
}
class ProductListViewModel: ProductListViewModelProtocol {
    private(set) var products: [Product]

    var productListDataSource: ProductListDataSource! {
        didSet {
            self.productsDidChange?(self)
        }
    }

    var productsDidChange: ((ProductListViewModelProtocol) -> ())?

    required init(products: [Product]) {
        self.products = products
    }

    func showProductList() {
        productListDataSource = ProductListDataSource(products: products)
    }
}
Chúng ta sử dụng data source để đưa dữ liệu vào data table:
class ProductListDataSource: NSObject, UITableViewDataSource {
    var products: [Product]

    init(products: [Product]) {
        self.products = products
    }

    func tableView(tableView: UITableView, numberOfRowsInSection section: Int) -> Int {
        return products.count
    }

    func numberOfSectionsInTableView(tableView: UITableView) -> Int {
        return 1
    }

    func tableView(tableView: UITableView, cellForRowAtIndexPath indexPath: NSIndexPath) -> UITableViewCell {
        let cell = tableView.dequeueReusableCellWithIdentifier("ProductCell", forIndexPath: indexPath)
        let product = products[indexPath.row]
        cell.textLabel?.text = product.name
        cell.detailTextLabel?.text = String(product.price)
        return cell
    }
}
View
Trong ví dụ này, ProductListViewController đóng vai trò là view với các đoạn code đơn giản như sau:
class ProductListViewController: UITableViewController {

    var viewModel: ProductListViewModelProtocol! {
        didSet {
            self.viewModel.productsDidChange = { [unowned self] viewModel in
                self.tableView.dataSource = self.viewModel.productListDataSource
                self.tableView.reloadData()
            }
        }
    }

    override func viewDidLoad() {
        super.viewDidLoad()

        viewModel.showProductList()
    }
}
Mix
Công đoạn kết nối các thành phần với nhau ta sẽ thực hiện ở AppDelegate:
func application(application: UIApplication, didFinishLaunchingWithOptions launchOptions: [NSObject: AnyObject]?) -> Bool {
    let nc = self.window?.rootViewController as! UINavigationController
    let productListViewController = nc.topViewController as! ProductListViewController // view

    let products = [ // model
        Product(name: "Keyboard", price: 6),
        Product(name: "Mouse", price: 5)
    ]

    let viewModel = ProductListViewModel(products: products)
    productListViewController.viewModel = viewModel

    return true
}
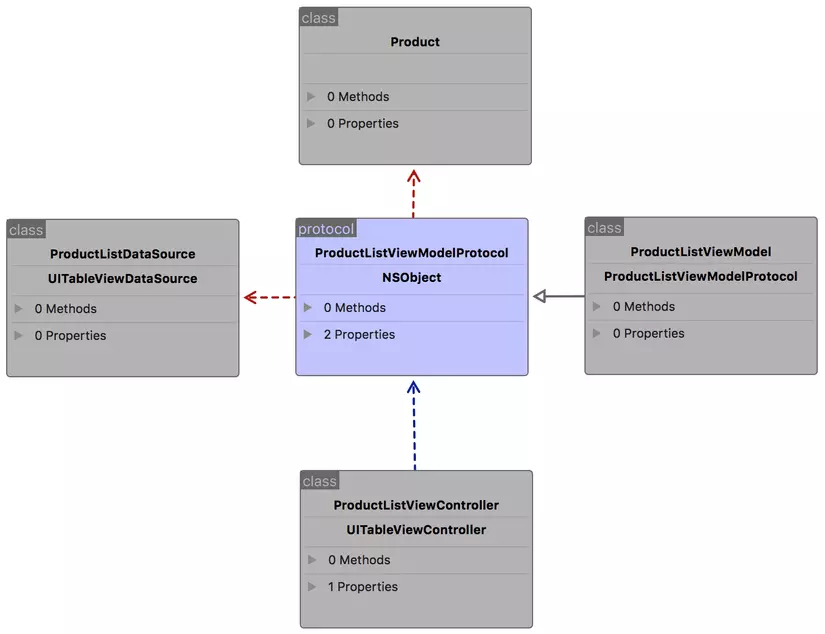
Mối quan hệ giữa các thành phần lúc này như sau:

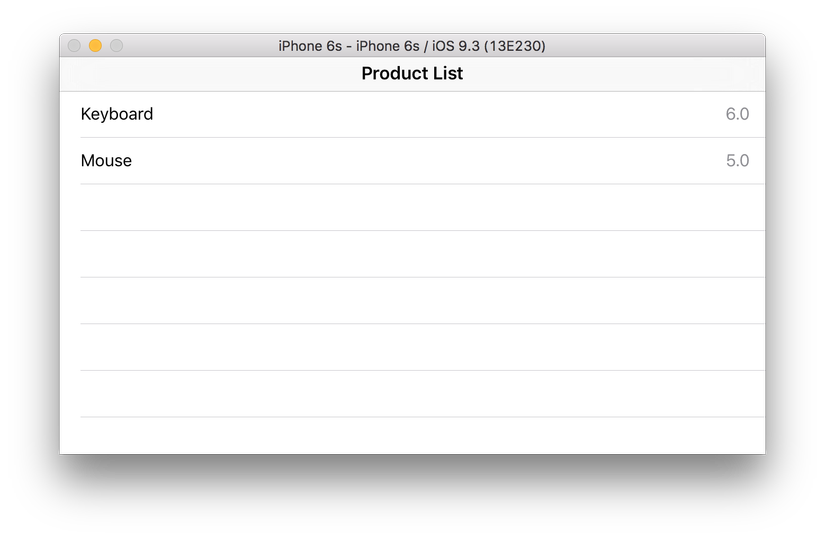
Chạy demo:

3. Kết luận
Như vậy là chúng ta đã hoàn thành việc tìm hiểu mô hình MVVM, các bạn có thể hoàn thiện chương trình bằng cách thêm các tính năng thêm, sửa, xóa sản phẩm.
All rights reserved