Hướng dẫn gửi notification realtime sử dụng WebSocket
Bài đăng này đã không được cập nhật trong 4 năm
Đặt vấn đề
Như tiêu đề hôm nay mình sẽ hướng dẫn các bạn làm 1 ứng dụng demo nho nhỏ về việc gửi notifications theo thời gian thực cho client bằng websocket có sử dụng Ratchet và kết thúc series về Ratchet. Trong phạm vi bài viết này mình xin đặt ra một ứng dụng nhỏ với các yêu cầu như sau: user có thể đăng nhập và post bài viết lên và tất cả các user khác có thể like và comment bài viết đó, khi có người like, comment thì hệ thống sẽ gửi thông báo đến user đã post bài viết đó. Bắt đầu thôi nào...
Xây dựng hệ thống
Bây giờ mình sẽ xây dựng hệ thống dựa trên laravel. Ta sẽ tải 1 phiên bản laravel về bằng câu lệnh quen thuộc composer create-project --prefer-dist laravel/laravel notifications. Vào project cài đặt thêm ratchet: composer require cboden/ratchet. Sau đấy ta tiếp tục setup 1 database cho project và tạo phần đăng nhập đăng kí laravel có hỗ trợ php artisan make:auth. Như vậy là đã có phần đăng nhập đăng kí, ta tạo thêm database cho bài post và like comment để xây dựng chức năng post bài, like và comment cho user. Phần này đơn giản nên mình sẽ không đi chi tiết nữa, và đây là kết quả.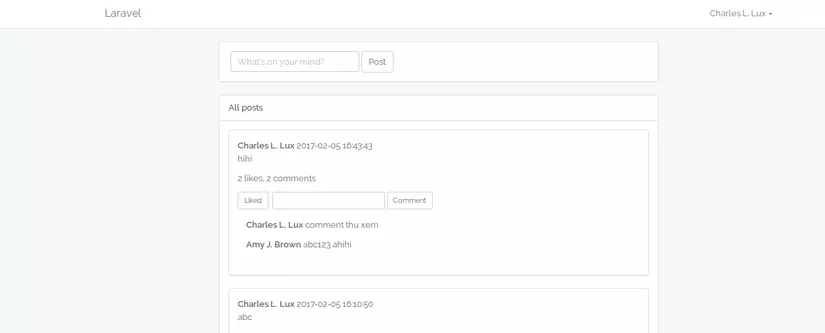 Ở phần xử lý like/comment mình thêm 1 đoạn code như sau:
    // xử lí like/comment => lưu vào database xong thì gửi lệnh cho websocket server nhận để gửi thông báo đến các user đang subcribe bài post đó
    $entryData = [
        'user' => $post->user->id, // id của user đã post bài
        'action' => 'like',
        'post_content' => $post->content,
        'name' => auth()->user()->name // người đã like bài post
    ];
    $context = new ZMQContext();
    $socket = $context->getSocket(ZMQ::SOCKET_PUSH, 'my pusher');
    $socket->connect("tcp://localhost:5555");

    $socket->send(json_encode($entryData));
Tiếp theo mình sẽ tạo 1 class Pusher với nội dung sau:
namespace App\Services;

use Ratchet\ConnectionInterface;
use Ratchet\Wamp\WampServerInterface;

class Pusher implements WampServerInterface
{
    /**
     * A lookup of all the topics clients have subscribed to
     */
    protected $subscribedTopics = array();

    public function onSubscribe(ConnectionInterface $conn, $topic) {
        $this->subscribedTopics[$topic->getId()] = $topic;
    }
    public function onUnSubscribe(ConnectionInterface $conn, $topic) {
    }
    public function onOpen(ConnectionInterface $conn) {
    }
    public function onClose(ConnectionInterface $conn) {
    }
    public function onCall(ConnectionInterface $conn, $id, $topic, array $params) {
        $conn->callError($id, $topic, 'You are not allowed to make calls')->close();
    }
    public function onPublish(ConnectionInterface $conn, $topic, $event, array $exclude, array $eligible) {
        $topic->broadcat($event);
    }
    public function onError(ConnectionInterface $conn, \Exception $e) {
    }

    public function onLikeComment($entry) {
        $entryData = json_decode($entry, true);

        // If the lookup topic object isn't set there is no one to publish to
        if (!array_key_exists($entryData['user'], $this->subscribedTopics)) {
            return;
        }

        $topic = $this->subscribedTopics[$entryData['user']];

        // re-send the data to all the clients subscribed to that post
        $topic->broadcast($entryData);
    }
}
Về nội dung class này giống với class trong bài trước mình đã dùng với ứng dụng chat room nhưng ở cuối có thêm hàm onLikeComment, mục đích hàm này khi xảy ra sự kiện like hoặc comment sẽ gửi dữ liệu về các client đang subscribe đến bài post của user đó. Và tiếp tục ta cũng tạo 1 command PushServer để mở cổng webSocket.
namespace App\Console\Commands;

use App\Services\Pusher;
use Illuminate\Console\Command;
use Ratchet\Http\HttpServer;
use Ratchet\Server\IoServer;
use Ratchet\Wamp\WampServer;
use Ratchet\WebSocket\WsServer;
use React\EventLoop\Factory;
use React\Socket\Server;
use React\ZMQ\Context;

class PushServer extends Command
{
    protected $signature = 'push_server:run';

    protected $description = 'We\'re going to build our Ratchet application with I/O, WebSockets, Wamp, and ZeroMQ components and run the event loop.';

    public function __construct()
    {
        parent::__construct();
    }

    public function handle()
    {
        $loop   = Factory::create();
        $pusher = new Pusher;

        // Listen for the web server to make a ZeroMQ push after an ajax request
        $context = new React\ZMQ\Context($loop);
        $pull = $context->getSocket(ZMQ::SOCKET_PULL);
        $pull->bind('tcp://127.0.0.1:5555'); // Binding to 127.0.0.1 means the only client that can connect is itself
        $pull->on('message', array($pusher, 'onLikeComment'));

        // Set up our WebSocket server for clients wanting real-time updates
        $webSock = new Server($loop);
        $webSock->listen(8080, '0.0.0.0'); // Binding to 0.0.0.0 means remotes can connect
        $webServer = new IoServer(
            new HttpServer(
                new WsServer(
                    new WampServer(
                        $pusher
                    )
                )
            ),
            $webSock
        );

        $loop->run();
    }
}
Trong class này ta cũng chỉnh sửa một chút về phần nội dung đó là phần khi nhận $entryData đã gửi từ ZMQ connection ở trên thì sẽ chạy sự kiện onLikeComment trong class Pusher để gửi message đến client.
Ở client mình viết đoạn code cơ bản như sau:
<script src="http://autobahn.s3.amazonaws.com/js/autobahn.min.js"></script>
<script>
    var conn = new ab.Session('ws://localhost:8080',
        function() {
            conn.subscribe('{{ auth()->id() }}', function(topic, data) {
                // Ở đây sẽ xử lý phần show lên thông báo cho người dùng
                console.log(data.name + 'liked your post "' + data.post_content + "'");
            });
        },
        function() {
            console.warn('WebSocket connection closed');
        },
        {'skipSubprotocolCheck': true}
    );
</script>
Như vậy khi có 1 người like thì ấn F12 lên ta sẽ thấy thông báo ví dụ như Amy J. Brown liked your post "hihi", từ chỗ script này mình sẽ viết để show alert ra cho người dùng thì nhìn nó đẹp hơn.
Tạm thời bài viết của mình tạm dừng tại đây, mình sẽ update sourcecode sau nhé.
All rights reserved
