Push notification IOS sử dụng AWS SNS
Bài đăng này đã không được cập nhật trong 6 năm
Bài viết này sẽ hướng dẫn mọi người cách sử dụng aws sns để push notification cho IOS. Mình sử dụng laravel để code phần này.
Cài đặt
Đầu tiền bạn cần cài đặt package của aws cho laravel https://github.com/aws/aws-sdk-php-laravel
Cài đặt package
trong file composer.json thêm đoạn code như sau:
{
    "require": {
        ...
        "aws/aws-sdk-php-laravel": "~3.0"
    }
}
Rồi chạy composer install để lấy package về.
Thêm vào app/config.php đoạn code sau:
'providers' => array(
    // ...
    Aws\Laravel\AwsServiceProvider::class,
)

'aliases' => array(
    // ...
    'AWS' => Aws\Laravel\AwsFacade::class,
)
chạy lệnh sau để publish config php artisan vendor:publish --provider="Aws\Laravel\AwsServiceProvider"
Bạn cần điều thông tin sau vào .env của banj:
AWS_ACCESS_KEY_ID
AWS_SECRET_ACCESS_KEY
AWS_REGION (default = us-east-1)
Chú ý AWS_REGION của package khác tên với .env của bạn.
Cài đặt aws sns
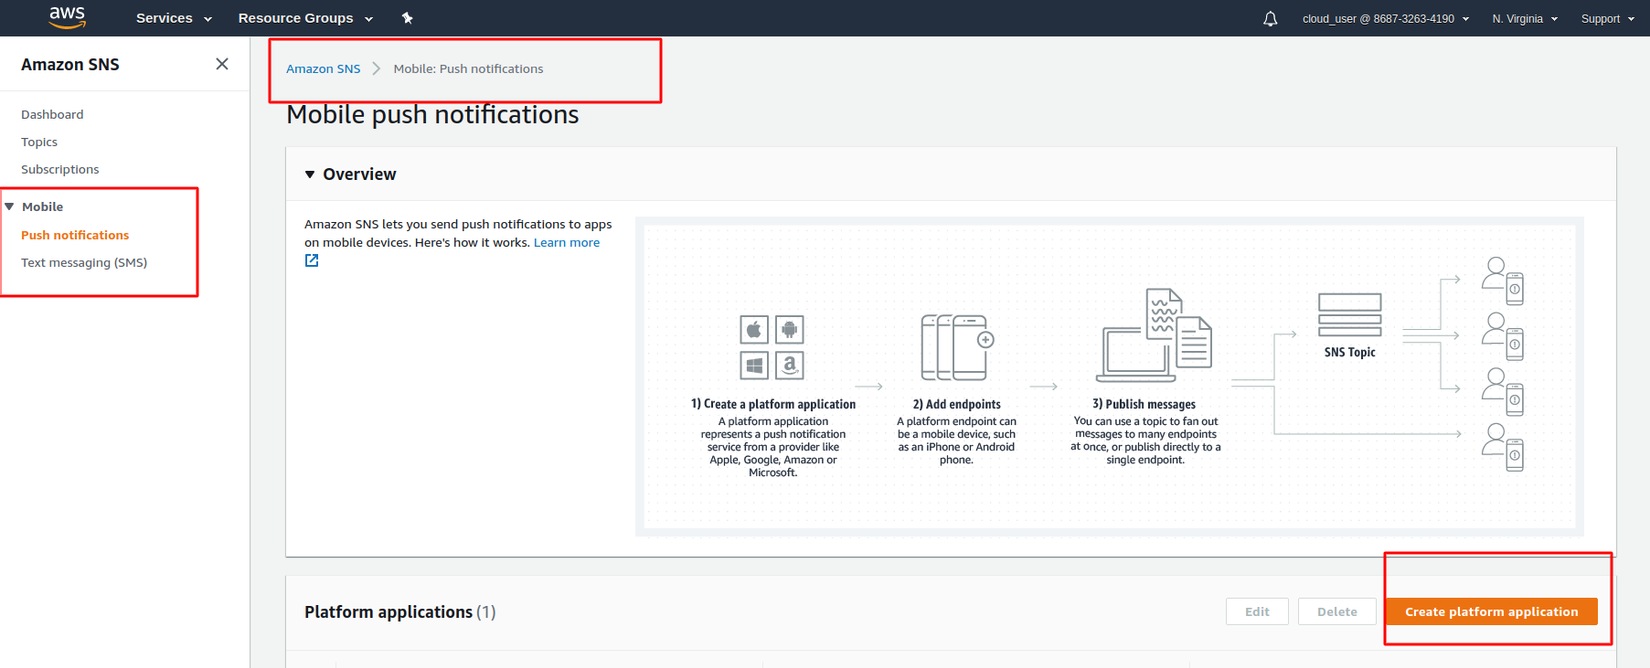
Bạn login vào aws rồi làm theo 2 hình như sau:
đầu tiên phải tạo platform application:
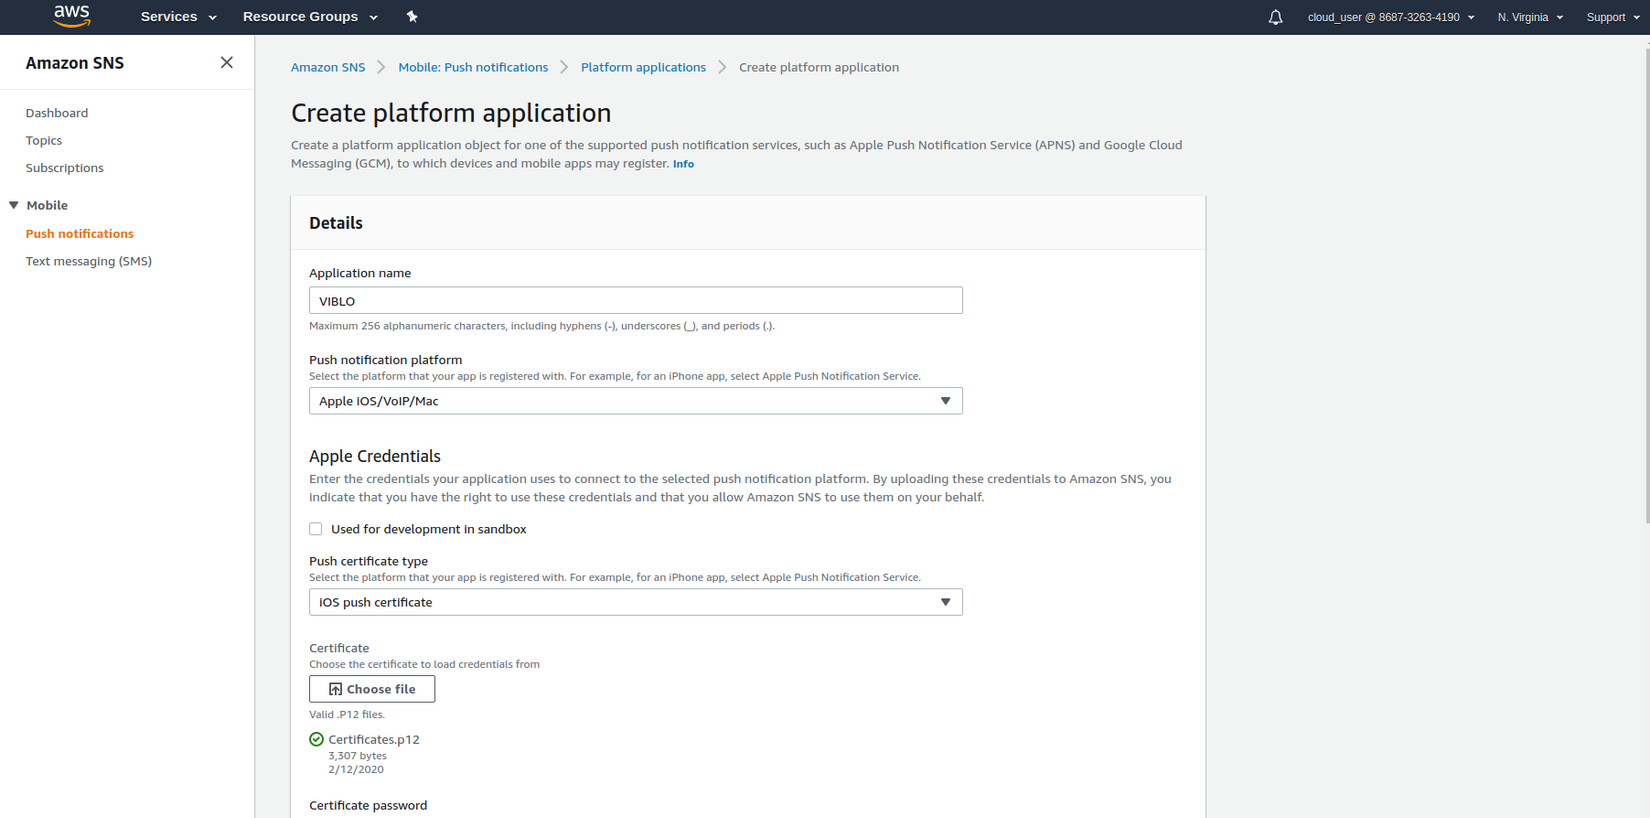
chú ý khi tạo chúng ta cần có một file là Certificate, file này có định dạng là .p12, file này bạn cần bảo bên app đưa cho bạn, mình cũng không biết file này được tạo ra thế nào, cứ request phía app thôi  .
upload file này lên thì click vào nút
.
upload file này lên thì click vào nút Load ... nó sẽ load là public key vào private cho bạn rồi ấn create thôi.
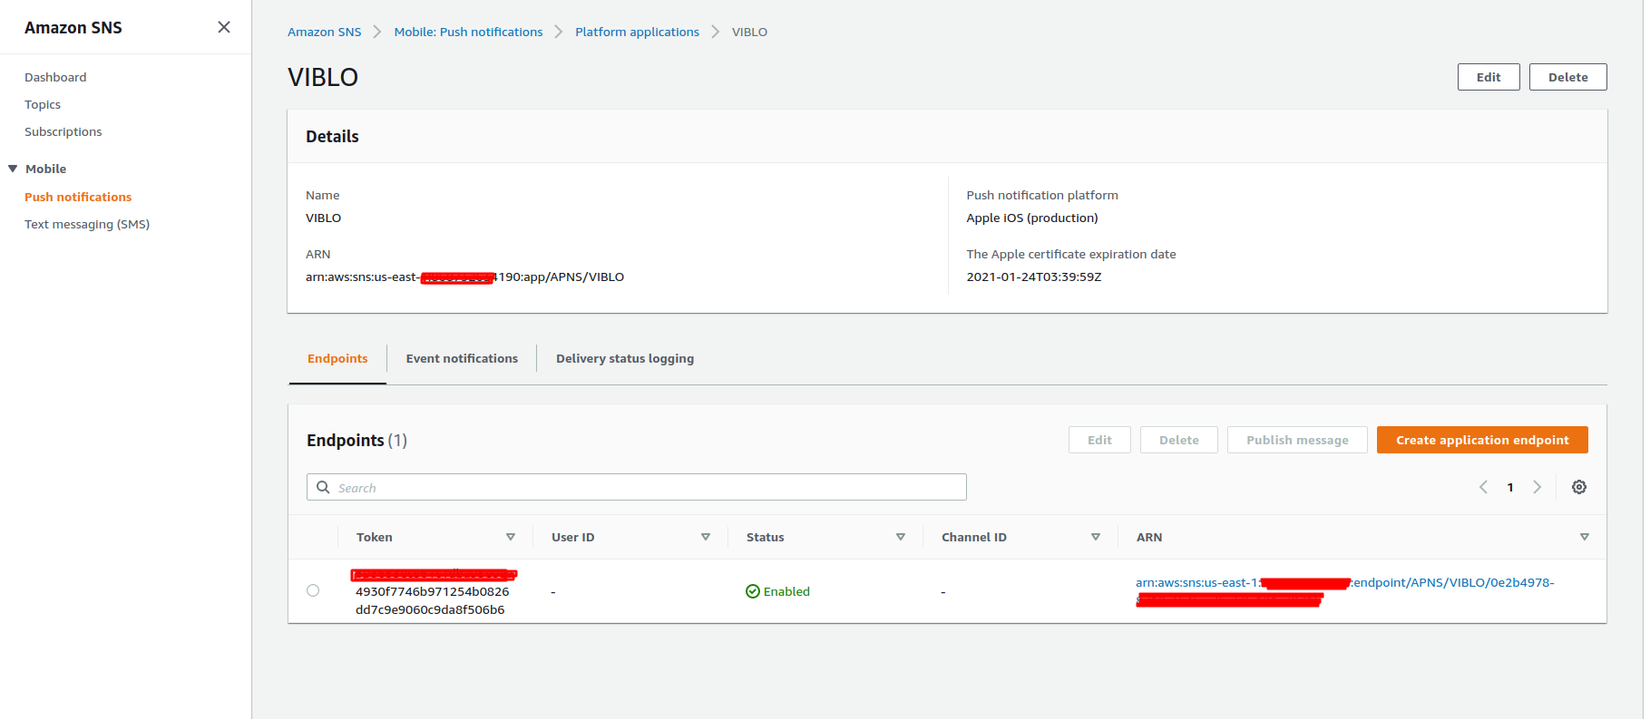
Sau khi tạo xong nó có một cái là ARN bạn cần lưu cái này lại:
ARNarn:aws:sns:us-east-1:XXXXXXXXXXX:app/APNS/VIBLO
add luôn key này vào file '.env' của bạn AWS_SNS_ARN=ARNarn:aws:sns:us-east-1:XXXXXXXXXXX:app/APNS/VIBLO để chút nữa code cần sử dụng cái này.
Database.
để đơn giản chúng ta chỉ cần 1 bảng thế này:
create table devices
(
   id               bigint unsigned auto_increment primary key,
   device_token     varchar(255) not null,
   endpoint_arn     varchar(255) null,
   created_at       timestamp    null,
   updated_at       timestamp    null,
)
   collate = utf8mb4_unicode_ci;
Code thôi
Phần code này chúng ta sẽ có 2 phần, phần 1 giống với đăng kí với aws để lấy endpoint_arn cho từng device một, phần 2 là push notification, 2 cái này có thể dùng tách biệt với nhau, mình thì để cái 1 sau khi có device token được bắn lên, thì chạy luôn 1 job để đăng kí với aws luôn.
public function getSnsEndpointArn($device)
{
       try {
           $platformApplicationArn = env('AWS_SNS_ARN');
           if (!$platformApplicationArn) {
               Log::error('AWS_SNS_ARN not config, to push notification please config it in .env');
               return;
           }

           $client = App::make('aws')->createClient('sns');
           $result = $client->createPlatformEndpoint(array(
               'PlatformApplicationArn' => $platformApplicationArn,
               'Token' => $device->device_token,
           ));

           $endPointArn = isset($result['EndpointArn']) ? $result['EndpointArn'] : '';
           $device->endpoint_arn = $endPointArn;
           $device->save();
       } catch (SnsException $e) {
           Log::error($e->getMessage());
       }

       return;
   }
Hàm getSnsEndpointArn cũng khá đơn giản, chỉ cần truyền vào 1 model intance của bảng device, sau đó nó sẽ gọi lên aws để đăng ký lấy endpoint sau này để push notification.
Sau khi đăng kí xong bạn vài aws sns sẽ thấy như sau là thành công:
OK rồi, chúng ta đến hàm pushnotification
public function pushnotificationIOS()
   {
       Log::info('start push notification ... ');
       $defaultMessageNotification = 'default message';
       $userDeviceTokens = Device::groupBy('device_token')->get(); # chỗ này mình test mới lấy hết ra gửi thôi nhé :)
       foreach ($userDeviceTokens as $userDeviceToken) {
           $endPointArn = [
               'EndpointArn' => $userDeviceToken->endpoint_arn
           ];

           try {
               $sns = App::make('aws')->createClient('sns');
               $endpointAtt = $sns->getEndpointAttributes($endPointArn);
               if ($endpointAtt == 'failed' || !$endpointAtt['Attributes']['Enabled']) {
                   Log::error('not found endPointArn of device token = ' . $userDeviceTokens->device_token);
                   return;
               }

               $payload = [
                   'aps' => [
                       'alert' => "Hello, this is message come from viblo.asia",
                       'badge' => 1, # cái này chính là số lượng noti nó hiển thị đỏ đỏ trên cái icon của app ấy
                       'sound' => 'default'
                   ],
                   'order_id' => 'test',
               ];

               $message = json_encode([
                   'default' => $defaultMessageNotification,
                   'APNS' => json_encode($payload) # chú ý chỗ này có 1 json_encode nữa nhé
               ]);

               $sns->publish([
                   'TargetArn' => $userDeviceToken->endpoint_arn,
                   'Message' => $message,
                   'MessageStructure' => 'json'
               ]);
           } catch (SnsException $e) {
               Log::error($e->getMessage());
           } catch (\Exception $exception) {
               report($exception);
           }
       }
       return;
   }
Hàm này mình gửi từng device một, mỗi device nhận một tin nhắn khác nhau, còn nếu muốn gửi all thì sns có cái subcript để gửi all, bạn tìm hiểu thêm phần này nhé.
All rights reserved
