Notification với Action Cable
Bài đăng này đã không được cập nhật trong 4 năm
Ngày hôm nay tôi sẽ giới thiệu các bạn một cái mini app với notification. Hiểu đơn giản Action Cable là một hệ thống chuyển giao thông tin một cách tức thời, giống như một người lắc chuông bằng dây: ở đây người cầm chuông là chủ thể tạo ra action, cable chính là dợi dây nối với chuông là nơi chúng ta phản hồi tín hiệu. Hiểu một cách đơn giản thì hệ thống ấy là như vậy. Nên khi có bất kì một hành động nào trong tầm kiểm soát của Action Cable sẽ được đáp trả lại ngay lập tức. Thôi không dài dòng lan mang luyên thuyên nữa. Nhập đề thôi! Nếu muốn biết tổng quan về Action Cable là gì thì có tại đây
1. Chuẩn Bị
Điều kiện: – Rails 5 – Ruby ~2.3 – Font awesome có thể vứt béng link cnd vào hoặc dùng gem tại đây – Một chút nhạc
2. Ý tưởng
Ý tưởng là thế này: Mình sẽ tạo 1 hệ thống nhỏ ứng dụng Action Cable thông báo mỗi khi người dùng tạo một tin nhắn thì sẽ đẩy thông báo về client với số lượng tin nhắn và content. Nào! Nện thôi.
3. Setup
Sau khi khởi tạo 1 Rails app chúng ta tiến hành tạo Notification model và controller cho nó
rails generate  model Notification event:string
rails generate controller notifications index
rails db:migrate
Tiến hành lấy tất cả các Notification theo thứ tự cũ cho tới mới: notificator/app/controllers/notifications_controller.rb
class NotificationsController < ApplicationController
  def index
    @notifications = Notification.all.reverse
  end
end
Để nhanh gọn mình sẽ tạo scaffold cho mesage
rails generate scaffold  Message body:string
rails db:migrate
4. Setting Up Views
notificator/app/views/notifications/_notification.html.erb
<li>
  <%= notification.event %>
  <span> <%= notification.created_at.strftime("%d %b. %Y") %></span>
</li>
notificator/app/views/notifications/_notification_center.html.erb
<ul class="notificator">
  <div id="notificationContainer">
    <div id="notificationTitle">Notifications</div>
    <div id="notificationsBody" class="notifications">
      <ul id="notificationList">
        <%= render notifications %>
      </ul>
    </div>
    <div id="notificationFooter"></div>
  </div>
</ul>
2 view này sẽ là chỗ chứa cho thông báo tiến hành render vào index của notifications notificator/app/views/notifications/index.html.erb
<%= render "notification_center", notifications: @notifications %>
Tuyệt đúng không nào, đảm bảo khi người dùng vào root sẽ danh sách thông báo notificator/config/routes.rb
Rails.application.routes.draw do
  root to: 'notifications#index'
  resources :messages
end
Để cho phép tạo ra thông báo mỗi khi một ai đó nhắn tin chúng ta gắn call back cho message notificator/app/models/message.rb
class Message < ApplicationRecord
  after_create_commit { notify }

  private
  def notify
    Notification.create(event: "New Notification")
  end
end
trải nghiệm phát đã nào
rails s
=> khởi động server rails nào
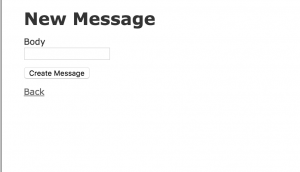
Try cập vào đường dẫn: http://localhost:3000/messages/new để tạo vài messages nào
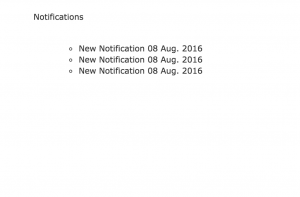
 quay lại root sẽ được danh sách thông báo của tin nhắn
5. Styling
Có được căn bản view chứa cho thông báo rồi nhé, tiếp đến mình sẽ style cho nó notificator/app/views/notifications/_counter.html.erb
<i class="fa fa-bell-o fa-3x"></i>
<li>
  <span id="notification-counter"><%= counter %></span>
</li>
notificator/app/views/notifications/_notification_center.html.erb
<ul class="notificator">
  <a href="#" id="open_notification">
    <%= render 'counter', counter: notifications.count %>
  </a>
  <div id="notificationContainer">
    <div id="notificationTitle">Notifications</div>
    <div id="notificationsBody" class="notifications">
      <ul id="notificationList">
        <%= render notifications %>
      </ul>
    </div>
    <div id="notificationFooter"></div>
  </div>
</ul>
notificator/app/assets/stylesheets/notifications.scss
ul.notificator {
  display: inline-block;
  float:right;
  margin: 0;
  li
  {
    position: relative;
    list-style: none;

    i
    {
      color: #fff;
    }
  }
}

#notification-counter {
  position: absolute;
  top: -2px;
  left: 25px;

  background-color: rgb(212, 78, 3);
  color: #fff;
  border-radius: 3px;
  padding: 1px 3px;
  font: 8px Verdana;
}
notificator/app/assets/stylesheets/notifications.scss
ul #notificationList
{
  li
  {
    position:relative;
    border-bottom: #dddddd 1px solid;
  }
  span
  {
    color: #989494;
    font-size: 8px;
  }

}

#notificationsBody  ul
{
  padding-left: 0;
}

#notificationContainer
{
  background-color: #fff;
  border: 1px solid rgba(100, 100, 100, .4);
  -webkit-box-shadow: 0 3px 8px rgba(0, 0, 0, .25);
  overflow: visible;
  position: absolute;
  top: 70px;
  margin-left: -253px;
  width: 300px;
  z-index: 0;
  display: none;
}


#notificationContainer:before {
  content: '';
  display: block;
  position: absolute;
  width: 0;
  height: 0;
  color: transparent;
  border: 10px solid black;
  border-color: transparent transparent white;
  margin-top: -20px;
  margin-left: 258px;
}

#notificationTitle
{
  font-weight: bold;
  padding: 8px;
  font-size: 13px;
  background-color: #f0f0f0;
  position: absolute;
  z-index: 1;
  width: 284px;
  border-bottom: 1px solid #d44e03;
  color: #d44e03;
}

#notificationsBody
{
  padding: 3px 0px 0px 0px !important;
  min-height:300px;
  max-height:300px;
  overflow: auto;
  position: relative;
  width: 100%;
}


#notificationFooter
{
  background-color: #e9eaed;
  text-align: center;
  font-weight: bold;
  padding: 8px;
  font-size: 12px;
  border-top: 1px solid #dddddd;
}
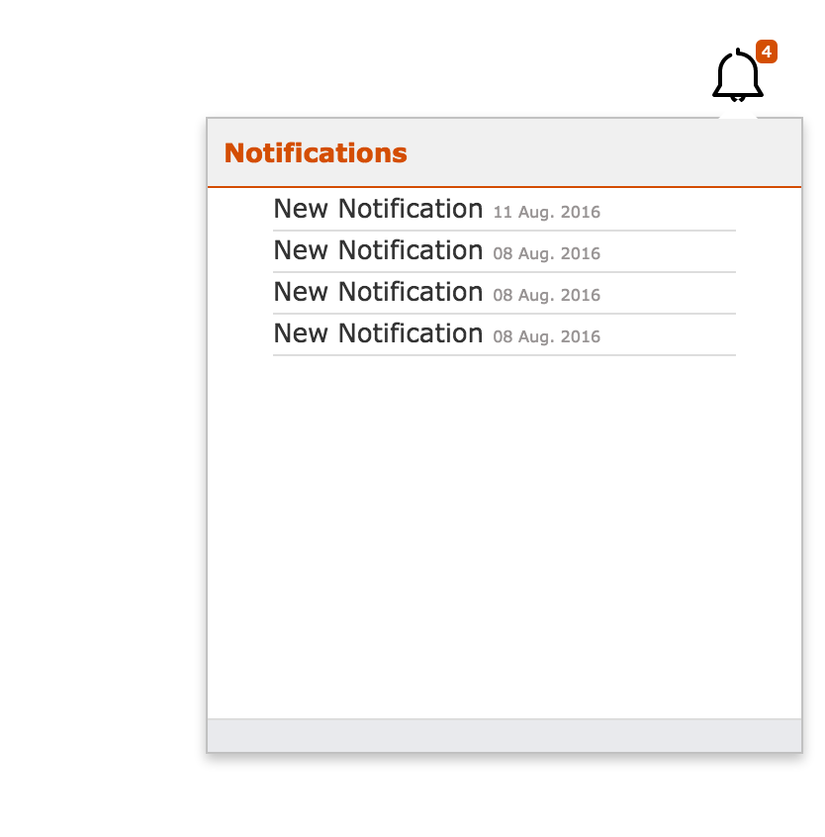
Tuyệt vời! Container chứa thông báo của chúng ta đã hiển thị một cách ngay ngắn và gọn gàng:
Chúng ta cần phải đóng mở Container chưa thông báo ở đây mình sử dụng một ít JQuery:
$(document).ready(function()
{
    $("#open_notification").click(function()
    {
        $("#notificationContainer").fadeToggle(300);
        $("#notification_count").fadeOut("fast");
        return false;
    });

    $(document).click(function()
    {
        $("#notificationContainer").hide();
    });


    $("#notificationContainer").click(function()
    {
        return false;
    });

});
Gọn gàng hơn nữa khi chúng ta có thể đóng mở container chứa thông báo phải không nào ^^
Tiếp theo ta sang phần thú vị nhất - Action Cable nào
6. Say hello to ActionCable!
Action cable cho phép chúng ta đăng ký một kênh và truyền tín hiệu về một cách liên tục mà không cần phải refresh trang, để làm được điều này chúng ta cần tạo 1 kênh cho nó:
rails g channel notifications
config tên kênh:
class NotificationsChannel < ApplicationCable::Channel
  def subscribed
    stream_from "notification_channel"
  end

  def unsubscribed
  end
end
notification_channel chính là tên kênh chúng ta phát sóng cũng như nhận tín hiệu từ kênh này Như thế là chưa đủ nên chúng ta cần phải config lại routes notificator/config/routes.rb
Rails.application.routes.draw do
  root to: 'notifications#index'

  resources :messages

  mount ActionCable.server => '/cable'
end
OK! khởi động lại server rails và xem nào!
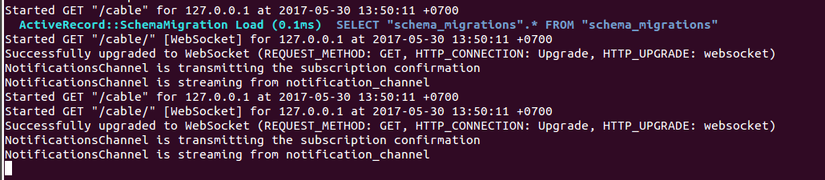 Điều này có nghĩa là kênh mà bạn đã tạo đang được phát sóng
Để kiểm tra ở phía client đã thông với kênh mà server đã phát tín hiệu hay chưa chúng ta cần truy cập vào http://localhost:3000
Inspect vào trình duyệt hoặc F12 vào tab console và gõ: App.cable
 đạt được kết quả như hình có nghĩa là nơi nhận tín hiệu và nơi phát sóng tín hiệu đã được thông nhau
Nói sơ qua một tý về câu lệnh:
đạt được kết quả như hình có nghĩa là nơi nhận tín hiệu và nơi phát sóng tín hiệu đã được thông nhau
Nói sơ qua một tý về câu lệnh:
rails g channel notifications
Câu lệnh trên sẽ tạo ra 2 file: app/assets/javascripts/channels/notifications.coffee và app/channels/notifications_channel.rb - với File notifications_channel.rb chúng ta dùng để đăng ký kênh nhằm phát tín hiệu về - còn với File notifications.coffee là nơi chúng ta sẽ chỉ thị cho client phải làm gì mỗi khi nhận được tín hiệu, khi không còn kết nối nữa, hoặc khi đã kết nối thành công vv..
notificator/app/assets/javascripts/channels/notifications.coffee
App.notifications = App.cable.subscriptions.create "NotificationsChannel",
  connected: ->
    # Called when the subscription is ready for use on the server

  disconnected: ->
    # Called when the subscription has been terminated by the server

  received: (data) ->
    # Called when there's incoming data on the websocket for this channel
    $('#notificationList').prepend "#{data.notification}"
    $('#open_notification').html data.counter
Vậy nên: ở hàm received mình sẽ nhận tín hiệu trả về và chỉ thị cho trình duyệt làm gì với nó Tiến hành đẩy tín hiệu thông qua Job: Vì công việc đẩy thông báo là 1 công việc khá là nặng nhọc và có khối lượng các request gửi lên khá là lớn nên chúng ta sẽ tiến hành tạo job cho nó:
rails generate job NotificationBroadcast
notificator/app/jobs/notification_broadcast_job.rb Trong job chúng ta sẽ hiến hành render thông báo cũng như phát tín hiệu trả về:
class NotificationBroadcastJob < ApplicationJob
  queue_as :default

  def perform(counter,notification)
    ActionCable.server.broadcast 'notification_channel',  counter: render_counter(counter), notification: render_notification(notification)
  end

  private

  def render_counter(counter)
    ApplicationController.renderer.render(partial: 'notifications/counter', locals: { counter: counter })
  end

  def render_notification(notification)
    ApplicationController.renderer.render(partial: 'notifications/notification', locals: { notification: notification })
  end
end
Để đẩy công việc này qua cho Job nó làm thì sẽ cần phải gắn after_create_commit cho Notification như đã làm ở trên: notificator/app/models/notification.rb
class Notification < ApplicationRecord
  after_create_commit { NotificationBroadcastJob.perform_later(Notification.count,self)}
end
Chúng ta sẽ phải sửa lại Model message.rb notificator/app/models/message.rb
class Message < ApplicationRecord
  after_create_commit { notify }

  private
  def notify
    Notification.create(event: "New Notification (#{self.body})")
  end
end
Ngay lúc này, Thông báo được đẩy sẽ không chỉ đơn thuần là đoạn text: 'New Notification' mà sẽ còn bao gồm cả nội dung message và số lượng của messages
Và ngay lúc này bạn có thể khởi động lại server và tận hưởng những gì mà Action Cable đã mang lại. Mở 2 tab trình duyệt song song tiến hành tạo messages và quan sát thông báo được đẩy về! Cám ơn các bạn đã quan tâm theo dõi nếu hữu dụng hãy nhấn nút vote và chia sẻ. Tham khảo thêm tại: đây
All rights reserved
