Document Based App
Bài đăng này đã không được cập nhật trong 7 năm
1. Overview
Đối với những người sử dụng máy tính thì việc thao tác và sử dụng các file rất là dễ dàng. Từ việc tạo file, lưu file, đọc file...đều rất quen thuộc và dễ sử dụng. Còn trên máy điện thoại thì sao. Bạn muốn làm điều đó khá là phức tạp, và nhiều lúc bạn cũng không để ý các file được lưu trữ ở đâu hoặc không biết lúc lưu trữ nó sẽ nằm ở chỗ nào trong cái điện thoại của mình. Thấu hiểu vấn đề đó từ iOS 11 Apple đã cung cấp Document Browser để làm việc đó dễ dàng hơn trên cái iPhone của bạn. Trong phạm vi bài viết này mình sẽ giới thiệu về Document Browser để làm những việc sau:
-
Hiển thị tất cả những tệp văn bản ở trong devices của bạn lên -
Tạo một tệp văn bản mới -
Mở tệp văn bản
Sau đây mình sẽ hướng dẫn tạo một sample project đơn giản về Document Browser để thực hiện những việc bên trên.
2. Setting Up the Document Browser
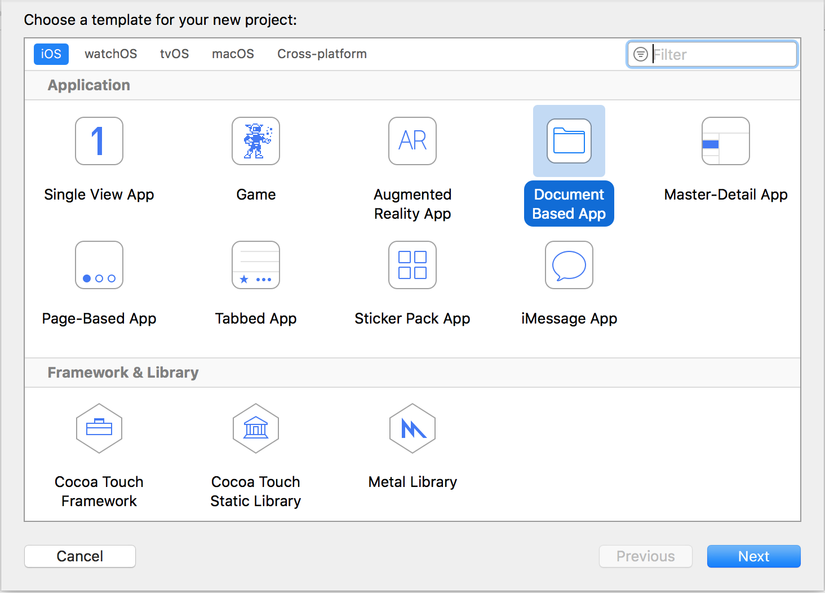
Để cho đơn giản thì chúng trong Xcode mới nhất sẽ có thêm một phần nữa là Document Based App ở trong phần tạo Application mới. Tương tự như hình sau:
 Theo Project mặc định được tạo ra ta sẽ thấy có file DocumentBrowserViewController.swift được tạo ra. Và file này trong file Main.storyboard là file RootViewController của windows. Ta sẽ giữ nguyên những thiết lập từ file mặc định này.
    allowsDocumentCreation = true
    allowsPickingMultipleItems = false
Ta sẽ thấy bên trên có setup là allowsDocumentCreation = true tức là Document Browser này sẽ cho phép chúng ta tạo thêm document mới. Còn đối với dòng code allowsPickingMultipleItems = false sẽ ngăn cho người dùng mở nhiều tài liệu cùng một lúc.
3. Creating New Documents
Sau khi chúng ta tạo ứng dụng và thử chạy sẽ có màn hình như sau:
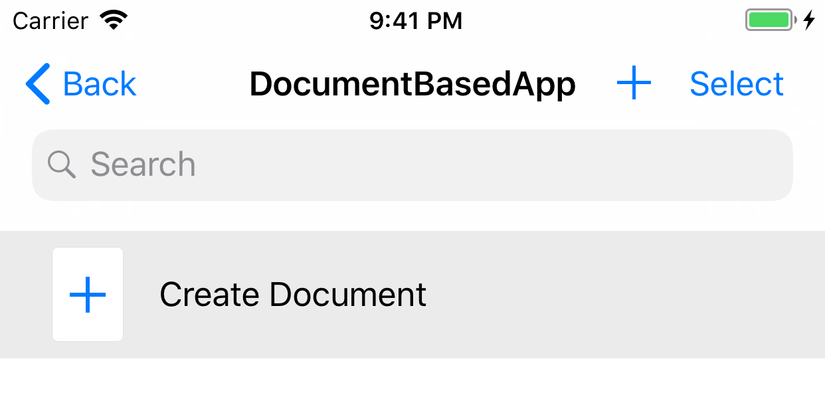 Trong hình trên chúng ta thấy có button Create Document. Nhưng chúng ta ấn vào thì không thấy Document mới nào được tạo ra cả. Vì sao lại như vậy? Vì chúng ta chưa xử lý việc tạo ra Document mới. Việc nhấn vào button Create Document sẽ gọi đến delegate sau: documentBrowser(:didRequestDocumentCreationWithHandler:)
Chúng ta cần phải implement đoạn tạo Document mới thì mới có file được tạo ra. Để cho đơn giản chúng ta sẽ tạo file Text Document như đoạn code sau:
Trong hình trên chúng ta thấy có button Create Document. Nhưng chúng ta ấn vào thì không thấy Document mới nào được tạo ra cả. Vì sao lại như vậy? Vì chúng ta chưa xử lý việc tạo ra Document mới. Việc nhấn vào button Create Document sẽ gọi đến delegate sau: documentBrowser(:didRequestDocumentCreationWithHandler:)
Chúng ta cần phải implement đoạn tạo Document mới thì mới có file được tạo ra. Để cho đơn giản chúng ta sẽ tạo file Text Document như đoạn code sau:
func documentBrowser(_ controller: UIDocumentBrowserViewController, didRequestDocumentCreationWithHandler importHandler: @escaping (URL?, UIDocumentBrowserViewController.ImportMode) -> Void) {
    let doc = TextDocument()
    let url = doc.fileURL

    // Create a new document in a temporary location.
    doc.save(to: url, for: .forCreating) { (saveSuccess) in
        // Make sure the document saved successfully.
        guard saveSuccess else {
            // Cancel document creation.
            importHandler(nil, .none)
            return
        }

        // Close the document.
        doc.close(completionHandler: { (closeSuccess) in
            // Make sure the document closed successfully.
            guard closeSuccess else {
                // Cancel document creation.
                importHandler(nil, .none)
                return
            }
            // Pass the document's temporary URL to the import handler.
            importHandler(url, .move)
        })
    }
}
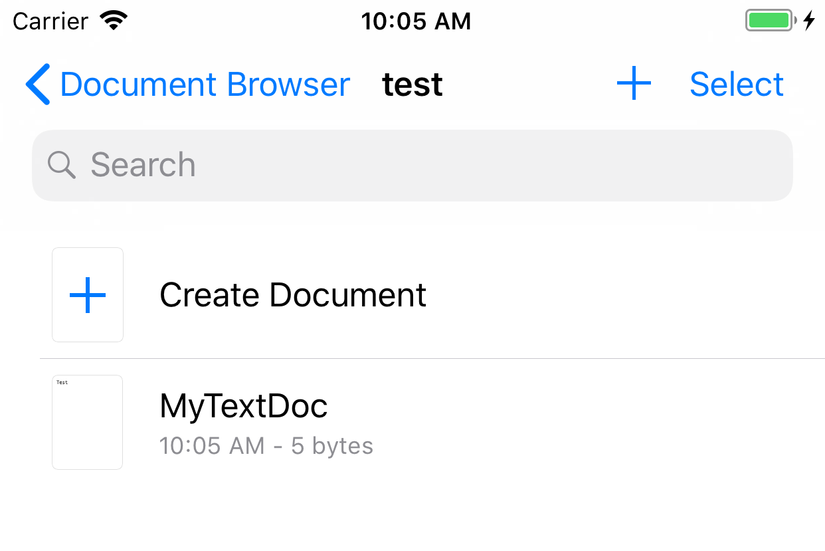
Trong đoạn code trên chúng ta thấy có hàm tạo ra TextDocument, sau đó lưu lại, và đóng TextDocument mới được tạo ra. Nếu thành công thì dữ liệu sẽ được lưu lại ở url được truyền vào. Nếu không thành công sẽ trả về nil và return để thoát khỏi hàm. Tạo document thành công sẽ được như hình sau:
4. Opening and Importing Documents
Người dùng có thể mở các tài liệu được tạo ra bằng nhiều cách, và Document Browser cung cấp các Delegate để làm những việc đấy. Các trường hợp có thể xảy ra:
- Nếu App import một tài liệu mới (bao gồm cả việc chúng ta tạo ra một tài liệu mới thành công) thì sẽ được gọi vào hàm này: documentBrowser(:didImportDocumentAt:toDestinationURL:)
- Nếu người dùng Click chọn vào document đã có sẵn để đọc thì sẽ vào hàm này: documentBrowser(:didPickDocumentURLs:)
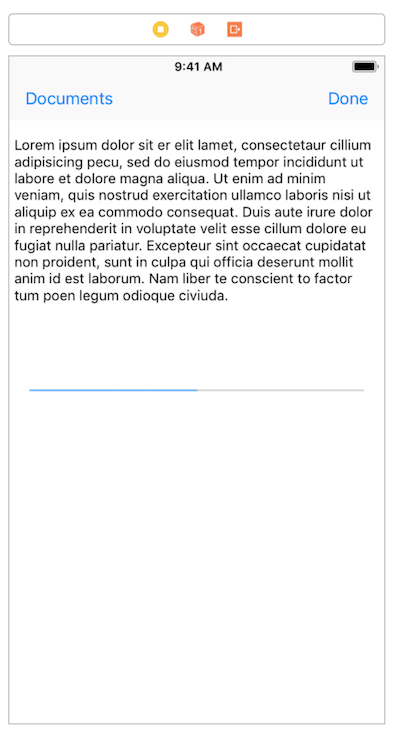
- Nếu người dùng chia sẻ tài liệu hoặc kéo thả tài liệu vào App thì sẽ vào hàm: application(:open:options:) Để mở được Document ta cần thiết kế một TextDocumentViewController chứa dữ liệu text và hiển thị lên từ ứng dụng của mình. Chúng ta sẽ thiết kế màn hình hiển thị text như sau:
Để gọi và hiển thị text từ DocumentBrowserViewController.swift ta viết hàm sau:
// MARK: Document Presentation
/// - Tag: presentDocuments
func presentDocument(at documentURL: URL) {
    let storyBoard = UIStoryboard(name: "Main", bundle: nil)
    let tempController = storyBoard.instantiateViewController(withIdentifier: "TextDocumentViewController")
    guard let documentViewController = tempController as? TextDocumentViewController else {
        fatalError("*** Unable to cast \(tempController) into a TextDocumentViewController ***")
    }

    // Load the document view.
    documentViewController.loadViewIfNeeded()
    let doc = TextDocument(fileURL: documentURL)

    // Get the transition controller.
    let transitionController = self.transitionController(forDocumentURL: documentURL)
    // Set up the transition animation.
    transitionController.targetView = documentViewController.textView
    documentViewController.transitionController = transitionController
    // Set up the loading animation.
    transitionController.loadingProgress = doc.loadProgress

    // Set and open the document.
    documentViewController.document = doc
    doc.open { [weak self](success) in
        // Remove the loading animation.
        transitionController.loadingProgress = nil
        guard success else {
            fatalError("*** Unable to open the text file ***")
        }
        self?.present(documentViewController, animated: true, completion: nil)
    }
}
Chúng ta sẽ gọi hàm này ở các delegate ở bên trên khi muốn mở một tài liệu đã có sẵn hoặc vừa mới tạo ra. Trên đây là một chút kiến thức về Document Based App mới trên iOS11 cho các bạn tham khảo. Cảm ơn các bạn đã quan tâm theo dõi.
All rights reserved
