Widget - To day extendsion tutorial
Bài đăng này đã không được cập nhật trong 4 năm
Đến hẹn lại lên, cuối tháng roài làm cái rì pọt cho đỡ bị trừ lương và làm cái tutorial nho nhỏ cho newbie chém gió. Làm dự án thấy có cái today extendsion cũng khá hay lên vác qua đây ae tham khảo nhé.Today extendsion này rất tiện lợi giúp chúng ta có thể quảng cáo cho app hay làm các tiện ích nho nhỏ như thời tiết, lấy khoảng trống ổ cứng hay đồng hồ thời trang ... Ở đây mình sẽ làm cái demo về lấy dung lượng ổ cứng còn các tiện ích nhỏ khác thì các bạn tự tìm hiểu nhé.
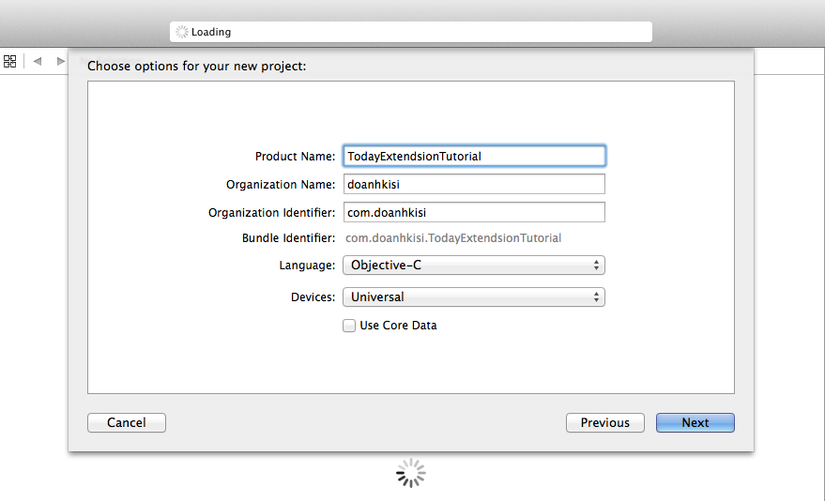
Đầu tiên chúng ta tạo project mang tên TodayExtendsionTutorial.
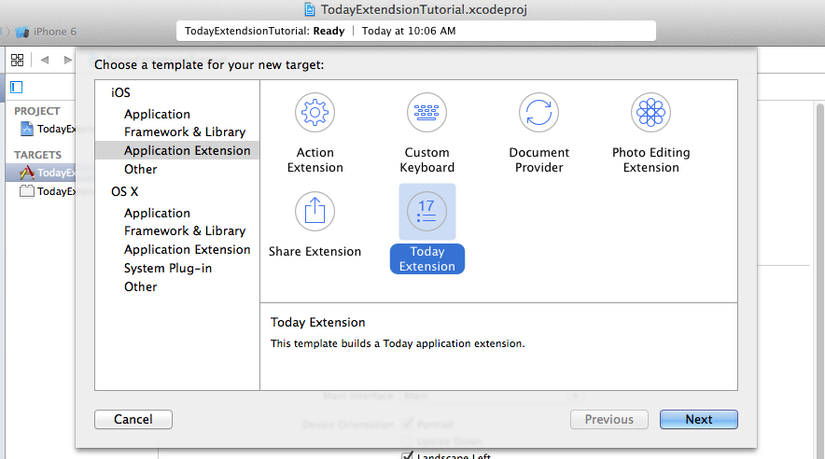
Khi đã tạo project xong ta bắt đầu thêm extendsion. Bạn vào File --> new --> Taget, sau đó chọn today extendsion.
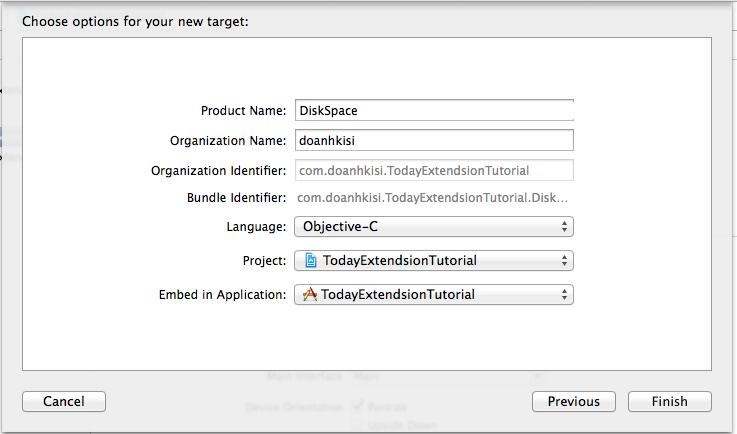
Bạn thiết lập tên extendsion là DiskSpace, chọn ngôn ngữ và project tương ứng sau đó click finish.
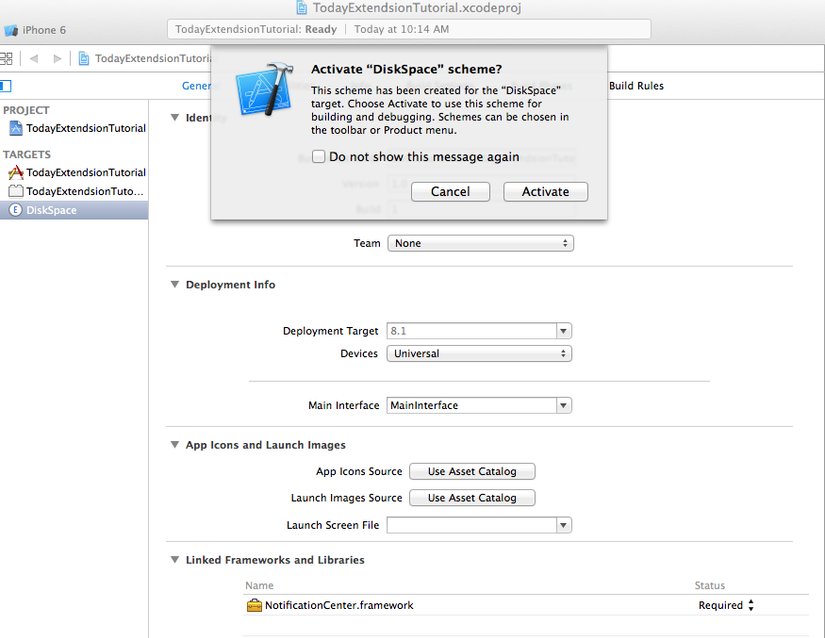
Sau đó Xcode sẽ hỏi chúng ta có active cheme diskspace ko và ta ấn active.
Với các tiện ích khác như thời tiết hay tiện ích nào cần add framework vào thì click vào project chọn DiskSpace và add các thư viện cần thiết vào. VD ứng dụng thời tiết thì thêm framework CryptoCurrencyKit.framework ... Và bạn phải chắc chắn đã link đến thư viện Notification Center. Đây là thư viện tối cần thiết cho ứng dụng của bạn.
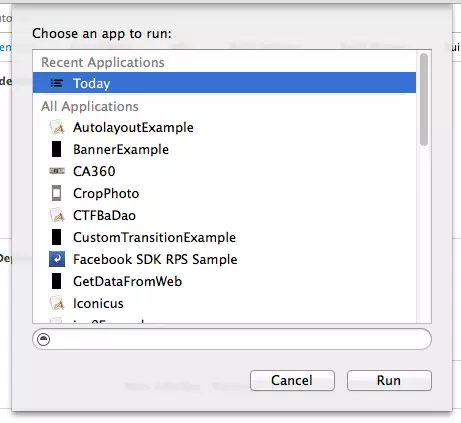
Khi tạo ra extendsion nó sẽ tự tạo cho ta 1 thư mục trong project tương ứng với tên widget ta đã đặt. Cụ thể ở đây là thư mục DiskSpace chứa giao diện và các controller tương ứng. Ở đây sẽ có file MainInterface.Storyboard để chúng ta chỉnh sửa giao diện cho extendsion. Khởi đầu chỉ có label helloworld. Bây giờ bạn có thể chạy thử xem  Khi click run sẽ hiện ra cửa sổ chọn extendsion, bạn chọn today và ấn run
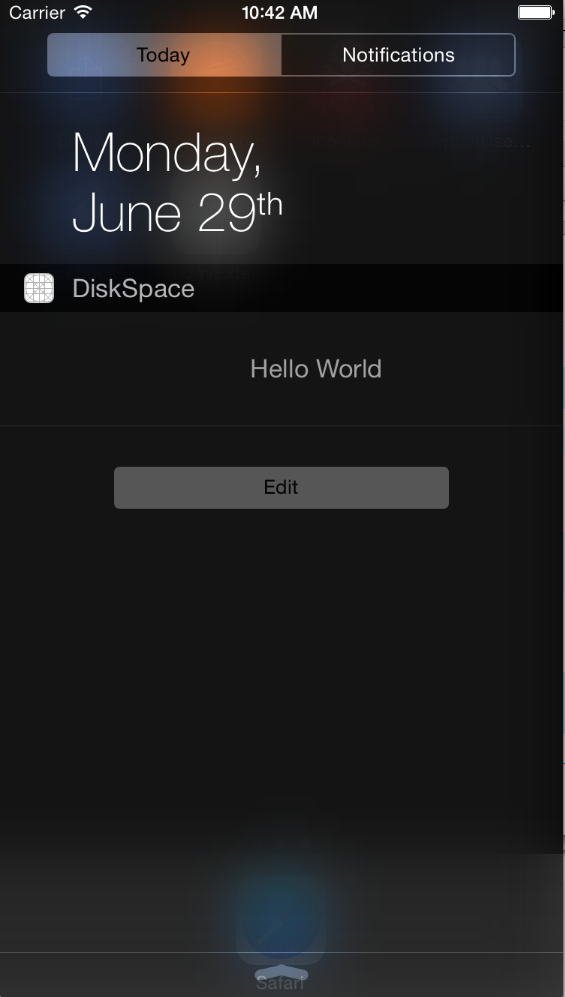
Và đây là kết con bố quả:
Chú ý: Đây là chúng ta chạy trực tiếp với scheme DiskSpace lên có giao diện như vậy. Còn nếu chạy với scheme khác thì chúng ta cần làm những bước sau để hiển thị.
- Bước 1: Chạy ứng dụng và kéo cửa sổ notification xuống và chọn tab today. Màn hình này sẽ chứa các widget đã được add vào.
- Bước 2: Chọn Button Edit và select DiskSpace extendsion và click done. Như vậy mỗi lần bật cửa sổ notification lên widget của bạn đã được hiển thị. Bây giờ chúng ta tiếp tục xây dựng giao diện cho widget. Lưu ý với các bạn rằng bài viết này mình ko tập trung nói về việc xây dựng cái giao diện cho ứng dụng này. Các bạn chỉ cần search today extendsion tutorial sẽ có cả rổ bài hướng dẫn về cách làm. Bài này mình sẽ nói về vấn đề build app và real data hơn.
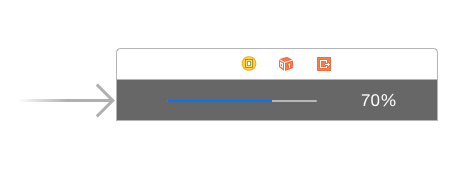
Nào chúng ta cùng đi xây dụng giao diện cho app. Chúng ta thêm vào 1 cái progress view và 1 label hiển thị % của progress đó.
Chỉnh autolayout cho label:
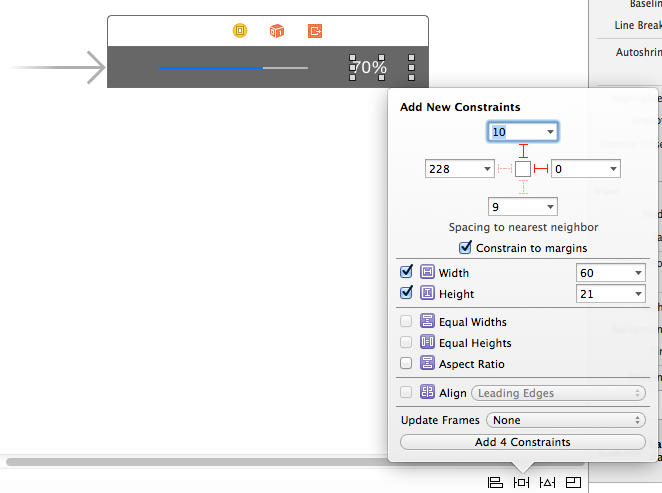
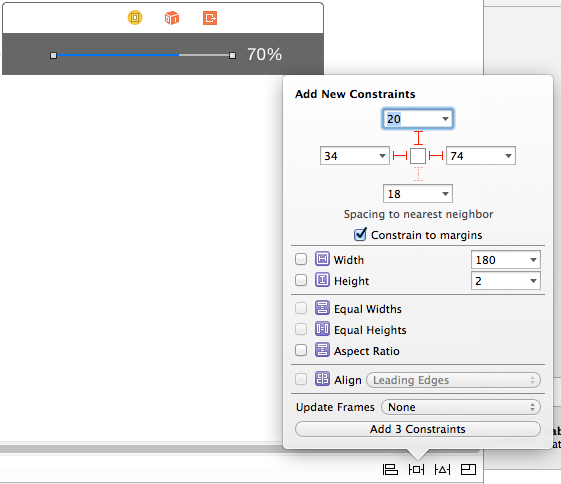
Tiếp theo chỉnh layout cho progress view nữa.
Tạo outlet và đặt tên các controls như sau:
@interface TodayViewController : UIViewController
@property (weak, nonatomic) IBOutlet UIProgressView *progressBar;
@property (weak, nonatomic) IBOutlet UILabel *percenLabel;

@end
Để hiển thị data theo thời gian today extendsion cung cấp cho chúng ta hàm
- (void)widgetPerformUpdateWithCompletionHandler:(void (^)(NCUpdateResult))completionHandler {
    // Perform any setup necessary in order to update the view.

    // If an error is encountered, use NCUpdateResultFailed
    // If there's no update required, use NCUpdateResultNoData
    // If there's an update, use NCUpdateResultNewData

    completionHandler(NCUpdateResultNewData);
}
Ở đây sẽ có 3 trạng thái: - Có dữ liệu update - Ko có dữ liệu trả về - Lỗi ko trả về kết quả
Giờ chúng ta phải tính toán dung lượng ổ đĩa cứng
@property (nonatomic, assign) unsigned long long fileSystemSize;
@property (nonatomic, assign) unsigned long long freeSize;
@property (nonatomic, assign) unsigned long long usedSize;
@property (nonatomic, assign) double usedRate;
Viết hàm để tính toán dung lượng
- (void)updateSizes
{
    // Retrieve the attributes from NSFileManager
    NSDictionary *dict = [[NSFileManager defaultManager]
                attributesOfFileSystemForPath:NSHomeDirectory()
                                        error:nil];

    // Set the values
    self.fileSystemSize = [[dict valueForKey:NSFileSystemSize]
                              unsignedLongLongValue];
    self.freeSize       = [[dict valueForKey:NSFileSystemFreeSize]
                              unsignedLongLongValue];
    self.usedSize       = self.fileSystemSize - self.freeSize;
}
Và ko phải lúc nào chúng ta cũng cần update dữ liệu, và ko hẳn lúc nào cũng có dữ liệu trả về. Do vậy chúng ta cần cache lại dữ liệu. Cụ thể ở đây chúng ta cần cache lại dung lượng ổ cứng đã sử dụng
- (double)usedRate
{
    return [[[NSUserDefaults standardUserDefaults]
             valueForKey:@"diskpace"] doubleValue];
}

- (void)setUsedRate:(double)usedRate
{
    NSUserDefaults *defaults =
    [NSUserDefaults standardUserDefaults];
    [defaults setValue:[NSNumber numberWithDouble:usedRate]
                forKey:@"diskpace"];
    [defaults synchronize];
}
Ok đến đây là công việc đã gần hoàn thành rồi, giờ update interface thôi
- (void)updateInterface
{
    double rate = self.usedRate; // retrieve the cached value
    self.percenLabel.text =
    [NSString stringWithFormat:@"%.1f%%", (rate * 100)];
    self.progressBar.progress = rate;
}
Các hàm đã ổn rồi giờ tính toán hiển thị theo thời gian thực thôi
- (void)widgetPerformUpdateWithCompletionHandler:(void (^)(NCUpdateResult))completionHandler
{

    [self updateSizes];

    double newRate = (double)self.usedSize / (double)self.fileSystemSize;

    if (newRate - self.usedRate < 0.0001) {
        completionHandler(NCUpdateResultNoData);
    } else {
        [self setUsedRate:newRate];
        [self updateInterface];
        completionHandler(NCUpdateResultNewData);
    }
}
Chạy thử và xem kết quả đi nhé. Còn mềnh thì phải làm thêm cái giao diện chi tiết hơn về các thông tin phần cứng

Ta định nghĩa thêm 2 macro định nghĩa chiều cao của widget
#define kWClosedHeight   40.0
#define kWExpandedHeight 120.0
Khi mới chạy lên ta cần widget hiển thị size nhở và ẩn label details đi
- (void)viewDidLoad {
    [super viewDidLoad];
    [self updateInterface];
    // new
    [self setPreferredContentSize:CGSizeMake(0.0, kWClosedHeight)];
    [self.detailsLabel setAlpha:0.0];
}
Tiếp theo là format lại hiển thị của detailsLabel
-(void)updateDetailsLabel
{
    NSByteCountFormatter *formatter =
                           [[NSByteCountFormatter alloc] init];
    [formatter setCountStyle:NSByteCountFormatterCountStyleFile];

    self.detailsLabel.text =
      [NSString stringWithFormat:
          @"Used:\t%@\nFree:\t%@\nTotal:\t%@",
           [formatter stringFromByteCount:self.usedSize],
           [formatter stringFromByteCount:self.freeSize],
           [formatter stringFromByteCount:self.fileSystemSize]];
}
Tiếp theo viết sự kiện khi touch vào widget
-(void)touchesBegan:(NSSet *)touches withEvent:(UIEvent *)event
{
    if (self.preferredContentSize.height == kWClosedHeight) {
        [self updateDetailsLabel];
        [self setPreferredContentSize:
         CGSizeMake(0.0, kWExpandedHeight)];
    } else {
        [self setPreferredContentSize:CGSizeMake(0.0, kWClosedHeight)];
    }
}
Tiếp theo là thêm animation cho nó máu:
-(void)viewWillTransitionToSize:(CGSize)size
      withTransitionCoordinator:
       (id<UIViewControllerTransitionCoordinator>)coordinator
{
    [coordinator animateAlongsideTransition:
       ^(id<UIViewControllerTransitionCoordinatorContext> context)
       {
          [self.detailsLabel setAlpha:1.0];
       } completion:nil];
}
Rồi đến đây là công việc xây dựng app đã hoàn thành. Phần tiếp theo là các hướng dẫn về hiển thị và build app Default widget để padding là khoảng 20 px hay 10px gì đó. Các bạn xem các widget có sẵn thì sẽ rõ nó sẽ bị lệch về bên phải, giờ muốn widget vào giữa màn hình thì làm như thế nào. Bạn cần làm bước sau: Thêm hàm và nhìn lệnh sẽ rõ
 - (UIEdgeInsets)widgetMarginInsetsForProposedMarginInsets:(UIEdgeInsets)margins
{
    return UIEdgeInsetsZero ;
}
Thứ 2 muốn build thành file ipa để mọi người có thể cài app thì bạn cần phải làm các bước sau: - Truy cập vào trang https://developer.apple.com/membercenter/index.action để login - Truy cập certificates, identifiers, devices để có thể chỉnh sửa file provisioning - Thạo thêm app id cho extendsion. VD bunder identifer của mình là doanhkisi.abc.todayextendsiontutorial thì mình tạo thêm 1 app id có tên là doanhkisi.abc.todayextendsiontutorial.diskspace vì widget của mình đặt là diskspace - update lại file provisening và download về máy dùng là ok. Như vậy là những gì cầ thiết để tạo today extendsion đã đc mình giới thiệu cụ thể. Có ý kiến gì các bạn hãy đóng góp để nâng cao chất lượng bài viết nhé. Chào thân ái và quyết thắng.
link Souce
https://github.com/doanhkisi/todayextendsion.git
All rights reserved
