TreeView in ios
Bài đăng này đã không được cập nhật trong 4 năm
Sau 1 tháng OT trả góp dòng dã, hnay mới lại nâng mông lên nghiên cứu monthly report tháng này. Làm project củ chuối này thấy có cái treeview khá là hay bên bê sang đây cho ae tham khảo và học tập. Khi xem qua treeview này cảm giác khá kì công và hiệu ứng cũng khá đẹp. Ae nào custom đc cho dễ dùng hơn thì nhớ để lại link cho mình copy với nhé. Thôi chém gió đủ rồi ta vào việc chính nhé.
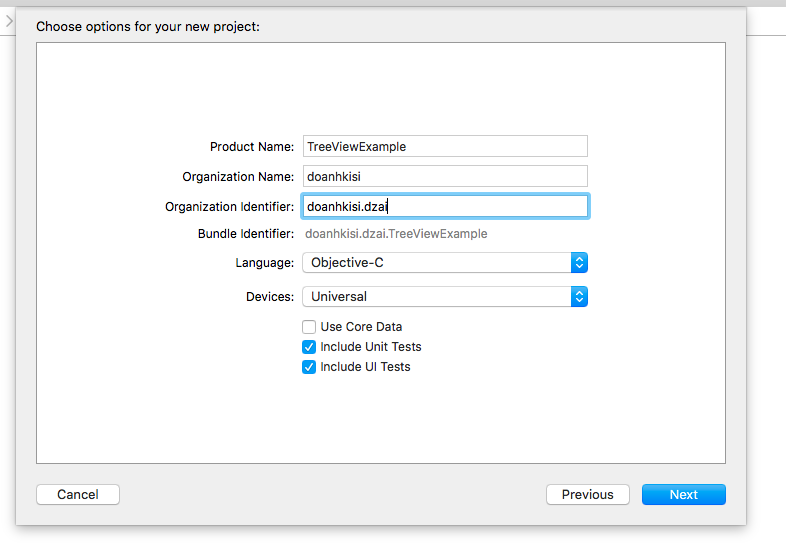
Đầu tiên chúng ta tạo 1 project mang tên TreeViewExample cho nó đúng chuẩn nhé.
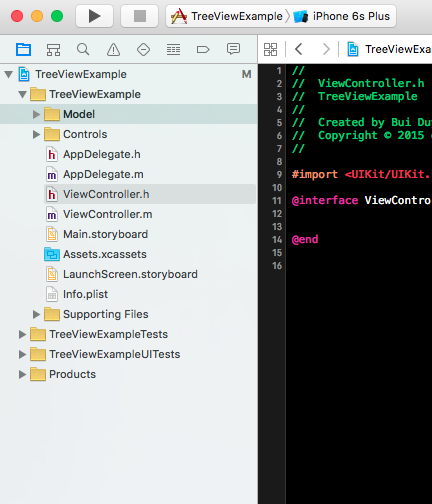
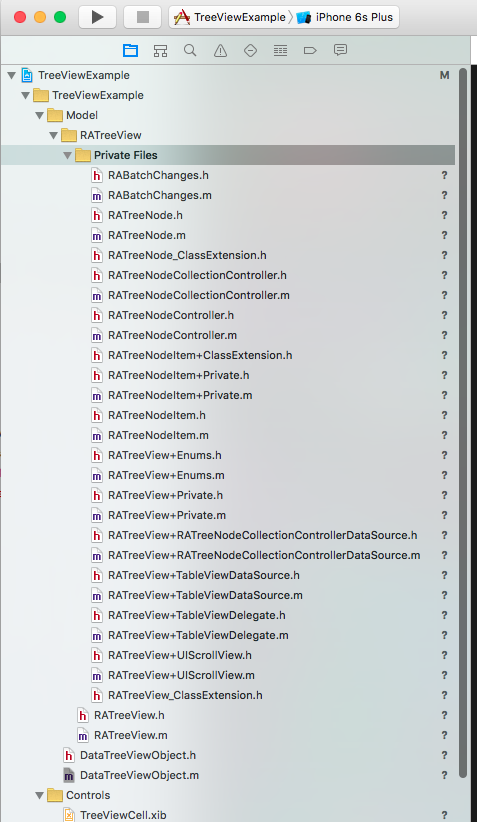
Việc tiếp theo ta cần thêm 2 groups là Controls và model để chứa các controls cần sử dụng và các class tiện ích sẽ sử dụng trong dự án.
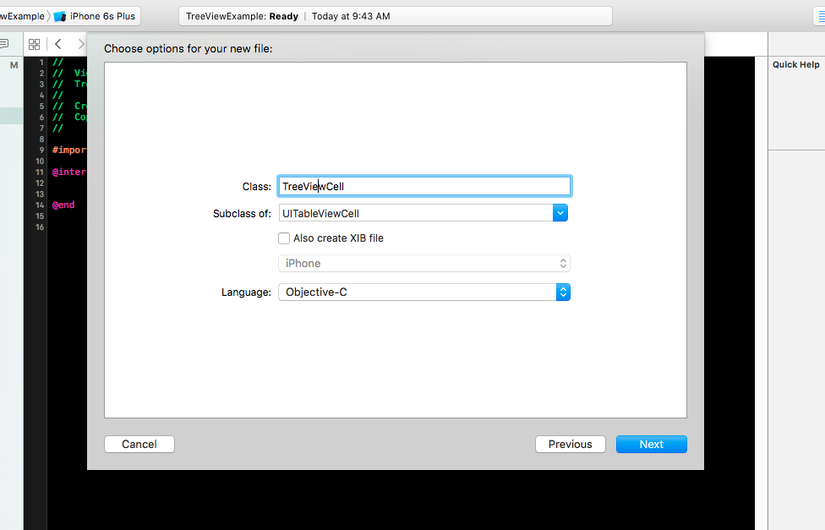
 Nào chúng ta cùng đi tạo 2 tableview cell mang tên TreeViewCell sẽ hiển thị dữ liệu.
 Theo thói quen mình cứ tạo ra 1 group là tạo ngay ra 1 thư mục cùng tên với nó. Như vậy các project khác muốn dùng lại thì copy cả thư mục là đc rồi, rất tiện lợi và khoa học. Mình nghĩ là các bạn cũng nên làm vậy sẽ tốt hơn.
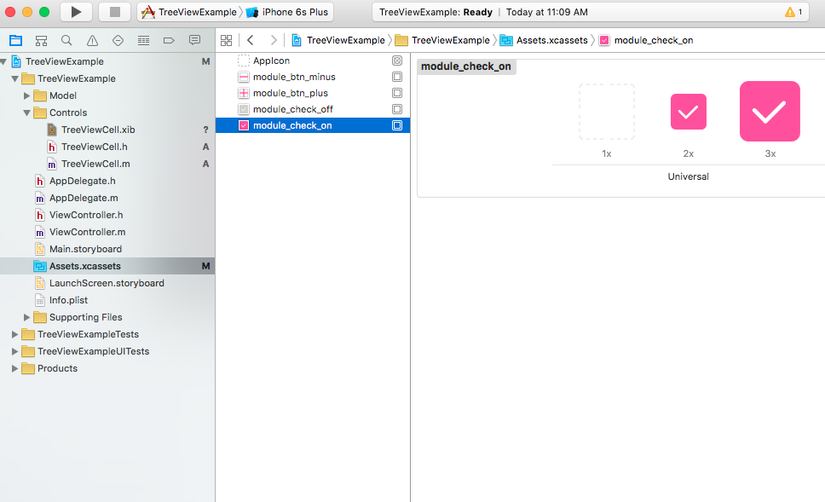
Việc tiếp theo là chúng ta cần tạo ra 1 file giao diện treeviewCell. Ở project này mình khuyên các bạn tạo ra file xib cho tiện lợi. Dễ sửa và sẽ cần đăng kí với treeview.cell sẽ có giao diện như sau. Àh quên thêm mấy file resource vào cho nó đẹp cái đã. Bạn vào file Assets.xcassets để thêm ảnh nhé.
Theo thói quen mình cứ tạo ra 1 group là tạo ngay ra 1 thư mục cùng tên với nó. Như vậy các project khác muốn dùng lại thì copy cả thư mục là đc rồi, rất tiện lợi và khoa học. Mình nghĩ là các bạn cũng nên làm vậy sẽ tốt hơn.
Việc tiếp theo là chúng ta cần tạo ra 1 file giao diện treeviewCell. Ở project này mình khuyên các bạn tạo ra file xib cho tiện lợi. Dễ sửa và sẽ cần đăng kí với treeview.cell sẽ có giao diện như sau. Àh quên thêm mấy file resource vào cho nó đẹp cái đã. Bạn vào file Assets.xcassets để thêm ảnh nhé.
Và giao diện Treeview Cell sẽ như sau:
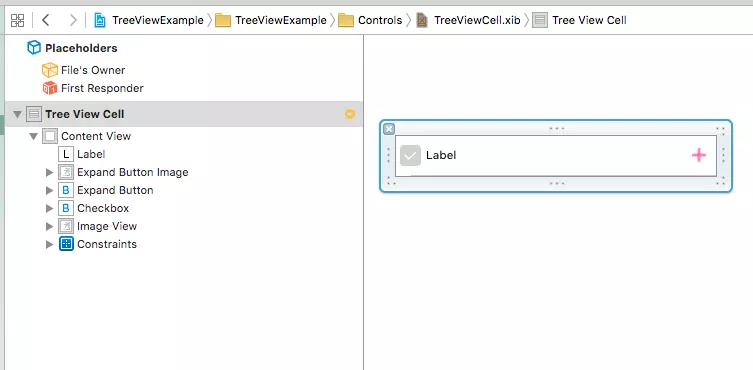
Ở đây mình thiết kế cell gồm các controls sau:
- Button checkbox
- Label hiển thị text
- Button Expand
- ImageView hình Expand
- ImageView Separator nhìn cho đẹp.
Do thiết kế ảnh hơi nhỏ + mẫu cũ của nó có thêm cái image expand cũng ko hay lắm nhưng lười lên các bợn trẻ cứ tự sửa nhé. OT nhiều quá giờ lười lắm
 .
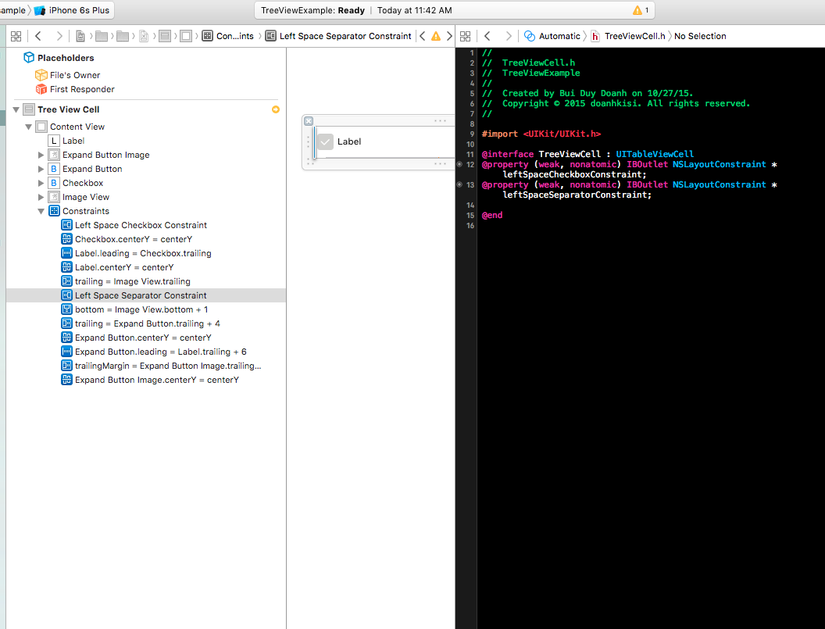
Và tất nhiên các bợn trẻ nhớ auto layout cho nó đầy đủ để chạy trên mọi màn hình nhé. Mìngh sẽ ko đi chi tiết vào hướng dẫn auto layout, mà chỉ cái auto layout nào cần mới viết về nó.
Cái Label hiển thị dữ liệu thì bạn nên để auto theo cái checkbox luôn, đỡ phải set nhiều. Các bạn làm theo hình của mình nhé
.
Và tất nhiên các bợn trẻ nhớ auto layout cho nó đầy đủ để chạy trên mọi màn hình nhé. Mìngh sẽ ko đi chi tiết vào hướng dẫn auto layout, mà chỉ cái auto layout nào cần mới viết về nó.
Cái Label hiển thị dữ liệu thì bạn nên để auto theo cái checkbox luôn, đỡ phải set nhiều. Các bạn làm theo hình của mình nhé
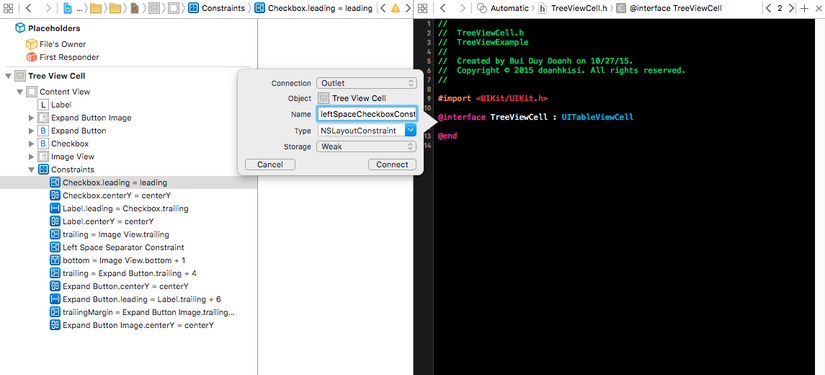
Xong rồi. Giờ khai báo các properties để sài thôi, Code mẫu đây:
//
//  TreeViewCell.h
//  TreeViewExample
//
//  Created by Bui Duy Doanh on 10/27/15.
//  Copyright © 2015 doanhkisi. All rights reserved.
//

#import <UIKit/UIKit.h>

@interface TreeViewCell : UITableViewCell

@property (weak, nonatomic) IBOutlet UIButton *expandButton;
@property (weak, nonatomic) IBOutlet UIImageView *expandButtonImage;
@property (weak, nonatomic) IBOutlet UILabel *label;
@property (weak, nonatomic) IBOutlet UIButton *checkbox;
@property (weak, nonatomic) IBOutlet NSLayoutConstraint *leftSpaceCheckboxConstraint;
@property (weak, nonatomic) IBOutlet NSLayoutConstraint *leftSpaceSeparatorConstraint;

@property (nonatomic, copy) void (^expandButtonTapAction)(TreeViewCell *cell, id sender);
@property (nonatomic, copy) void (^checkboxTapAction)(TreeViewCell *cell, id sender);

@property (nonatomic, assign) BOOL expand;
@property (nonatomic, assign) BOOL checked;

- (void)setupWithTitle:(NSString *)title
                 level:(NSInteger)level
          isShowExpand:(BOOL)isShowExpand;

@end
Ở đây có 1 cái hay là mình dùng block để truyền action từ bên cell sang class khai báo treeview. Cách làm này dễ thực hiện và đơn giản. Hơn nữa với 1 số hàm mình sẽ xử lí luôn bên này cho class chính vơi bớt code. Như vậy code rất rõ ràng và sáng sủa. Ta khao báo thêm 2 properties expand và checked để set trạng thái expand và checked cho cell. Giờ bên file .m ta triển khai ghi đè các phương thức setter thôi. Đầu tiên ta overide phương thức setter của Expand
- (void)setExpand:(BOOL)expand {
    if (_expand != expand) {
        _expand = expand;
        // 展開状況に応じて画像を変更
        if (expand) {
            [self.expandButtonImage setImage:[UIImage imageNamed:@"module_btn_minus"]];
        }
        else {
            [self.expandButtonImage setImage:[UIImage imageNamed:@"module_btn_plus"]];
        }
    }
}
Tiếp theo ta overide tiếp phương thức setter của checked:
- (void)setChecked:(BOOL)checked {
    if (_checked != checked) {
        _checked = checked;
        if (checked) {
            [self.checkbox setImage:[UIImage imageNamed:@"area_checkbox_on"]
                           forState:UIControlStateNormal];
        } else {
            [self.checkbox setImage:[UIImage imageNamed:@"area_checkbox_off"]
                           forState:UIControlStateNormal];
        }
    }
}
Đừng quên là con phải triển khai nốt 2 cái action của 2 button expand và checked nhé:
- (IBAction)expandButtonTapped:(id)sender {
    if (self.expandButtonTapAction) {
        self.expandButtonTapAction(self, sender);
    }
}

- (IBAction)checkboxTapped:(id)sender {
    if (self.checkboxTapAction) {
        self.checkboxTapAction(self, sender);
    }
}
Cuối cùng là triển khai phương thức điền dữ liệu vào thôi.
- (void)setupWithTitle:(NSString *)title level:(NSInteger)level isShowExpand:(BOOL)isShowExpand {
    self.label.text = title;
    NSInteger marginLeft = 10;
    NSInteger paragraphConst = 0;
    self.leftSpaceSeparatorConstraint.constant = 0.f;
    if (level > 0) {
        paragraphConst = 20;
        marginLeft = 20;
        if (level == 2) {
            paragraphConst += marginLeft;
        }
        self.leftSpaceSeparatorConstraint.constant = paragraphConst + 4.f;
    }
    self.leftSpaceCheckboxConstraint.constant = paragraphConst;
    self.checkbox.hidden = NO;
    self.expandButton.hidden = self.expandButtonImage.hidden = (level == 2 || !isShowExpand);
}
Tạm ổn với cell rồi đó, ta chuyển sang data thôi. Ở đây mình sẽ tạo ra class mang tên treeviewDataObject để chứa làm dữ liệu hiển thị.
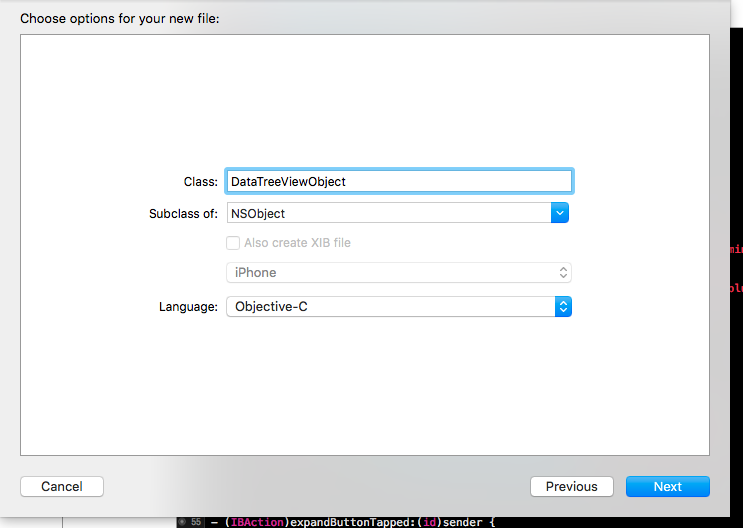
Do dài dòng quá rồi mà sắp đến giờ đi nhậu lên copy cả class lên đây cho nhanh ae đỡ sốt ruột.
#import <Foundation/Foundation.h>

@interface DataTreeViewObject : NSObject
@property (nonatomic, strong) NSString *name;
@property (nonatomic, strong) NSString *ID;
@property (nonatomic, assign) NSInteger jobCount;
@property (nonatomic, strong) NSArray *children;

@property (nonatomic, assign) BOOL checked;

+ (id)dataObjectWithName:(NSString *)name
                      ID:(NSString *)ID
                jobCount:(NSInteger)jobCount
                children:(NSArray *)children;

- (id)initWithName:(NSString *)name
                ID:(NSString *)ID
          jobCount:(NSInteger)jobCount
          children:(NSArray *)children;

- (void)addChild:(id)child;
- (void)removeChild:(id)child;
@end
#import "DataTreeViewObject.h"

@implementation DataTreeViewObject

- (id)initWithName:(NSString *)name
                ID:(NSString *)ID
          jobCount:(NSInteger)jobCount
          children:(NSArray *)children {
    self = [super init];
    if (self) {
        self.name = name;
        self.ID = ID;
        self.jobCount = jobCount;
        self.children = [NSArray arrayWithArray:children];
        self.checked = NO;
    }
    return self;
}

+ (id)dataObjectWithName:(NSString *)name
                      ID:(NSString *)ID
                jobCount:(NSInteger)jobCount
                children:(NSArray *)children {
    return [[self alloc] initWithName:name
                                   ID:ID
                             jobCount:jobCount
                             children:children];
}

- (void)addChild:(id)child {
    NSMutableArray *children = [self.children mutableCopy];
    NSInteger index = children.count == 0 ? 0 : children.count -1;
    [children insertObject:child atIndex:index];
    self.children = [children copy];
}

- (void)removeChild:(id)child {
    NSMutableArray *children = [self.children mutableCopy];
    [children removeObject:child];
    self.children = [children copy];
}
@end
Cái cần thiết nhất là giờ import thư viện và làm giao diện trang chính thôi. Bạn cần thêm folder mình sẽ gửi sau kèm project. Đó là RATTreview. Trên cocoapod cũng có cái tương tự nhưng hơi khác với cái này. các bợn trẻ có thể custom cả 2 cho máu.
Để sử dụng được cái RATTreeview này bạn cần import mấy cái file sau:
#import "RATreeView.h"
#import "RATreeView+Private.h"
#import "RATreeNode.h"
Tiếp theo cần triển khai các delegate và datasource cho treeview. Các bạn cứ làm theo thôi đừng suy nghĩ nhiều.
//
//  ViewController.m
//  TreeViewExample
//
//  Created by Bui Duy Doanh on 10/27/15.
//  Copyright © 2015 doanhkisi. All rights reserved.
//

#import "ViewController.h"
#import "RATreeView.h"
#import "RATreeView+Private.h"
#import "RATreeNode.h"

@interface ViewController ()  <RATreeViewDelegate, RATreeViewDataSource>

@property (weak, nonatomic) IBOutlet RATreeView *treeView;
@property (strong, nonatomic) NSMutableArray *dataSource;
@property (assign, nonatomic) BOOL displayFooter;

- (void)expandCellForTreeView:(RATreeView *)treeView
                     treeNode:(RATreeNode *)treeNode
               informDelegate:(BOOL)informDelegate;
- (void)collapseCellForTreeView:(RATreeView *)treeView
                       treeNode:(RATreeNode *)treeNode
                 informDelegate:(BOOL)informDelegate;

@end

@interface RATreeView ()
@property (nonatomic, strong) IBOutlet UITableView *tableView;
@end

@implementation ViewController

- (void)viewDidLoad {
    [super viewDidLoad];
    // Do any additional setup after loading the view, typically from a nib.
}

- (void)didReceiveMemoryWarning {
    [super didReceiveMemoryWarning];
    // Dispose of any resources that can be recreated.
}

@end
Giờ làm cái giao diện cái đã, tý thì quên. Các bạn thêm 1 cái view để chứa tableview và để class là RATTreeview nhé. Sau đó nhớ thêm cái tabelview và outlet cho nó. Đừng quên settup auto layout nhé.
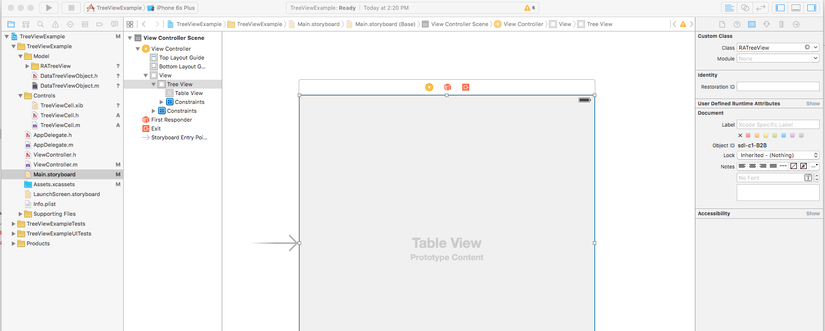
Vậy thôi vào code mà xúc nhanh kẻo đến giờ đi nhậu. Ở ViewDidLoad bạn thiết lập delegate và datasource cho treeview nhé.
- (void)viewDidLoad {
    [super viewDidLoad];
    // Do any additional setup after loading the view, typically from a nib.
    self.dataSource = [NSMutableArray new];
    if ([self.treeView respondsToSelector:@selector(setSeparatorInset:)]) {
        [self.treeView setSeparatorInset:UIEdgeInsetsZero];
    }
    if ([self.treeView respondsToSelector:@selector(setLayoutMargins:)]) {
        [self.treeView setLayoutMargins:UIEdgeInsetsZero];
    }
    [self.treeView registerNib:[UINib nibWithNibName:@"TreeViewCell" bundle:nil]
        forCellReuseIdentifier:NSStringFromClass([TreeViewCell class])];
    self.treeView.tableView.tableFooterView = [[UIView alloc] initWithFrame:CGRectZero];

    self.treeView.delegate = self;
    self.treeView.dataSource = self;
    self.treeView.separatorStyle = RATreeViewCellSeparatorStyleNone;
    [self.treeView reloadData];

}
Việc tiếp theo là cần triển khai các delegate, datasource cho treeview. Ở đây code khá là dài, mình chỉ liệt kê ra các phương thức càn thiết thôi:
RATTreeView Delegate
- (CGFloat)treeView:(RATreeView *)treeView heightForRowForItem:(id)item;
- (void)treeView:(RATreeView *)treeView willExpandRowForItem:(id)item;
- (void)treeView:(RATreeView *)treeView willCollapseRowForItem:(id)item;
- (void)treeView:(RATreeView *)treeView didSelectRowForItem:(id)item;
- (UITableViewCellEditingStyle)treeView:(RATreeView *)treeView editingStyleForRowForItem:(id)item;
- (CGFloat)treeView:(RATreeView *)treeView heightForFooterInSection:(NSInteger)section
- (UIView *)treeView:(RATreeView *)treeView viewForFooterInSection:(NSInteger)section
RATTreeView DataSource
- (UITableViewCell *)treeView:(RATreeView *)treeView cellForItem:(id)item
- (NSInteger)treeView:(RATreeView *)treeView numberOfChildrenOfItem:(id)item
- (id)treeView:(RATreeView *)treeView child:(NSInteger)index ofItem:(id)item
Các method liên quan đến việc expand, checkbox của treeview
- (void)expandCellForTreeView:(RATreeView *)treeView
                     treeNode:(RATreeNode *)treeNode
               informDelegate:(BOOL)informDelegate

- (void)collapseCellForTreeView:(RATreeView *)treeView
                       treeNode:(RATreeNode *)treeNode
                 informDelegate:(BOOL)informDelegate
- (void)treeView:(RATreeView *)treeView toggleCheckBoxForItem:(DataTreeViewObject *)item
Vậy là ok rồi đó, chi tiết nên xem trong source code để hiểu rõ hơn, nói nhiều ở đây tốn giấy mực mà trễ giờ đi nhậu. Việc cuối cùng là quan trọng nhất là tạo fake data, làm đến đây mà ko có phần này thì cũng vứt. Mình sẽ tạo hàm để fake data các bạn xem qua cũng sẽ hiểu điều cần thiết.
- (void)fakeData {
    DataTreeViewObject *supperData = [DataTreeViewObject dataObjectWithName:@"doanhkisi dzai có gì nổi bật" ID:@"1" jobCount:0 children:@[]];
    DataTreeViewObject *data1 = [DataTreeViewObject dataObjectWithName:@"depzai" ID:@"2" jobCount:0 children:@[]];
    DataTreeViewObject *subData1 = [DataTreeViewObject dataObjectWithName:@"depzai do bản chất" ID:@"3" jobCount:0 children:nil];
    DataTreeViewObject *subData2 = [DataTreeViewObject dataObjectWithName:@"depzai do a thích thế" ID:@"4" jobCount:0 children:nil];
    [data1 addChild:subData1];
    [data1 addChild:subData2];
    DataTreeViewObject *data2 = [DataTreeViewObject dataObjectWithName:@"tốt bụng" ID:@"5" jobCount:0 children:nil];
    DataTreeViewObject *data3 = [DataTreeViewObject dataObjectWithName:@"hiền lành" ID:@"6" jobCount:0 children:nil];
    DataTreeViewObject *data4 = [DataTreeViewObject dataObjectWithName:@"vui tính" ID:@"7" jobCount:0 children:nil];
    [supperData addChild:data1];
    [supperData addChild:data2];
    [supperData addChild:data3];
    [supperData addChild:data4];
    [self.dataSource addObject:supperData];
    [self.treeView reloadData];
}
Đây là fake data cho vui thôi nhé. Đừng chém em em ngại =)) Đây là link github: https://github.com/doanhkisi/TreeViewWithCheckbox ae có thể tham khảo nhé.
All rights reserved
