Auto deploy rails web apps với Capistrano
Bài đăng này đã không được cập nhật trong 4 năm
I. Giới thiệu:
Capistrano là một công cụ được viết bằng ngôn ngữ ruby giúp chúng ta tự động deploy các ứng dụng rails web lên server thông qua giao thức ssh và thực hiện các công việc đã được định sẵn.
Ở bài hướng dẫn dưới đây mình sẽ cần chuẩn bị:
- 1 server ubuntu đã cài đặt sẵn nginx, git, mysql server và môi trường để chạy rails app.
- 1 máy tính nền linux ( dùng window cũng được nhưng lằng nhằng hơn nên khuyến cáo là sử dụng linux ) và cũng được cài đủ môi trường, công cụ lập trình để develop rails app.
II. Hoạt động của Capistrano:
-
Deploy:
Khi bạn chạy lệnh "cap production deploy", Capistrano sẽ thực hiện các task theo trình tự sau: ( cái này đọc trên trang chủ http://capistranorb.com/ )
deploy:starting - start a deployment, make sure everything is ready deploy:started - started hook (for custom tasks) deploy:updating - update server(s) with a new release deploy:updated - updated hook deploy:publishing - publish the new release deploy:published - published hook deploy:finishing - finish the deployment, clean up everything deploy:finished - finished hook
-
Rollback:
Khi bạn chạy lệnh "cap production deploy:rollback", Capistrano sẽ thực hiện các bước sau:
deploy:starting deploy:started deploy:reverting - revert server(s) to previous release deploy:reverted - reverted hook deploy:publishing deploy:published deploy:finishing_rollback - finish the rollback, clean up everything deploy:finished
III. Cài đặt:
-
Trên server cài đặt:
a. git
Tải git về để server có thể lấy code về chạy app
$ sudo apt-get install git -yb. ruby
Cài đặt các thư viện cần thiết
$ sudo apt-get install git-core curl zlib1g-dev build-essential libssl-dev libreadline-dev libyaml-dev libsqlite3-dev sqlite3 libxml2-dev libxslt1-dev libcurl4-openssl-dev python-software-properties libffi-dev -yCài đặt ruby có nhiều cách như sử dụng rbenv, rvm ... Ở đây mình sử dụng rvm.
$ gpg --keyserver hkp://keys.gnupg.net --recv-keys 409B6B1796C275462A1703113804BB82D39DC0E3$ \curl -sSL https://get.rvm.io | bash -s stable --ruby$ source /home/lethanhviet/.rvm/scripts/rvmc. Rails
Trước khi cài rails chúng ta cần cài nodejs cho nó
$ sudo apt-get install nodejs -yCài đặt Rails vaf bundler
$ gem install rails -V --no-ri --no-rdoc$ gem install bundler -V --no-ri --no-rdocd. Cài đặt mysql server ( có thể thay bằng database server khác như postgreSQL ... )
$ sudo apt-get install mysql-serverCứ theo các bước nó hiện ra là xong.
e. Cài đặt puma
puma là một web server cho rails app. Nó sẽ nhận các HTTP request và tiến hành hợp tác với rails để xử lý yêu cầu.
$ gem install pumaf. Cài đặt nginx:
nginx cũng là 1 web server, nó hỗ trợ cho puma trong việc xử lý các HTTP request. Điều này có nghĩa là chỉ cần puma là server đã chạy rồi, tuy nhiên, bạn cần phải có thêm nginx để giúp hỗ trợ server chạy tốt hơn.
$ sudo apt-get install nginx -yNhư vậy là công việc trên server đã xong, giờ sang máy cá nhân linux
-
Trên máy tính cá nhân nền linux:
a. Chỉnh sửa Gemfile
Gemfile là nơi khai báo các thư viện, gem cần thiết cho rails app
Vào trong thư mục chứa rails project, ví dụ của mình để project test để trong thư mục theo đường dẫn: "/home/lethanhviet/test"
$ cd /home/lethanhviet/test$ vim GemfileThêm vào cuối file này đoạn khai báo sau:
group :development do gem 'capistrano', require: false gem 'capistrano-rvm', require: false gem 'capistrano-rails', require: false gem 'capistrano-bundler', require: false gem 'capistrano3-puma', require: false end
Chạy lệnh để cập nhật Gemfile
$ bundle updateChạy tiếp lệnh sau để cài đặt các gem cần đã khai báo trong Gemfile
$ bundleChạy tiếp lệnh sau sẽ khởi tạo các file cấu hình cho deploy
$ cap installb. Chỉnh sửa Capfile
Đây là file định nghĩa các thư viện con của capistrano mà nó sẽ dùng trong việc deploy.
$ vim config/CapfileThay thế nội dụng trong Capfile với đoạn cấu hình sau:
require 'capistrano/setup' require 'capistrano/deploy' require 'capistrano/rails' require 'capistrano/bundler' require 'capistrano/rvm' require 'capistrano/puma' Dir.glob('lib/capistrano/tasks/*.rake').each { |r| import r }
c. Chỉnh sửa file deploy.rb
$ vim config/deploy.rbserver 'your_server_ip', port: 22, roles: [:web, :app, :db], primary: true set :repo_url, 'https://github.com/daiphuthuy/test.git' set :application, 'test' set :user, 'deploy' set :puma_threads, [4, 16] set :puma_workers, 0 set :pty, true set :use_sudo, false set :stage, :production set :deploy_via, :remote_cache set :deploy_to, "/home/#{fetch(:user)}/apps/#{fetch(:application)}" set :puma_bind, "unix://#{shared_path}/tmp/sockets/#{fetch(:application)}-puma.sock" set :puma_state, "#{shared_path}/tmp/pids/puma.state" set :puma_pid, "#{shared_path}/tmp/pids/puma.pid" set :puma_access_log, "#{release_path}/log/puma.error.log" set :puma_error_log, "#{release_path}/log/puma.access.log" set :ssh_options, { forward_agent: true, user: fetch(:user), keys: %w(~/.ssh/id_rsa.pub) } set :puma_preload_app, true set :puma_worker_timeout, nil set :puma_init_active_record, true # Change to false when not using ActiveRecord namespace :puma do desc 'Create Directories for Puma Pids and Socket' task :make_dirs do on roles(:app) do execute "mkdir #{shared_path}/tmp/sockets -p" execute "mkdir #{shared_path}/tmp/pids -p" end end before :start, :make_dirs end namespace :deploy do desc "Make sure local git is in sync with remote." task :check_revision do on roles(:app) do unless
git rev-parse HEAD==git rev-parse origin/masterputs "WARNING: HEAD is not the same as origin/master" puts "Rungit pushto sync changes." exit end end end desc 'Initial Deploy' task :initial do on roles(:app) do before 'deploy:restart', 'puma:start' invoke 'deploy' end end desc 'Restart application' task :restart do on roles(:app), in: :sequence, wait: 5 do invoke 'puma:restart' end end before :starting, :check_revision after :finishing, :compile_assets after :finishing, :cleanup after :finishing, :restart endd. Tạo file nginx.conf để tí deploy cùng luôn
upstream puma { server unix:///home/deploy/apps/test/shared/tmp/sockets/test-puma.sock; } server { listen 80 default_server deferred; root /home/deploy/apps/test/current/public; access_log /home/deploy/apps/test/current/log/nginx.access.log; error_log /home/deploy/apps/test/current/log/nginx.error.log info; location ^~ /assets/ { gzip_static on; expires max; add_header Cache-Control public; } try_files $uri/index.html $uri @puma; location @puma { proxy_set_header X-Forwarded-For $proxy_add_x_forwarded_for; proxy_set_header Host $http_host; proxy_redirect off; proxy_pass http://puma; } error_page 500 502 503 504 /500.html; client_max_body_size 10M; keepalive_timeout 10; }
e. Bắt đầu deploy rails app:
Giờ ta cần commit các sự thay đổi ( Gemfile, Capfile, ... ) lên github
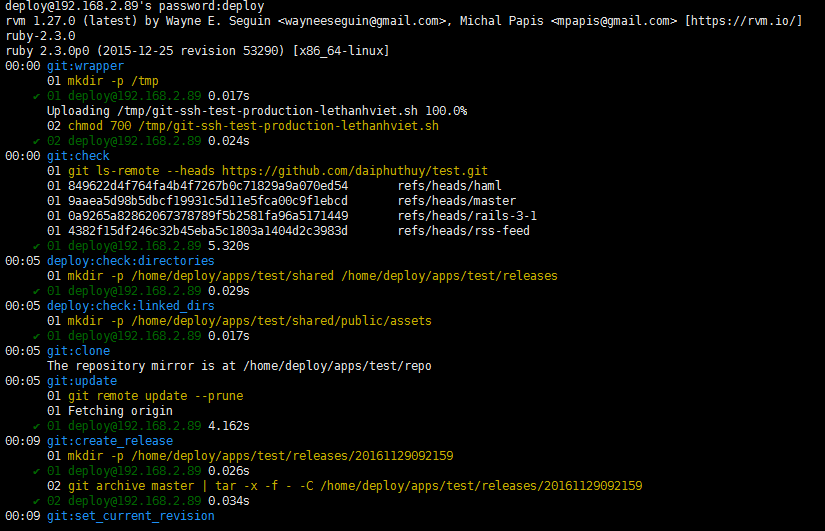
$ git add -A$ git commit -m "Set up Puma, Nginx & Capistrano"$ git push origin masterChạy lệnh sau để bắt đầu deploy:
$ cap production deployTrong quá trình chạy, nó sẽ show ra 1 đống log trong terminal, bạn có thể theo dõi để biết tiến trình và kết quả.
All rights reserved
