ការកសាងតំបន់បណ្តាញដោយប្រើប្រាស់AngularJs នឹង Rails
Bài đăng này đã không được cập nhật trong 4 năm
ជំហាានដំបូងនៃការបង្កើតនេះតម្រូវឲ្យយើងបង្កើតគម្រោងកម្មវិធីRailsជាមុនសិនដោយខ្ញុំនិងបង្កើតកម្មវិធីធម្មតាមួយដើម្បីជាគំរូសម្រាប់លោកអ្នកដើម្បីយកគំរូតាម។ដោយនៅក្នុងការកសាងគម្រោងនេះយើងចាត់ទុកថាលោកអ្នកមានការយល់ដឹងខ្លះអំពីAngularJs នឹង Railsហើយ។
បង្កើតគម្រោងកម្មវីធី Rails៖
$rails new AngularJsRails --skip-test-unit
ក្រោយពីកម្មវិធីRailsបានបង្កើតយើងត្រូវការបន្ថែមនូវ gem rspec ទៅក្នុង Gemfile ដើម្បី ឲ្យយើងអាចធ្វើការតិស្តកម្មវិធីRailsរបស់យើងបាន។
group :test do
  gem "rspec-rails"
end
ក្រោយពី gem rspecបានដាក់បញ្ចូលយើងត្រូវការវាយCommand ដើម្បីដំឡើងrspecទៅក្នុងកម្មវិធីរបស់យើង។
$ bundle install
$ rails g rspen:install
ជំហានបន្ទាប់យើងត្រូវការបង្កើតនូវ modelសម្រាប់ផ្ទុកទិន្នន័យដើម្បីឲ្យយើងអាចធ្វើការជាមួយ។
$ rails g model Contact name:string email:string description:text
$ rake db:create
$ rake db:migrate
បន្ទាប់មកយើងសាកល្បងសរសេ rspec ដើម្បីតិស្ត model ដែលយើងទើបបានបង្កើត៖
#spec/model/contact_spec.rb
require "rails_helper"

RSpec.describe Contact, type: :model do
  before :each do
    @contact = Contact.new name: "Gallery Name 1",
                           email: "test@yoyo.com",
                           description: "Lorem ipsum dolor sit amet, consectetur
                                        adipisicing elit. Sed necessitatibus
                                        mollitia rerum rem inventore voluptatem
                                        esse suscipit, quas vel dolorem autem,
                                        eaque ullam enim, minus ratione commodi
                                        hic, ex modi."
  end

  it "name should be valid" do
    expect(@contact).to be_valid
  end

  context "Name" do
    it "should invalid when it is not present" do
      @contact.name = ""
      expect(@contact).not_to be_valid
    end

    it "should invalid when it is short than 5 character" do
      @contact.name = "AAAA"
      expect(@contact).not_to be_valid
    end

    it "should invalid when it is long than 80 character" do
      @contact.name = "AAAAAAAAAA" * 9
      expect(@contact).not_to be_valid
    end
  end

  context "Email" do
    it "should invalid when it is not present" do
      @contact.email = ""
      expect(@contact).not_to be_valid
    end

    it "should invalid when it is incorrect format" do
      @contact.email = "DDDDDDDDDD@dddddd"
      expect(@contact).not_to be_valid

      @contact.email = "DDDDDDDDDD@dddddd"
      expect(@contact).not_to be_valid

      @contact.email = "DDD..DDDDDDD@dddddd.com"
      expect(@contact).not_to be_valid

      @contact.email = "DDDDDDDDDD@dddddd.commmm"
      expect(@contact).not_to be_valid
    end

    it "should invalid when it is short than 10 character" do
      @contact.email = "A" * 9
      expect(@contact).not_to be_valid
    end

    it "should invalid when it is long than 80 character" do
      @contact.email = "AAAAAAAAAA" * 9
      expect(@contact).not_to be_valid
    end
  end

  context "Description" do
    it "should invalid when it is not present" do
      @contact.description = ""
      expect(@contact).not_to be_valid
    end
  end
end
ដើម្បីឲ្យការតិស្តទទួលបានជោគជ័យនោះយើងត្រូវការបន្ថែមកូដមួយចំនួនទៅក្នុង model contact.rb ដូចខាងក្រោម៖
class Contact < ActiveRecord::Base
  validates :description, presence: true
  validates :name, presence: true, length: {minimum: 5, maximum: 50}
  EMAIL = /\A[a-zA-Z][a-zA-Z\d]*[_.-]?[a-zA-Z\d]+@[a-zA-Z]+\.[a-zA-Z]{2,3}\Z/i
  validates :email, presence: true, length: {minimum: 10, maximum: 80}, format: EMAIL
end
បន្ទាប់មកយើងត្រូវការបង្កើត StaticPages controler មួយដើម្បីបម្រើជាទំព័រដើមសម្រាប់ការដំណើរការAngularJs។
$ rails g controller StaticPages Home
resources :contacts
root "static_pages#home"
ក្រោយពីការដំឡើងកម្មវីធីRailsបានជោគជ័យ ជាបន្ទាប់នេះយើងធ្វើការដំឡើង AngularJsទៅក្នុងកម្មវីធីRails របស់យើង។ ដើម្បីជាជំនួយឲ្យការគ្រប់គ្រងកូដមានភាពងាយស្រួលនោះយើងគួររៀបចំទីតាំងសម្រាប់រក្សាទុកកួដAngularJSដូចខាងក្រោម៖
app-> assets->javascripts->
- lib ជាថតឯកសារសម្រាប់ផ្ទុកAngularJs file libary ដែលយើងយកមកប្រើប្រាស់នូក្នុងគម្រោងរបស់យើង
- directives សម្រាប់ផ្ទុកឯកសារកូដដែលទាក់ទងទៅនឹង directives
- controllers សម្រាប់ផ្ទុកឯកសារកូដដែលទាក់ទងទៅនឹង controllers
- services សម្រាប់ផ្ទុកឯកសារកូដដែលទាក់ទងទៅនឹង services និង factory
- filter សម្រាប់ផ្ទុកឯកសារកូដដែលទាក់ទងទៅនឹង filter
public->templates សម្រាប់ផ្ទុក templatesទាំងអស់ដែលប្រើប្រាស់នៅក្នុងកម្មវីធីនេះ។
spec->javascripts
- controllers សម្រាប់តិស្ត controllers
- directives សម្រាប់តិស្ត directives
- services សម្រាប់តិស្ត services
- ......
សម្រាប់គម្រោងកម្មវីធីនេះយើងត្រូវការឯកសារAngularJs មួយចំនួនដូចជា៖
- angularjs.js
- angular-route.js
- angular-resource.js
- angular-animate.js
- angular-mocks.js
ហើយឯកសារទាំនោះអាចរកបានតាមតណរនេះhttps://code.angularjs.org/1.4.3/ ហើយក្រោយពីការរទាញយកបានជោគជ័យ យើងធ្វើការថតចម្លងឯកសារទាំងនោះទៅក្នុងថតឯកសារ app->javascripts->lib
បន្ទាប់មកដើម្បីធ្វើឲ្យកម្មវិធីអាចការប្រើប្រាស់AngularJsនោះយើងត្រូវបន្ថែមកូដទៅក្នុង application.js ដូចខាងក្រោម៖
// This is a manifest file that'll be compiled into application.js, which will include all the files
// listed below.
//
// Any JavaScript/Coffee file within this directory, lib/assets/javascripts, vendor/assets/javascripts,
// or any plugin's vendor/assets/javascripts directory can be referenced here using a relative path.
//
// It's not advisable to add code directly here, but if you do, it'll appear at the bottom of the
// compiled file.
//
// Read Sprockets README (https://github.com/rails/sprockets#sprockets-directives) for details
// about supported directives.
//
//= require jquery
//= require jquery_ujs
//= require bootstrap
//= require turbolinks
//= require lib/angular
//= require_tree .

$(document).on("page:load", function() {
  return $("[ng-app]").each(function() {
    var module;
    module = $(this).attr("ng-app");
    return angular.bootstrap(this, module);
  });
});
បន្ទាប់មកដាក់AngularJs Appទៅក្នុងកម្មីធីរបស់យើងដោយធ្វើការបន្ថែមកូដទៅលើឯកសារ application.html.erb ដូចខាងក្រោម៖
<!DOCTYPE html>
<html ng-app="AngularDemo">
<head>
  <base href="/">
  <title>AngularRails</title>
  <%= stylesheet_link_tag    "application", media: "all", "data-turbolinks-track" => true %>
  <%= javascript_include_tag "application", "data-turbolinks-track" => true %>
  <%= csrf_meta_tags %>
</head>
<body>
  <div class="navbar navbar-inverse" ng-controller="NavController">
  <div class="navbar-header">
    <ul class="nav navbar-nav">
      <li class="{{home}}"><a href="/">Home</a></li>
      <li class="{{help}}"><a href="/help">Help</a></li>
      <li class="{{about}}"><a href="/about">About</a></li>
    </ul></div>
  </div>
  <div ng-view>
    <%= yield %>
  </div>
</body>
</html>
បន្ទាប់បង្កើត ឯកសារ app.js នៅក្នុងទីតាំង app/javascripts/ ហើយសរសេរកូដទៅក្នុងឯកសារដូចខាងក្រោមនេះ៖
//app/assets/javascripts/app.js
myApp = angular.module("AngularDemo", ["ngAnimate","ngRoute", "ngResource"]);
myApp.config(function($routeProvider, $locationProvider){
  $locationProvider.html5Mode(true);
  $routeProvider
  .when("/", {
    templateUrl: "templates/home.html",
    controller: "ContactController"
  })
  .when("/help",{
    template: "<center><h1>This is help</h1></center>"
  })
  .when("/about",{
    template: "<center><h1>This is About Page</h1></center>"
  })
  .otherwise({ redirectTo: '/' });
});
សម្រាប់ការបង្ហាញ menu bar
//app/assets/javascripts/controllers/nav-controller.js
angular.module("AngularDemo").controller("NavController", [ "$scope", function ( $scope) {
  $scope.home = "active";
  $scope.help = "";
  $scope.about = "";
  $scope.$on('$locationChangeSuccess',
    function(evt, next, current) {
      // console.log(evt);
    $scope.reset();
    if(next.match("/help")){
      $scope.help = "active";
    }else if(next.match("/about")){
      $scope.about = "active";
    }else{
      $scope.home = "active";
    }
  });
  $scope.reset = function(){
    $scope.home = "";
    $scope.help = "";
    $scope.about = "";
  }
}]);
បន្ទាប់មកយើងអាចអាចធ្វើការបង្កើតឯកសារ home.html នៅក្នុងទីតាំង public/templates បន្ទាប់មកសរសេរកូដដូចខាងក្រោមនេះដើម្បីតិស្តថាតើAngularJSដំណើរការឫទេ។
1+2 = {{1+2}}
ក្រោយពីការដំឡើង AngularJsបានដោយជោគជ័យជំឈានបន្ទាប់នេះគឺជាការដំឡើង test unit ដើម្បីធ្វើការតិស្តកូដ AngularJs របស់ពួកយើង។ ដោយជាដំបូងយើងត្រូវបង្កើតឯកសារមួយដើម្បីកំណត់ការតិស្តរបស់យើងដែលឯកាសរដែលត្រូវបង្កើតនោះគឺស្ថិតនៅក្រោម project rootនិងមានឈ្មោះangularjs-demo.conf.js ហើយងកូដដែលត្រូវសរសេរមានដូចខាងក្រោម៖
// Karma configuration
// Generated on Thu Jul 16 2015 10:54:01 GMT+0700 (ICT)

module.exports = function(config) {
  config.set({

    // base path that will be used to resolve all patterns (eg. files, exclude)
    basePath: '',

    // frameworks to use
    // available frameworks: https://npmjs.org/browse/keyword/karma-adapter
    frameworks: ['jasmine'],

    // list of files / patterns to load in the browser
    files: [
        'app/assets/javascripts/lib/angular.js',
        'app/assets/javascripts/lib/angular-mocks.js',
        'app/assets/javascripts/lib/angular-route.js',
        'app/assets/javascripts/lib/angular-animate.js',
        'app/assets/javascripts/lib/angular-resource.js',
        'app/assets/javascripts/app.js',
        'app/assets/javascripts/controllers/*.js',
        'app/assets/javascripts/directives/*.js',
        'app/assets/javascripts/services/*.js',
        'app/assets/javascripts/filters/*.js',

        'spec/javascripts/unit/**/*.js'
    ],

    // list of files to exclude
    exclude: [
    ],

    // preprocess matching files before serving them to the browser
    // available preprocessors: https://npmjs.org/browse/keyword/karma-preprocessor
    preprocessors: {
    },

    // test results reporter to use
    // possible values: 'dots', 'progress'
    // available reporters: https://npmjs.org/browse/keyword/karma-reporter
    reporters: ['progress'],

    // web server port
    port: 9876,

    // enable / disable colors in the output (reporters and logs)
    colors: true,

    // level of logging
    // possible values: config.LOG_DISABLE || config.LOG_ERROR || config.LOG_WARN || config.LOG_INFO || config.LOG_DEBUG
    logLevel: config.LOG_INFO,

    // enable / disable watching file and executing tests whenever any file changes
    autoWatch: true,

    // start these browsers
    // available browser launchers: https://npmjs.org/browse/keyword/karma-launcher
    browsers: ['Chrome'],

    // Continuous Integration mode
    // if true, Karma captures browsers, runs the tests and exits
    singleRun: false
  })
}
បន្ទាប់មកនេះយើងចាប់ផ្តើមសរសេរកូដតិស្តទៅលើ AngularJs ជាលើកដំបូង៖
//spec/javascripts/appSpec.js
describe("Spec Route Test", function(){
  var location, route, rootScope;
  beforeEach(module("AngularDemo"));
  beforeEach(inject(function($location, $route, $rootScope){
    location = $location;
    route = $route;
    rootScope = $rootScope;
  }));

  describe('"/" path', function(){
    beforeEach(inject(function($httpBackend){
      $httpBackend.expectGET("templates/home.html").respond(200);
    }))
    it('should  load right controller with path "/" ', function(){
      location.path("/");
      rootScope.$digest();
      expect(route.current.controller).toBe ("ContactController");
    });

    it('should redirect to / and call "ContactController" when user type wrong path', function(){
      location.path("/this/the/wrong/path");
      rootScope.$digest();
      expect(route.current.controller).toBe ("ContactController");
    });
  });
});
//spec/javascripts/unit/controllers/nav-controller-spec.js
describe('Spec NavController Test', function(){
  var scope, controller;
  beforeEach(module("AngularDemo"));
  beforeEach(inject(function($rootScope, $controller){
    scope = $rootScope.$new();
    controller = $controller("NavController", {$scope: scope});
  }));

  it('should define home help about', function(){
    expect(scope.home).toBeDefined();
    expect(scope.help).toBeDefined();
    expect(scope.about).toBeDefined();
  });

  it('should clear all value when function reset was trigger', function(){
    scope.home = "active";
    scope.help = "active";
    scope.about = "active";
    scope.reset();
    expect(scope.home).toEqual("");
    expect(scope.help).toEqual("");
    expect(scope.about).toEqual("");
  });
});
បន្ទាប់មកចាប់ផ្តើមដំណើរការតិស្តរបស់យើងដោយដំឡើងនិងដំណើរការម៉ាស៊ីនម៉េ karma៖
$ sudo apt-get install nodejs-legacy npm
$ sudo npm install -g karma
$ sudo npm install -g karma-ng-scenario
$ sudo npm install -g karma-jasmine karma-chrome-launcher --save-dev
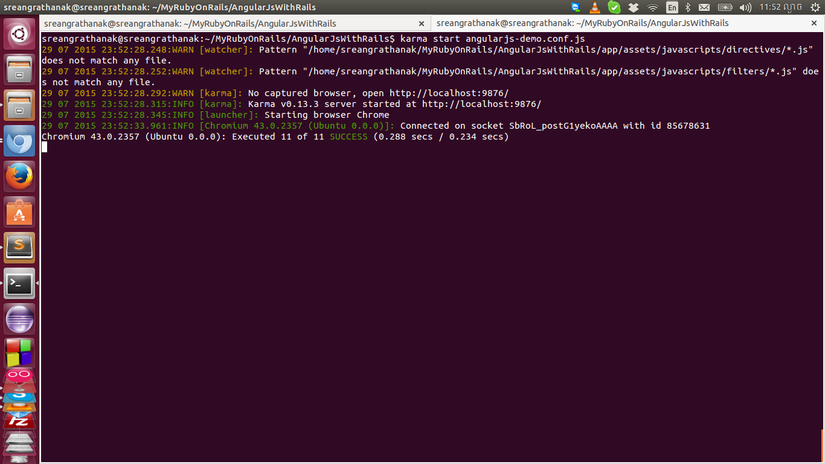
$ karma start angularjs-demo.conf.js
ក្រោយពីការតិស្តខាងលើទទួលបានជោគជ័យ។ យើងចាបផ្ដើមបន្តការអនុវត្តរបស់យើងបន្តមកទៀត។ ដើម្បីឲ្យAngularJs អាចធ្វើការជាមួយម៉ាស៊ីនម៉េបានយើងត្រូវការបង្កើត controller មួយដើម្បីធ្វើការឆ្លើយតបទៅនឹងសំណើររបស់ Angularjs
$rails g controller contacts
ហើយនៅក្នុង contcts_controller.rb យើងសរសេរកូដមួយំនួនើម្បីធ្វើការឆ្លើតបទៅកាន់រាល់សំណើររបស់ client៖
class ContactsController < ApplicationController

  def index
    render json: Contact.all
  end

  def create
    @contact = Contact.new contact_params
    if @contact.save
      render json: @contact
    else
      render json: {status: 404, message: @contact.errors.full_messages}
    end
  end

  def destroy
    @contact = Contact.find params[:id]
    @contact.destroy
    render json: @contact
  end

  private
  def contact_params
    params.require(:contact).permit :id, :name, :email, :description
  end
end
ហើយដើម្បីអនុញាតអ្នកប្រើប្រាស់អាចធ្វើការបង្កើតរបស់លុបនូវព័តមានបាននៅក្នុង AngularJs នោះយើងត្រូវបន្ថែមកូដទៅក្នុង application_controller.rb ដូចខាងក្រោម៖
after_filter :set_csrf_cookie_for_ng
  def set_csrf_cookie_for_ng
    cookies['XSRF-TOKEN'] = form_authenticity_token if protect_against_forgery?
  end

  protected
    def verified_request?
      super || valid_authenticity_token?(session, request.headers['X-XSRF-TOKEN'])
    end
យើងក៏ត្រូវបន្ថែម resources :contacts ទៅក្នុង routes.rb
#config/routes.rb
.....
resources :contacts
ហើយដើម្បីមានទិន្នន័យមួយចំនួនមកធ្វើការប្រើប្រាស់នោះយើងត្រូវការបង្កើតពត័មានមួយចំនួនដើម្បីធ្វើការប្រើប្រាស់នក្នុងកម្មវិធី។
#db/seed
10.times do |n|
  Contact.create name: "Name #{n}", email: "sss_#{n}sss@kuku.ca",
                  description: "Lorem ipsum dolor sit amet,
                              consectetur adipisicing elit. Corrupti reiciendis
                              aspernatur veniam officiis adipisci voluptatem
                              eius odio error, nihil quam quisquam illo in modi
                              id alias, expedita aliquam iusto omnis."
end
នៅក្នុង app/assets/javascripts/services/ បង្កើតឯកសារឈ្មោះ contact-factory.jsដើម្បីអនុញ្ញាតឲ្យអ្នកប្រើប្រាស់អាចធ្វើការប្រើប្រាស់ដើម្បីដាក់សំណើរទៅកាន់ម៉ាស៊ីនម៉េ។
//app/assets/javascripts/services/contact-factory.js
angular.module("AngularDemo").factory('Contact', ["$http", function ($http) {
  var contact_obj={
    contact_datas: []
  };

  contact_obj.getAll = function(){
    return $http.get("/contacts.json").success(function(data){
      angular.copy(data, contact_obj.contact_datas);
    });
  }

  contact_obj.create = function(value){
    return $http.post("/contacts.json", value).success(function(data){
      console.log(data);
      if(data.status != 404){
        contact_obj.contact_datas.unshift(data);
      }
    });
  }

  contact_obj.destroy = function(id){
    return $http.delete("/contacts/" + id + ".json").success(function(data){
      var new_arr = contact_obj.contact_datas.filter(function(val){
        return val["id"] !== id;
      });
      angular.copy(new_arr, contact_obj.contact_datas);
    });
  }

  return contact_obj;
}]);
នៅក្នុង app.js យើងធ្វើការកែប្រែកូដមួយចំនួនដូចខាងក្រោម៖
//app/assets/javascripts/app.js
myApp = angular.module("AngularDemo", ["ngAnimate","ngRoute", "ngResource"]);

myApp.config(function($routeProvider, $locationProvider){
  $locationProvider.html5Mode(true);
  $routeProvider
  .when("/", {
    templateUrl: "templates/home.html",
    controller: "ContactController",
    resolve: {
      postPromise: ["Contact", function(Contact){
        return Contact.getAll();
      }]
    }
  })
  .when("/help",{
    template: "<center><h1>This is help</h1></center>"
  })
  .when("/about",{
    template: "<center><h1>This is About Page</h1></center>"
  })
  .otherwise({ redirectTo: '/' });
});
and in our ContactController we need to make some change ហើយនៅក្នុង ContactController យើងក៏ត្រូវធ្វើការផ្លាស់ផ្តូរមួយចំនួនផងដែរ៖
//app/assets/javascripts/controllers/contact-controller.js
angular.module("AngularDemo").controller("ContactController", [ "$scope", "Contact", function ( $scope, Contact) {
  $scope.contacts = [];
  $scope.contacts = Contact.contact_datas;
  $scope.contact = {
    name: "",
    email: "",
    description: ""
  }

  $scope.create = function(){
    Contact.create($scope.contact).success(function(){
      $scope.contact = null;
    });
  }

  $scope.delete = function(id){
    Contact.destroy(id);
  }
}]);
ជាចុងក្រោយគឺធ្វើការបន្ថែមកូដមួយចំនួនទៅកាន់ home.html template ដើម្បីអាចឲ្យអ្នកប្រើប្រាស់អាចធ្វើការ បង្ហាញ បន្ថែមឫលុបពត័មានរបស់Contactបាន។
<!--  public/templates/home.html -->
<div class="col-md-4 col-md-offset-4 well">
  <form name="formContact" ng-submit="create()" novalidate >
    <div class="form-group">
      <div class="input-group">
        <label class="input-group-addon" >Name</label>
        <input autofocus="autofocus" class="form-control" type="text" ng-model = "contact.name" name="contact.name" required ng-minlength="5" ng-maxlength="50">

        <div class="input-group-addon" ng-show="formContact['contact.name'].$dirty">
          <i class="fa fa-check" style="color:green" ng-show="formContact['contact.name'].$valid">Ok</i>
          <i class="fa fa-times" style="color:red" ng-show="formContact['contact.name'].$invalid">X</i>
        </div>
      </div>
    </div>
    <div class="form-group">
      <div class="input-group">
        <label class="input-group-addon" >Email</label>
        <input class="form-control" type="email" ng-model = "contact.email" name="contact.email" required
        ng-minlength="10" ng-maxlength="80">

        <div class="input-group-addon" ng-show="formContact['contact.email'].$dirty">
          <i class="fa fa-check" style="color:green" ng-show="formContact['contact.email'].$valid">Ok</i>
          <i class="fa fa-times" style="color:red" ng-show="formContact['contact.email'].$invalid">X</i>
        </div>
      </div>
    </div>

    <div class="form-group">
      <label>Description</label><br>
      <textarea class="form-control" rows= "5" ng-model = "contact.description" name="contact.description" required></textarea>
    </div>
    <div class="actions">
      <input type="submit" name="commit" value="Create Contact" class="btn btn-primary" ng-disabled = "formContact.$invalid">
    </div>
  </form>
</div>
<div class="col-md-12">
  <table class="table">
    <thead>
      <th>Name</th>
      <th>Email</th>
      <th>Description</th>
      <th></th>
    </thead>
    <tbody>
      <tr ng-repeat="contact in contacts">
        <td>{{contact.name}}</td>
        <td>{{contact.email}}</td>
        <td><pre>{{contact.description}}</pre></td>
        <td><a ng-click="delete(contact.id)">delete</a></td>
      </tr>
    </tbody>
  </table>
</div>
ជាចុងក្រោយគឺជាការធ្វើតិស្តទៅលើ Services ដែលបានបង្កើត៖
//spec/javascripts/unit/services/contact-factories-spec.js
describe('Service Contact', function(){
  var scope, contact;
  beforeEach(module("AngularDemo"));
  beforeEach(inject(function(Contact, $rootScope){
    contact = Contact;
    scope = $rootScope.$new();
  }));

  beforeEach(function(){
    contact.contact_datas.push({id: 1, name: "Kuku 1", description: "description 1",
                                email:"sssss1ss@yoyo.com"});
    contact.contact_datas.push({id: 2, name: "Kuku 2", description: "description 2",
                                email:"sssss1ss@yoyo.com"});
    contact.contact_datas.push({id: 3, name: "Kuku 3", description: "description 3",
                                email:"sssss1ss@yoyo.com"});
  });
  describe('get all methods', function(){
    var httpBackend;
    beforeEach(inject(function($httpBackend){
      httpBackend = $httpBackend;
       $httpBackend.whenGET("/contacts.json").respond(200,[
        {
          name: "Name 1",
          description: "rrrrrrr",
          email: "sssss1sssss@yoyo.com"
        },
        {
          name: "Name 2",
          description: "kakakak",
          email: "sssssdddddds@yoyo.com"
        },
        {
          name: "Name 3",
          description: "lalala",
          email: "bababa@yoyo.com"
        }
        ]);
    }));
    it('should get all data form server', function(){
      contact.getAll();
      scope.$digest();
      httpBackend.flush();
      expect(contact.contact_datas.length).toBe(3);
    });
  });

  describe('function create', function(){
    it('should save and add one more colomn', inject(function($httpBackend){
      $httpBackend.whenPOST("/contacts.json").respond(200,
        {
          name: "Sok ka",
          description: "The 4 description",
          email: "saaaa@yoyo.com"
        }
      );
      contact.create({name: "Sok ka", description: "The 4 description",
                      email: "saaaa@yoyo.com"});
      scope.$digest();
      $httpBackend.flush();
      expect(contact.contact_datas.length).toBe(4);
    }));
    it('should not be able to save and or add any data', inject(function($httpBackend){
      $httpBackend.whenPOST("/contacts.json").respond(404,
        {
          "error": "Something wrong"
        }
      );
      contact.create({"description": "Before Create"});
      scope.$digest();
      $httpBackend.flush();
      expect(contact.contact_datas.length).toBe(3);
    }));
  });

  describe('function delete', function(){
    it('should delete one row if successful delete', inject(function($httpBackend){
      $httpBackend.whenDELETE("/contacts/1.json").respond(200,
        {
          "success": "Delete success"
        }
      );
      contact.destroy(1);
      scope.$digest();
      $httpBackend.flush();
      expect(contact.contact_datas.length).toBe(2);
    }));
    it('should delete one row if successful delete', inject(function($httpBackend){
      $httpBackend.whenDELETE("/contacts/1.json").respond(404,
        {
          "error": "Delete fail"
        }
      );
      contact.destroy(1);
      scope.$digest();
      $httpBackend.flush();
      expect(contact.contact_datas.length).toBe(3);
    }));
  });
});
ជាចុងក្រោយយើងខ្ញុំ សង្ឃឹមថាអត្ថបទនេះអាចជាឯកសារជំនួយក្នុងការកសាងកម្មវិធីរបស់លោកអ្នកនាពេលអនាគត។
សូមអគុណ!
All rights reserved
