Tạo hiệu ứng xem ảnh với UIViewControllerAnimatedTransitioning
Bài đăng này đã không được cập nhật trong 4 năm
Đầu tiên mình sẽ hướng dẫn các bạn tạo hiệu ứng xem ảnh với UIViewControllerAnimatedTransitioning

Bắt đầu thực hiện
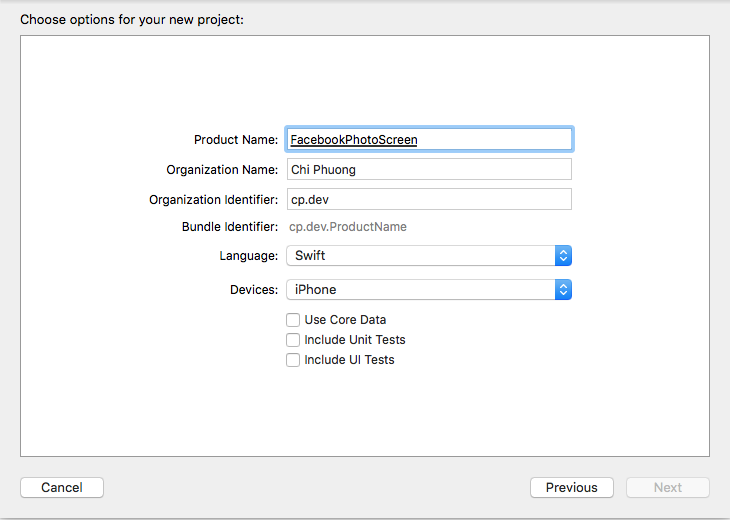
Đầu tiên, tạo 1 project có tên FacebookPhotoScreen và sử dụng ngôn ngữ Swift
PopAnimator
Tạo 1 subclass từ NSObject và conform với UIViewControllerAnimatedTransitioning có tên là PopAnimator. Ta sẽ chỉ quan tâm đến 2 func trong UIViewControllerAnimatedTransitioning :
func transitionDuration(using transitionContext: UIViewControllerContextTransitioning?)-> TimeInterval: Dùng để trả về thời gian cho animationfunc animateTransition(using transitionContext: UIViewControllerContextTransitioning): Tạo hiệu ứng khi present và dismiss cho view controller
class PopAnimator: NSObject, UIViewControllerAnimatedTransitioning {

  let duration:TimeInterval  = 0.5 // Thời gian cho animation
  var presenting  = true //Check trạng thái của viewcontroller đang present hoặc dismiss
  var originFrame = CGRect.zero // Lưu lại vị trí frame của view khi present
  var presentCompletionAnimation: ((Bool) -> Void)? // Closure được gọi khi present thành công
  var dismissCompletionAnimation: ((Bool) -> Void)? // Closure được gọi khi dismiss thành công


  func transitionDuration(using transitionContext: UIViewControllerContextTransitioning?)-> TimeInterval {
    return duration
  }

  func animateTransition(using transitionContext: UIViewControllerContextTransitioning) {

    let containerView = transitionContext.containerView // View sẽ chứa khi có animation

    // herbView sẽ kiểm tra biến presenting để lấy view sẽ dùng để animation.Nếu presenting = true thì sẽ lấy view controller present.Và ngược lại nếu presenting = false thì sẽ lấy view bị dismiss xuống
    let herbView = presenting ? transitionContext.viewController(forKey: UITransitionContextViewControllerKey.to)!.view! : transitionContext.view(forKey: UITransitionContextViewKey.from)!.viewWithTag(100)!


    herbView.frame =  presenting ? UIScreen.main.bounds :  herbView.frame

    let initialFrame = presenting ? originFrame : UIScreen.main.bounds
    let finalFrame = presenting ? UIScreen.main.bounds : originFrame

    // Tính toán xScale và yScale cho hearView
    let xScaleFactor = presenting ?
      initialFrame.width / finalFrame.width :
      finalFrame.width / initialFrame.width

    let yScaleFactor = presenting ?
      initialFrame.height / finalFrame.height :
      finalFrame.height / initialFrame.height

    // Tạo 1 biến Transform cho xScale và yScale
    let scaleTransform = CGAffineTransform(scaleX: xScaleFactor, y: yScaleFactor)

    // Khi presenting = true thì ta set transform lại cho herbView để cho herbView bằng với kích thước mà cell ta sẽ touch vào
    if presenting {
      herbView.transform = scaleTransform
      herbView.center = CGPoint(
        x: initialFrame.midX,
        y: initialFrame.midY)
      herbView.clipsToBounds = true
    }

    if presenting {
        containerView.addSubview(transitionContext.view(forKey: UITransitionContextViewKey.to)!)
    }

    containerView.bringSubview(toFront: herbView)

    // Tạo hiệu ứng animation với spring và velocity của UIView
    UIView.animate(withDuration: duration, delay:0.0,
      usingSpringWithDamping: 0.8,
      initialSpringVelocity: 0.5,
      options: [],
      animations: {
        if self.presenting {
            herbView.transform = self.presenting ? CGAffineTransform(scaleX: 1, y: 1) : scaleTransform
        } else {
            herbView.frame = finalFrame
        }
        herbView.center = CGPoint(x: finalFrame.midX,y: finalFrame.midY)

      }, completion:{_ in
        transitionContext.completeTransition(true)
        if self.presenting {
            herbView.frame = UIScreen.main.bounds
        }
        self.presenting ? self.presentCompletionAnimation?(true) : self.dismissCompletionAnimation?(true)
    })

  }

}
Trong đoạn code trên các bạn sẽ thấy mã lệnh transitionContext.view(forKey: UITransitionContextViewKey.from)!.viewWithTag(100)!. Tại vì sao phải lấy view với tag là 100 thì mình sẽ nói ở phần phía dưới. Bây giờ , chúng ta đã xong phần animation khi present và dismiss cho view controller
ListPhotoViewController
- Ở
ListPhotoViewControllerchỉ cần 1 collection view ở file xib hoặc storyboard. Và kéoIBOutletvào view controller
class ListPhotoViewController: UIViewController {

    @IBOutlet private var collectionView: UICollectionView!
    let transition = PopAnimator() // Khởi tạo biến transition với PopAnimator mà đã tạo ở phần trên
    var selectCell: UIView! // Nhận giá trị của cell khi được select
    let images = [UIImage(named: "1"), UIImage(named: "2"), UIImage(named: "3"), UIImage(named: "4"), UIImage(named: "5"), UIImage(named: "6")] // Mảng các hình ảnh sẽ show lên collection view

    override func viewDidLoad() {
        super.viewDidLoad()
        // Gán delegate và datasource cho collection view
        collectionView.delegate = self
        collectionView.dataSource = self

        // Đăng ký cell cho collection view
        collectionView.register(ImageCell.self, forCellWithReuseIdentifier: "Cell")
    }

}
Sử dụng extension để conform cho UICollectionViewDataSource và UICollectionViewDelegate
extension ListPhotoViewController: UICollectionViewDataSource {
    func collectionView(_ collectionView: UICollectionView, cellForItemAt indexPath: IndexPath) -> UICollectionViewCell {
        guard let cell = collectionView.dequeueReusableCell(withReuseIdentifier: "Cell", for: indexPath) as? ImageCell else {
            fatalError("You don't register cell")
        }
        // Gán image vào cho cell
        cell.image = images[index]
        return cell
    }

    func collectionView(_ collectionView: UICollectionView, numberOfItemsInSection section: Int) -> Int {
        return images.count
    }
}

extension ListPhotoViewController: UICollectionViewDelegate {
    func collectionView(_ collectionView: UICollectionView, didSelectItemAt indexPath: IndexPath) {
        // Gán cell được select vào cho selectCell
        selectCell = collectionView.cellForItem(at: indexPath)
        // Ẩn cell được select đi để tạo cho ngừoi dùng có cảm giác là cell này đã được phóng to lên khi present photo detail
        selectCell.isHidden = true
        // Khởi tạo photoDetail và gán image và transitioningDelegate
        let photoDetail = PhotoDetailViewController(nibName: "PhotoDetailViewController", bundle: nil)
        photoDetail.image = images[indexPath.row]
        photoDetail.transitioningDelegate = self
        present(photoDetail, animated: true, completion: nil)
    }
}
Sau khi đã conform xong delegate và datasource thì tiếp tục với UIViewControllerTransitioningDelegate. Đây là phần quan trọng để khi bạn muốn custom cho việc present/dismiss view controller. Khi bạn present 1 controller thì UIKit sẽ tự động gọi đến thuộc tính transitioningDelegate trong view controller để hiện thị animation cho nó.Nếu bạn ko gán thì mặc định UIKit sẽ dùng kiểu default.Các bạn có thể đọc thêm về UIViewControllerTransitioningDelegate ở đây. Hiện tại, chỉ cần quan đến 3 func chính là:
swift func animationController(forDismissed dismissed: UIViewController) -> UIViewControllerAnimatedTransitioning?Trả về cho delegate 1 transitioning khi dismiss view controllerswift func animationController(forPresented presented: UIViewController, presenting: UIViewController, source: UIViewController) -> UIViewControllerAnimatedTransitioning?Trả về cho delegate 1 transitioning khi present view controllerswift func presentationControllerForPresentedViewController(presented: UIViewController, presentingViewController presenting: UIViewController!, sourceViewController source: UIViewController) -> UIPresentationController?Thông báo cho delegate về việc phân cấp khi present view controller
extension ListPhotoViewController: UIViewControllerTransitioningDelegate {

    func animationController(forDismissed dismissed: UIViewController) -> UIViewControllerAnimatedTransitioning? {
        transition.presenting = false
        transition.dismissCompletionAnimation = {(completed) in
            self.selectCell.isHidden = false
        }
        return transition
    }

    func animationController(forPresented presented: UIViewController, presenting: UIViewController, source: UIViewController) -> UIViewControllerAnimatedTransitioning? {

        transition.originFrame = selectCell!.superview!.convert(selectCell.frame, to: self.view)
        transition.presenting = true
        return transition
    }

    func presentationControllerForPresentedViewController(presented: UIViewController, presentingViewController presenting: UIViewController!, sourceViewController source: UIViewController) -> UIPresentationController? {
        return UIPresentationController(presentedViewController: presented, presenting: presenting)
    }
}
Như vậy chúng ta đã chuẩn bị xong mọi việc cho class ListPhotoViewController. Tiếp theo sẽ qua phần PhotoDetailViewController
PhotoDetailViewController
Yêu cầu của màn hình này bao gồm:
- Zoom out và zoom in photo ( Sử dụng
UIScrollView) - Bắt sự kiện di chuyển ngón tay để di chuyển photo ( Sử dụng
UIPanGestureRecognizer)
Mình sẽ nói lại phần trên vì sao phải sử dụng view với tag là 100. Khi dismiss view controller, transitioning delegate sẽ gọi về func animationController(forDismissed dismissed: UIViewController) -> UIViewControllerAnimatedTransitioning? khi đó trong PopAnimator sẽ get lấy image view trong PhotoDetailViewController và scale lại về vị trí select cell. Lúc đó sẽ cho ngừoi dùng có cảm giác là image được thu nhỏ lại về ví trí trước.
        panImageView = UIImageView(image: self.image)
        guard let image = image else {
            return
        }
        let width =   view.bounds.width
        let height = (image.size.height * width) / image.size.width
        panImageView.frame = CGRect(x: 0, y: 0, width: width, height: height)
        panImageView.contentMode = UIViewContentMode.scaleAspectFill
        panImageView.tag = 100 //Add tag for image view. When controller dismissed then controller transition will get image view by tag and show animation
        panImageView.clipsToBounds = true
Bắt tay vào handle cho sự kiện di chuyển image nào 
    func actionPanImageView(pan: UIPanGestureRecognizer) {
        switch pan.state {
        case .began:
            isAction = true
            startPoint = pan.location(in: self.view) // Gán vị trí bắt đầu khi chạm vào màn hình
            scrollView.zoomScale = 1
            scrollView.isHidden = true
            panImageView.center = view.center
            view.addSubview(panImageView) // Add pan image view vào view chính và dùng nó để di chuyển theo direction của ngón tay
            break
        case .changed:
            let updatePoint = pan.location(in: view)
            let dy = abs(startPoint.y - updatePoint.y) // Tính khoảng cách theo chiều dọc giữa vị trí ngón tay hiện tay và vị trí bắt đầu
            let dx = abs(startPoint.x - updatePoint.x) // Tính khoảng cách theo chiều ngang giữa vị trí ngón tay hiện tay và vị trí bắt đầu
            var scale = updatePoint.y > startPoint.y ? startPoint.y/updatePoint.y : updatePoint.y/startPoint.y // Tính scale theo y
            scale = scale > 0.6 ? scale : 0.6
            //Update lại vị trí của pan image view và transform scale
            let y = updatePoint.y > startPoint.y ? center.y + dy : center.y - dy
            let x = updatePoint.x > startPoint.x ? center.x + dx : center.x - dx
            panImageView.transform = CGAffineTransform(scaleX: scale, y: scale)
            panImageView.center = CGPoint(x: x, y: y)
            bgView.alpha = scale
            break
        case .ended:
            let updatePoint = pan.location(in: self.view)
            let distanceY = updatePoint.y > startPoint.y ? updatePoint.y - startPoint.y : startPoint.y - updatePoint.y
            if distanceY > 70 {
                bgView.alpha = 0
                panImageView.contentMode = .scaleAspectFill
                dismiss(animated: true, completion: nil)
            } else {
                UIView.animate(withDuration: 0.5, animations: {
                    self.panImageView.transform = CGAffineTransform(scaleX: 1, y: 1)
                    self.panImageView.center = self.center
                }, completion: { (completed) in
                     self.scrollView.isHidden = false
                     self.panImageView.removeFromSuperview()
                     self.isAction = false
                })
                bgView.alpha = 1
            }
            break
        default:
            break
        }
    }
Kết luận
Mình đã hướng dẫn các bạn làm 1 hiệu ứng xem photo đơn giản sử dụng UIViewControllerAnimatedTransitioning. Các bạn có thể download example tại đây. Cảm ơn các bạn đã đọc bài viết của mình
All rights reserved
