Tạo giao diện bàn phím (Keyboard) trên Android
Bài đăng này đã không được cập nhật trong 8 năm
Trong bài hướng dẫn này, tôi sẽ hướng dẫn các bạn cách tạo một bàn phím ảo của riêng bạn trên Android trên Android Studio. Bàn phím này có thể thay cho bàn phím hệ thống được sử dụng trong bất kỳ ứng dụng nào được cài đặt trên điện thoại mình.
Tạo giao diện cho Bàn phím****
Đầu tiên cần làm là tạo giao diện cho bàn phím của bạn. Tệp sẽ được đặt tên là keyboard_view.xml và sẽ được đặt dưới thư mục res / layout. Layout này giống như một bộ chứa chứa bàn phím tùy chỉnh của bạn. Đối với hướng dẫn của tôi, tôi chỉ sử dụng một bàn phím nhưng bạn có thể thêm các bàn phím khác và hoán đổi chúng trong và ngoài KeyboardView này:
keyboardview.xml
<?xml version="1.0" encoding="utf-8"?>
<android.inputmethodservice.KeyboardView
    xmlns:android="http://schemas.android.com/apk/res/android"
    android:id="@+id/keyboard_view"
    android:layout_width="match_parent"
    android:layout_height="wrap_content"
    android:keyPreviewLayout="@layout/key_preview"
    android:layout_alignParentBottom="true"
    android:background="#E0E0E0"
    />
Lưu ý ở đây là tôi chọn thiết lập nền cụ thể cho bàn phím là #E0E0E0 các bạn có thể thay đổi lại màu nền theo ý thích của các bạn. Hơn nữa, tôi căn chỉnh chế độ xem bàn phím xuống dưới cùng của màn hình theo dòng lệnh android:layout_alignParentBottom="true".
Sau đó, chúng ta có thể tạo tệp tin bố cục key_preview.xml được đặt dưới thư mục res / layout . Bản xem trước chính này là bố cục xuất hiện khi sử dụng sẽ nhấn phím bàn phím. Nó sẽ hiển thị phím được nhấn. Nó có thể hữu ích nếu một số người dùng có ngón tay lớn chẳng hạn.Tôi xác định một nền màu xám nhạt và màu chữ sẽ là màu đen. Kích thước văn bản được đặt là 20sp.
keypreview.xml
<?xml version="1.0" encoding="utf-8"?>
<TextView
    android:layout_marginTop="30dp"
    xmlns:android="http://schemas.android.com/apk/res/android"
    android:layout_width="wrap_content"
    android:padding="5dp"
    android:layout_height="wrap_content"
    android:gravity="center"
    android:background="@android:color/white"
    android:textColor="#000000"
    android:textSize="20sp">
</TextView>
Thêm nội dung cho Bàn phím****
Bây giờ, chúng ta cần phải tạo các tệp XML hỗ trợ cho Bàn phím Hệ thống. Cho điều đó, chúng tôi tạo một tệp number_pad.xml được đặt dưới thư mục res / xml. Tệp này sẽ định nghĩa nội dung của Bàn phím Hệ thống. Đối với hướng dẫn này, tôi chọn hiển thị số và cả hai nút ở dưới cùng: một để "DELETE" và một tên khác là "ENTER" để cho phép người dùng xuống dòng tiếp theo:
number_pad.xml
<?xml version="1.0" encoding="utf-8"?>
<Keyboard xmlns:android="http://schemas.android.com/apk/res/android"
    android:keyWidth="20%p"
    android:horizontalGap="5dp"
    android:verticalGap="5dp"
    android:keyHeight="60dp">

    <Row>
        <Key android:codes="49" android:keyLabel="1" android:keyEdgeFlags="left"/>
        <Key android:codes="50" android:keyLabel="2"/>
        <Key android:codes="51" android:keyLabel="3"/>
        <Key android:codes="52" android:keyLabel="4"/>
        <Key android:codes="53" android:keyLabel="5" android:keyEdgeFlags="right"/>
    </Row>

    <Row>
        <Key android:codes="54" android:keyLabel="6" android:keyEdgeFlags="left"/>
        <Key android:codes="55" android:keyLabel="7"/>
        <Key android:codes="56" android:keyLabel="8"/>
        <Key android:codes="57" android:keyLabel="9"/>
        <Key android:codes="48" android:keyLabel="0" android:keyEdgeFlags="right"/>
    </Row>
    <Row>
        <Key android:codes="-5"
            android:keyLabel="DELETE"
            android:keyWidth="40%p"
            android:keyEdgeFlags="left"
            android:isRepeatable="true"/>
        <Key android:codes="10"
            android:keyLabel="ENTER"
            android:keyWidth="60%p"
            android:keyEdgeFlags="right"/>
    </Row>
</Keyboard>
Sau đó, tôi tạo thêm một tệp method.xml trong thư mục res / xml. Với tập tin này, tôi gửi đến hệ thống các phương thức được nhạp vào.
method.xml
<?xml version="1.0" encoding="utf-8"?>
<input-method xmlns:android="http://schemas.android.com/apk/res/android">
    <subtype android:imeSubtypeMode = "keyboard"/>
</input-method>
Class InputMethodService Tiếp theo thì tôi tạo một class thực hiện InputMethodService từ SDK chuẩn Android có tên là MyInputMethodService . Tất cả các logic của bàn phím được đặt trong lớp đó. Nó xử lý đầu vào nhận được từ bàn phím và gửi nó trên xem đó là nhận được nó như và EditText. Trong phương pháp onKey(), chúng ta chỉ có một hành vi cụ thể cho nút "DELETE". Tôi lấy văn bản đã chọn từ trường hợp InputConnection(). Nếu không có lựa chọn, chúng ta chỉ cần xóa ký tự trước. Nếu không, chúng ta sẽ xóa vùng được chọn. Đối với các phím khác của bàn phím của chúng tôi, chúng ta chỉ cần khai thác text trong char mã chính nhận được đưa nó vào InputConnection(). InputConnection này được sử dụng để gửi đầu vào đến một chế độ xem như và EditText.
/**
 * Created by Tuanlvt on 09/02/2018.
 */

public class MyInputMethodService extends InputMethodService
        implements KeyboardView.OnKeyboardActionListener {

    @Override
    public View onCreateInputView() {
        KeyboardView keyboardView = (KeyboardView) getLayoutInflater().inflate(R.layout.key_board_view,null);
        Keyboard keyboard = new Keyboard(this, R.xml.number_pad);
        keyboardView.setKeyboard(keyboard);
        keyboardView.setOnKeyboardActionListener(this);
        return keyboardView;

    }

    @Override
    public void onPress(int primaryCode) {

    }

    @Override
    public void onRelease(int primaryCode) {

    }

    @Override
    public void onKey(int primaryCode, int[] keyCodes) {
        InputConnection inputConnection = getCurrentInputConnection();
        if (inputConnection !=null){
            switch (primaryCode){
                case Keyboard.KEYCODE_DELETE:
                    CharSequence selectedText = inputConnection.getSelectedText(0);
                    if (TextUtils.isEmpty(selectedText)){
                        inputConnection.deleteSurroundingText(1,0);
                    }else {
                        inputConnection.commitText("",1);
                    }
                    break;
                    default:
                        char code = (char) primaryCode;
                        inputConnection.commitText(String.valueOf(code),1);
            }
        }

    }

    @Override
    public void onText(CharSequence text) {

    }

    @Override
    public void swipeLeft() {

    }

    @Override
    public void swipeRight() {

    }

    @Override
    public void swipeDown() {

    }

    @Override
    public void swipeUp() {
    }
}
Tạo bố cục của ứng dụng****
Để thử Bàn phím Hệ thống thì tôi chỉ cần tạo một bố cục đơn giản cho nó hoạt động EditText được căn giữa trên màn hình là được .Các bạn có thể chỉnh sửa giao diện đó theo cách của cách bạn :
<?xml version="1.0" encoding="utf-8"?>
<android.support.constraint.ConstraintLayout
    xmlns:android="http://schemas.android.com/apk/res/android"
    xmlns:app="http://schemas.android.com/apk/res-auto"
    xmlns:tools="http://schemas.android.com/tools"
    android:layout_width="match_parent"
    android:layout_height="match_parent"
    android:padding="5dp"
    tools:context="com.tuanlvt.demo_keybboard.MainActivity"
    >

    <EditText
        android:layout_width="match_parent"
        android:layout_height="wrap_content"
        android:layout_marginTop="20dp"
        app:layout_constraintBottom_toBottomOf="parent"
        app:layout_constraintLeft_toLeftOf="parent"
        app:layout_constraintRight_toRightOf="parent"
        app:layout_constraintTop_toTopOf="parent"
        tools:ignore="LabelFor,TextFields"
        />

</android.support.constraint.ConstraintLayout>
Tạo một Activity đơn giản****
Mã cho hoạt động chính sẽ khá đơn giản. Chúng ta chỉ cần thiết lập bố cục là layout nội dung: class MainAcitivty
package com.tuanlvt.demo_keybboard;

import android.support.v7.app.AppCompatActivity;
import android.os.Bundle;

public class MainActivity extends AppCompatActivity {

    @Override
    protected void onCreate(Bundle savedInstanceState) {
        super.onCreate(savedInstanceState);
        setContentView(R.layout.activity_main);
    }
}
Sử dụng Bàn Phím****
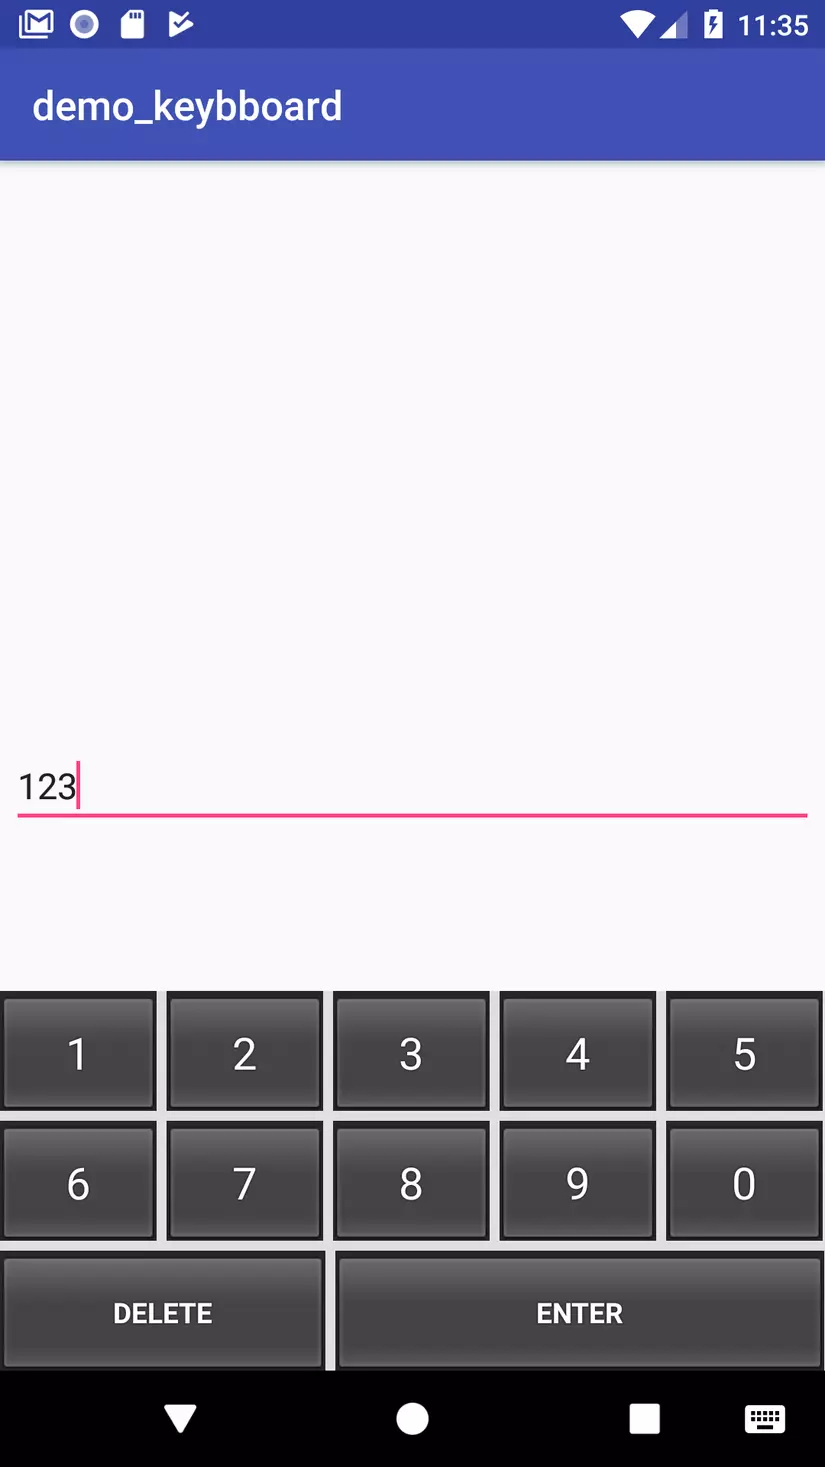
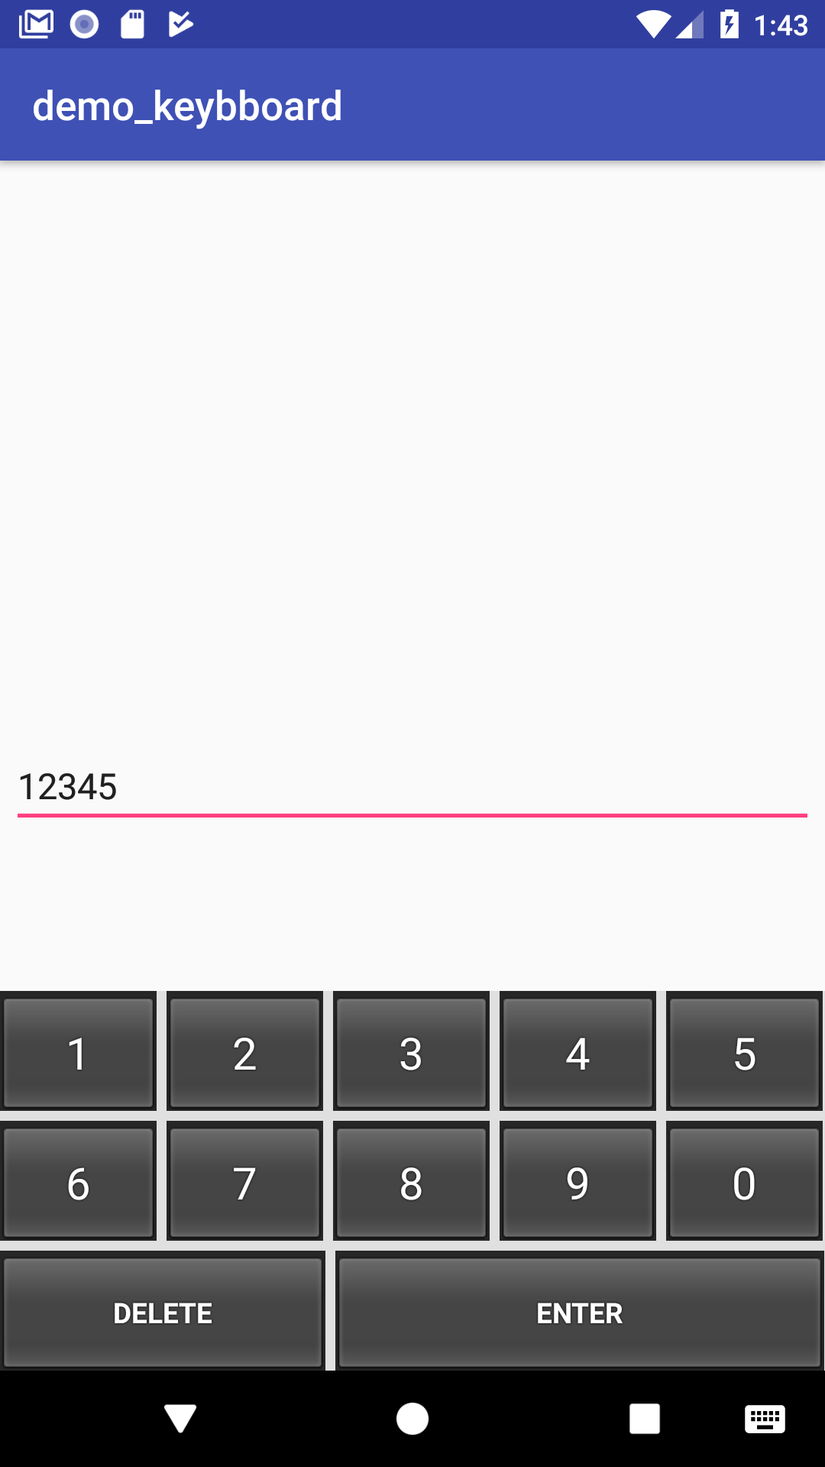
Bây giờ, đã đến lúc sử dụng Bàn phím Hệ thống của tôi. Để thực hiện điều đó, bạn cần kích hoạt nó trên thiết bị của bạn. Đi tới Settings > Langage > Input. Nhấp vào Bàn phím Ảo của bạn và cho phép bàn phím làm mặc định.
Một khi Bàn phím Hệ thống được kích hoạt, bạn chỉ cần chạm vào EditText và bạn có thể sử dụng nó :
 Chúc các bạn thành công!
Nguồn tham khảo: https://android.jlelse.eu/learn-to-create-a-system-keyboard-on-android-95aca21b1e5f
All rights reserved
