Redux, Redux Saga trong React
Bài đăng này đã không được cập nhật trong 7 năm
I. Mở đầu
Chắc không cần mình giới thiệu nhiều về redux và redux-saga nữa, vì nó nhan nhản khắp mọi nơi  nên bây giờ mình chỉ viết về việc tạo một redux và redux-saga theo cách đơn giản và dễ hiểu hơn, có thể bạn sẽ nghĩ mình chém gió nhưng xin lỗi mình không quan tâm đâu =))
II. Cài đặt
- Việc đầu tiên cần làm chính là tạo app, tạo app thế nào và cần những gì tạo app React thì chắc mình cũng không cần nói nữa nên mình sẽ bỏ qua phần này
- Mình sẽ chia ra làm 2 phần chính:
- Phần 1: sử dụng redux
- Phần 2: sử dụng redux-saga
- Để sử dụng được cả redux và redux-saga, ta cần 3 package
- redux
- redux-saga
- react-redux
- Sau khi cài đặt xong, ta bắt đầu vào tìm hiểu redux và redux-saga :v
- À có một lưu ý nhỏ nữa là redux và redux-saga nó liên quan tới nhau nên trước khi bạn tìm hiểu redux-saga thì hãy biết redux chạy như thế nào trước đã, đơn giản là redux-saga chỉ là middleware của redux nên việc bỏ redux để nhảy qua redux-saga là không thể.
III. Sử dụng redux
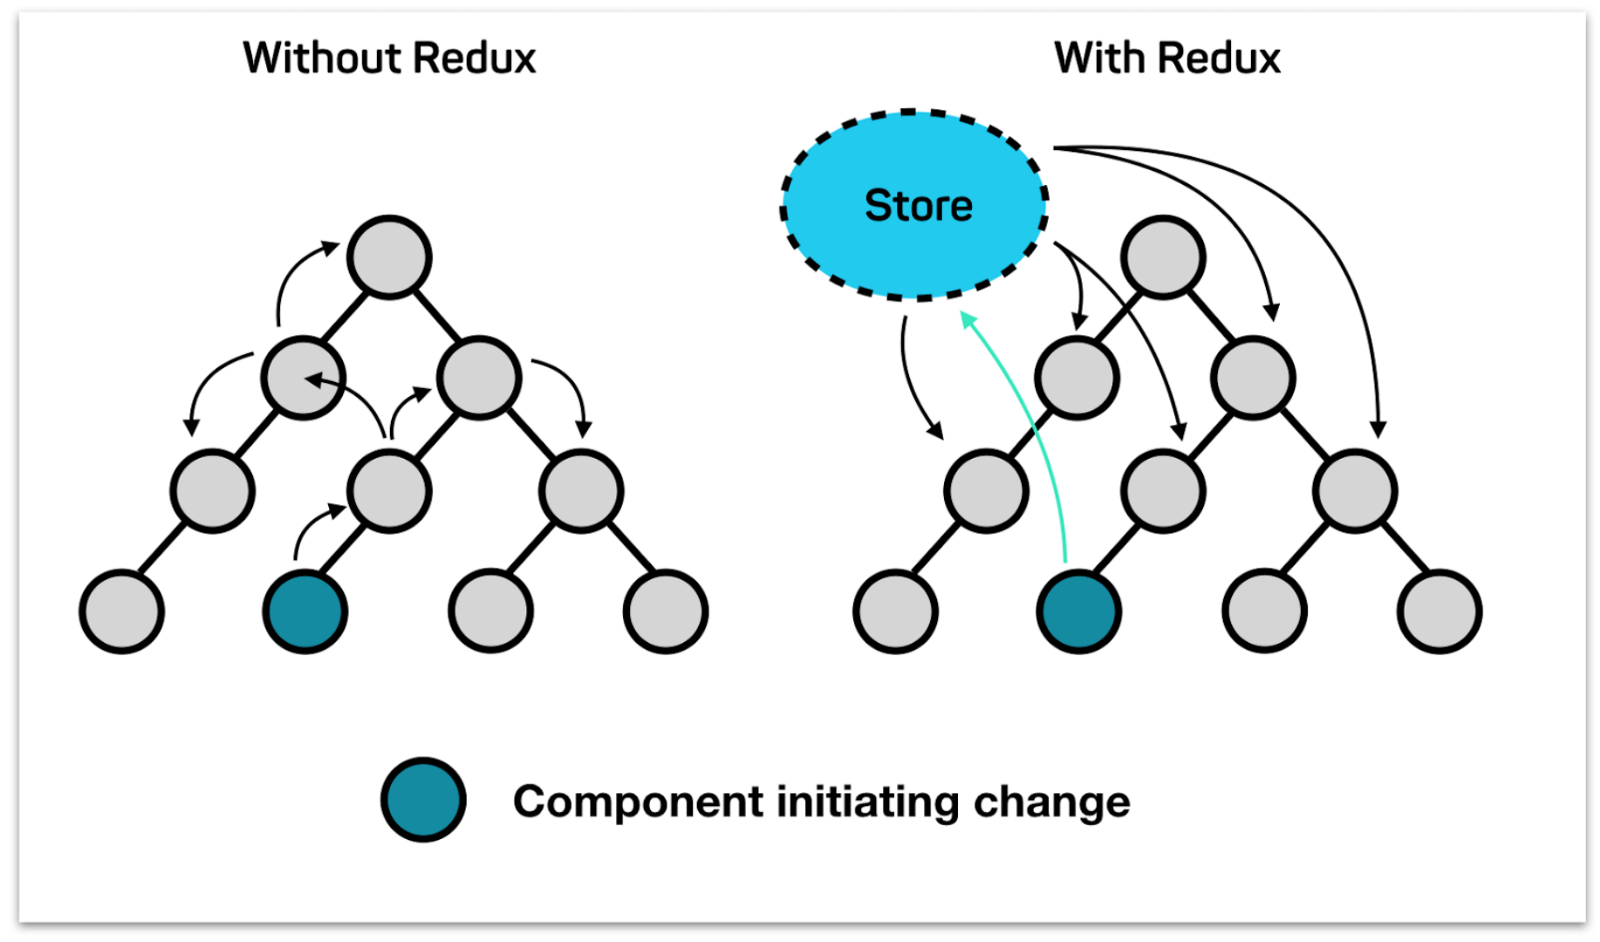
- Đối với redux, điều không thể thiếu chính là store, store giúp lưu trữ lại dữ liệu ở mọi nơi về một nguồn duy nhất, và từ nguồn này ta sẽ điều phối về lại các component
-
Vì vậy ta tạo store cho app của mình
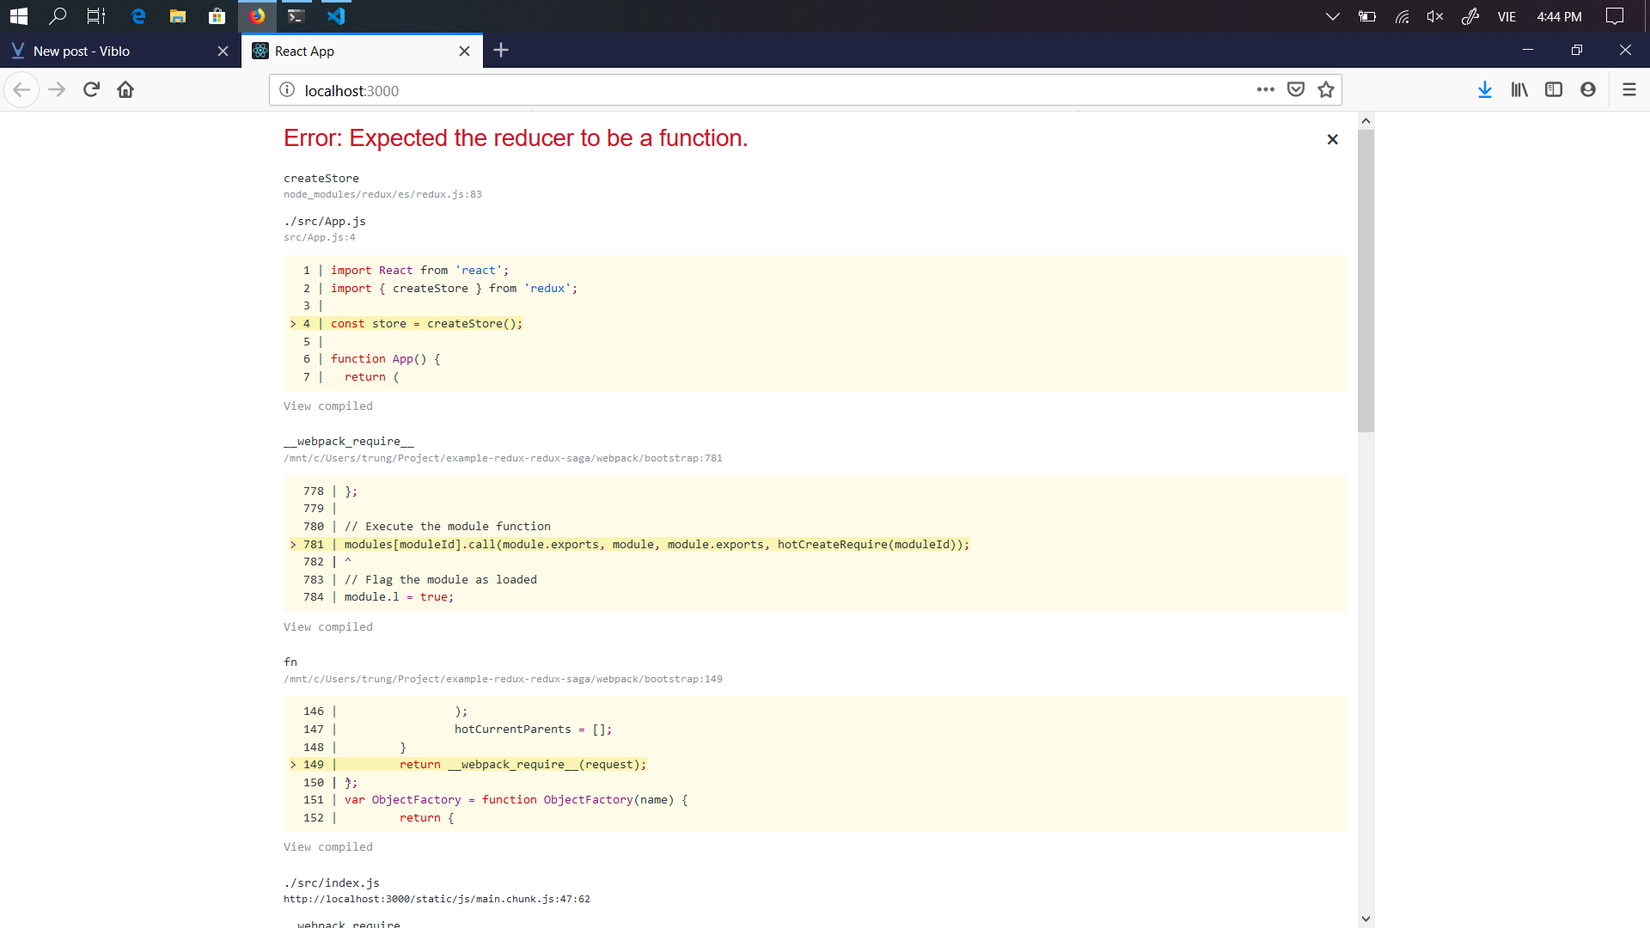
import React from 'react'; import { createStore } from 'redux'; // import createStore const store = createStore(); // Tạo store function App() { return ( <div>Hello!</div> ); } export default App; -
Nhưng sau khi ta chạy app thì lỗi xuất hiện
![]()
-
Lỗi này nói cho bạn cần phải có reducer trong store, vì vậy ta tạo reducer để thỏa mãn yêu cầu :v
const reducer = () => {
  return 'Trung';
}

const store = createStore(reducer);

function App() {
  return (
    <div>Hello! {store.getState()}</div> // Ở đây ta dùng store.getState() để lấy dữ liệu
  );
}

export default App;

- Giả sử ta có 2 hoặc nhiều reducer thì làm cách nào để lưu vào trong store?
const userReducer = () => { return 'Trung'; } const productReducer = () => { return [ {name: 'iPhone XR'}, {name: 'Samsung Galaxy S10'}, ]; } - Để lưu vào trong store với nhiều reducer thì có rất nhiều cách nhưng phổ biến nhất vẫn là dùng combineReducers
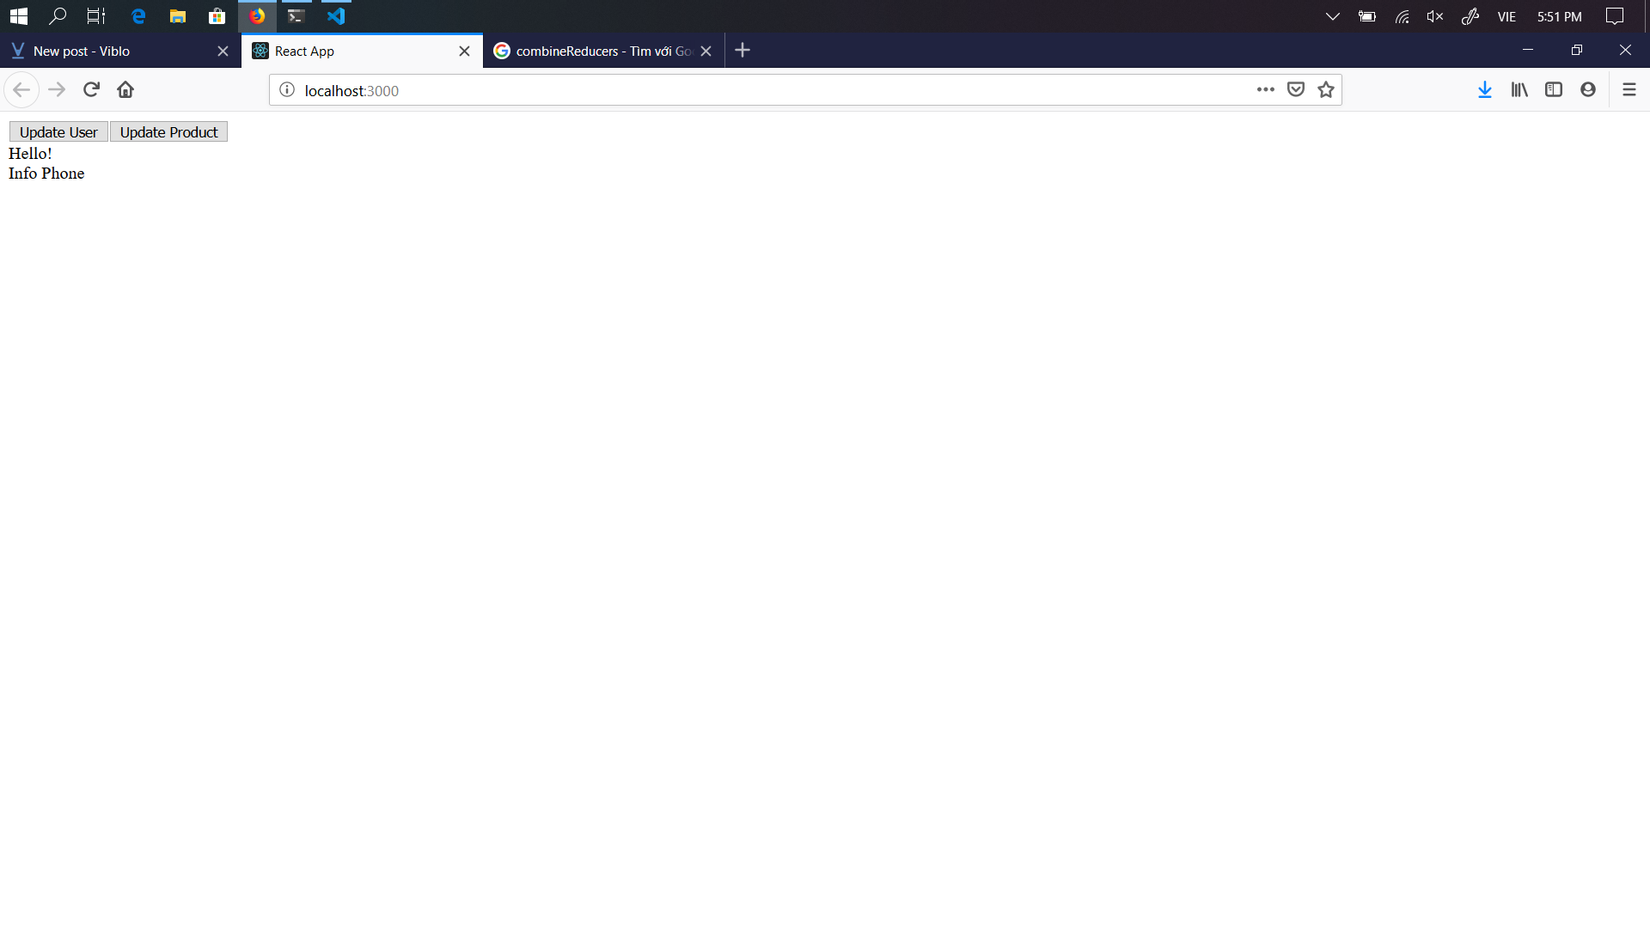
import React from 'react';
// import combineReducers
import { createStore, combineReducers } from 'redux';

const userReducer = () => {
  return 'Trung';
}

const productReducer = () => {
  return [
    {name: 'iPhone XR'},
    {name: 'Samsung Galaxy S10'},
  ];
}

// Tạo một reducer tổng
const allReducers = combineReducers({
  userReducer,
  productReducer,
});

const store = createStore(allReducers);

const renderdataStore = store.getState().productReducer.map((data, index) => {
  return <li key={`store-${index}`}>{data.name}</li>
});

function App() {
  return (
  // Chuyển đổi một chút render dữ liệu để tránh bị lỗi
    <div>
      <div>Hello! {store.getState().userReducer}</div>
      <div>Info Phone</div>
      <ul>
        {renderdataStore}
      </ul>
    </div>
  );
}

export default App;
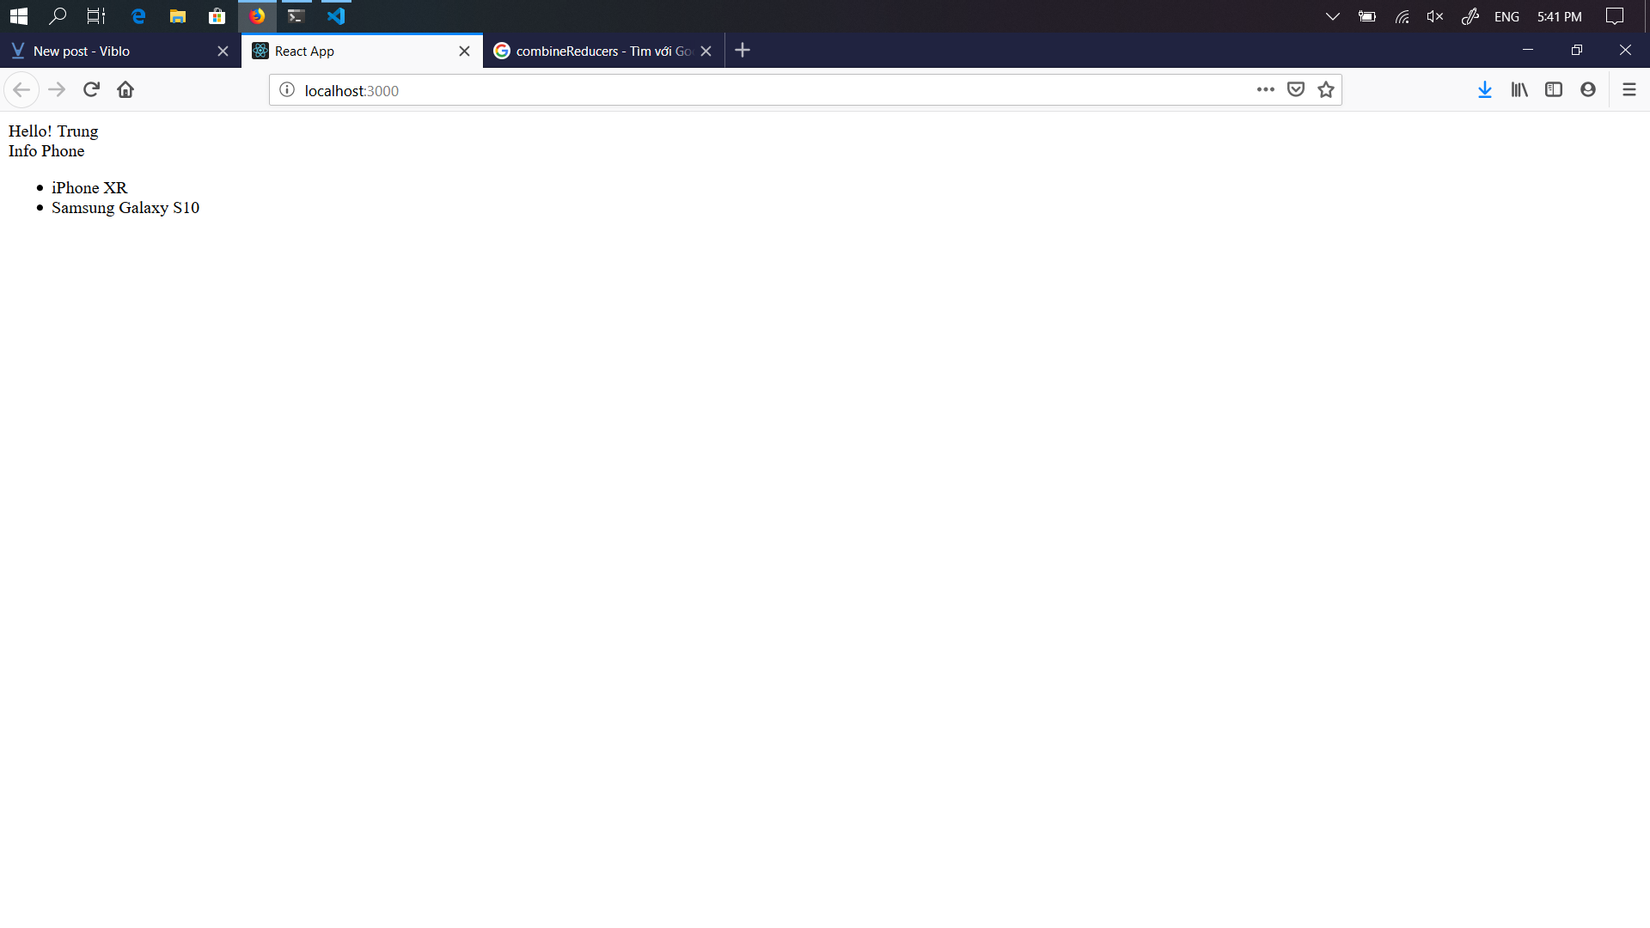
- Đây là đối với dữ liệu luôn luôn xuất hiện, nhưng nếu ta muốn chỉ xuất hiện khi nào ta cần thì phải làm thế nào?
- Lúc này đây, ta sẽ phải tạo ra các action để thực hiện việc này
- Trong redux, thường cấu trúc của action sẽ gồm type và payload
- Và một lưu ý nhỏ nữa là các action này phải là một object
const userAction = { type: 'UPDATE_USER', payload: 'Trung', } const productAction = { type: 'UPDATE_PRODUCT', payload: [ {name: 'iPhone XR'}, {name: 'Samsung Galaxy S10'}, ], } - Biến đổi các reducer để có thể lắng nghe được các action
const userReducer = (state = '', action) => { switch(action.type) { case 'UPDATE_USER': return action.payload; default: return state; } } const productReducer = (state = [], action) => { switch(action.type) { case 'UPDATE_PRODUCT': return action.payload; default: return state; } }![]()
- Hiện tại để reducer lắng nghe được action ta cần dùng dispatch có trong store
store.dispatch(productAction);
store.dispatch(userAction);

// Hoặc

store.dispatch(
  productAction,
  userAction
);
- Tạo hai button để gọi action thực hiện việc render dữ liệu khi nào mình cần
function App() { return ( <div> // Tạo button, lưu ý là onClick chỉ chạy khi trong nó là một function // Nhớ xóa store.dispatch ở trên :v <button onClick={() => store.dispatch(userAction)}>Update User</button> <button onClick={() => store.dispatch(productAction)}>Update Product</button> <div>Hello! {store.getState().userReducer}</div> <div>Info Phone</div> <ul> {renderdataStore} </ul> </div> ); }![]()
- Hiện tại khi click thì việc render dữ liệu lên trên app không thể thực hiện được do cơ chế life cycle của nó
- Để có thể biết ta có làm thành công hay không thì hãy console.log trong reducer bất kì
const userReducer = (state = '', action) => {
  console.log(action);
  switch(action.type) {
    case 'UPDATE_USER': return action.payload;
    default: return state;
  }
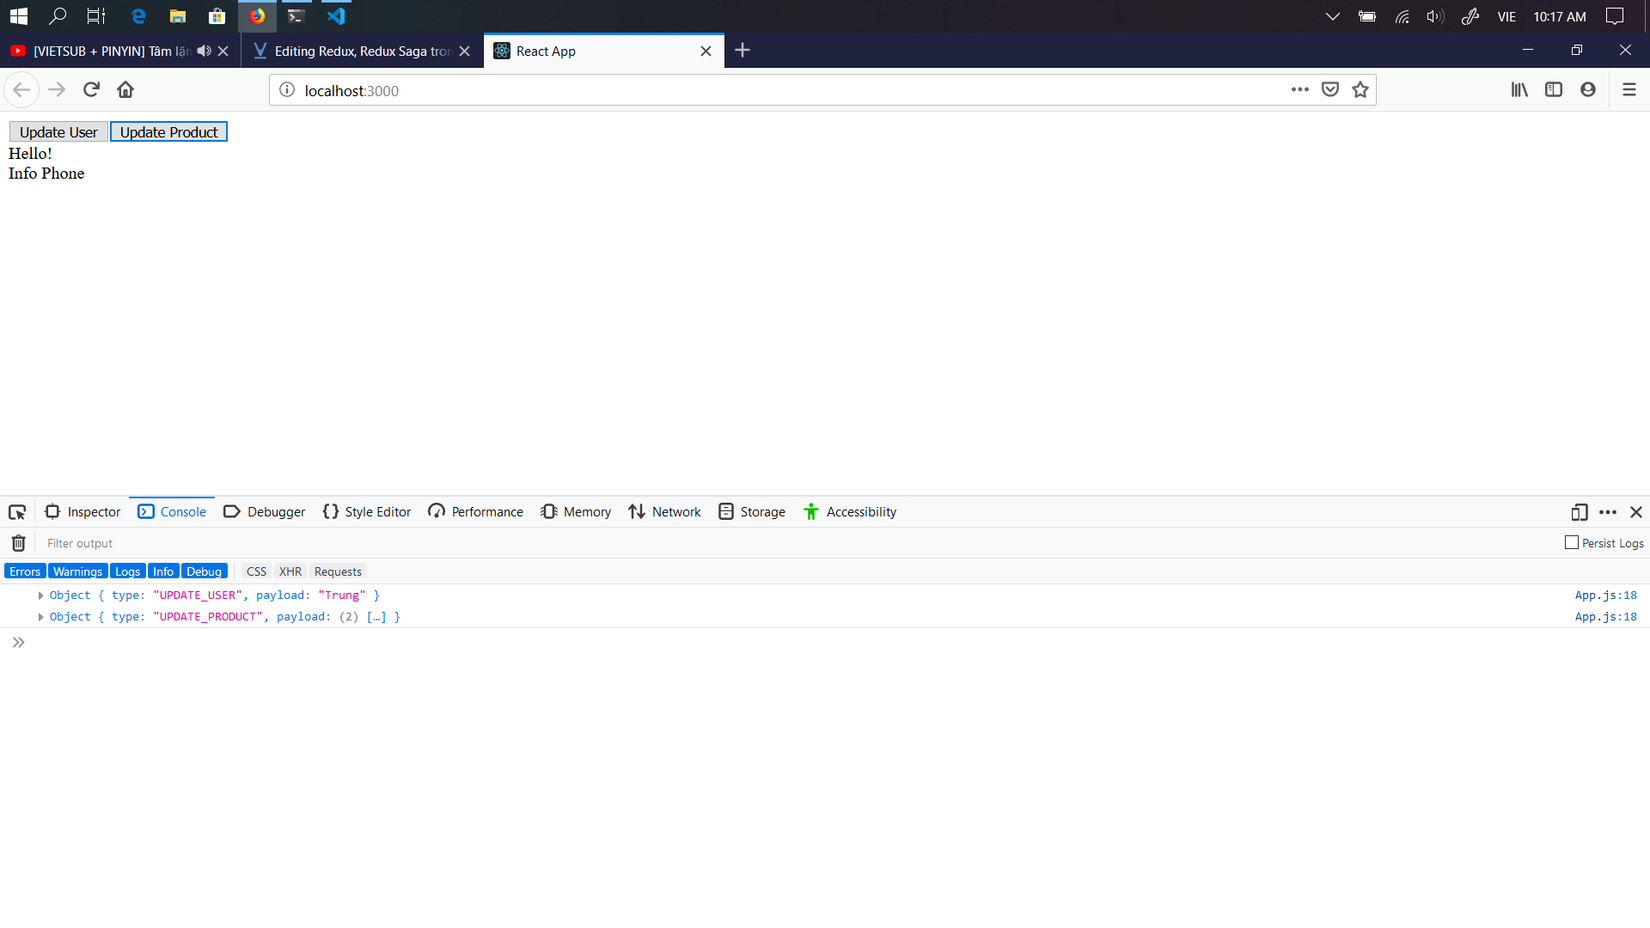
- Khi console.log trong reducer sẽ thấy có thêm các action khác và mặc dù chỉ console.log trong 1 reducer khi click vào 1 trong 2 nút thì vẫn thấy nó console ra dữ liệu của action còn lại, cái này thì mọi người tự tìm hiểu nha, mình không giải thích đâu =))
- Bây giờ ta sẽ tách code ra các file để giống một dự án hơn, áp dụng Provider để thêm store vào các component con và show dữ liệu lên trên app
- Vì trong app react đã có sẵn file index.js và App.js nên sẽ dùng App.js là component, index.js là nơi chứa store và các function của redux (mọi người có thể tách code theo file mà mình thấy hợp lý, còn mình thấy hơi lười nên chỉ tách 2 file này cho tiện :v)
- Đầu tiên là file index.js
import React from 'react'; import ReactDOM from 'react-dom'; // Thêm Provider (hỗ trợ truyền state, dispatch, ... sâu xuống dưới // Tức là truyền xuống các component con của con của con nó mà chỉ cần khai báo 1 lần) import { Provider } from 'react-redux'; import { createStore, combineReducers } from 'redux'; // Chuyển store và reducer qua bên này import App from './App'; import * as serviceWorker from './serviceWorker'; const userReducer = (state = '', action) => { switch(action.type) { case 'UPDATE_USER': return action.payload; default: return state; } } const productReducer = (state = [], action) => { switch(action.type) { case 'UPDATE_PRODUCT': return action.payload; default: return state; } } const allReducers = combineReducers({ userReducer, productReducer, }); const store = createStore(allReducers); ReactDOM.render( // Sử dụng provider như thế này <Provider store={store}> <App /> </Provider>, document.getElementById('root') ); // If you want your app to work offline and load faster, you can change // unregister() to register() below. Note this comes with some pitfalls. // Learn more about service workers: https://bit.ly/CRA-PWA serviceWorker.unregister(); - Tiếp theo App.js
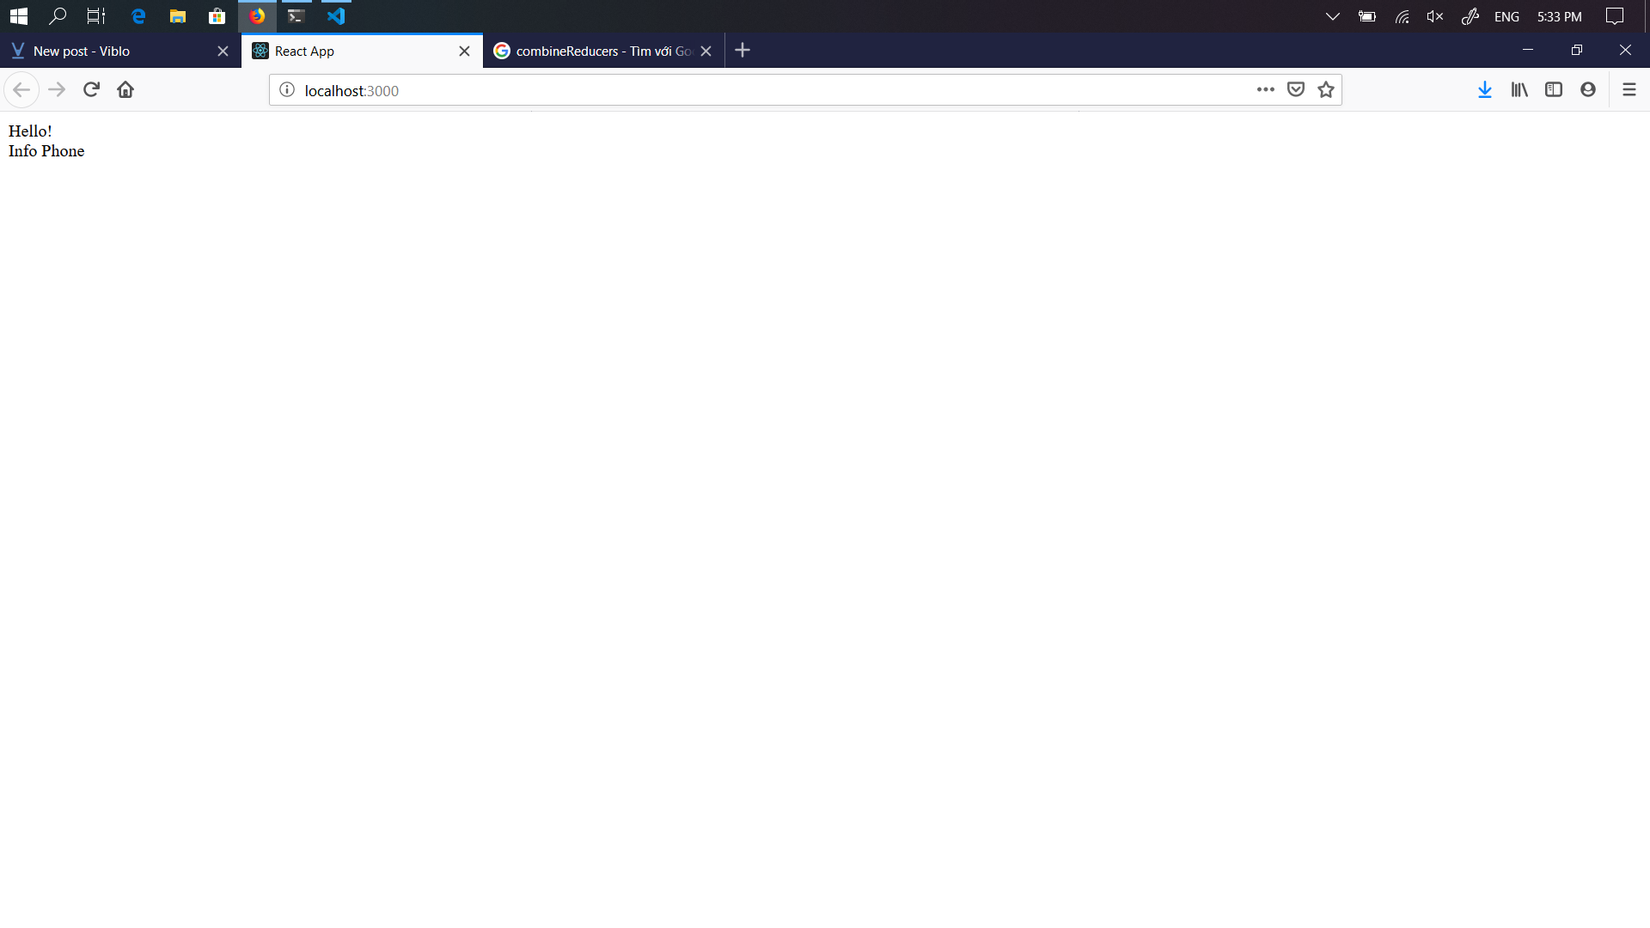
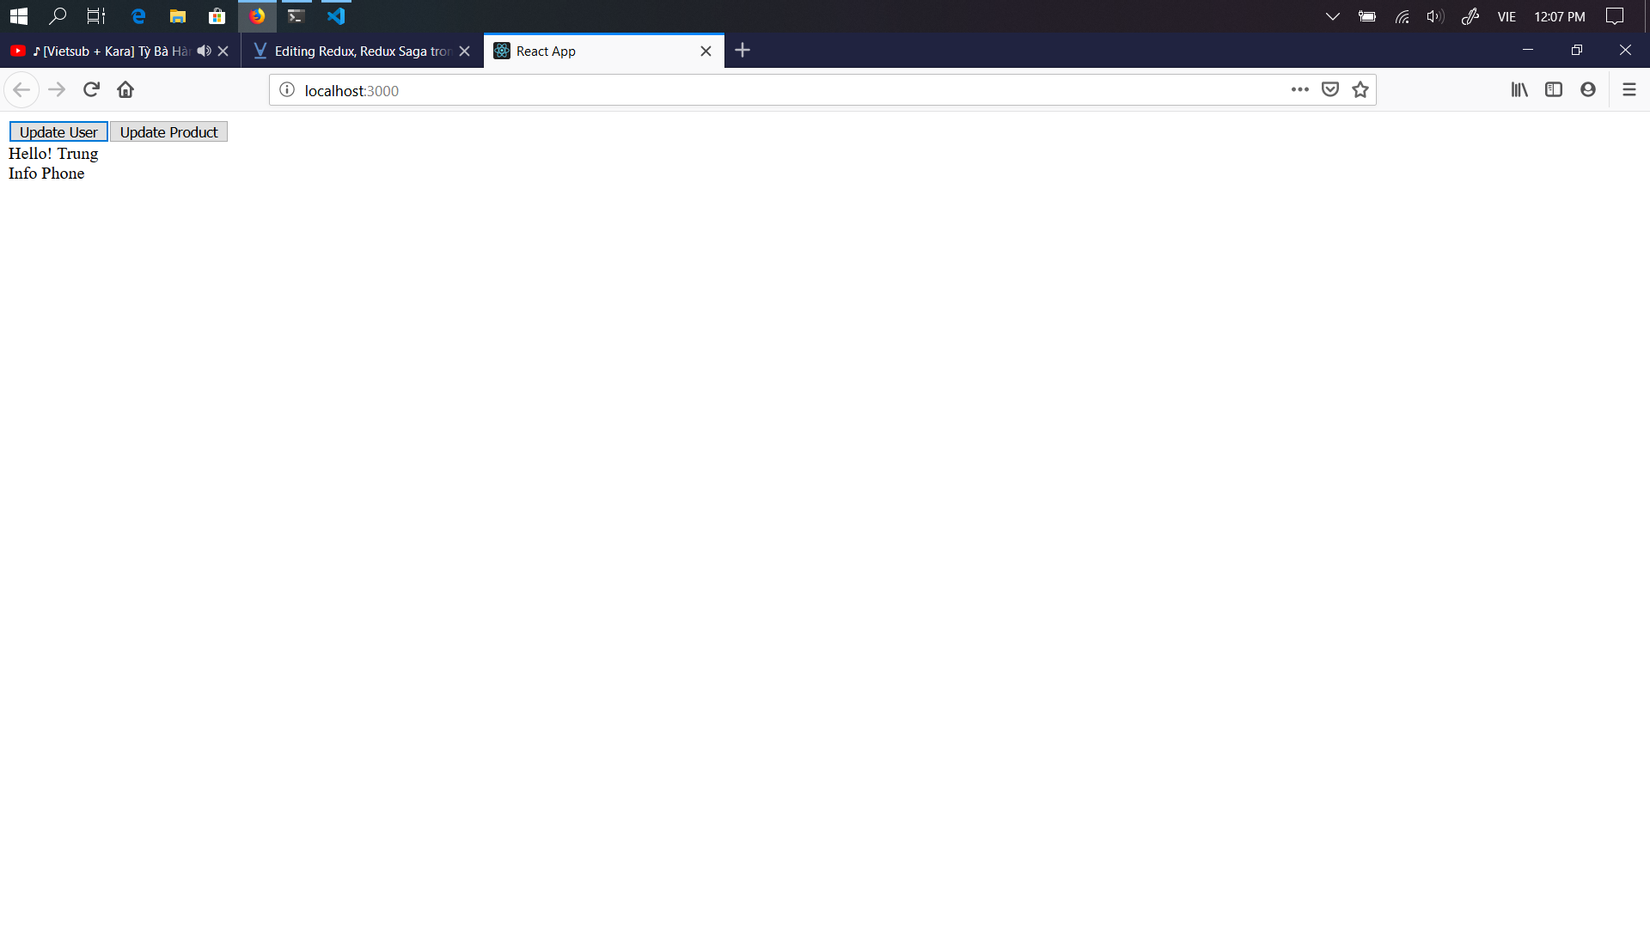
// Thêm Component import React, { Component } from 'react'; // Thêm connect để có thể kết nối tới Provider lấy dispatch và state import { connect } from 'react-redux'; // Giữ lại các action bên file này để thực hiện việc click button lấy dữ liệu const userAction = { type: 'UPDATE_USER', payload: 'Trung', } const productAction = { type: 'UPDATE_PRODUCT', payload: [ {name: 'iPhone XR'}, {name: 'Samsung Galaxy S10'}, ], } // Tạo mapDispatchToProps để dispatch vào props const mapDispatchToProps = (dispatch) => { return { userDispatch: () => dispatch(userAction), productDispatch: () => dispatch(productAction), } } // Tạo mapStateToProps để chuyển state vào props const mapStateToProps = (state) => { return { user: state.userReducer, products: state.productReducer, } } // Chuyển đổi function App thành class App để tiện cho việc xử lý dữ liệu class App extends Component { render() { // Vì đã ta đã chuyển dispatch và state vào trong props nên ta chỉ việc gọi nó như một props bình thường const { user, products, userDispatch, productDispatch } = this.props; // Thay store thành products const renderdataStore = products.map((data, index) => { return <li key={`store-${index}`}>{data.name}</li> }); return ( <div> // Thay store thành uerDispatch và productDispatch <button onClick={() => userDispatch(userAction)}>Update User</button> <button onClick={() => productDispatch(productAction)}>Update Product</button> <div>Hello! {user}</div> <div>Info Phone</div> <ul> {renderdataStore} </ul> </div> ); } } // Điều quan trọng nhất là phần kết nối bên dưới nếu muốn lấy được dữ liệu export default connect(mapStateToProps, mapDispatchToProps)(App); - Done! Xem thành quả thôi nào
![]()
- Đây là luồng redux chạy, mọi người xem thử nãy giờ mình làm đã đúng luồng chưa nha, chưa thì mọi người tự điều chỉnh sao cho hợp lý với chính mình =))

IV. Sử dụng redux-saga
-
Tiếp theo mình sẽ nói về redux-saga, mà cũng chẳng có gì nhiều cả, vì hầu hết công việc đều được redux thực hiện, còn saga chỉ là middleware nên nó chỉ chiếm 10 - 20%
-
Đầu tiên là file index.js
import React from 'react'; import ReactDOM from 'react-dom'; import { Provider } from 'react-redux'; // Thêm applyMiddleware để redux có thể sử dụng redux-saga import { createStore, combineReducers, applyMiddleware } from 'redux'; // Gọi function createSagaMiddle import createSagaMiddleware from 'redux-saga'; // Các hàm effects trong redux-saga, công dụng của nó sẽ được nói ở phía dưới import { put, call, all, takeLatest } from 'redux-saga/effects'; import App from './App'; import * as serviceWorker from './serviceWorker'; const userReducer = (state = '', action) => { switch(action.type) { // Chuyển UPDATE_USER thành UPDATE_USER_SUCCESS vì hiện tại ta đang lắng nghe từ saga case 'UPDATE_USER_SUCCESS': return action.payload; default: return state; } } const productReducer = (state = [], action) => { switch(action.type) { case 'UPDATE_PRODUCT_SUCCESS': return action.payload; default: return state; } } const allReducers = combineReducers({ userReducer, productReducer, }); // Sử dụng function* thay cho function bình thường và arrow function // Để có thể sử dụng synchronous trong js // Còn vì sao phải sử dụng thì mọi người tự search nha :v function* userSaga(action) { // id của action.payload được nhận từ action bên file App.js // Mình đang giả lập khi gửi id để put, patch bên api const { id } = action.payload; // call trong thực tiễn là sẽ được dùng gọi các api // Ở đây mình chỉ giả lập trả về const result = yield call(() => { return id === 1 ? 'Trung' : ''; }); // put là để trả về cho reducer giá trị yield put({ type: 'UPDATE_USER_SUCCESS', payload: result, }); } function* productSaga(action) { const { id } = action.payload; const result = yield call(() => { return id === 2 ? [ {name: 'iPhone', gen: 7}, {name: 'Galaxy', gen: 8}, ] : []; }); yield put({ type: 'UPDATE_PRODUCT_SUCCESS', payload: result, }); } // viết một saga tổng function* rootSaga() { // all thôi mọi người tự hiểu =)) yield all([ // takeLatest lắng nghe action cuối takeLatest('UPDATE_USER', userSaga), takeLatest('UPDATE_PRODUCT', productSaga), ]); } // Tạo sagaMiddleware const sagaMiddleware = createSagaMiddleware(); const store = createStore( allReducers, applyMiddleware(sagaMiddleware), ); // Để có thể lắng nghe action thì phải chạy sagaMiddleware sagaMiddleware.run(rootSaga); ReactDOM.render( <Provider store={store}> <App /> </Provider>, document.getElementById('root') ); // If you want your app to work offline and load faster, you can change // unregister() to register() below. Note this comes with some pitfalls. // Learn more about service workers: https://bit.ly/CRA-PWA serviceWorker.unregister(); -
Bên App.js, việc thay đổi chủ yếu là action
const userAction = { type: 'UPDATE_USER', payload: {id: 1}, } const productAction = { type: 'UPDATE_PRODUCT', payload: {id: 2}, } -
Rồi đấy, hoàn thành redux-saga
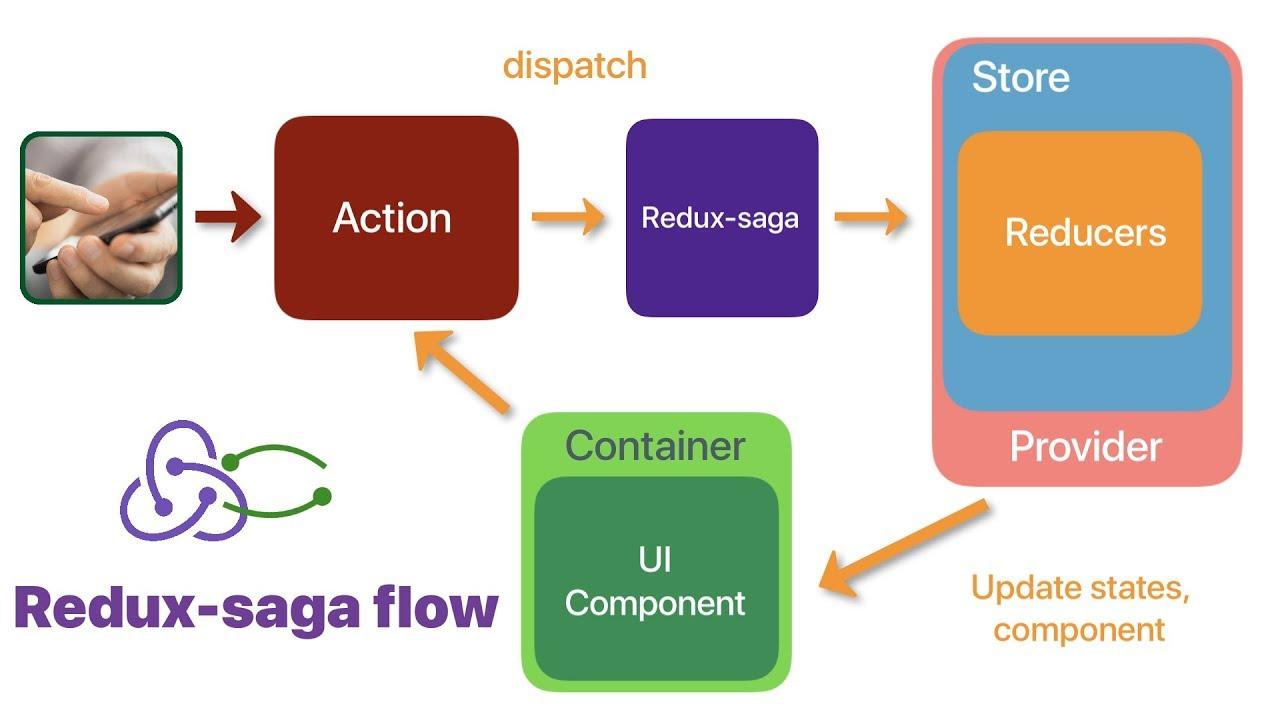
-
Đây là flow, bạn có thể console.log lần lượt trong các function để hiểu rõ hơn về luồng của nó
![]()
V. Kết
- Việc sử dụng redux hay redux-saga thì tùy vào mỗi người, và trong một số trường hợp cũng không cần nhất thiết phải sử dụng redux-saga trong redux, ví dụ như không gửi request lên api, chỉ muốn gọi một action để thực hiện sự thay đổi gì đấy trên app.
- Nói chung tùy ngữ cảnh mà mọi người tùy biến :v
All rights reserved
