React-Router Part 2
Bài đăng này đã không được cập nhật trong 7 năm
Redirect
Sẽ điều hướng tới 1 location mới. Từ Project mình tạo từ phần 1 của bài viết. Nay mình sẽ làm chức năng login và khi login thành công sẽ redirect tới trang Home.
Ok đơn giản và nhanh thì mình sẽ tạo ra user và password. Rồi so sánh khi user vs password nhập ở input mà trùng với thì sẽ login thành công
import React from 'react'
import {Redirect} from 'react-router-dom';

// add sự kiện submit login form
// khi name và pass đúng => sử dụng localStorage để set giá trị user = true
const onLogin = () => {
  const name = document.getElementById('userName').value
  const pass = document.getElementById('passWord').value
  if((name === 'MinhDT') && (pass === 'MinhDT')){
    return localStorage.setItem('user', true)
  }
}

const Login = () => {
 // lấy user từ trong localStorage nếu == 'true' thì sẽ Redirect. Còn không sẽ ở trang Login
 if(localStorage.getItem('user') === 'true'){
    return <Redirect to='/' />
  }
  return (
    <div className="d-flex justify-content-center">
      <div className="w-50 p-3">
        <h1>This is Login Page</h1>
        <form onSubmit={onLogin}>
          <legend>Login</legend>
          <div className="form-group">
            <label>User Name</label>
            <input type="text" className="form-control" id="userName" placeholder="User Name" name="txtUserName" />
          </div>
          <div className="form-group">
            <label>PassWord</label>
            <input type="password" className="form-control" id="passWord" placeholder="Input field" name="txtPassWord" />
          </div>
          <button type="submit" className="btn btn-primary">Login</button>
        </form>
      </div>
    </div>
  )
}

export default Login
Note: Chú ý 1 tý thì ở ở document của nó: thì nó viết import { Route, Redirect } from 'react-router'
Thật ra from từ react-router or react-router-dom đều được hết á.
Hiểu đơn giản thì thằng react-router sẽ export các core component và funtions. Còn thằng react-router-dom sẽ kết thừa tất cả thằng core nhưng nó sẽ thêm các Dom-aware component khác nữa VD: <Link>, <BrowserRouter>...
(Ở phần 1 mình có nói đến React Router được chia làm 3 package rồi đúng không nào? Vậy nên cứ react-router-dom mà sử dụng thôi nhé các web developer)
Logic mình comment giải thích trong code rồi giờ tập trung zô thằng Redirect thôi, <Redirect> gồm có:
-
to: string (như mình đã viết ở trên VD) nó sẽ react tới đường path mà mình đã định -
to: Object bạn có thể truyền params, truyền state, pathname,...ex
<Redirect to={{ pathname: '/', state: { from: '/login' }, search: '?name=MinhDT' }} /> -
push: bool cái này liên quan tới history mình giải thích sau nhé -
from: string sẽ là url hiện tại trước khi redirect. Nó sẽ cho ta biết nó được redirect từ trang nàoex:
<Redirect from='/login' to='/'/>
Prompt
Thằng này sử dụng để hiện popup trước khi muốn chuyển đến tới 1 trang khác. Vì nó có trong react-router nên mình cũng sẽ đề cập đến nó luôn.
Giờ mình sẽ làm TH khi người dùng đang nhập dữ liệu login thì người dùng chuyển trang và sẽ hiển thị prompt xác nhận để redirect nhé
Đánh lẻ sang ôn lại phần recompose https://viblo.asia/p/recompose-library-for-react-bWrZn1ovKxw
-
yarn add recompose
-
Trong file Login chúng import
import { compose, withState } from 'recompose -
Khởi tạo props status giá trị default là false, function để thay đổi status là changeStatus
const enhance = compose(withState('status', 'changeStatus', false)) -
truyền props vào trong Login component
const Login = ({status, changeStatus}) => {....} -
Thêm sự kiện changeStatus trong input
<input type="text" className="form-control" id="userName" placeholder="User Name" name="txtUserName" onChange={() => changeStatus(true)} /> -
import và add Prompt
import {Redirect, Prompt} from 'react-router-dom'.... <Prompt when={status} message="Are you sure you want to leave?" /> -
Giờ thì check và kiểm tra kết quả xem sao nhé

History
Để sử dụng history bạn phải cài đặt gói package history. Đây là 1 package quan trọng trong thư viện react router. Nó cung cấp các hàm chức năng chính cho react router. Tìm hiểu sau cứ cài đặt cái đã
yarn add history
Có 3 loại history là
- BrowserHistory : được sử dụng cho các web browsers sử dhungj HTML5 history API => nhận được sau domain VD: example.com/users/1
- HashHistory: được sử dụng cho các legecy web browsers. Và chỉ được nhìn thấy các phần bên phải của dấu
#VD: example.com/#/users => users - MemoryHistory: được sử dụng trong React Native or tests
=> Ở đây mình dùng BrowserHistory nhé
Các Method trong history:
length: number => số entry bên trong history stackaction: string => gồm các action PUSH, POP, REPLACElocation: object => current locationpathname: string => url ('/here')search: string => params ('?key=value')hash: string => đoạn usrl đc băm ('#aaaaaaaaa')state: object ({a: 'abcxyz'})
push(): method => add 1 entry hiện tại trong history stackreplace(): method => thay thế entry hiện tại trong history stackgo(): method => giúp dịch con trỏ trong history stack đi n entrygoBack(): method => (-1)goForward(): method => (1)block(prompt): method => không cho chuyển trang
Sử dụng
OK Kiến thức lơ tơ mơ đã xong. Giờ phải thực hành chút để cho hiểu rõ hơn nhé
Đầu tiên thứ phân biệt BrowserHistory với HashHistory xem sao nhé
Ở phần đầu có nói đến BrowserRouter (default history sẽ là BrowserHistory) rồi Nếu chuyển sang dùng HistoryRouter thì history sẽ là HashHistory
Ở đây mình sẽ sử dụng Router và truyền history là HashHistory vào nhé
// index.js
import { Router } from 'react-router-dom'
import createHashHistory from 'history/createHashHistory'
const history = createHashHistory()

ReactDOM.render(
  <Router history={history}>
    <App />
  </Router>,
  document.getElementById('root'));
registerServiceWorker();
OK giờ reload lại và check url xem sao?
http://localhost:3000/#/ or http://localhost:3000/#/login
Advance Với webpack
Mình đoán mọi người ai dùng react-router kết hợp vs webpack server đầu đã từng gặp phải vấn đề như này rồi
 Single Page Apllication(SPA) thường chỉ sử dụng một tệp chỉ mục có thể truy cập được bằng trình duyệt web và thường thì là
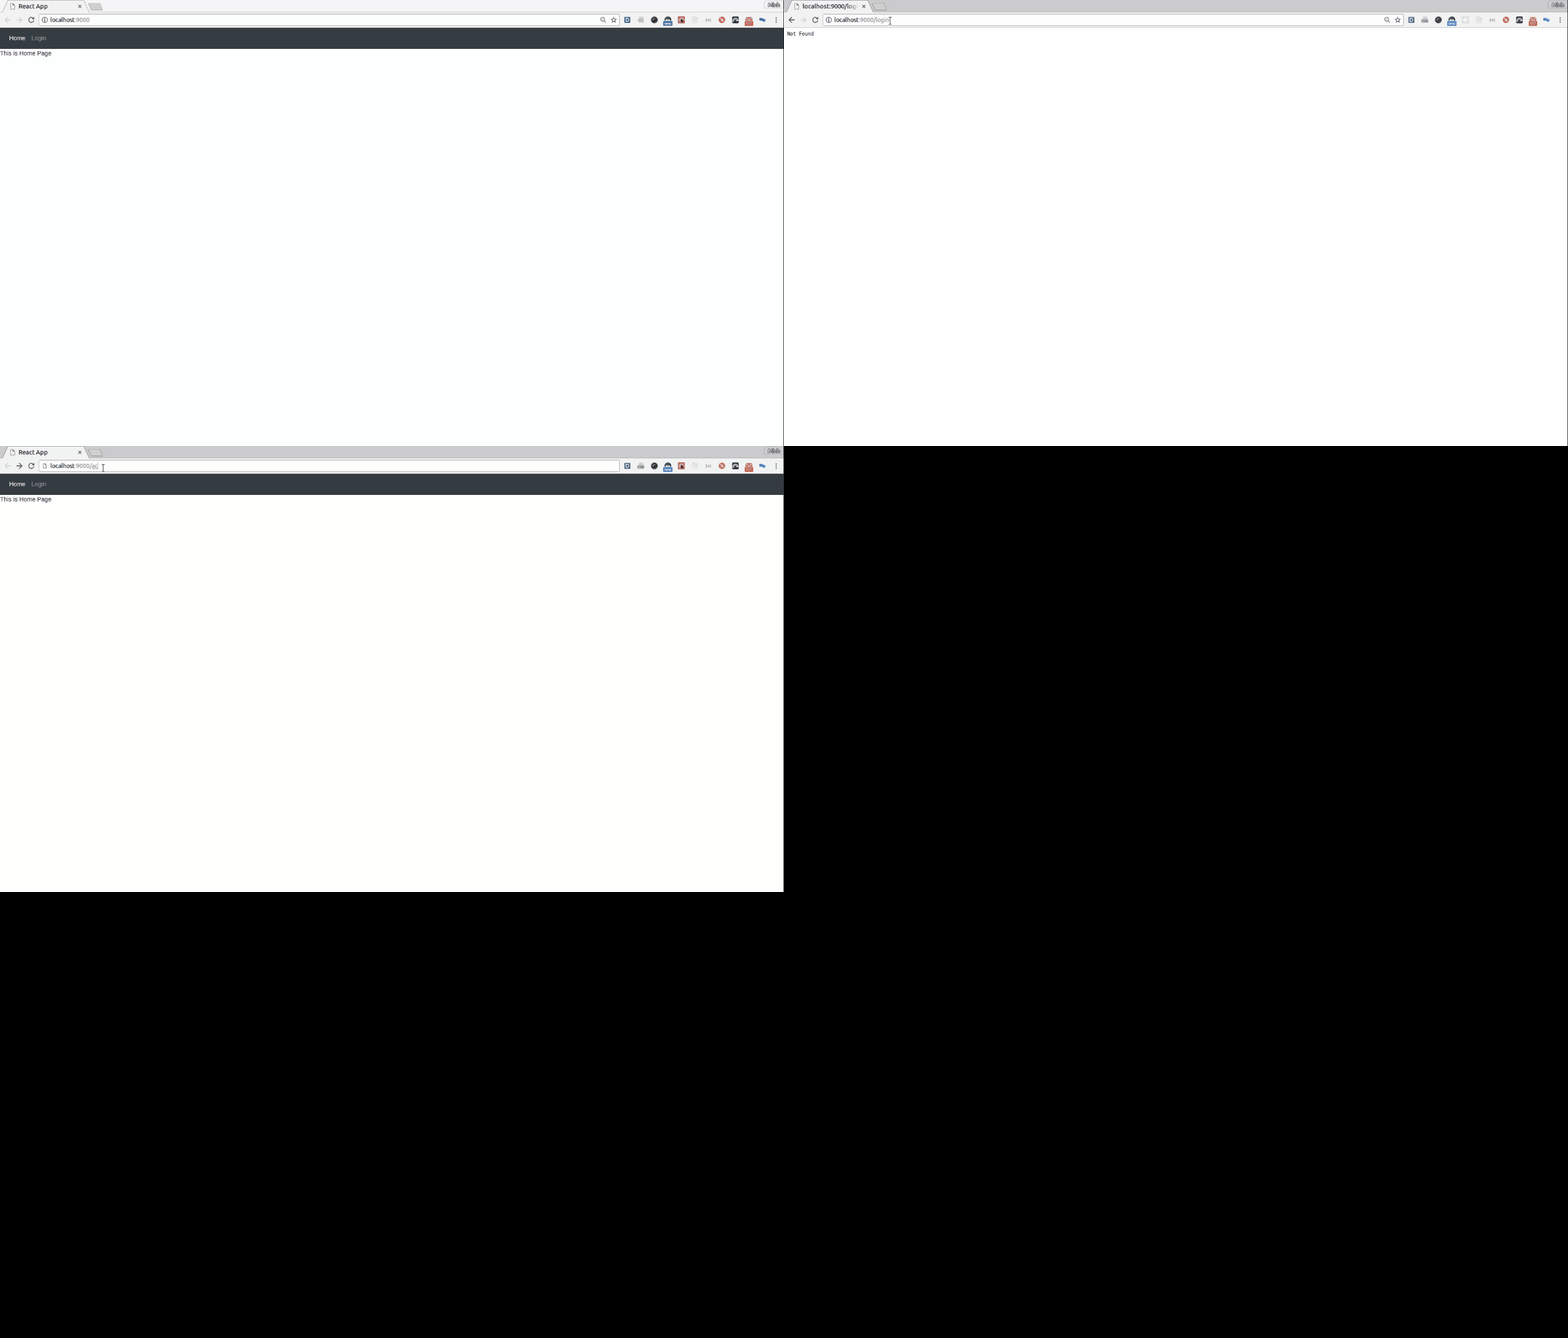
 index.html. Các điều hướng trên web application đầu phụ vào vào JS với sự giúp đỡ của HTML5 History API. Điều đó tạo ra 1 issues khi người dùng refesh page or truy cập các địa chỉ khác vs địa chỉ gốc. ex: '/help, /login,...' Khi đó server sẽ bỏ qua tệp chỉ mục là index.html và sẽ tìm file ở vị trí tương úng
Cơ mà vẫn đề này không biết là nên viết ở trong bài webpack hay react-router đây. =.="
App Lifecycle
- visit
localhost - hit node server for router '/'
- server gives index.html
- react app boots up
- react router looks at URL
- react router shows app component Hiểu đơn giản là vòng đời của 1 web application gôm 6 bước Đầu tiên ỏ localhost, server sẽ tìm root router (nếu không có tệp nào cũng như đường dẫn nào được cung cấp) thì router sẽ tự lấy index.html => và sẽ được react app khởi động => react router sẽ nhận url và hiển thị component theo url mà nó nhận. Như vậy nếu application của bạn là SPA, thì web server sẽ không cố gắng truy cập tệp và sẽ trả về 404-Not Found tới bạn.
App lifecycle, continued
- user clicks link
- address bar updates
- no new request to server
- react router show new component
- refesh page
- access '/login' on serser (404)
Tiếp tục khi load component lên. User sẽ click vào 1 đường link để thay đổi nội dung. Lúc này thanh địa chỉ sẽ được update ('/' => '/login') Việc address bar updates sẽ dấn đến việc ko có 1 request mới bào đc gửi lên server và react router sẽ show new component. Tuy nhiên khi ta refesh or gõ đường link rồi enter trên address bar thì sẽ xảy ra lỗi not found page (webpack-serve) or lỗi cannot Get /login (webpack-dev-server) Vì sao lại như vây? Vì server đã ko access nó. Do đó ko phải là url update
Server Access
Vậy lý do vì sao nó ko access?
Khi user type vào trong thanh địa chỉ và enter OK. kiểu như (/posts, /users, /, /....) lúc đó server always serves index.html (dù có chuyện j xảy ra nó cũng chỉ phục vụ và load index.html, tức là thằng root '/') =.=" Khi đó thằng React-router sẽ khởi động và show các component đúng. Đó là lý do vì sao các thằng /abcxyz xảy ra lỗi 404.
Vậy cách fix đó sẽ như thế nào?
Đầu tiên phải setup môi trường đã: Nếu như bạn đã đọc bài webpack của mình thì nó sẽ khá dễ dàng thôi.
-
install các package cần thiết và plugin của webpack cũng như babel
-
Note: Nếu bạn dùng file jsx (Home.jsx, Login.jsx) thì add thêm webpack vào file config nhé:
resolve: {
  modules: ['node_modules', 'src'],
  extensions: ['.js', '.jsx'],
}
Lúc đó import, webpack sẽ load cả file jsx
-
install thêm
connect-history-api-fallback: Nó sẽ giúp thay đổi vị trí được yêu cầu thằnh chỉ mục chỉ định (tức là giờ nó không phải là thằng index.html nữa) tuy nhiên các request phải phù hợp với những yêu cầu sau:- Phải là Get request
- địa điểm accepts là text/html
- đường dẫn ko chưa ký tự '.'
- Không khớp với các request đc khai báo trong Routes.
npm install --save connect-history-api-fallback -
config connect-history-api-fallback trong webpack.config.js
const historyFallback = require('connect-history-api-fhttps://github.com/MinhDo2007/viblo-react-routerallback') const history = options => (ctx, next) => new Promise((resolve, reject) => historyFallback(options)( ctx.req, ctx.res, err => (err ? reject(err) : resolve(next())) ) ) ... serve: { port: 9000, hotClient: true, open: true, add(app, middleware, options) { app.use(webpackServeWaitpage(options, { theme: 'dark' })) app.use(history()) }, }, -
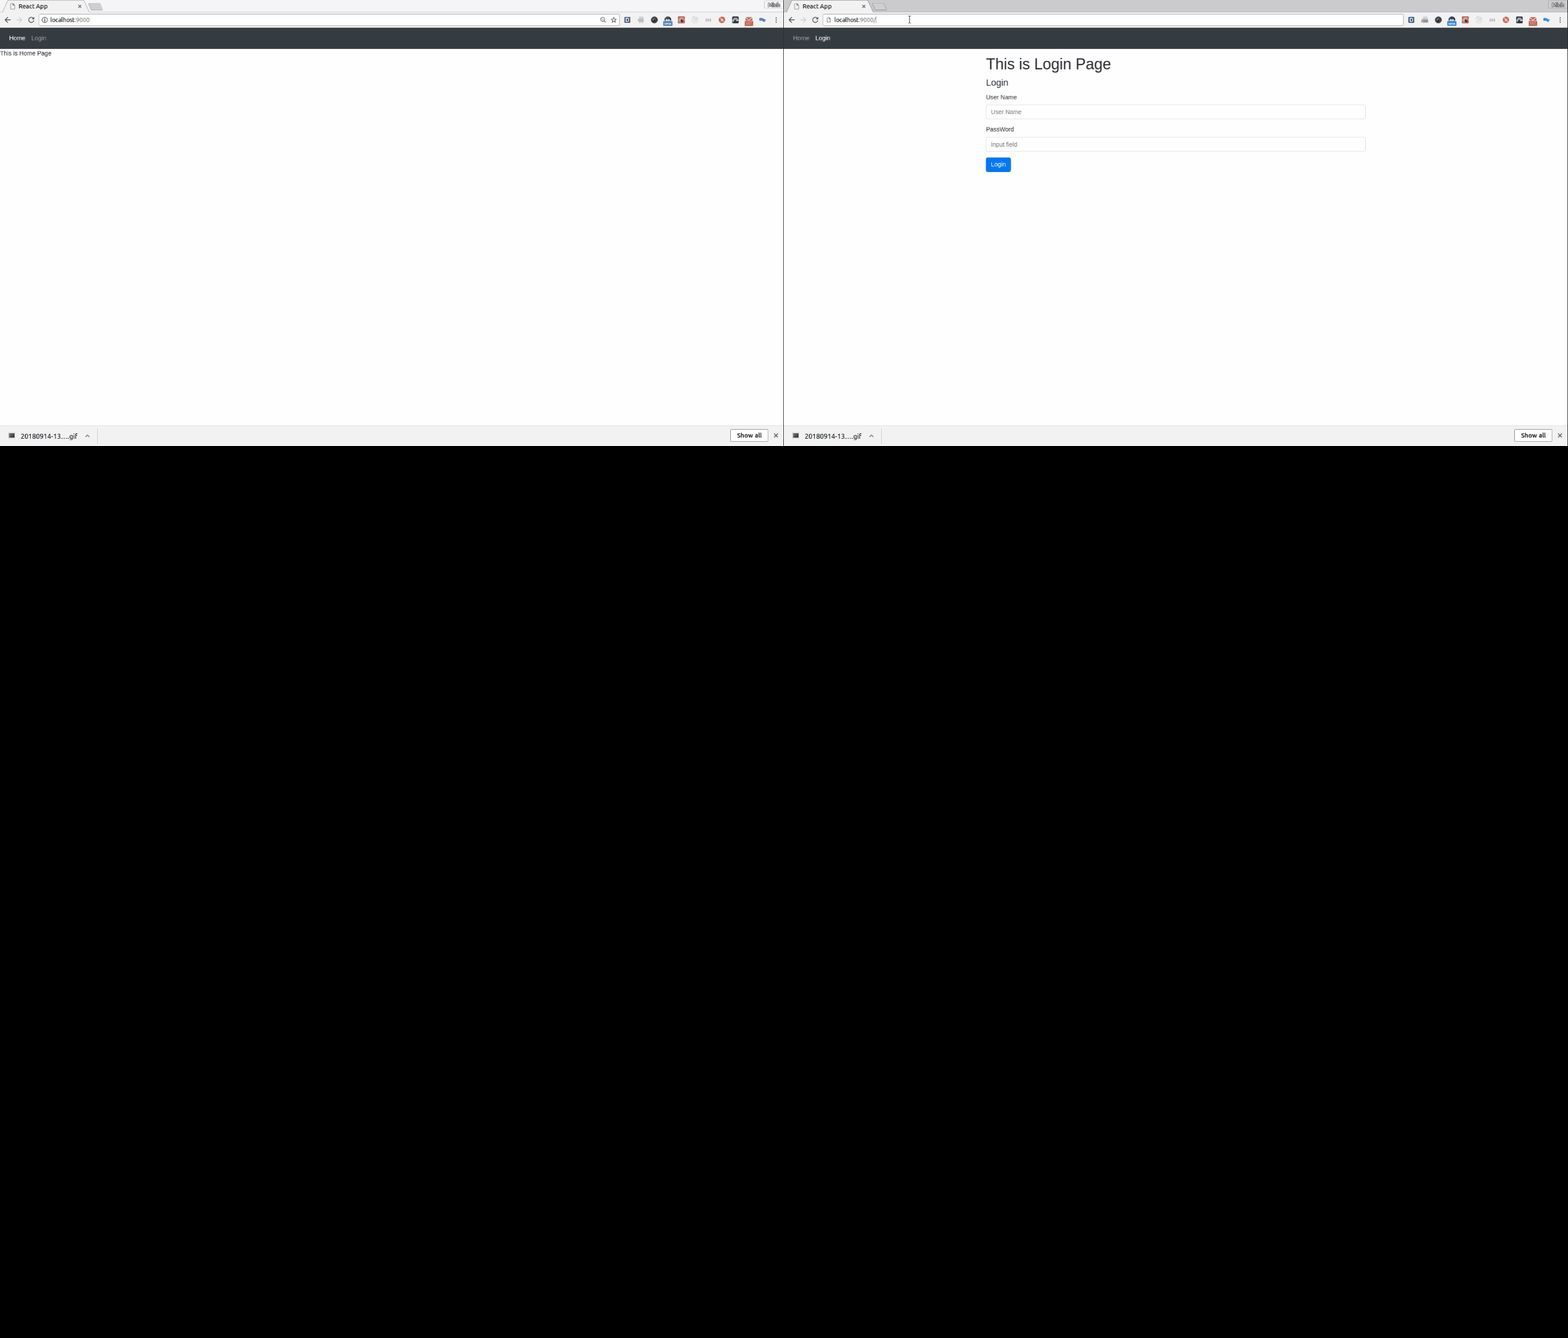
OK và các bạn thử check lại xem sao.

Các bạn có thể xem source code mình update lên để có thể install webpack nhé https://github.com/MinhDo2007/viblo-react-router
Kết Luận
Nó không quá khó phải không nào? Việc ứng dụng hoàn cũng không quá khó. Mình mong qua bài viết này các bạn có thể sử dụng đc nó 1 cách thành thạo Thank you ^^
All rights reserved