iOS-ParseService Following and Followers
Bài đăng này đã không được cập nhật trong 4 năm
Chào mọi người, tiếp phần này mình sẽ thao tác sử dụng Parser service để thao tác tạo chức năng user check following các user khác. Sau đấy là các user đã following nhau thì có thể thấy các bài post của các users đã được follow.
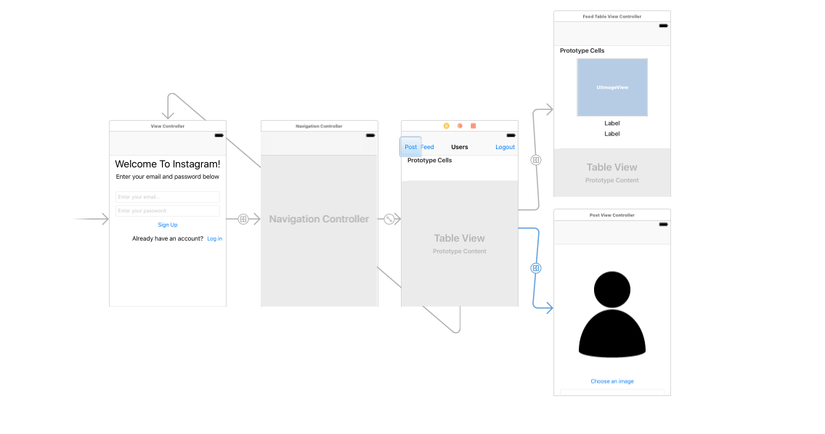
Okay. Chúng ta sẽ kéo một số giao diện đơn giản để làm ví dụ như sau
1 Một NavigationController để list danh sách các user, cho phép người dùng thực hiện đánh dấu follow/ huỷ follow các user khác
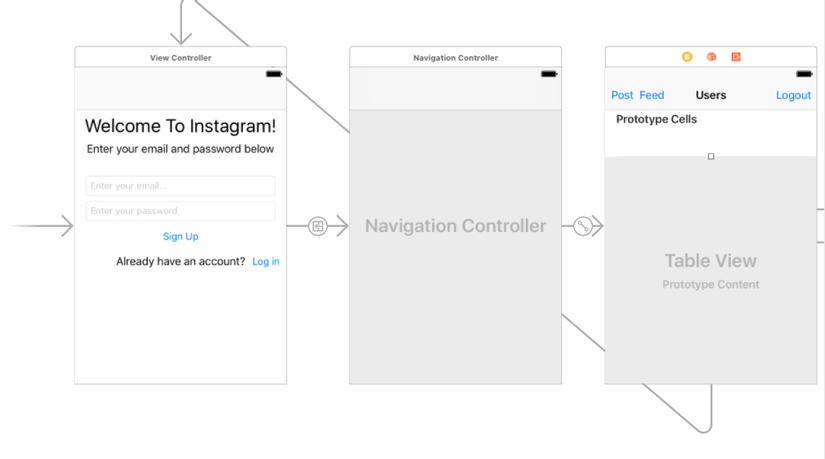
- Cùng với tạo một CocaoTouch class kế thừa TableViewController map vào view này, mình đặt tên là UserTableViewController ( sau ni mình vứt bớt cái "CocaoTouch classclass kế thừa ..." nhé, cứ gọi là tạo TableViewController subclass thôi nhé)
2 Một tableview để show list các bài post của những user mà người dùng hiện tại đang follow
- Cùng với subclass TableViewController map vào view này, đặt tên FeedTableViewController ( tên gì cũng được)
- Và thêm tí màu mè bạn tạo thêm subclass TableViewCell để map vào cho cell của table. Bởi mình muốn cho cái cell của table chứa Image của bài post, tên người gửi và nội dung message gửi lên
3 Môt view để thực hiện chức năng post bài viết
- Thằng này thì bạn tạo một subclass ViewController đặt tên PostViewController
Okay. Chúng ta sẽ có một số class như sau
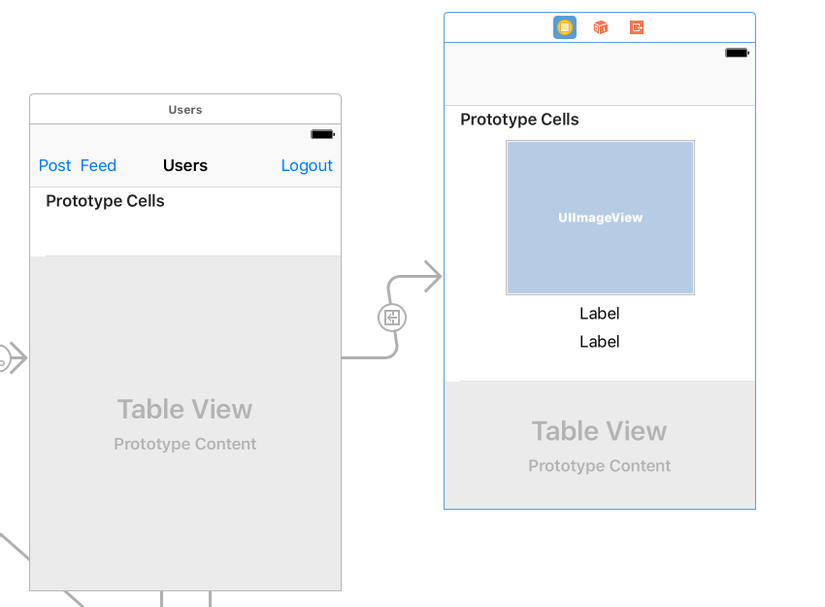
Tiếp theo chúng ta tạo các segue để chuyển các màn hình tương ứng, đặt tên Identifier như sau (cái này mình nhắc để các bạn dễ hiểu khi nhắc tới trong code thôi)
- Từ màn hình login/signup sang list use: "showUserTable"
- Click button Feed, link tới màn hình danh sach các bài post của các user đã follow: "listFollowUserPosts"
- Click button Post, link đến màn hình post : "postImage"
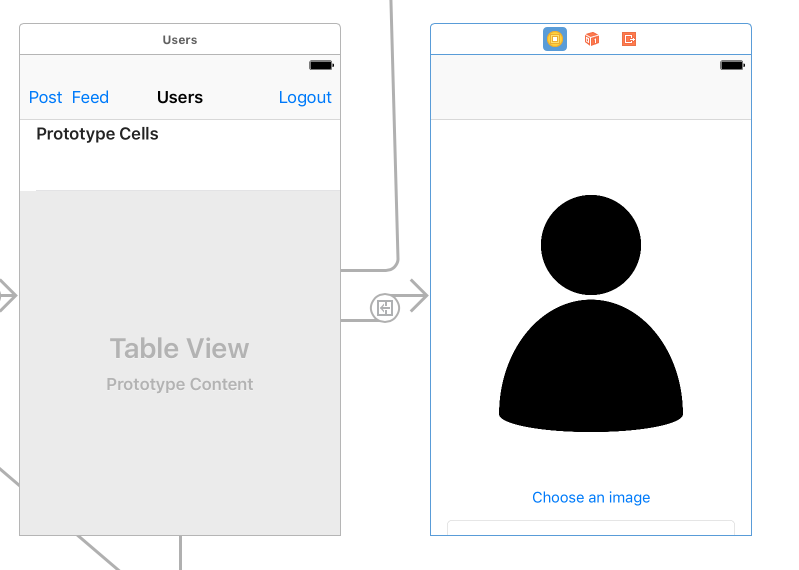
Chúng ta sẽ có storyboard như thế này
Ah quên mọi người nhớ vụ kéo thả các sự kiện và outlet tương ứng từ các màn hình vào các class custom tương ứng nhé. Tên thì mọi người đặt sao để hiểu nhất về các action, và name là được Bây giờ mình sẽ nói về chi tiết code xử lí linh tinh trong từng màn hình.
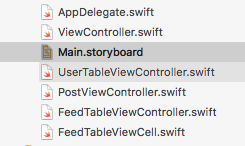
UserTableViewController.swift
Ta sẽ load users cho tableview bằng việc sử dụng PFUser.query() để tạo một object query với table User
    func loadUsersContent(){
        let query = PFUser.query()
        query?.findObjectsInBackground(block: {(objects, error) in
            if error != nil {
                print(error ?? "error user query")
            } else if let users = objects {
                self.userNames.removeAll()
                self.userIds.removeAll()
                self.isFollowing.removeAll()
                for object in users {
                    if let user = object as? PFUser {
                        if user.objectId != PFUser.current()?.objectId {

                            print(user.username!)
                            self.userNames.append(user.username!)
                            self.userIds.append(user.objectId!)
                            let query = PFQuery(className: "Followers")
                            query.whereKey("follower", equalTo: (PFUser.current()?.objectId)!)
                            query.whereKey("following", equalTo: user.objectId!)
                            query.findObjectsInBackground(block:{( objects, error) in
                                if let objects = objects {
                                    self.isFollowing[user.objectId!] = objects.count > 0
                                }
                                if self.isFollowing.count == self.userNames.count {
                                    self.tableView.reloadData()
                                    self.refresher.endRefreshing()
                                }
                            })
                        }
                    }
                }
            }
        })
    }
Các bạn có thể thấy chúng ta có thể thực hiện một câu query với mệnh đề where tìm kiếm trong class Followers để check việc đánh dấu user đã follow nhau hay chưa
    let query = PFQuery(className: "Followers")
                            query.whereKey("follower", equalTo: (PFUser.current()?.objectId)!)
                            query.whereKey("following", equalTo: user.objectId!)
                            query.findObjectsInBackground(block:{( objects, error) in
                                if let objects = objects {
                                    self.isFollowing[user.objectId!] = objects.count > 0
                                }
                                if self.isFollowing.count == self.userNames.count {
                                    self.tableView.reloadData()
                                    self.refresher.endRefreshing()
                                }
                            })
Rất là cool đúng không nào. Đấy là khả năng cho rất nhiều bạn muốn làm app mà không muốn tốn thời gian viết một service =))
Ở đây mình chưa dùng đến object model để map dữ liệu lưu trữ vì thế mình sẽ dùng tạm 3 cái list userNames, usersIds và isFollowing để lưu dữ liệu sau đổ dữ liệu vào cho từng Cell
    override func tableView(_ tableView: UITableView, cellForRowAt indexPath: IndexPath) -> UITableViewCell {

        let cell = tableView.dequeueReusableCell(withIdentifier: "Cell", for: indexPath)
        cell.textLabel?.text = userNames[indexPath.row]
        if isFollowing[userIds[indexPath.row]]! {
            cell.accessoryType = UITableViewCellAccessoryType.checkmark
        }
        return cell
    }
Và tất nhiên chúng ta sẽ gọi hàm reloaduser này ở ngay khi các View được load lên màn hình, và thêm tí nắm muốn để tableview hiện refresh khi scroll ontop. Mình thêm vào UIRefreshControl cho tableview
    override func viewDidLoad() {
        super.viewDidLoad()
        loadUsersContent()
        refresher = UIRefreshControl()
        refresher.attributedTitle = NSAttributedString(string: "Pull to refresh")
        refresher.addTarget(self, action: #selector(UserTableViewController.loadUsersContent), for: UIControlEvents.valueChanged)
        tableview.addSubview(refresher)
    }
Tiếp theo chúng ta sẽ thực hiện update việc khi người dùng select 1 user để thực hiện follow hoặc bỏ follow. Bạn sẽ overrider thao tác "didSelectRowAt" của tableview
    override func tableView(_ tableView: UITableView, didSelectRowAt indexPath: IndexPath) {

        let cell = tableView.cellForRow(at: indexPath)

        if isFollowing[userIds[indexPath.row]]! {
            isFollowing[userIds[indexPath.row]] = false
            cell?.accessoryType = UITableViewCellAccessoryType.none
            let query = PFQuery(className: "Followers")
            query.whereKey("follower", equalTo: (PFUser.current()?.objectId!)!)
            query.whereKey("following", equalTo: userIds[indexPath.row])
            query.findObjectsInBackground(block: {(objects, error) in
                if let objects = objects {
                    for object in objects {
                        object.deleteInBackground()
                    }
                }
            })

        } else {
            isFollowing[userIds[indexPath.row]] = true
            cell?.accessoryType = UITableViewCellAccessoryType.checkmark
            let following = PFObject(className: "Followers")
            following["follower"] = PFUser.current()?.objectId
            following["following"] = userIds[indexPath.row]
            following.saveInBackground()
        }

    }
Ở đây bạn có thể thấy mình sẽ tạo một object và lưu nó với className là Followers, tiếp theo add 2 giá trị cho 2 column follower, following.
Bạn cứ làm thế mà chưa cần động gì vào parser sever nhé. Rồi sau đấy mở lại link Parser sever xem thế này nhé 
 Bạn có thấy ko nó tự tạo class và các column tương ứng đấy. Kool nhỉ
  Ah đừng quên mộ số làm "không bao giờ thiếu" khi xài tableview nhé
    override func numberOfSections(in tableView: UITableView) -> Int {
        // #warning Incomplete implementation, return the number of sections
        return 1
    }

    override func tableView(_ tableView: UITableView, numberOfRowsInSection section: Int) -> Int {
        // #warning Incomplete implementation, return the number of rows
        return userNames.count
    }
Wola..thế là xong UserTableView
Phần sau mình sẽ nói về upload Image một tí nữa là xong cái ví dụ này
Chào mọi người
All rights reserved
