Hướng dẫn làm VR với Unity (phần 3)
Bài đăng này đã không được cập nhật trong 4 năm
Chào các bạn hôm nay mình sẽ tiếp tục hướng dẫn các bạn làm VR với Unity . Hôm nay mình sẽ hướng dẫn nội dung chính là : Tương tác trong VR
Trong VR, chúng ta thường xuyên phải kích hoạt một đối tượng mà người dùng đang xem . Trong VRSample, chúng ta đã xây dựng một hệ thống đơn giản, có thể mở rộng, cho phép người dùng tương tác với các đối tượng. Điều này bao gồm trong ba script chính: VREyeRaycaster, VRInput, và VRInteractiveItem - một mô tả ngắn gọn về các lớp này ở dưới đây.
VREyeRaycaster
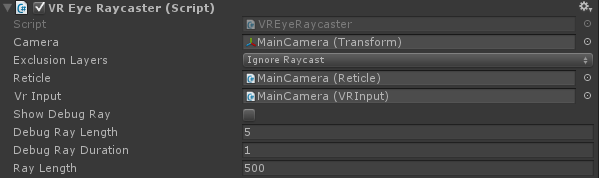
Script này cần được đặt vào Máy ảnh Chính. mỗi lần Update kịch bản sẽ tạo ra một Raycast để xem liệu tia này có trúng bất kỳ đối tượng va chạm nào hay không. Điều này cũng có thể loại trừ một số lớp - tùy thuộc vào cảnh của bạn, bạn có thể di chuyển tất cả các đối tượng tương tác lên một lớp riêng biệt vì lý do hiệu suất.
Nếu collider đã bị ảnh hưởng bởi raycast, tập lệnh này cố gắng tìm một thành phần VRInteractiveItem trên GameObject:
VRInteractiveItem interactible = hit.collider.GetComponent<VRInteractiveItem>(); //attempt to get the VRInteractiveItem on the hit object
Từ đây, chúng ta có thể xác định xem người dùng đang nhìn vào đối tượng nào, hoặc đã ngừng nhìn vào đối tượng nào. Nếu người dùng đã bắt đầu nhìn hoặc ngừng xem một đối tượng, chúng ta có thể làm điều gì đó với nó, chẳng hạn như gọi một hàm.
VRInput

VRInput là một lớp đơn giản xác định xem có nên đặt các nút swipe, taps, hoặc double-taps vào GearVR hay thiết lập điều khiển tương đương cho đầu vào PC khi sử dụng DK2 hay không.
Bạn có thể đăng ký trực tiếp các sự kiện trên VRInput:
public event Action<SwipeDirection> OnSwipe;                // Called every frame passing in the swipe, including if there is no swipe.
public event Action OnClick;                                // Called when Fire1 is released and it's not a double click.
public event Action OnDown;                                 // Called when Fire1 is pressed.
public event Action OnUp;                                   // Called when Fire1 is released.
public event Action OnDoubleClick;                          // Called when a double click is detected.
public event Action OnCancel;                               // Called when Cancel is pressed.
Để biết thêm thông tin về đăng ký các sự kiện, vui lòng xem Hướng dẫn ở đây : https://unity3d.com/learn/tutorials/modules/intermediate/scripting/events
VRInteractiveItem
Đây là một thành phần bạn có thể thêm vào bất kỳ GameObject nào mà bạn muốn người dùng tương tác với trong VR. Nó đòi hỏi một collider trên đối tượng nó được gắn vào.
Có sáu sự kiện bạn có thể đăng ký:
public event Action OnOver;             // Called when the gaze moves over this object
public event Action OnOut;              // Called when the gaze leaves this object
public event Action OnClick;            // Called when click input is detected whilst the gaze is over this object.
public event Action OnDoubleClick;      // Called when double click input is detected whilst the gaze is over this object.
public event Action OnUp;               // Called when Fire1 is released whilst the gaze is over this object.
public event Action OnDown;             // Called when Fire1 is pressed whilst the gaze is over this object.
Một giá trị boolean để sử dụng xem Over hiện tại :
public bool IsOver
{
    get { return m_IsOver; }              // Is the gaze currently over this object?
}
Sau đó bạn có thể tạo ra script của riêng bạn sẽ phản ứng lại những sự kiện này. Dưới đây là một ví dụ rất đơn giản, sử dụng một số sự kiện này:
using UnityEngine;
using VRStandardAssets.Utils;

namespace VRStandardAssets.Examples
{
    // This script is a simple example of how an interactive item can
    // be used to change things on gameobjects by handling events.
    public class ExampleInteractiveItem : MonoBehaviour
    {
        [SerializeField] private Material m_NormalMaterial;
        [SerializeField] private Material m_OverMaterial;
        [SerializeField] private Material m_ClickedMaterial;
        [SerializeField] private Material m_DoubleClickedMaterial;
        [SerializeField] private VRInteractiveItem m_InteractiveItem;
        [SerializeField] private Renderer m_Renderer;


        private void Awake ()
        {
            m_Renderer.material = m_NormalMaterial;
        }


        private void OnEnable()
        {
            m_InteractiveItem.OnOver += HandleOver;
            m_InteractiveItem.OnOut += HandleOut;
            m_InteractiveItem.OnClick += HandleClick;
            m_InteractiveItem.OnDoubleClick += HandleDoubleClick;
        }


        private void OnDisable()
        {
            m_InteractiveItem.OnOver -= HandleOver;
            m_InteractiveItem.OnOut -= HandleOut;
            m_InteractiveItem.OnClick -= HandleClick;
            m_InteractiveItem.OnDoubleClick -= HandleDoubleClick;
        }


        //Handle the Over event
        private void HandleOver()
        {
            Debug.Log("Show over state");
            m_Renderer.material = m_OverMaterial;
        }


        //Handle the Out event
        private void HandleOut()
        {
            Debug.Log("Show out state");
            m_Renderer.material = m_NormalMaterial;
        }


        //Handle the Click event
        private void HandleClick()
        {
            Debug.Log("Show click state");
            m_Renderer.material = m_ClickedMaterial;
        }


        //Handle the DoubleClick event
        private void HandleDoubleClick()
        {
            Debug.Log("Show double click");
            m_Renderer.material = m_DoubleClickedMaterial;
        }
    }
}
Để xem một ví dụ cơ bản về điều này, hãy xem scene InteractiveItem trong VRSampleScenes / Scenes / Examples /
SelectionRadial and SelectionSlider
Chúng tôi sử dụng cả thanh lựa chọn xuyên tâm (SelectionRadial) và thanh trượt lựa chọn (SelectionSlider) để cho phép người dùng giữ phím Fire1 để xác nhận sự tương tác:
Khi bạn giữ nút ấn xuống, thanh chọn sẽ đầy và gửi sự kiện OnSelectionComplete hoặc OnBarFilled khi đã đầy. Mã code cho điều này có thể được tìm thấy trong SelectionRadial.cs và SelectionSlider.cs, và được coment kỹ lưỡng. Với VR chúng tôi muốn đảm bảo rằng từ quan điểm UX người sử dụng biết họ đang làm gì và luôn kiểm soát - và trong khi đưa ra một kiểu xác nhận "held input" theo thời gian sẽ không làm ảnh hưởng đến tính trực tiếp, nó đảm bảo rằng không ai có thể lựa chọn Một cái gì đó do nhầm lẫn.
Interaction Examples in VRSampleScenes
Bây giờ chúng ta hãy xem xét một số ví dụ về tương tác mà chúng tôi đã đưa vào dự án VR Samples của chúng tôi. Chúng tôi sẽ thảo luận về một số tương tác mà mỗi cảnh sử dụng và cách chúng được thực hiện như thế nào.
Interactions in the Menu scene
Mỗi màn hình trình đơn có một số thành phần. Đặc biệt quan tâm ở đây là MenuButton, VRInteractiveItem, và Mesh Collider.
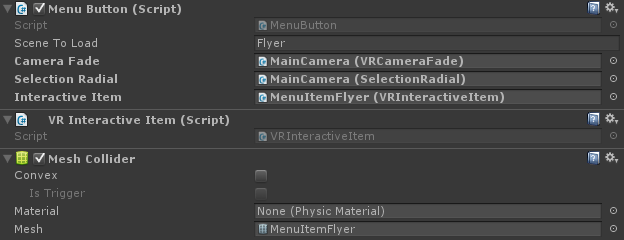
Thành phần MenuButton gồm các sự kiện OnOver và OnOut , do đó khi mặt lưới trên màn hình menu, vùng lựa chọn xuyên tâm xuất hiện, và khi nhìn từ mục menu, vùng chọn xuyên tâm sẽ biến mất. Khi lựa chọn xuyên tâm được nhìn thấy, và phím Fire1 được giữ xuống, các hình tròn đầy:

Lớp này cũng đăng ký cho sự kiện OnSelectionComplete trên SelectionRadial, do đó khi xuyên tâm đầy, HandleSelectionComplete được gọi, làm cho camera tắt và mở level đã chọn.
private void OnEnable ()
{
    m_InteractiveItem.OnOver += HandleOver;
    m_InteractiveItem.OnOut += HandleOut;
    m_SelectionRadial.OnSelectionComplete += HandleSelectionComplete;
}


private void OnDisable ()
{
    m_InteractiveItem.OnOver -= HandleOver;
    m_InteractiveItem.OnOut -= HandleOut;
    m_SelectionRadial.OnSelectionComplete -= HandleSelectionComplete;
}


private void HandleOver()
{
    // When the user looks at the rendering of the scene, show the radial.
    m_SelectionRadial.Show();

    m_GazeOver = true;
}


private void HandleOut()
{
    // When the user looks away from the rendering of the scene, hide the radial.
    m_SelectionRadial.Hide();

    m_GazeOver = false;
}


private void HandleSelectionComplete()
{
    // If the user is looking at the rendering of the scene when the radial's selection finishes, activate the button.
    if(m_GazeOver)
        StartCoroutine (ActivateButton());
}


private IEnumerator ActivateButton()
{
    // If the camera is already fading, ignore.
    if (m_CameraFade.IsFading)
        yield break;

    // If anything is subscribed to the OnButtonSelected event, call it.
    if (OnButtonSelected != null)
        OnButtonSelected(this);

    // Wait for the camera to fade out.
    yield return StartCoroutine(m_CameraFade.BeginFadeOut(true));

    // Load the level.
    SceneManager.LoadScene(m_SceneToLoad, LoadSceneMode.Single);
}
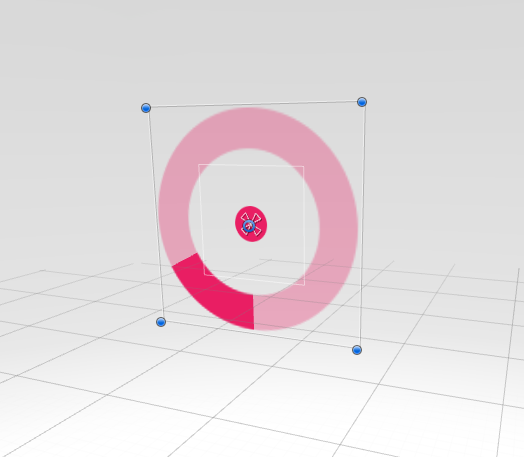
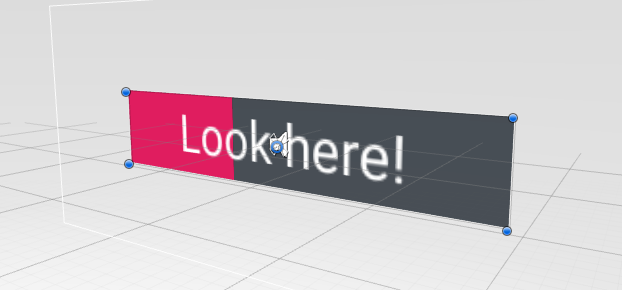
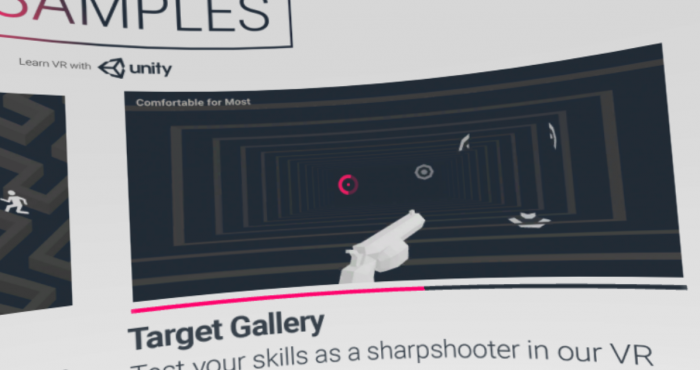
Hãy nhìn vào một số ví dụ của Radial Selection, lưu ý các phần tử màu hồng ở giữa các ảnh chụp màn hình dưới đây :
người dùng đang nhìn vào màn hình menu
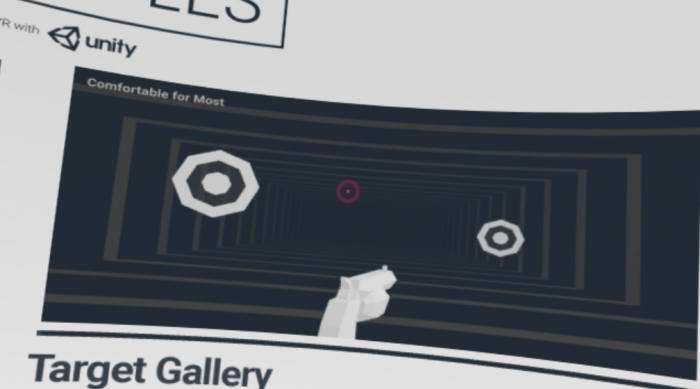
Lựa chọn Radial filling (người dùng đang nhìn vào màn hình menu, và giữ phím Fire1)
Chúng tôi cố gắng duy trì phong cách này trong suốt dự án mẫu với các thanh và hình radial điền vào một khoảng thời gian nhất quán. Chúng tôi khuyên bạn nên suy nghĩ về điều này khi làm việc với các dự án VR của riêng bạn - vì tính nhất quán trong UX giúp người sử dụng yên tâm, và sẽ giúp họ thích nghi với môi trường mới có thể là một môi trường mới.
All rights reserved
