Giới thiệu gem ckeditor
Bài đăng này đã không được cập nhật trong 4 năm
1.Giới thiệu
Hôm nay mình xin giới thiệu tới các bạn 1 gem trong Ruby on Rails mà được rất nhiều lập trình viên sử dụng.đó chính là CKeditor
CKeditor là một gem rất linh hoạt được sử trong soạn thảo các form text.Nó hỗ trợ rất nhiều trong việc tạo ra các đoạn văn bản đẹp mắt.Nó thường được dùng trong các trang blog nhằm tạo ra những đoạn comment nổi bật.
Ckeditor là một thư viện javascript được tạo ra bởi lập trình viên người Ukraine tên Igor Galeta: https://github.com/galetahub
2.Các bước cài đặt
Bước 1: Tạo một project
$rails new demo_ckeditor
trong file Gemfile add thêm các gem
gem 'mini_magick'
gem 'carrierwave'
gem 'ckeditor'
Vào rails console chạy lệnh bundle install
$bundle install
Nếu máy bạn chưa cài mini-magick thì cần cd đến thư mục project chạy các lệnh sau trong console để cài.
1. wget http://www.imagemagick.org/download/ImageMagick.tar.gz
2. tar xvfz ImageMagick.tar.gz
3. cd ImageMagick
4. ./configure --with-bzlib=yes --with-fontconfig=yes --with-freetype=yes --with-gslib=yes --with-gvc=yes --with-jpeg=yes --with-jp2=yes --with-png=yes --with-tiff=yes --disable-shared
5. make
6. sudo make install
7. sudo ldconfig /usr/local/lib
8. run again "convert -list configure" and look at changes
Sau đó chạy lệnh để sinh các thư mục lưu trữ Image và file trong Ckeditor
$rails generate ckeditor:install --orm=active_record --backend=carrierwave
Các file được tạo ra bao gồm: + config/initializers/ckeditor.rb + route mount Ckeditor::Engine => '/ckeditor' + app/models/ckeditor/asset.rb + app/models/ckeditor/picture.rb + app/models/ckeditor/attachment_file.rb + app/uploaders/ckeditor_attachment_file_uploader.rb + app/uploaders/ckeditor_picture_uploader.rb + db/migrate/20160125182929_create_ckeditor_assets.rb
Bước 2:Thêm ckeditor
Thêm dòng sau vào file app/assets/javascripts/application.js
//= require ckeditor/init
Thêm dòng sau vào file config/initializers/assets.rb
Rails.application.config.assets.precompile += %w( ckeditor/filebrowser/images/gal_del.png )
Trong view bạn thêm class ckeditor
<div class="field">
    <%= f.label :description %><br>
    <%= f.text_area :description, class: "ckeditor" %>
</div>
Trong javascript bạn cần gọi class ckeditor ra.ví dụ tôi tạo ra một file config_ckeditor.js
$(document).ready(function(){
  if ($('textarea').length > 0) {
    var data = $('.ckeditor');
    $.each(data, function(i) {
      CKEDITOR.replace(data[i].id)
    });
  }
});
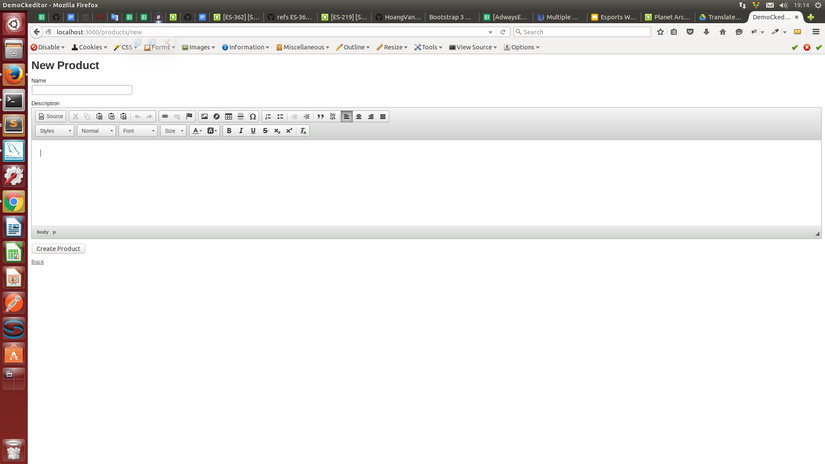
Sau đó bạn chạy server sẽ thu được màn hình chỉnh sửa đoạn text như dưới đây
Bước 3:Customize CKeditor
Để customize ckeditor bạn dùng các hàm được hỗ trợ bởi phiên bản ckeditor đó overwrite lại.ví dụ trong file config_ckeditor.js tôi vừa tạo tôi muốn chỉnh sửa khung ngoài của ckeditor có chiều cao là 800px.
$(document).ready(function(){
  ......
  CKEDITOR.config.height = 800;
});
Bạn có thể config các toolbar nào trong ckeditor.
CKEDITOR.editorConfig = function(config){
   config.toolbar = [
      {name: 'clipboard', items: ['Cut', 'Copy', 'Paste', 'PasteText', 'PasteFormWord', '-', 'Undo', 'Redo']},
      {name: 'editing', items: ['Scayt']},
      {name: 'links', items: ['Link', 'Unlink', 'Anchor']},
      {name: 'insert', items: ['Image', 'Table', 'HorizontaRule', 'SpecialChar']},
      {name: 'tool', items: ['Maximize']},
      {name: 'document', items: ['Source']}
   ];
};
tất cả các config toolbar của ckeditor ở đây: http://docs.ckeditor.com/#!/guide/dev_toolbar
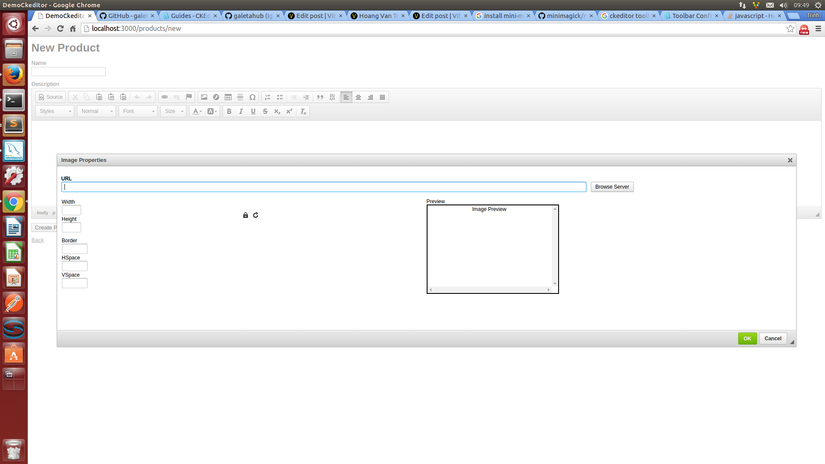
Chỉnh sửa nội dung trong Image preview
CKEDITOR.config.image_previewText = "Image Preview";
Chỉnh sửa nội dung các dialog
CKEDITOR.on( 'dialogDefinition', function(ev){
var dialogName = ev.data.name;
var dialogDefinition = ev.data.definition;
if (dialogName == 'link')
{
dialogDefinition.removeContents('advanced');
dialogDefinition.removeContents('target');
}
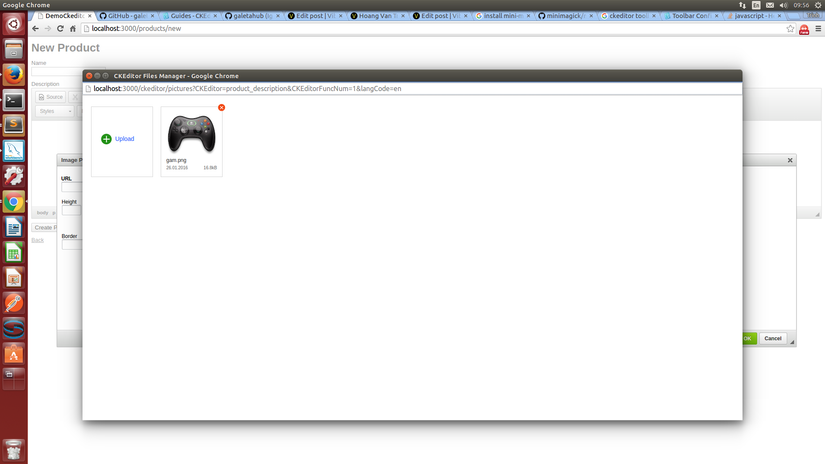
if (dialogName == 'image')
{
dialogDefinition.removeContents('advanced');
dialogDefinition.removeContents('Link');
dialogDefinition.removeContents('Upload');
// dialogDefinition.height = 800;
// dialogDefinition.width = 1700;
}
if (dialogName == 'flash')
{
dialogDefinition.removeContents('advanced');
}
});
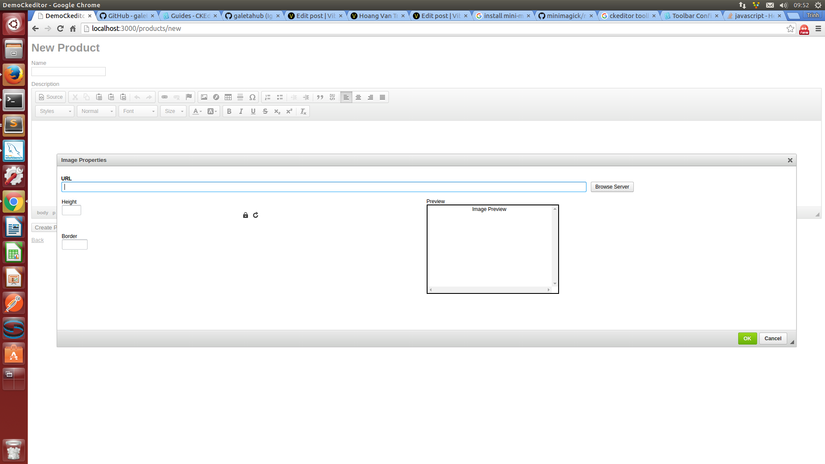
bỏ đi các infotab trong ImagePreview
var infoTab = dialogDefinition.getContents('info');
    //infoTab.remove('txtAlt');
    //infoTab.remove('cmbAlign');
    //infoTab.remove( 'previewImage');
    infoTab.remove( 'txtBorder' ); //Remove Element Border From Tab Info
    infoTab.remove( 'txtHSpace' ); //Remove Element Horizontal Space From Tab Info
    infoTab.remove( 'txtVSpace' ); //Remove Element Vertical Space From Tab Info
    infoTab.remove( 'txtWidth' ); //Remove Element Width From Tab Info
    infoTab.remove( 'txtHSpace');
    infoTab.remove( 'txtVSpace');
Ck editor sẽ lưu toàn bộ định dạng văn bản nhập vào dưới dạng mã html trong database. ví dụ bạn viết một đoạn văn bản như sau:
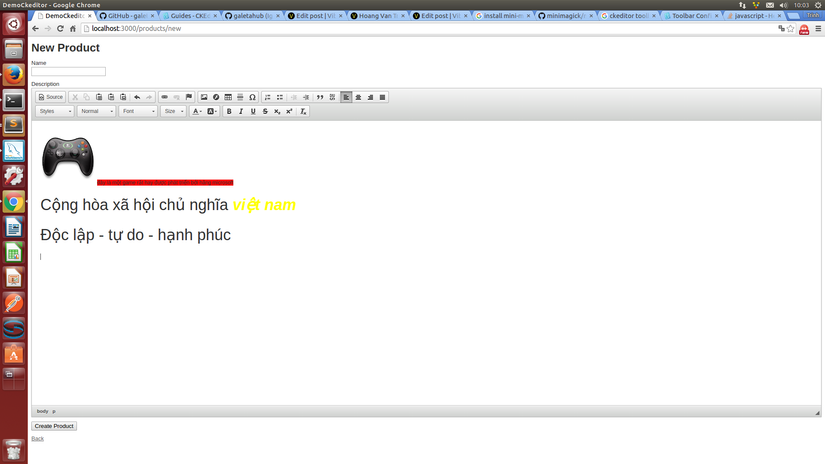
thì sẽ được lưu trong database dưới dạng mã
<p><img alt="" src="/uploads/ckeditor/pictures/3/content_gam.png" style="height: 128px;" /> <span style="font-size:12px;"><span style="background-color:#FF0000;">đây là một game rất hay được phát triển bởi hãng microsoft</span></span></p>

<p><span style="font-size:36px;">Cộng hòa xã hội chủ nghĩa <span style="color:#FFFF00;"><strong><em>việt nam</em></strong></span></span></p>

<p><span style="font-size:36px;">Độc lập - tự do - hạnh phúc</span></p>

<p> </p>
3.Kết luận
Như vậy là tôi đã giới thiệu xong với các bạn về Gem Ckeditor.một gem rất hữu ích trong việc editor một đoạn văn bản.Các bạn có thể sử dụng thêm các chức năng upload file ...Chúc các bạn thành công trong việc cài đặt và sử dụng gem ckeditor. Tất cả thông tin về gem ckeditor được cung cấp tại đây: https://github.com/galetahub/ckeditor
Toàn bộ source code demo các bạn có thể download tại đây: https://github.com/HoangVanTrinh92/demo_ckeditor
Tất cả những hàm hỗ trợ customize ckeditor được cung cấp tại đây: http://docs.ckeditor.com/#!/guide
All rights reserved
