AWS CloudFormation Hands-on 01: Khởi tạo EC2 instance với EBS volume
Bài đăng này đã không được cập nhật trong 2 năm
Overview
Trong bài viết này, chúng ta sẽ thực hiện từng bước để triển khai EC2 instance cùng EBS Volume sử dụng CloudFormation template.
Hands-on
Bước 1: Tạo file template.yml
Khởi tạo file template.yml với nội dung sau:
Description: >-
  AWS CloudFormation sample template.
  Create a new EC2 instance and if environment is 'prod' then attach a new EBS volume to it
Bổ sung các parameters:
## =================== PARAMETERS ===================
Parameters:
  paramEnvironmentType: # ask a user to define whether it is 'dev', 'qa' or 'prod' environment
    Description: Environment type
    Default: dev # by default it is 'dev' environment
    Type: String
    AllowedValues: [dev, qa, prod]
    ConstraintDescription: Must specify 'dev', 'qa' or 'prod'
  paramTagValues: #ask a user to specify some values for tags
    Description: 'Comma-delimited list of tag values corresponse to compaty department'
    Type: CommaDelimitedList
    Default: 'Development, Operation, Finance'
Ở đây chúng ta khai báo hai tham số:
- paramEnvironmentType: tham số định nghĩa môi trường đang triển khai, có thể là dev, qa hoặc prod
- paramTagValues: một dãy các giá trị phân tách bởi dấu ',' được sử dụng làm thẻ tag cho resource
Tiếp đến, khởi tạo một đối tượng map trong mục Mapping
## =================== MAPPINGS ===================
Mappings: # map image ids with regions
  mapRegion:
    us-east-1:
      AMI: ami-1853ac65
    us-west-1:
      AMI: ami-bf5540df
    eu-west-1:
      AMI: ami-3bfab942
    ap-southeast-1:
      AMI: ami-e2adf99e
    ap-southeast-2:
      AMI: ami-43874721
Đối tượng này sẽ lưu trữ EC2 image ID mà ta cần tạo cho từng region riêng biệt.
Tiếp theo, khởi tạo Condition
## =================== CONDITIONS ===================
Conditions:
  isProd: !Equals [!Ref paramEnvironmentType, prod] # if 'prod' then TRUE, otherwise FALSE
  isDev: !Equals [!Ref paramEnvironmentType, dev]   # if 'dev' then TRUE, otherwise FALSE
Hai biến điều kiện này sẽ xác định môi trường hiện tại là Prod hay Dev dựa vào giá trị của tham số paramEnvironmentType định nghĩa phía trên.
Cuối cùng là thêm các resources, bao gồm: EC2 Instanc, EBS volume và VolumeAttachment (để liên kết EC2 instance với volume).
Resources:
  myEC2Instance: # create a new EC2 instance
    Type: 'AWS::EC2::Instance'
    Properties:
      ImageId: !FindInMap # define imageId based on region
        - mapRegion # map's name
        - !Ref 'AWS::Region' # top level key which is a region where a new instance is being created
        - AMI # second level key - e.g. for 'us-east-1' the value for ImageId is 'ami-0ff8a91507f77f867'
      InstanceType: !If [isProd, t2.micro, !If [isDev, t2.nano, t1.micro] ] # if 'prod', then t2.micro, (else) if 'dev' then t2.nano otherwise (if 'qa') then t1.micro
      Tags:
      - Key: CloudFormationLab
        Value: !Join [' ', ['EC2 Instance for', !Ref AWS::Region] ]

  myVolume: # create a new EBS volume only if environment is 'prod'
    Type: 'AWS::EC2::Volume'
    Condition: isProd # conditionally create EBS volume (only if environment is 'prod')
    Properties:
      Size: 20 # 20 GiB
      AvailabilityZone: !GetAtt myEC2Instance.AvailabilityZone # get AZ of a new EC2 instance
      Tags:
        - Key: CloudFormationLab
          Value: !Select [ 0, !Ref paramTagValues ] # output is 'Development' - the first value of in array paramater.

  myMountPoint: # attach an Amazon EBS volume to an EC2 instance only i environment is 'prod'
    Type: 'AWS::EC2::VolumeAttachment'
    Condition: isProd # conditionally attach EBS volume (only if environment is 'prod')
    Properties:
      InstanceId: !Ref myEC2Instance # ref to a new EC2 instance
      VolumeId: !Ref myVolume # ref to a new EBS volume
      Device: /dev/sdh
Cụ thể:
- myEC2Instance: resource được tạo với type là AWS::EC2::Instance. Các thuộc tính của nó bao gồm: ImageId (giá trị được tìm trong map mapRegion), InstanceType (loại EC2 instance, ở đây ta sử dụng function If để lựa chọn type tùy vào condition isProd, isDev), Tags (thẻ tên được gắn cho resource)
- myVolume: resource được tạo với type AWS::EC2::Volume. Các thuộc tính của nó bao gồm: Size (20GB), AvailabilityZone (lấy giá trị AZ của myEC2Instance) và Tags (thẻ tên được gắn cho resource). Ở đây ta sử dụng Condition: isProd, nghĩa là sẽ chỉ tạo resource này nếu tham số paramEnvironmentType="prod".
- myMountPoint: resouce với type AWS::EC2::VolumeAttachment. Các thuộc tính của nó bao gồm: InstanceId (tham chiếu đến EC2 instance), VolumeId (tham chiếu đến EBS volume) và Device (xác định disk partition cần mount volume). Ở đây ta sử dụng Condition: isProd, nghĩa là sẽ chỉ tạo resource này nếu tham số paramEnvironmentType="prod".
Vậy là hoàn tất, bạn có thể tham khảo file template hoàn chỉnh tại đây.
Chi tiết về cú pháp sử dụng trong file template, truy cập mục "CloudFormation Template" trong bài viết "Sơ lược về CloudFormation".
Bước 2: Tạo infrastructure
Tại bước này, ta sẽ khởi tạo tài nguyên AWS đã định nghĩa trong Template file sử dụng AWS CLI.
Chạy lệnh sau để tạo stack (CloudFormation coi mỗi một tập resource định nghĩa bởi một template là một stack) :
aws cloudformation create-stack --stack-name ec2-with-volume --template-body file://template.yml
Kiểm tra trạng thái stack vừa tạo
aws cloudformation describe-stacks --stack-name ec2-with-volume
Ta sẽ thấy log dạng như sau:
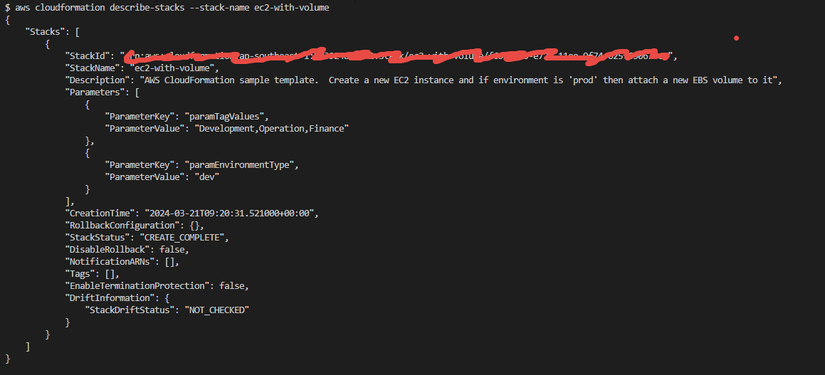
Chú ý đến trạng thái stack: "StackStatus": "CREATE_COMPLETE"
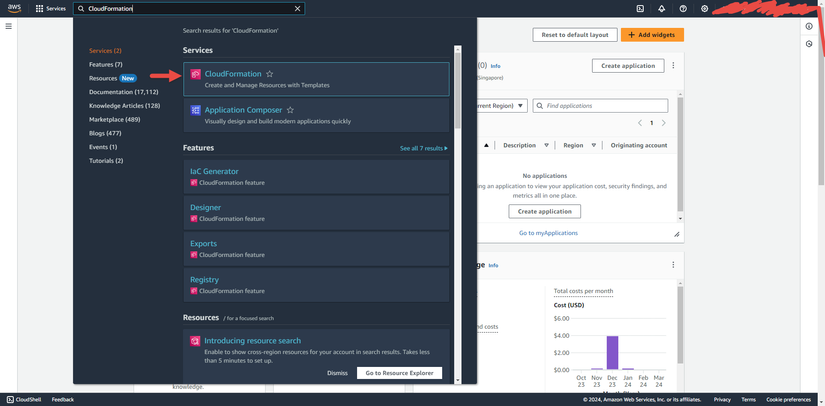
Bước 3: View stack trên website
Truy cập website https://aws.amazon.com/ , tiến hành đăng nhập và tìm kiếm mục "CloudFormation":
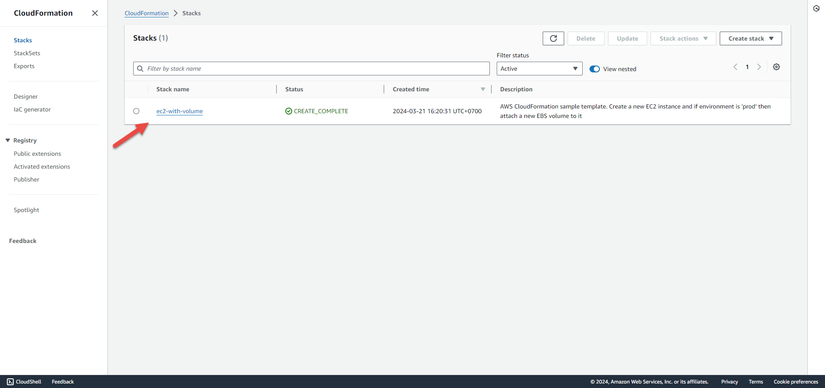
Click chọn tên stack bạn vừa khởi tạo:
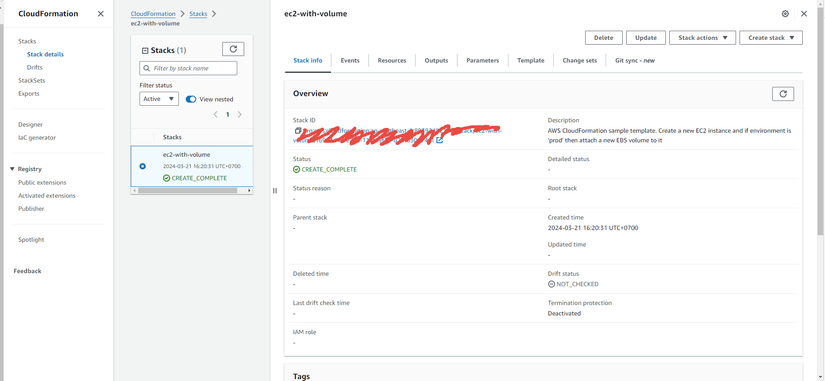
Tại đây ta sẽ thấy các thông tin của stack bao gồm: stack ID, trạng thái, thời gian khởi tạo, cùng các mục đã định nghĩa trong template file như Resources, Parameters, Outputs, ...
Truy cập tab Resource, bạn sẽ thấy hiện tại chỉ có myEC2Instance được khởi tạo.
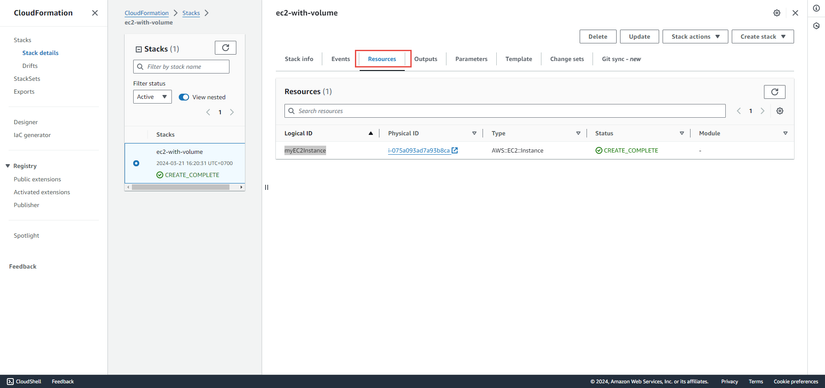
Nguyên nhân là do trong file template ta set giá trị mặc định của tham số paramEnvironmentType là "dev" nên Condition isProd sẽ trả về False, do đó hai resource myVolume và myMountPoint sẽ không được tạo.
Bước 4: Cập nhật stack
Trong phần này, ta sẽ cập nhật tham số paramEnvironmentType sang giá trị prod.
Chạy lệnh sau để khởi tạo ChangeSet
aws cloudformation create-change-set --stack-name ec2-with-volume --change-set-name updateParamEnvironmentType --use-previous-template --parameters ParameterKey="paramEnvironmentType",ParameterValue="prod"
Truy cập giao diện web, trong tab "Change sets", click chọn changeset vừa tạo:
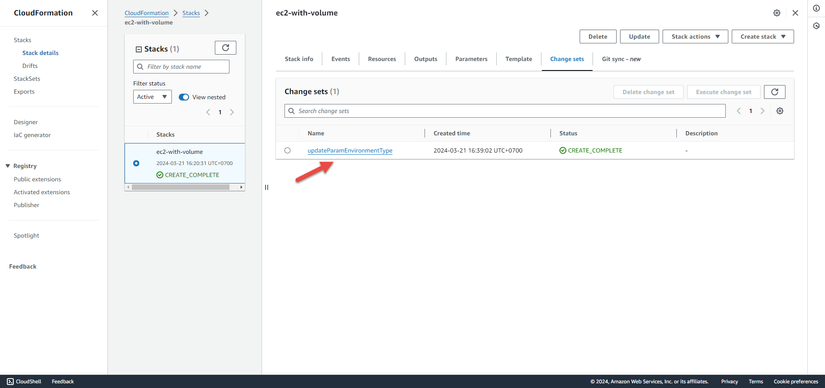
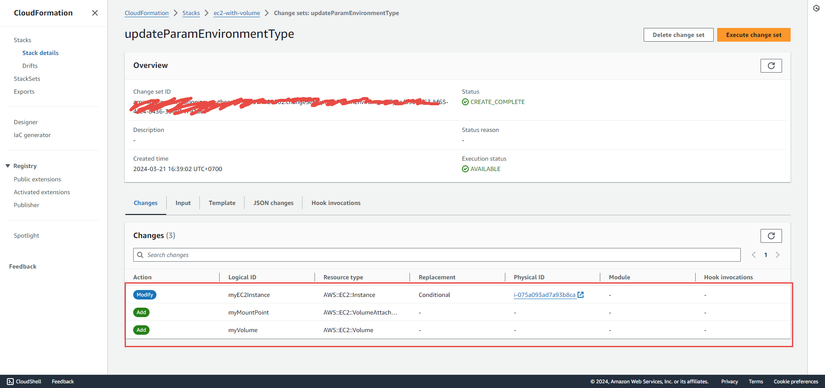
Bạn sẽ thấy các thay đổi sẽ được cập nhật nếu execute changeset, bao gồm 2 resource được tạo và một resource được cập nhật.
Tiến hành execute changeset với lệnh
aws cloudformation execute-change-set --stack-name ec2-with-volume --change-set-name updateParamEnvironmentType
Theo dõi stack trên website, bạn sẽ thấy cả 3 resource đã được tạo:

Bước 5: Delete stack
Bước cuối cùng, sau khi đã thực hành xong đừng quên delete stack nhé:
aws cloudformation delete-stack --stack-name ec2-with-volume
Kiểm tra trên giao diện web để chắc chắn bạn đã xóa stack thành công.
Kết bài
Trong bài viết này, mình đã chia sẻ chi tiết các bước để triển khai EC2 instance với EBS Volume sử dụng CloudFormation template. Hi vọng bài viết này có ích cho bạn. Trân trọng!
All rights reserved
