Tìm hiểu sâu hơn về DatePicker trong Flutter
Bài đăng này đã không được cập nhật trong 5 năm
Mình là dev IOS , khi làm app flutter thì mình thắc mắc Flutter sẽ show ngày tháng sinh nhật, show lịch hẹn bằng widget gì, mình có tìm hiểu thì có thể dùng thằng DatePicker giống 1 calendar để chọn ngày tháng năm, cái này thì chắc dev Android không lạ gì với nó.
1. Cài đặt DatePicker.
Các bạn hãy thêm đoạn code sau :
import 'package:flutter/material.dart';

class MyHomeApp extends StatelessWidget {
  @override
  Widget build(BuildContext context) {
    return MaterialApp(
      title: 'Flutter Demo',
      theme: ThemeData(primarySwatch: Colors.blue, brightness: Brightness.dark),
      home: DatePickerDemo(),
    );
  }
}


class DatePickerDemo extends StatefulWidget {
  @override
  _DatePickerDemoState createState() => _DatePickerDemoState();
}

class _DatePickerDemoState extends State<DatePickerDemo> {
  /// Which holds the selected date
  /// Defaults to today's date.
  DateTime selectedDate = DateTime.now();

  _selectDate(BuildContext context) async {
    final DateTime picked = await showDatePicker(
      context: context,
      initialDate: selectedDate,
      firstDate: DateTime(2000),
      lastDate: DateTime(2025),
    );
    if (picked != null && picked != selectedDate)
      setState(() {
        selectedDate = picked;
      });
  }

  @override
  Widget build(BuildContext context) {
    return Scaffold(
      body: Center(
        child: Column(
          mainAxisSize: MainAxisSize.min,
          children: <Widget>[
            Text(
              "${selectedDate.toLocal()}".split(' ')[0],
              style: TextStyle(fontSize: 55, fontWeight: FontWeight.bold),
            ),
            SizedBox(
              height: 20.0,
            ),
            RaisedButton(
              onPressed: () => _selectDate(context),
              child: Text(
                'Select date',
                style:
                TextStyle(color: Colors.black, fontWeight: FontWeight.bold),
              ),
              color: Colors.greenAccent,
            ),
          ],
        ),
      ),
    );
  }
}
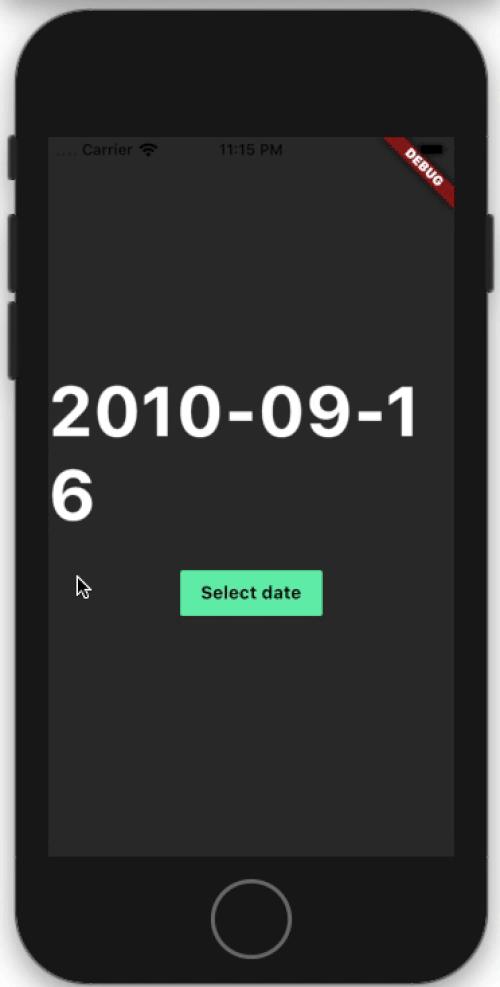
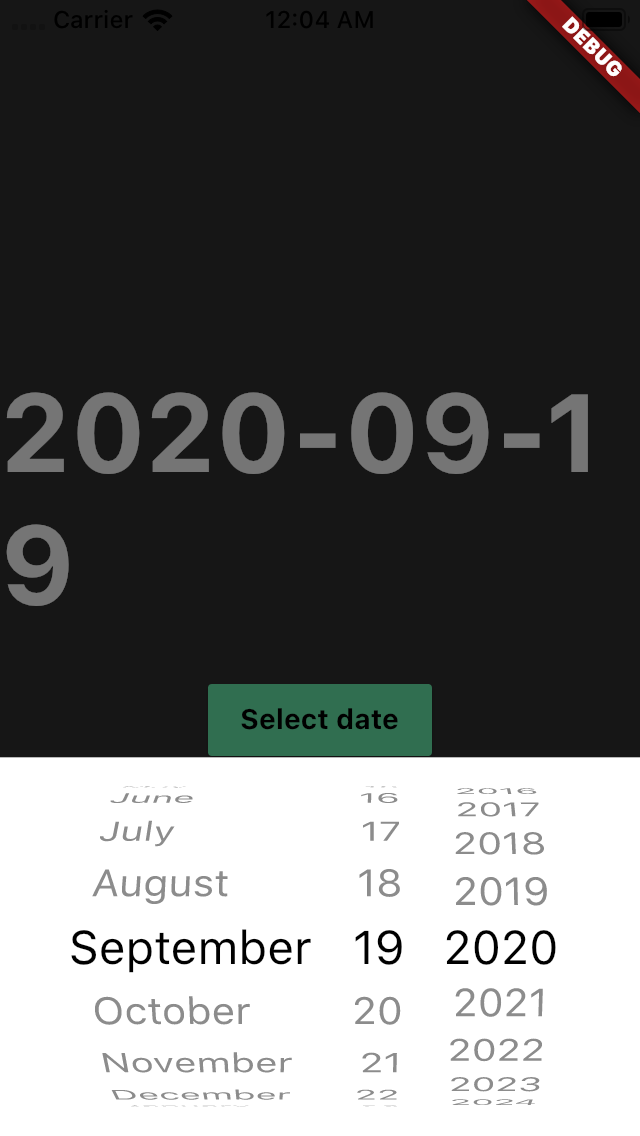
Kết quả:
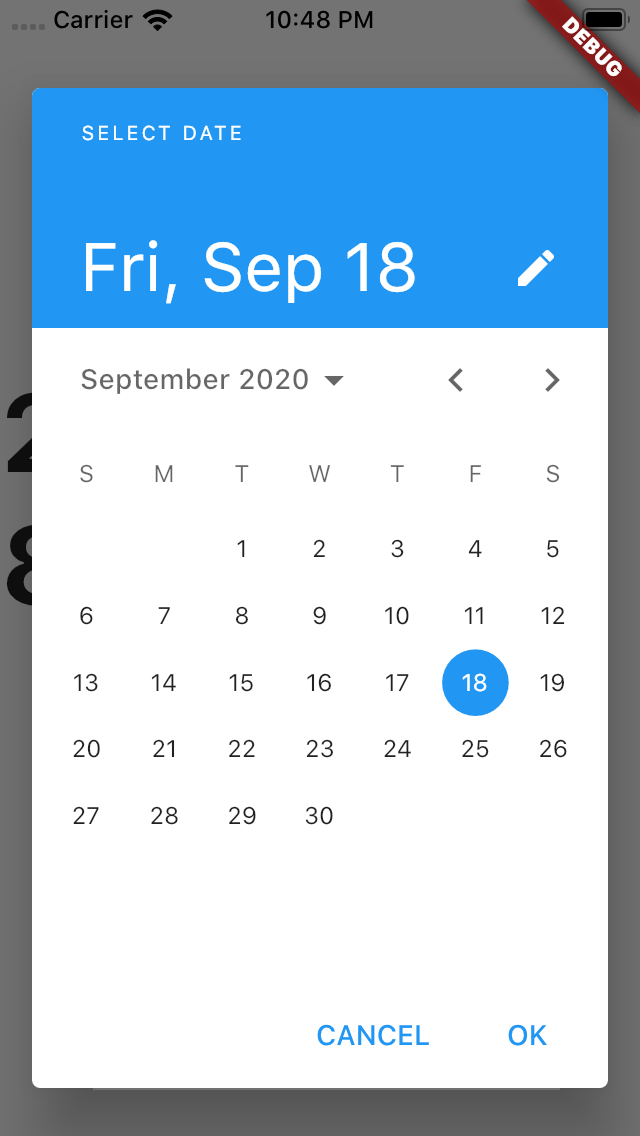
Chỉ cần vài dòng code là bạn có thể implement DatePicker:
showDatePicker(
  context: context,
  initialDate: DateTime.now(),
  firstDate: DateTime(2000),
  lastDate: DateTime(2025),
)
Để setting giới hạn của DatePicker , bạn set code cho 2 thuộc tính : firstDate, lastDate. Ở bên trên mình set giới hạn cho đến Picker là Min Year Date : 2000, Max Year Date: 2025.
2. Setting hộp thoại để nhập ngày tháng năm.
Nếu bạn không thích giao diện DatePicker như Calendar thì bạn có thể đổi nó sang giao diện nhập date vào 1 ô dialog:
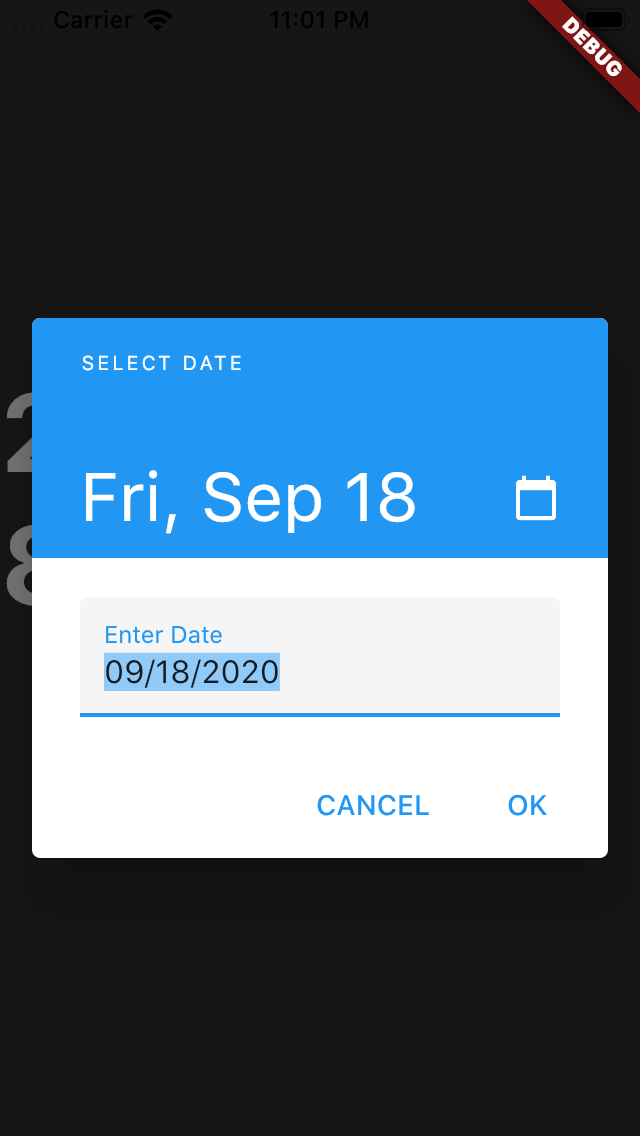
Đơn giản trong function showDatePicker có thuộc tính initialEntryMode mặc đinh value của nó là DatePickerEntryMode.calendar, bạn thay nó thành DatePickerEntryMode.input. Rất đơn giản ^_^.
Bây giờ nếu bạn biết chắc sinh nhật là một năm nào rồi và bạn muốn chọn năm trước sau đó mới chọn ngày tháng thì trong function showDatePicker bạn thêm thuộc tính initialDatePickerMode:DatePickerMode.year
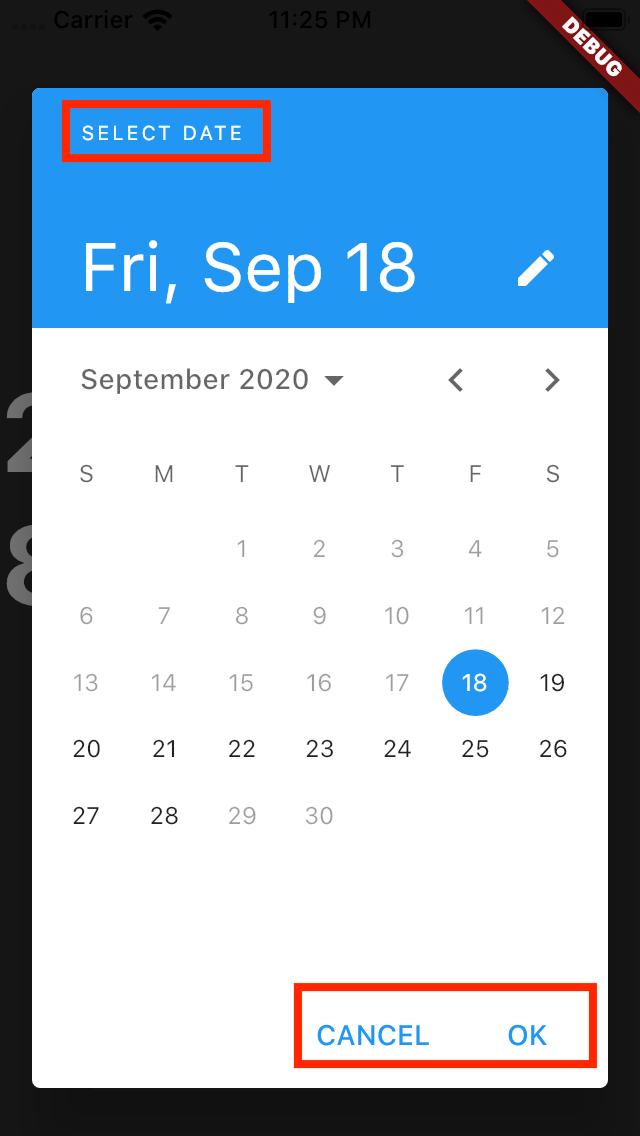
3. Setting người dùng chỉ được nhập ngày trong giới hạn cụ thể.
Nếu bạn muốn 1 người dùng chỉ được chọn một số ngày trong 1 tháng thì bạn thêm thuộc tính : selectableDayPredicate. Bạn hãy thêm đoạn code sau :
/// This decides which day will be enabled
/// This will be called every time while displaying day in calender.
bool _decideWhichDayToEnable(DateTime day) {
  if ((day.isAfter(DateTime.now().subtract(Duration(days: 1))) &&
      day.isBefore(DateTime.now().add(Duration(days: 10))))) {
    return true;
  }
  return false;
}
showDatePicker(
  context: context,
  initialDate: selectedDate,
  firstDate: DateTime(2000),
  lastDate: DateTime(2025),
  selectableDayPredicate: _decideWhichDayToEnable,
)
Kết quả :

4. Thay đổi text DatePicker.
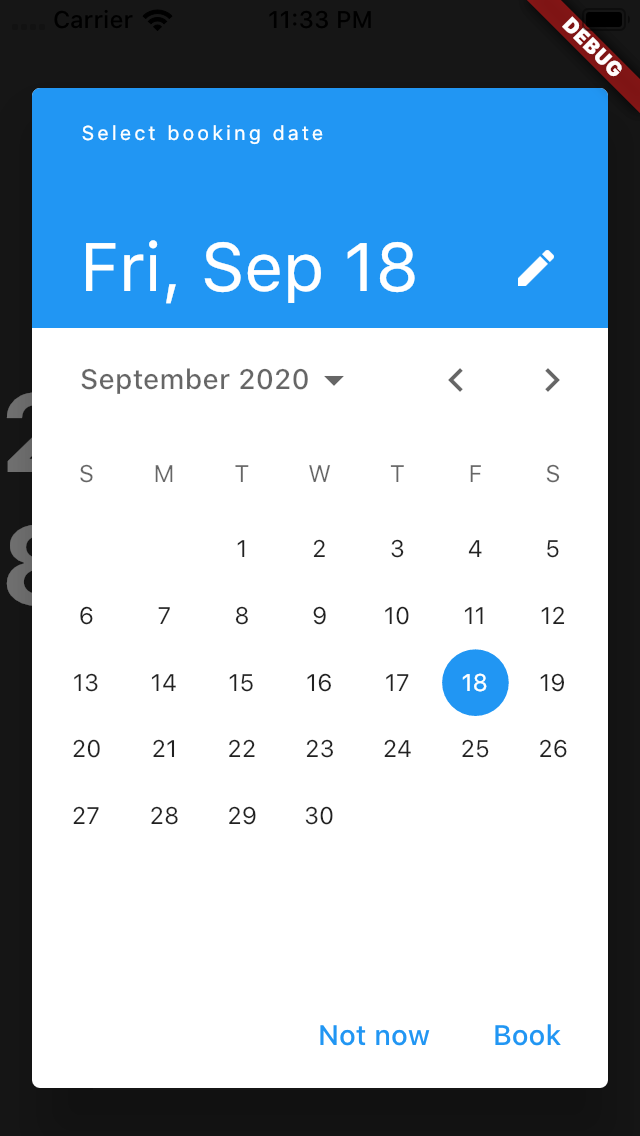
Bạn thử thêm các 3 dòng code vào trong function showDatePicker:
showDatePicker(
  context: context,
  initialDate: selectedDate,
  firstDate: DateTime(2000),
  lastDate: DateTime(2025),
  helpText: 'Select booking date', // Can be used as title
  cancelText: 'Not now',
  confirmText: 'Book',
)
Kết quả :
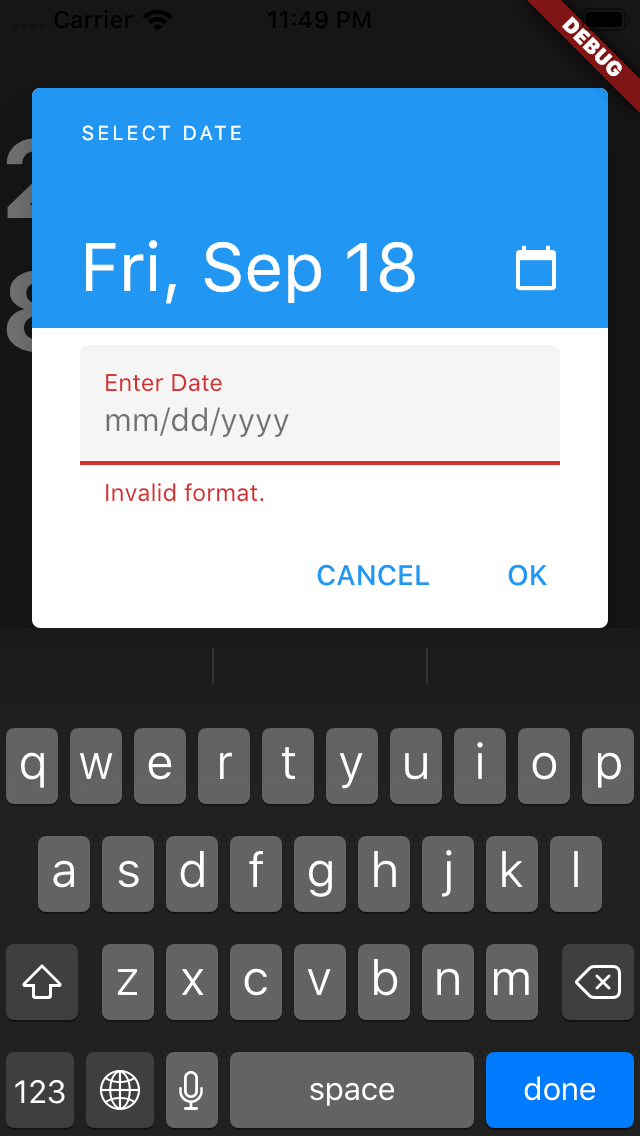
5. Thay đổi message lỗi.
Khi DatePicker đang ở dạng nhập bạn có thể thay đổi text message lỗi :
showDatePicker(
  context: context,
  initialDate: selectedDate,
  firstDate: DateTime(2000),
  lastDate: DateTime(2025),
  errorFormatText: 'Enter valid date',
  errorInvalidText: 'Enter date in valid range',
)
Kết quả :
Tương tự bạn có thể change label và hint text. Đoạn này các bạn tự thử nhé :
showDatePicker(
  context: context,
  initialDate: selectedDate,
  firstDate: DateTime(2000),
  lastDate: DateTime(2025),
  fieldLabelText: 'Booking date',
  fieldHintText: 'Month/Date/Year',
)
6. Cách để có giao diện DatePicker giống với target Platform?
Hiện tại thì mình đang dùng Material Design, vậy làm thế nào để dùng được Cupertino Datepicker in iOS? Các bạn import đoạn code sau :
import 'package:flutter/material.dart';
import 'package:flutter/cupertino.dart';


_selectDate(BuildContext context) async {
  final ThemeData theme = Theme.of(context);
  assert(theme.platform != null);
  switch (theme.platform) {
    case TargetPlatform.android:
    case TargetPlatform.fuchsia:
    case TargetPlatform.linux:
    case TargetPlatform.windows:
      return buildMaterialDatePicker(context);
    case TargetPlatform.iOS:
    case TargetPlatform.macOS:
      return buildCupertinoDatePicker(context);
  }
}
/// This builds material date picker in Android
buildMaterialDatePicker(BuildContext context) async {
  final DateTime picked = await showDatePicker(
    context: context,
    initialDate: selectedDate,
    firstDate: DateTime(2000),
    lastDate: DateTime(2025),
    builder: (context, child) {
      return Theme(
        data: ThemeData.light(),
        child: child,
      );
    },
  );
  if (picked != null && picked != selectedDate)
    setState(() {
      selectedDate = picked;
    });
}
/// This builds cupertion date picker in iOS
buildCupertinoDatePicker(BuildContext context) {
  showModalBottomSheet(
      context: context,
      builder: (BuildContext builder) {
        return Container(
          height: MediaQuery.of(context).copyWith().size.height / 3,
          color: Colors.white,
          child: CupertinoDatePicker(
            mode: CupertinoDatePickerMode.date,
            onDateTimeChanged: (picked) {
              if (picked != null && picked != selectedDate)
                setState(() {
                  selectedDate = picked;
                });
            },
            initialDateTime: selectedDate,
            minimumYear: 2000,
            maximumYear: 2025,
          ),
        );
      });
}
Như vậy khi chạy máy Android thì sẽ hiển thị Datepicker trong material còn chạy IOS thì sẽ hiển thị DatePicker của cupertino như hình dưới :
Cám ơn các bạn đã theo dõi bài viết của mình .
Tài liệu tham khảo :
https://medium.com/flutter-community/a-deep-dive-into-datepicker-in-flutter-37e84f7d8d6c
All rights reserved
