Tạo Slide Introduction App Trong React Native
Bài đăng này đã không được cập nhật trong 6 năm
Khi người dùng tiếp cận với một ứng dụng mới màn hình đầu tiên mà họ thấy đó là Splash và tiếp sau Giới thiệu những chức năng chính của app phải không nào? Hôm nay, chúng ta sẽ thử làm màn hình Introduction App với React Native các bạn nhé! À một điểm đặc biệt khi làm màn hình này không biết bạn có thắc mắc tại sao nó thường được designer làm khá cẩn thận và phải duyệt đi duyệt lại rất nhiều lần không?
Trả lời: Vì người dùng có quyết định dùng app của cty này nữa hay không phần trăm lớn nhất nằm ở màn hình đầu tiên này có đủ hấp dẫn họ hay không. Vì thế mà nó thực sự rất quan trọng, dù cho app của mình tính năng khá hay, lợi ích đến đâu mà họ không muốn dùng ngay khi tiếp cận app thì cũng "toi công" rồi. Nào bây giờ mình sẽ bắt đầu từng phần một cho đến khi bạn làm ra các slide introduction nhé!
1. Intro Slide Đơn Giản Và Dễ Custom

Mình sẽ thực hiện màn hình như trong hình ảnh ở trên, có tất cả 3 slide giới thiệu về tính năng chính của app. Chắc hẳn bạn đang nghĩ tới việc dùng ViewPager (trong Android) hay ScrollView trong React native? Đây là một hướng làm rất đúng rồi đó bạn. Nhưng thực tế nếu làm vậy sẽ mất khá nhiều thời gian theo cách này.
Đơn giản chúng ta sẽ sử dụng Swiper trong React native để đạt được spec này nha.
Trước tiên install Swiper (trong root project) : npm i --save react-native-swiper@nightly
Mở file App.js và sử dụng Swiper như sau:
import React, {Fragment, Component} from 'react';
import {
  StyleSheet,
  View,
  Text,
  Image,
  Dimensions
} from 'react-native';
import Swiper from 'react-native-swiper';

export default class App extends Component {

  render(){
    return (
      <Swiper style={styles.wrapper} showsButtons>
  <View style={styles.slide1}>
    <Text style={styles.text}>Network Booster</Text>
  </View>
  <View style={styles.slide2}>
    <Text style={styles.text}>VPN Secure</Text>
  </View>
  <View style={styles.slide3}>
    <Text style={styles.text}>Easy User</Text>
  </View>
</Swiper>
  );
}
}

const styles = StyleSheet.create({
  wrapper: {},
    slide: {
   flex: 1,
   justifyContent: 'center',
   backgroundColor: 'transparent'
 },
 text: {
   color: '#fff',
   fontSize: 30,
   fontWeight: 'bold'
 },
 image: {
   width,
   flex: 1
 },
    slide1: {
      flex: 1,
      justifyContent: 'center',
      alignItems: 'center',
      backgroundColor: '#9DD6EB'
    },
    slide2: {
      flex: 1,
      justifyContent: 'center',
      alignItems: 'center',
      backgroundColor: '#97CAE5'
    },
    slide3: {
      flex: 1,
      justifyContent: 'center',
      alignItems: 'center',
      backgroundColor: '#92BBD9'
    },
  scrollView: {
    backgroundColor: Colors.lighter,

  },
  engine: {
    position: 'absolute',
    right: 0,
  },
  body: {
    backgroundColor:Colors.white,
  },
  sectionContainer: {
    marginTop: 32,
    paddingHorizontal: 24,
  },
  sectionTitle: {
    fontSize: 24,
    fontWeight: '600',
    color: Colors.black,
  },
  sectionDescription: {
    marginTop: 8,
    fontSize: 18,
    fontWeight: '400',
    color: Colors.dark,
  },
  highlight: {
    fontWeight: '700',
  },
  footer: {
    color: Colors.dark,
    fontSize: 12,
    fontWeight: '600',
    padding: 4,
    paddingRight: 12,
    textAlign: 'right',
  },

  paginationStyle: {
    position: 'absolute',
    bottom: 10,
    right: 10
  },
  paginationText: {
    color: 'white',
    fontSize: 20
  }
});
Tiếp đó: Bạn run thử project trên Android hoặc iOS:
Android: react-native run-android
iOS: react-native run-ios

Bây giờ bạn muốn thay đổi 1 trong 3 màn hình trên, ví dụ thêm phần mô tả cho tính năng VPN Secure chẳng hạn "Always secure all data request" Mình sẽ làm như sau:
Chỗ slide2 thêm:
<View style={styles.slide2}>
    <Text style={styles.text}>VPN Secure</Text>
    <Text style={styles.textDes}> Always secure all data request</Text>
  </View>
Thêm stylesheet textDes
textDes: {
   color: '#fff',
   fontSize: 16,
 },
Khá đơn giản phải không nào. Tiếp theo mình thử một slide với hình ảnh nhé.
2. Intro Slide Với Ảnh

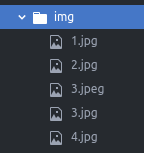
Bạn cần thêm resoure ảnh vào trong project của mình, thêm folder img vào root project. Copy những hình ảnh mong muốn vào folder này. (Hình ảnh dưới )
Sửa trong file App.js của bạn tại phần render view như sau:
export default class App extends Component {

  render(){
    return (
      <Swiper
          style={styles.wrapper}
          renderPagination={renderPagination}
          loop={false}
        >
          <View style={styles.slide} title={<Text numberOfLines={1}>Aussie tourist dies at Bali hotel</Text>}>
            <Image style={styles.image} source={require('./img/1.jpg')} />
          </View>
          <View style={styles.slide} title={<Text numberOfLines={1}>Big lie behind Nine’s new show</Text>}>
            <Image style={styles.image} source={require('./img/2.jpg')} />
          </View>
          <View style={styles.slide} title={<Text numberOfLines={1}>Why Stone split from Garfield</Text>}>
            <Image style={styles.image} source={require('./img/3.jpeg')} />
          </View>
          <View style={styles.slide} title={<Text numberOfLines={1}>Learn from Kim K to land that job</Text>}>
            <Image style={styles.image} source={require('./img/4.jpg')} />
          </View>
        </Swiper>
  );
}
}
Thêm các stylesheet sau:
wrapper: {},
    slide: {
   flex: 1,
   justifyContent: 'center',
   backgroundColor: 'transparent'
 },

 image: {
   width,
   flex: 1
 }
Và đừng quên khai báo Dimensions và lấy kích thước width của màn hình thiết bị như sau:
import {
  StyleSheet,
  View,
  Text,
  Image,
  Dimensions
} from 'react-native'

const { width } = Dimensions.get('window')

//Hiển thị số đếm lúc chuyển sang slide mới

const renderPagination = (index, total, context) => {
  return (
    <View style={styles.paginationStyle}>
      <Text style={{ color: 'grey' }}>
        <Text style={styles.paginationText}>{index + 1}</Text>/{total}
      </Text>
    </View>
  )
}
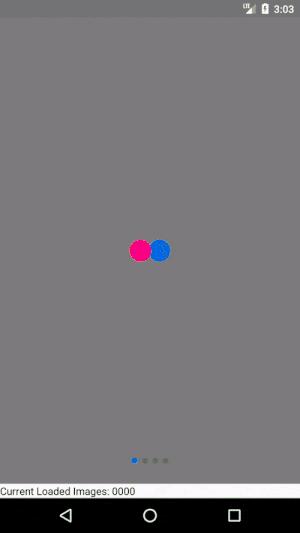
3. Slide Loading Và Hiển Thị Ảnh
Từ cái tên bạn có thể thấy được chức năng của nó rồi, phần loading sẽ hiển thị trươc khi lấy được dữ liệu cần thiết và ở đây là hiển thị ảnh từ một server.
Chúng ta sửa lại một chút trong phần render như sau:
constructor (props) {
    super(props)
    this.state = {
      imgList: [
        'https://leanature.com/wp-content/uploads/2015/09/Slide_g%C3%A9n%C3%A9rique_Groupe.jpg',
        'http://www.whoa.in/20131111-Whoa/natural-heart-criation-between-a-city.jpg',
        'https://www.pandotrip.com/wp-content/uploads/2018/07/San-Quirico-Val-d%E2%80%99Orcia-Tuscany-Italy.jpg',
        'https://www.usnews.com/dims4/USNEWS/0848a32/2147483647/thumbnail/640x420/quality/85/?url=http%3A%2F%2Fcom-usnews-beam-media.s3.amazonaws.com%2Fbb%2Fdc%2Fd01c5c674a318258efeff8baef30%2F0-intro-getty.jpg'
      ],
      loadQueue: [0, 0, 0, 0]
    }
    this.loadHandle = this.loadHandle.bind(this)
  }
  loadHandle (i) {
    let loadQueue = this.state.loadQueue
    loadQueue[i] = 1
    this.setState({
      loadQueue
    })
  }
  render () {
    return (
      <View style={{flex: 1}}>
        <Swiper loadMinimal loadMinimalSize={1} style={styles.wrapper} loop={false}>
          {
            this.state.imgList.map((item, i) => <Slide
              loadHandle={this.loadHandle}
              loaded={!!this.state.loadQueue[i]}
              uri={item}
              i={i}
              key={i} />)
          }
        </Swiper>
        <View>
          <Text>Current Loaded Images: {this.state.loadQueue}</Text>
        </View>
      </View>
    )
  }
Tạo thêm 1 view Slide :
const Slide = props => {
  return (<View style={styles.slide}>
    <Image onLoad={props.loadHandle.bind(null, props.i)} style={styles.image} source={{uri: props.uri}} />
    {
      !props.loaded && <View style={styles.loadingView}>
        <Image style={styles.loadingImage} source={loading} />
      </View>
    }
  </View>)
}
Sửa trong phần stylesheet:
image: {
   width,
   flex: 1,
    backgroundColor: 'transparent'
 },
 loadingView: {
   position: 'absolute',
   justifyContent: 'center',
   alignItems: 'center',
   left: 0,
   right: 0,
   top: 0,
   bottom: 0,
   backgroundColor: 'rgba(0,0,0,.5)'
 },

 loadingImage: {
   width: 60,
   height: 60
 },
Kết quả thực chạy:
4. Tổng kết
Qua bài viết này hy vọng các bạn sẽ tìm thấy nhiều sự hữu ích khi làm tính năng intro app và có thể rút gọn hơn những thao tác không cần thiết để xây dựng ứng dụng nhanh hơn. Nếu có thắc mắc bạn có thể để lại comment để cùng đóng góp thêm cho bài viết nhé~
All rights reserved
