Tạo ứng dụng TODO với React Native sử dụng Hooks
Bài đăng này đã không được cập nhật trong 7 năm
React Hooks là gì?
Hook là một khái niệm mới đc React team công bố gần đây ở React Conf 2018. Nó cho phép một functional component có thể sử dụng state, sử dụng các lifecycle method, context và nhiều thứ khác, nghe có vẻ rất tuyệt phải ko, trong bài viết này chúng ta sẽ tìm hiểu hooks thông qua todo app nhé. Chi tiết về Hooks các bạn có thể tham khảo thêm tại https://reactjs.org/docs/hooks-intro.html
Bắt đầu
Hiện tại React Native v0.59 đã chính thức hỗ trợ hooks. Cùng khởi tạo React Natve project với câu lệnh huyền thoại nhé:
react-native init RNHooksTodo
Mọi thứ có vẻ tốt chứ ? Bây giờ, hãy thêm các vector icons chúng ta sẽ sử dụng các icon trong ứng dụng:
$ yarn add react-native-vector-icons
hãy link package với lệnh:
$ react-native link react-native-vector-icons
Nếu gặp lỗi khi link tự động, Hãy thử link thủ công theo hướng dẫn tại đây
Đầu tiên hãy mở dự án trong IDE yêu thích của bạn, sau đó mở tệp App.js , hãy làm quen ngay với hook bằng cách chuyển class App thành function hooks: 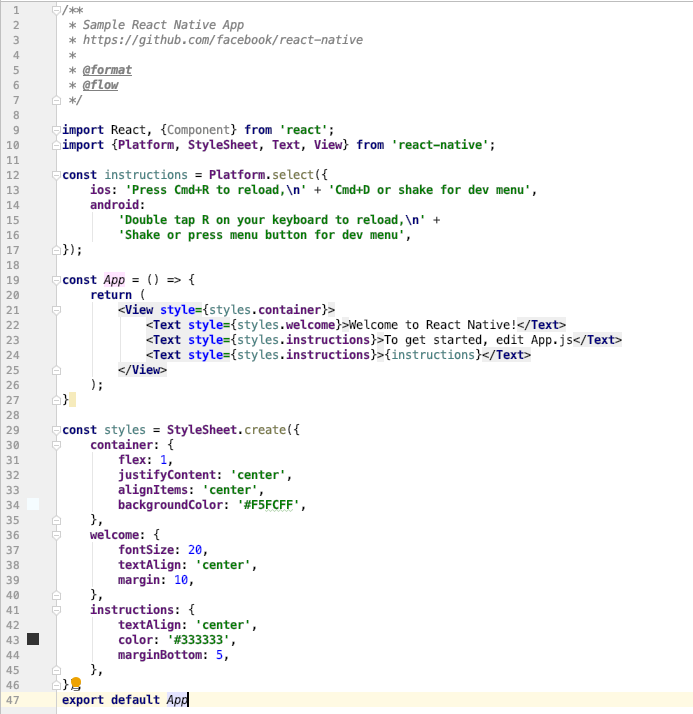
Bây giờ hãy chạy ứng dụng trong bất kỳ nền tảng nào bạn muốn, đối với tôi, tôi sẽ chạy trên iOS
$ react-native run-ios
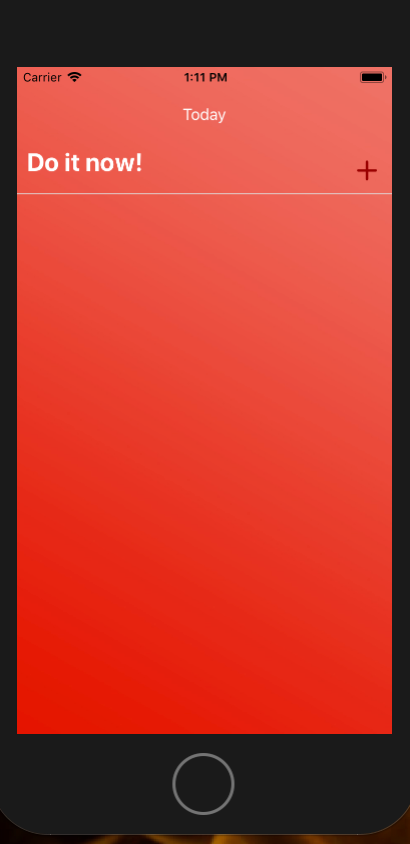
Tiếp theo, cùng tạo giao diện chính cho app nhé:
const App = () => {
    return (
        <ImageBackground source={{ uri: 'https://wallpapertag.com/wallpaper/full/3/4/d/121586-new-red-gradient-background-2560x1600-for-phone.jpg' }} style={styles.container}>
            <Text style={{ marginTop: '10%', fontSize: 16, color: 'white' }}>Today</Text>
            <View style={styles.textInputContainer}>
                <TextInput
                    style={styles.textInput}
                    multiline={true}
                    placeholder={'Do it now!'}
                    placeholderTextColor="white"
                />›
                <TouchableOpacity>
                    <Icon name="plus" size={30} color="#900" style={{ marginLeft: 15 }} />
                </TouchableOpacity>
            </View>
        </ImageBackground>
    );
}

const styles = StyleSheet.create({
    container: {
        flex: 1,
        justifyContent: 'flex-start',
        alignItems: 'center',
        backgroundColor: '#F5FCFF',
    },
    textInput: {
        height: 20,
        flex: 1,
        minHeight: '7%',
        marginTop: '5%',
        fontSize: 25,
        fontWeight: 'bold',
        color: 'white',
        paddingLeft: 10
    },
    welcome: {
        fontSize: 20,
        textAlign: 'center',
        margin: 10,
    },
    instructions: {
        textAlign: 'center',
        color: '#333333',
        marginBottom: 5,
    },
    textInputContainer: {
        flexDirection: 'row',
        alignItems: 'baseline',
        borderColor: 'rgb(222,222,222)',
        borderBottomWidth: 1,
        paddingRight: 10,
        paddingBottom: 5
    }
});
Cùng chạy ứng dụng xem giao diện thế nào nhé :
Phần thú vị nhất Tiếp theo, chúng ta sẽ sử dụng hooks để thêm các task của mình.
Để thêm một task theo cách thông thường là bằng cách khai báo state và cập nhật state đó bất cứ khi nào người dùng nhấp vào nút dấu cộng.
// thay vì sử dụng
this.state = {
     todo: [],
     value: ''
}
// với hooks, bạn có thể làm như sau
const [todos, setTodos] = useState([])
const [value, setValue] = useState('')
// updating the state the old way
this.setState({
     todos: [...this.state.todos,{text: this.state.values,
             key: Date.now()}            ]
})
// với hooks
setTodos([...todos, { text: value, key: Date.now()}])
Trong đoạn code trên, đối số duy nhất được truyền cho useState là initial state. Cú pháp array destructuring cho phép chúng ta đặt tên cho các biến state và phương thức mà chúng ta sẽ sử dụng để update nó. Vì vậy, theo quy ước, các todos là tên state mà chúng ta sẽ sử dụng trong render và setTodos sẽ chịu trách nhiệm cập nhật state của chúng ta. Nếu bạn muốn tìm hiểu thêm hãy xem liên kết này
Vì vậy, hãy để khởi tạo state trong thành phần ứng dụng
import React, {useState} from 'react'
.
.
const App () => {
   const [value, setValue] = useState('')
   const [todos, setTodos] = useState([])
value state chúng ta sẽ chịu trách nhiệm lưu trữ đầu vào của người dùng.
Bây giờ chúng tôi sẽ lưu trữ đầu vào của người dùng trong value state. Cùng tới TextInput và thêm prop onChangeText để cập nhật state của chúng ta trong bàn phím của người dùng.
<TextInput
 style={styles.textInput}
 multiline={true}
 onChangeText={(value) => setValue(value)}
 placeholder={'Do it now!'}
 placeholderTextColor="white"
 value={value}
/>
Bây giờ sau khi người dùng nhấp vào biểu tượng dấu cộng, chúng ta nên cập nhật todos state và hiển thị task trong màn hình
Đầu tiên, hãy để cập nhật todos state để chứa giá trị từ bàn phím người dùng. Chúng ta sẽ tạo ra một chức năng gọi là xử lý Addtodo:
const App = () => {
 const [value, setValue] = useState('')
 const [todos, setTodos] = useState([])

 handleAddTodo = () => {
   if (value.length > 0) {
    setTodos([...todos, { text: value, key: Date.now(), checked:                          false
 }])
    setValue('')
    }
 }
.
.
.
Xử lý khi người dùng nhấn nút thêm:
<TouchableOpacity
onPress={() => handleAddTodo()}>
....
</TouchableOpacity>
Bây giờ chúng ta sẽ xử lý màn hình chi tiết task. chúng ta sẽ tạo một tệp mới có tên là Task.js sẽ chịu trách nhiệm hiển thị task.
import React from 'react'
import { View, TouchableOpacity, Text, StyleSheet } from 'react-native'
import Icon from 'react-native-vector-icons/Feather';
const Task = (props) => (
    <View style={styles.taskWrapper}>
        <Icon
            name="square"
            size={30}
            color="#900"
            style={{ marginLeft: 15 }}
        />
        <Text style={styles.task}>{props.text}</Text>
        <Icon
            name="trash-2"
            size={30}
            color="#900"
            style={{ marginLeft: 'auto' }}
            onPress={props.delete}
        />
    </View>
)

export default Task

const styles = StyleSheet.create({
    taskWrapper: {
        marginTop: '5%',
        flexDirection: 'row',
        borderColor: '#FFFFFF',
        borderBottomWidth: 1.5,
        width: '100%',
        alignItems: 'stretch',
        minHeight: 40,
    },
    task: {
        paddingBottom: 20,
        paddingLeft: 10,
        marginTop: 6,
        borderColor: '#F0F0F0',
        borderBottomWidth: 1,
        fontSize: 17,
        fontWeight: 'bold',
        color: 'white',
    }
})
Giờ hãy quay trở lại file App.js, thêm đoạn code này vào phía cuối của method render ( trước khi close thẻ ImageBackground )
.
.
.
 <ScrollView style={{width: '100%'}}>
   {todos.map((task) => (
      <Task
        text={task.text}
        key={task.key}
      />
     ))
 }
 </ScrollView>
</ImageBackground>
Tiếp theo , hãy thêm chức năng select và xoá task :
const App = () => {
const [value, setValue] = useState('')
const [todos, setTodos] = useState([])

handleDeleteTodo = (id) => {
 setTodos( todos.filter((todo) => {
     if (todo.key !== id) return true
 })
)}
handleChecked = (id) => {
  setTodos( todos.map((todo) => {
     if (todo.key === id) todo.checked = !todo.checked;
       return todo;
     })
)}
Bây giờ chúng ta sẽ thực hiện render các components task:
<Task
 text={task.text}
 key={task.key}
 checked={task.checked} // toggle the checked icon
 setChecked={() => handleChecked(task.key)}
 delete={() => handleDeleteTodo(task.key)}
/>
Chỉnh sửa một chút trạng thái check/uncheck, và ta có kết quả:
import React from 'react'
import { View, TouchableOpacity, Text, StyleSheet } from 'react-native'
import Icon from 'react-native-vector-icons/Feather';
const Task = (props) => (
    <View style={styles.taskWrapper}>
        <Icon
            name={props.checked ? "check" : "square"}
            size={30}
            color="#900"
            style={{ marginLeft: 15 }}
            onPress={props.setChecked}
        />

        <View>
            {/* if the task is checked toggle a vertical line on top of task */}
            {props.checked && <View style={styles.verticalLine}></View>}
            <Text style={styles.task}>{props.text}</Text>
        </View>
        <Icon
            name="trash-2"
            size={30}
            color="#900"
            style={{ marginLeft: 'auto' }}
            onPress={props.delete}
        />
    </View>
)

export default Task

const styles = StyleSheet.create({
    taskWrapper: {
        marginTop: '5%',
        flexDirection: 'row',
        borderColor: '#FFFFFF',
        borderBottomWidth: 1.5,
        width: '100%',
        alignItems: 'stretch',
        minHeight: 40,
    },
    task: {
        paddingBottom: 20,
        paddingLeft: 10,
        marginTop: 6,
        borderColor: '#F0F0F0',
        borderBottomWidth: 1,
        fontSize: 17,
        fontWeight: 'bold',
        color: 'white',
    },
    verticalLine: {
        borderBottomColor: 'white',
        borderBottomWidth: 4,
        marginLeft: 10,
        width: '100%',
        position: 'absolute',
        marginTop: 15
    }
})
Kết quả:

Source code đầy đủ các bạn có thể xem tại đây
Trong bài viết này tôi hy vọng có thể giúp bạn hiểu sức mạnh của hook và cách tạo/sử dụng các state mà không phải đau đầu khi sử dụng các class và các binding function , v.v. Xin cảm ơn bạn đã theo dõi hết bài viết.
All rights reserved
