[RoR] Gửi mail với Amazon SES và Rails
Bài đăng này đã không được cập nhật trong 4 năm
Mở đầu
Amazon Simple Email Service (Amazon SES) là một dịch vụ gửi mail được xây dựng trên cơ sở hạ tầng đáng tin cậy và khả năng mở rộng của Amazon.com. Với Amazon SES, bạn có thể gửi email giao dịch, tiếp thị hoặc bất kỳ loại nội dung nào tới khách hàng của bạn. Bạn cũng có thể sử dụng Amazon SES để nhận các tin nhắn và lưu trữ trên Amazon S3 bucket, xử lý chúng thông qua chức năng AWS Lambda hoặc publish notifications tới Amazon SNS. Amazon SES không yêu cầu trả phí tối thiểu ban đầu, dùng bao nhiêu trả bấy nhiêu.
Trong bài viết này, tôi sẽ hướng dẫn bạn cách nhanh chóng thiết lập một ứng dụng Rails để gửi 62.000 email miễn phí mỗi tháng nếu gửi từ một instance Amazon EC2 (Ứng dụng được triển khai trên Amazon EC2). Ngoài ra, bạn cũng có thể nhận được 1.000 email mỗi tháng miễn phí trên Amazon SES. Ngay cả khi bạn không sử dụng Amazon EC2, bạn vẫn có thể nhận được mức giá rẻ nhất ($ 0.10 cho mỗi 1.000 email) khi lưu trữ tại nơi khác (Heroku, DigitalOcean vv). Trong phạm vi bài viết này, tôi sẽ gửi email từ Sandbox Amazon SES. Gửi email từ sandbox có một số hạn chế, như phải xác minh cả địa chỉ email gửi và nhận. Tuy nhiên, trước khi có thể chạy trên production, thì việc thử nghiệm thiết lập có đúng hay không bằng cách này là rất cần thiết.
Setup rails app
Trong bài viết này, t sẽ setup một app nhỏ sử dụng để gửi mail Contact us đến nhà cung cấp dịch vụ. Tại thời điểm bài viết này, tôi đang sử dụng Ruby 2.4.0 và Rails 4.2.8
rails new my_ses_app
cd my_ses_app
Tạo welcome controller với action index
rails generate controller welcome index
Vào config/routes.rb và định nghĩa các route như sau
Rails.application.routes.draw do
  get 'welcome/index'
  post '/send_email', to: 'welcome#send_email', as: 'send_email'
  root 'welcome#index'
end
Trong welcome_controller, tạo send_mail action
def send_email
  MyMailer.send_email(name: params[:name], phone: params[:phone], email: params[:email], message: params[:message]).deliver
  redirect_to root_url, notice: "Email sent!"
end
Tiếp theo ta sẽ tạo form để gửi mails, trước đó ta sẽ add thêm gem Bootstrap để sử dụng thư viện này
gem 'bootstrap-sass'
Chạy bundle, add thêm 2 dòng sau vào app/assets/stylesheets/application.scss
@import "bootstrap-sprockets";
@import "bootstrap";
Tạo view của action index, welcome_controller"
<% flash.each do |name, msg| %>
  <div class="alert alert-<%= name == 'notice' ? "info" : "danger" %> fade in">
    <button class="close" data-dismiss="alert">
      ×
    </button>
    <i class="fa-fw fa fa-info"></i>
    <strong><Info><%= name %>!</strong> <%= raw(msg) %>
  </div>
<% end %>
<h1 class="text-center">AWS SES Email Example</h1>
<div class="container">
  <div class="row">
      <div class="col-md-6 col-md-offset-3">
        <div class="well well-sm">
          <%= form_tag(send_email_path, method: "post", :class=>"form-horizontal") do %>
          <fieldset>
            <legend class="text-center">Contact us</legend>

            <!-- Name input-->
            <div class="form-group">
              <label class="col-md-3 control-label" for="name">Name</label>
              <div class="col-md-9">
                <input id="name" name="name" type="text" placeholder="Your name" class="form-control">
              </div>
            </div>

            <!-- Email input-->
            <div class="form-group">
              <label class="col-md-3 control-label" for="email">Your E-mail</label>
              <div class="col-md-9">
                <input id="email" name="email" type="text" placeholder="Your email" class="form-control">
              </div>
            </div>

            <!-- Message body -->
            <div class="form-group">
              <label class="col-md-3 control-label" for="message">Your message</label>
              <div class="col-md-9">
                <textarea class="form-control" id="message" name="message" placeholder="Please enter your message here..." rows="5"></textarea>
              </div>
            </div>

            <!-- Form actions -->
            <div class="form-group">
              <div class="col-md-12 text-right">
                <button type="submit" class="btn btn-primary btn-lg">Submit</button>
              </div>
            </div>
          </fieldset>
          <% end %>
        </div>
      </div>
  </div>
</div>
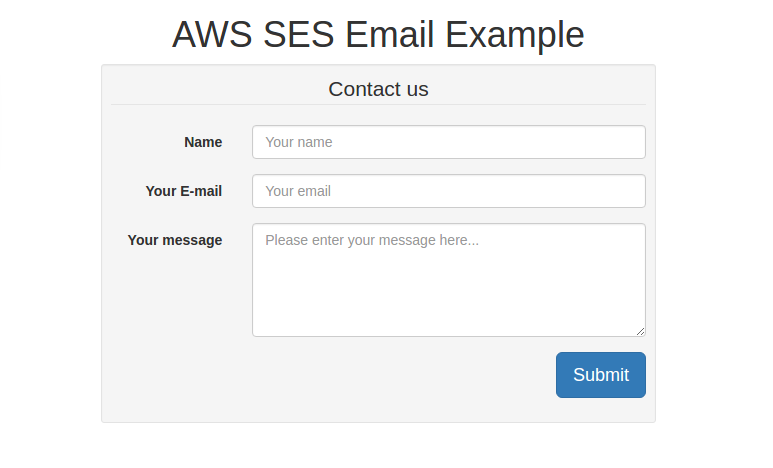
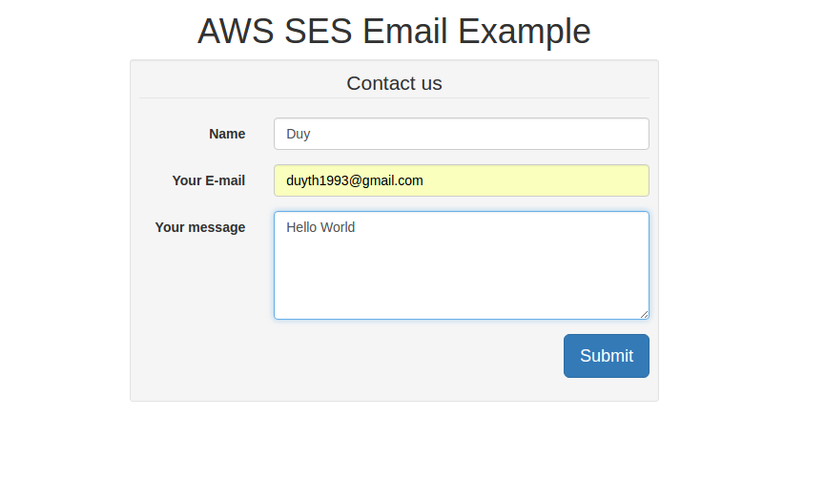
Vào địa chỉ http://localhost:3000/ kết quả mong muốn là form contact us như sau:
Tạo mailer:
rails generate mailer my_mailer
Tạo action send_mail trong file app/mailers/my_mailer.rb như sau
class MyMailer < ApplicationMailer
  def send_email(options={})
    @name = options[:name]
    @email = options[:email]
    @message = options[:message]
    mail(:to=>"another_email@example.com", :subject=>"Amazon SES Email")
  end
end
Tạo layout nội dung email sẽ được gửi đến:
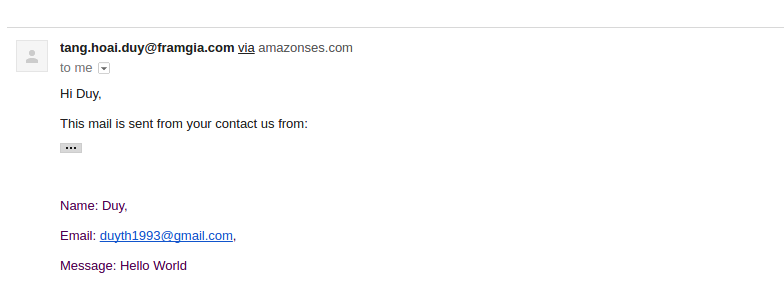
Hi Duy,

This mail is sent from your contact us from:

Name: <%= @name %>,

Email: <%= @email %>,

Message: <%= @message %>
Mở file config/environments/development.rb để thay đổi config SMTP:
config.action_mailer.perform_deliveries = true
config.action_mailer.raise_delivery_errors = true
config.action_mailer.smtp_settings = {
  :address => "...",
  :port => 587,
  :user_name => ENV["SES_SMTP_USERNAME"], #Your SMTP user
  :password => ENV["SES_SMTP_PASSWORD"], #Your SMTP password
  :authentication => :login,
  :enable_starttls_auto => true
}
Tạm thời bỏ trống address, sẽ điền vào sau khi config trên Amazon SES
Config Amazon SES
-
Đăng nhập vào AWS management console. Đăng ký nếu chưa có tài khoản

-
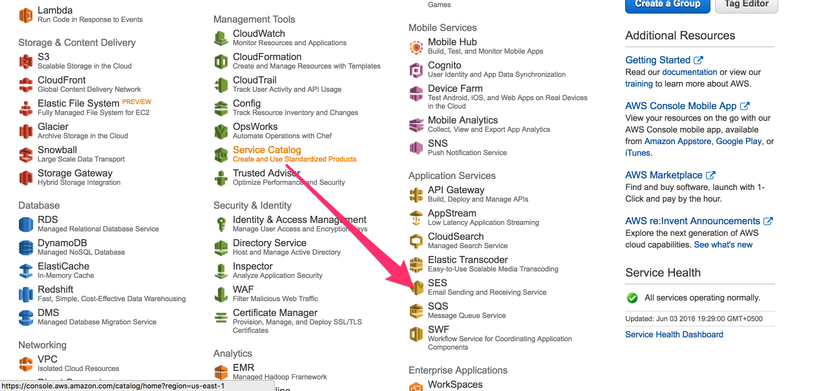
Chọn dịch vụ SES
-
Chọn
Email Addresses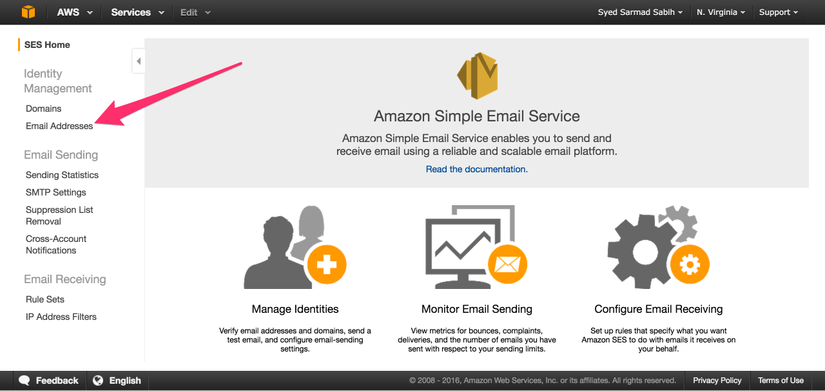
-
Verify 2 địa chỉ email mà ta sẽ dùng để test (trong chế độ
sandboxđể gửi được email cần phải tiến hành verify)
-
Sau khi verify xong, copy 1 email vào
default fromtrongapp/mailers/application_mailer.rb
default from: "verified_email_1@example.com"
Vả copy email còn lại vào app/mailers/my_mailer.rb thay cho địa chỉ sẽ được gửi mail tới
mail(:to=>"verified_email_2@example.com", :subject=>"Amazon SES Email")
- Vào trong
SES SMTP Settings, copyServer namevàoaddresstrong blockaction_mailer.smtp_settingstrongconfig/environments/development.rb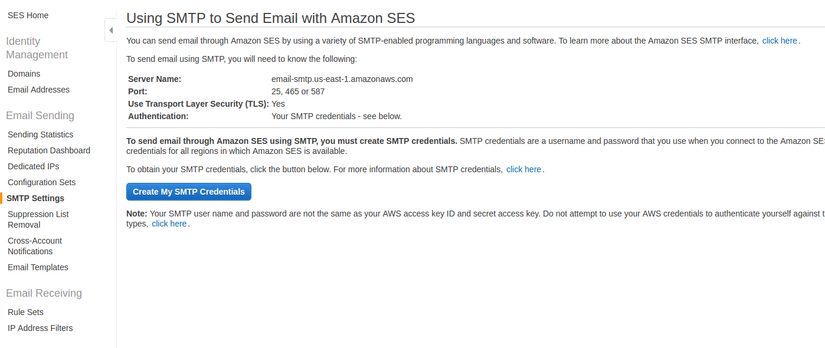
config.action_mailer.smtp_settings = {
  :address => "email-smtp.us-east-1.amazonaws.com",
  :port => 587,
  :user_name => ENV["SES_SMTP_USERNAME"], #Your SMTP user
  :password => ENV["SES_SMTP_PASSWORD"], #Your SMTP password
  :authentication => :login,
  :enable_starttls_auto => true
}
- Click vào
Create My SMTP Credentials, copy credentials và paste vào trong config/environments/development.rb hoặc thiết lập biến môi trường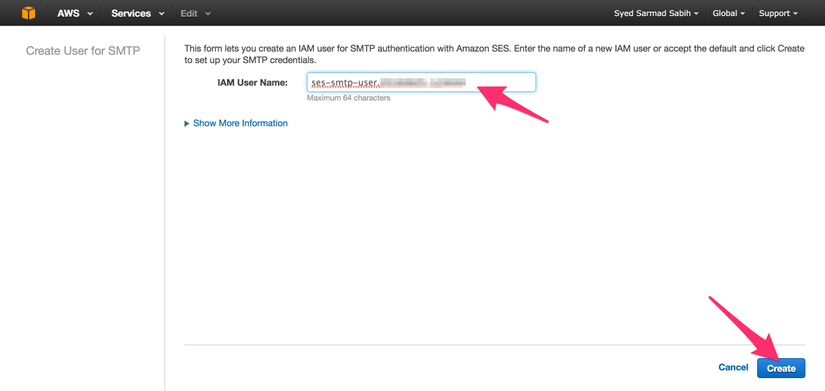
ENV["SES_SMTP_USERNAME"] = "*****" # Replace with your SMTP username
ENV["SES_SMTP_PASSWORD"] = "*****" # Replace with your SMTP password
- Bây giờ quay lại màn hình gửi mail, điền thông tin và bấm gửi:
Kết quả nhận được
KẾT LUẬN
Trên đây mình đã trình bày sơ qua về dịch gửi mail với Amazon Simple Email Service, cách cấu hình và tích hợp trong ứng dụng rails. Hi vọng bài viết phần nào giúp đỡ các bạn mới và sẽ làm quen với các dịch vụ của Amazon.
Nguồn tham khảo
All rights reserved
