Introduction to NodeJS
Bài đăng này đã không được cập nhật trong 5 năm

Introduction
Node.Js is quite interestig and easy to learn (As far a beginers go) and if you are already familiar with Html and javascript syntax then this tutorial will be a breeze. To keep thing as simple as possible i will demostrate how once can make simple Contact app using Node.js, MongoDb and Express. Lets begin!
Why Nodejs, Express and MongoDb?
You might be wondering, why use NodeJs? Well Node allows you to use Javascript as your backend (Server side) language. Express on the other hand allows you to build Web app on Node hereby simplifying the process of creating servers and well, MongoDB acts as our database. MongoDb is a NoSql classified database program. It is a cross-platform document-oriented database program that saves data in form of json like format. Now we will set up the working enviroment by installing nodeJS, a text editor (I prefer to use Sublime Text).
Setup Nodejs
First you can download nodejs here if you havent installed it yet. Run the setup file and follow the install instruction to complete the installation. To confirm node was successfully installed in yout computer simple open the Command Prompt and type:
node –v
You should see your node version. As time of writing this article the current version is v12.18.2 You can also check Npm version using:
npm –v
My version displayed was 6.14.5 Thats it Node is set up.
Setup Sublime
You can download SublimeText here Run and install it. It gives you a better editor for editing our files.
Overview of App's Architecture
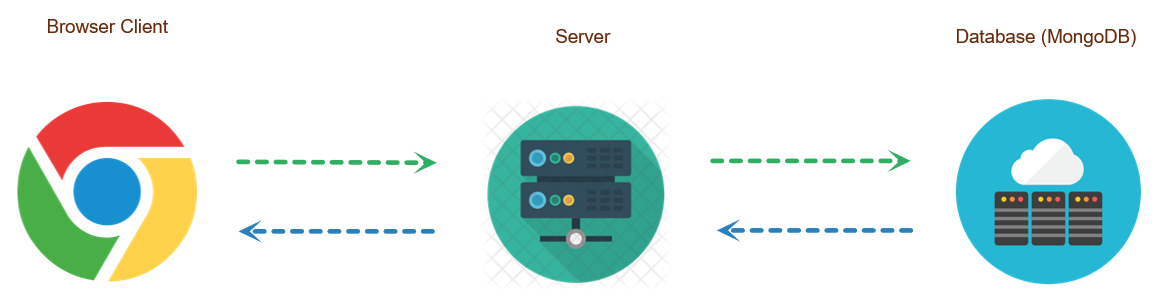
Our client will make request to the server (NodeJS) which in turn will communicate the the database. Consider the NodeJs as the intermediary. It handles our requests and in return gives us response in json format. To keep things simple we wont get into the technical part too much, you just have to understand how each components interacts with one another and what does what. Moving on! This project wont focus on looks but only features of a contact app so excuse the ugly looking designs. You can apply styles later on after you get the hang of it.
The Contact App
Lets create a folder called ContactApp and open command prompt and then navigate to this folder. In my case my demo folder looks like this:
C:\Users\pane\Desktop\Node JS Apps\ContactApp>
Next type npm init and press return key.
The npm init will creates a package.json file that is responsible for managing our various dependencies. More on this later. Click Enter for all the text displayed until done.
About to write to C:\Users\babatunde.sunday\Desktop\Node JS Apps\ContactApp\package.json:
Command Line looks like this:
{
  "name": "contactapp",
  "version": "1.0.0",
  "description": "",
  "main": "index.js",
  "scripts": {
    "test": "echo \"Error: no test specified\" && exit 1"
  },
  "author": "",
  "license": "ISC"
}


Is this OK? (yes)
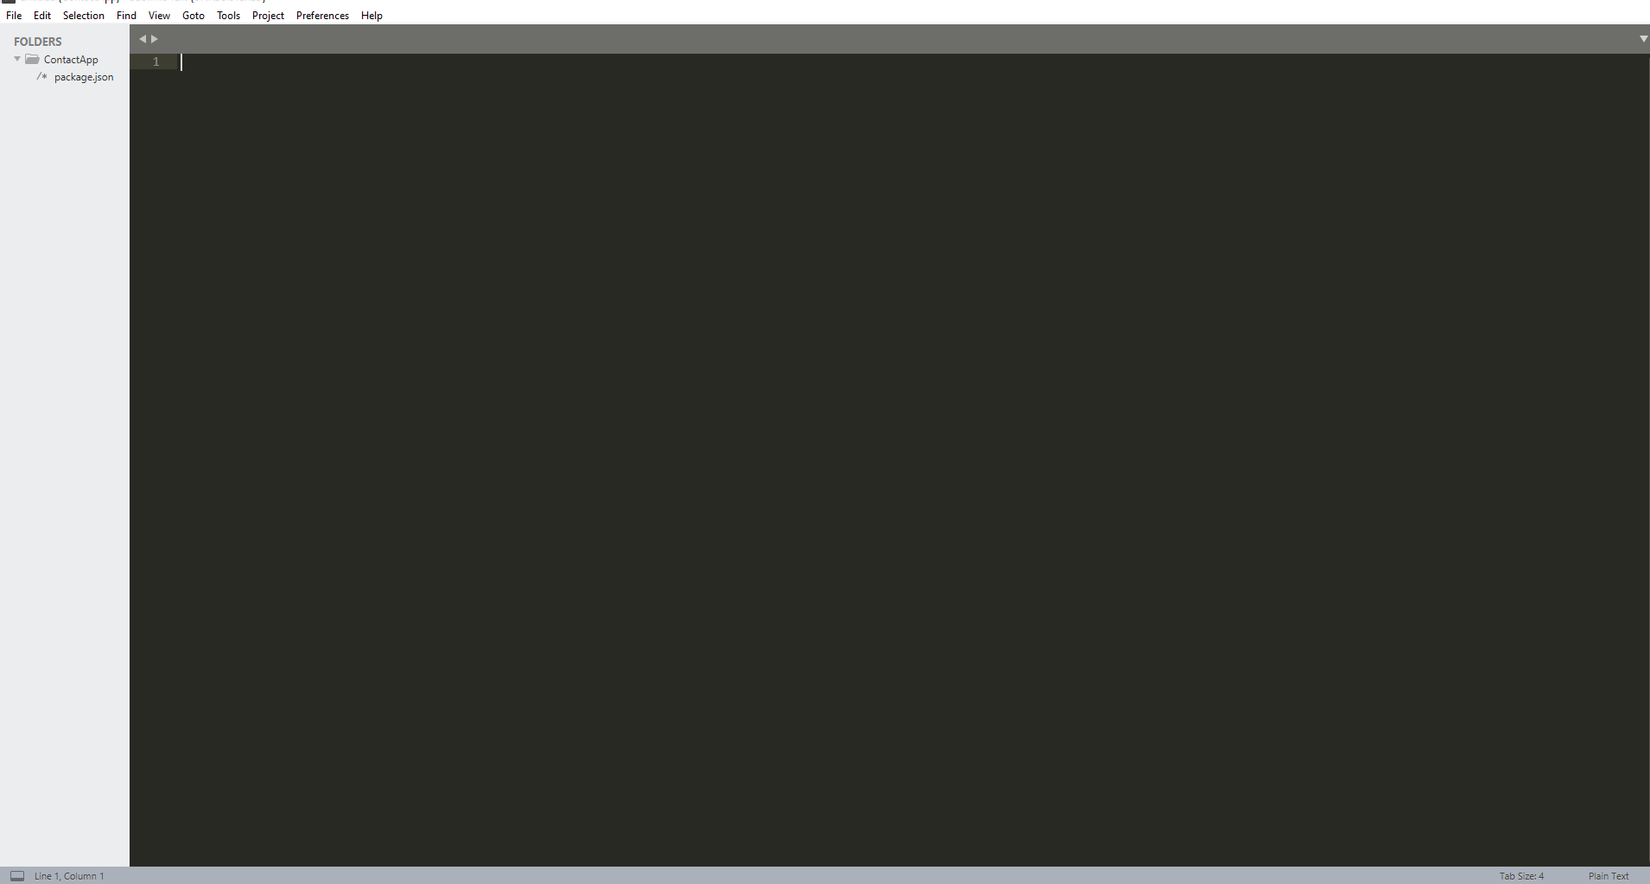
Next open Sublime Text and click on File then open your main project folder. Should look something like image below.
Next add a file server.js to the ContactApp. We will log a command line to test and ensure our apps runs successfully.
server.js
console.log('Hello World! Welcome to NodeJs')
Save and then run from the command line by typing: node server.js If all is well you should see a message "Hello World! Welcome to NodeJs". Amazing! Your first successful build and such. I know its not much but it sure is working as we want  .
.
Before we go further into making an actual functioning server, Lets explore a little Express.
Express
To use Express we will need to install the package. In the command line type:
npm install express --save
This will install Express by adding the reference in our package.json file. Wait for the installation to complete then proceed. Next we have to make a reference to express in our server
const express = require('express');
const app = express();
Because will will like to use our browser to connect to the server we will make our server listen at a specified port.
app.listen(3000, function() {
  console.log('server is listening on 3000')
})
Save the server.js file and run again using node server.js if a pop up shows up click allow so app can connect to internet. You should now see server running message as shown below.
Hello World! Welcome to NodeJs
server is listening on 3000
You can open http://localhost:3000 to confirm our sever sure is listening. You should get an error "Cannot GET /" Its ok this is good. Remember the port (3000) can be changed to other port of choice but we using this.
Performing the Operations
One can consider the localhost:3000/ as the doman address and what ever comes after it as a pointer to a requested page. If i was to add a Login page our request could look something like this http://localhost:3000/login specifying to the server to return the page login to our browser client.
Now to perform the Read we will use Express to make a GET request from our server. This request accepts two parameters:
app.get(url(endpoint), callback)
The endpoint being "http://localhost:3000/login" that is we requesting the login page from domain for example and the callback handles the request and response we get from the server. For demo purpose we can tell the sever to reply back to our client by displaying a message "You called me?"
server.js
app.get('/', function(req, res) {
  res.send('You called me?')
})
Save and reload your page and you should now get a message "You called me?" rather than the Cannot get / error.
Now lets create an index html page for our contact app. We will implement the server after the index is done. Now add a page index to the project.
index.html
<!DOCTYPE html>
<html lang="en">
<head>
  <meta charset="UTF-8">
  <title>CONTACT APP</title>
</head>
<body>
  <h1> Contact App </h1>

  <input type="text" placeholder="Name" name="name">
  <input type="text" placeholder="Phone" name="phone">
  <button type="submit">Save</button>

</body>
</html>
We have added two textfields and a button. Save the file and open server.js again. We will have to update it to return index when our client makes a call to the domain. Update the app.get method.
app.get('/', function(req, res) {
  res.sendFile(__dirname + '/index.html')
})
dirname simply points to your current directory. Save and run node server.js again and you should see the awesome design shown below.
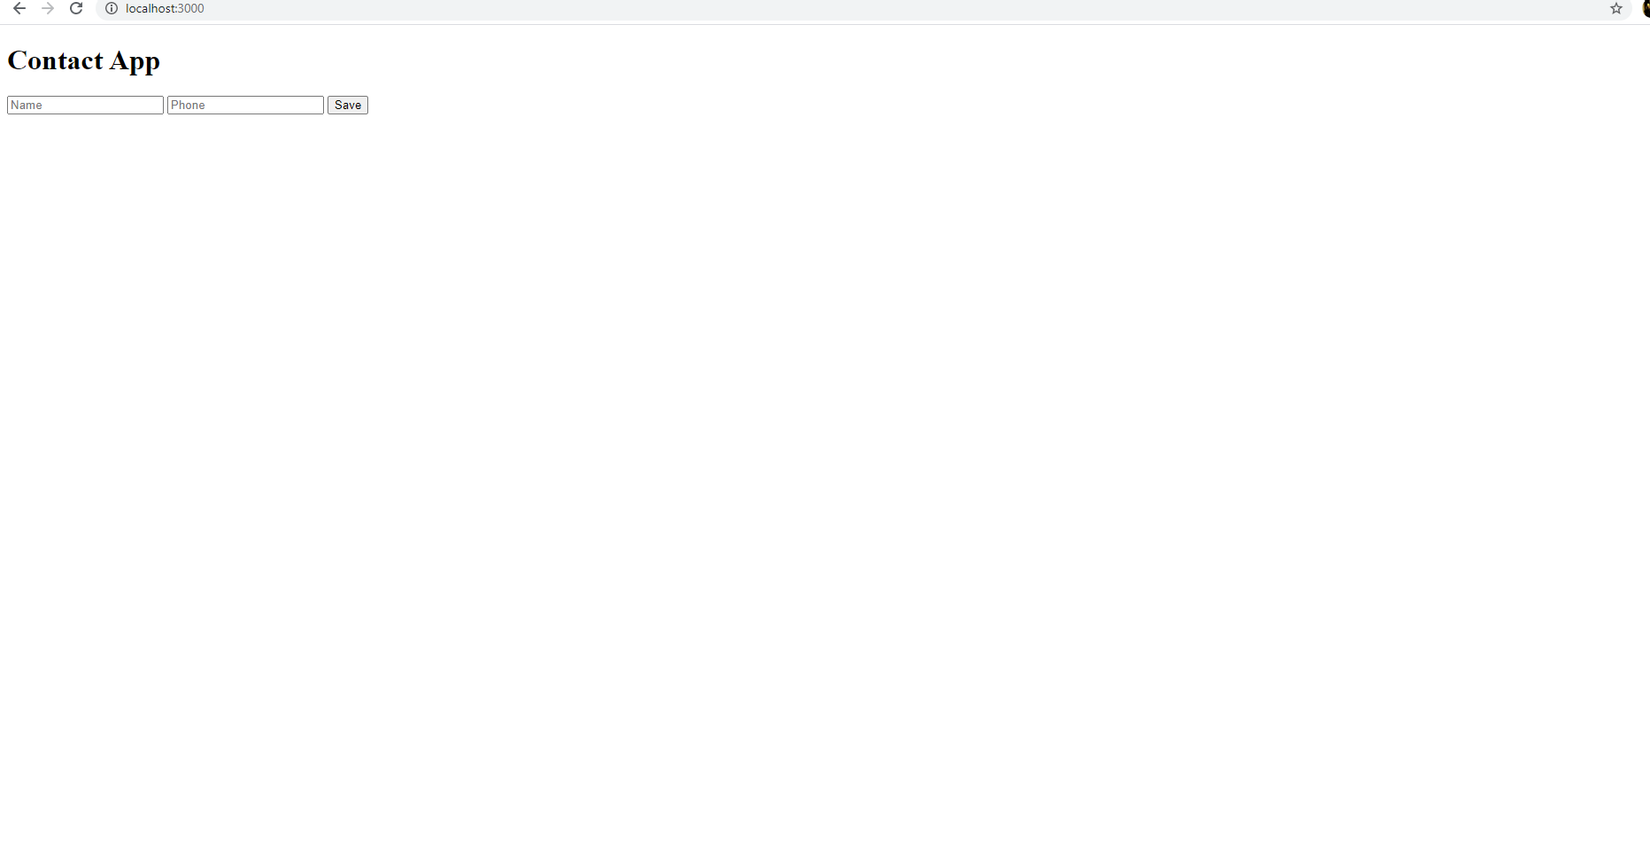
Amazing i know
So thats how to make a GET (read) and now we move on to next stage.
To make a Create request we will use the POST request to the server. Post can be made using a form tag in out htlm file. So we will add the form tag to our contents in index file.
index.html
<!DOCTYPE html>
<html lang="en">
<head>
  <meta charset="UTF-8">
  <title>CONTACT APP</title>
</head>
<body>
  <h1> Contact App </h1>

<form action="/contacts" method="POST">
  <input type="text" placeholder="Name" name="name">
  <input type="text" placeholder="Phone" name="phone">
  <button type="submit">Save</button>
</form>

</body>
</html>
In the method type we added "/contacts" telling the browser to send the request to contacts as the action and we have also specified "POST" a s the request type. So now here is how to handle the post on the server side. Lets open the server file again.
server.js
app.post('/contacts', (req, res) => {
  console.log('You have sent something and server has recieved it!')
})
Restart the server, enter some inputs and click save button. You should see a message "You have sent something and server has recieved it!" on your console. This means the POST request was successful. But this is not what we really want. We want to be able to get what the user enters in the textfields. Too bad Express cant handle data from forms alone. We will archieve this with the help of a package which we will now add. Type the following:
npm install body-parser --save
After successfully installing body parser open the server file and import the package.
const bodyParser= require('body-parser')
Also it is important to add this line of code before any app call.
// Add before the get, post....... calls
app.use(bodyParser.urlencoded({ extended: true }))
Now lets update the post method to log whatever is entered in the form.
app.post('/contacts', (req, res) => {
  console.log('Here are your sent data: ' + req.body)
})
Save and rerun the server. Now when you click save on the browser you should see the output in the log. When i entered Person One as name and 090909090 as phone no i get this as output:
{ name: 'Person One', phone: '090909090' }
All is good but now will add the database so that we can save our contact to it and retrieve data when we load the page to display the list of contacts to the user. Enters MogoDB.
To use MongoDB you can create an account here if you dont have any already. Add an organization name and select the free plan (MongoDB Atlas).
Next, we will create a Database in MongoDB by creating a new Project as shown below:
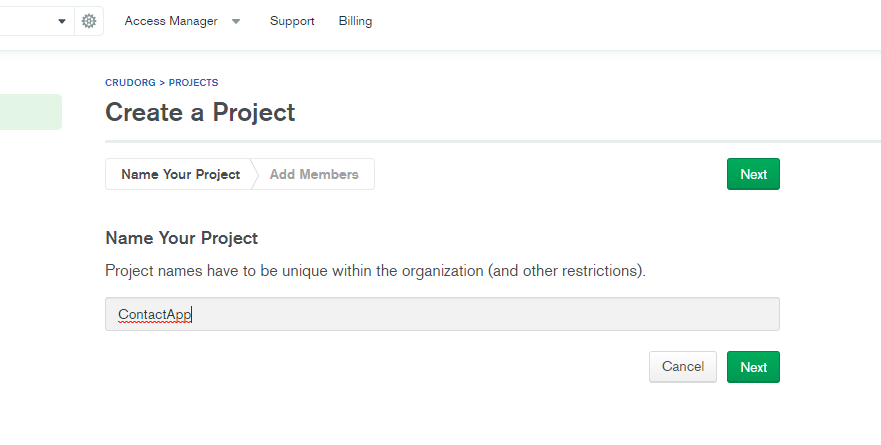
I have called this project ContactApp. Next add a new cluster by clicking on the Create Cluster button and select the free plan.
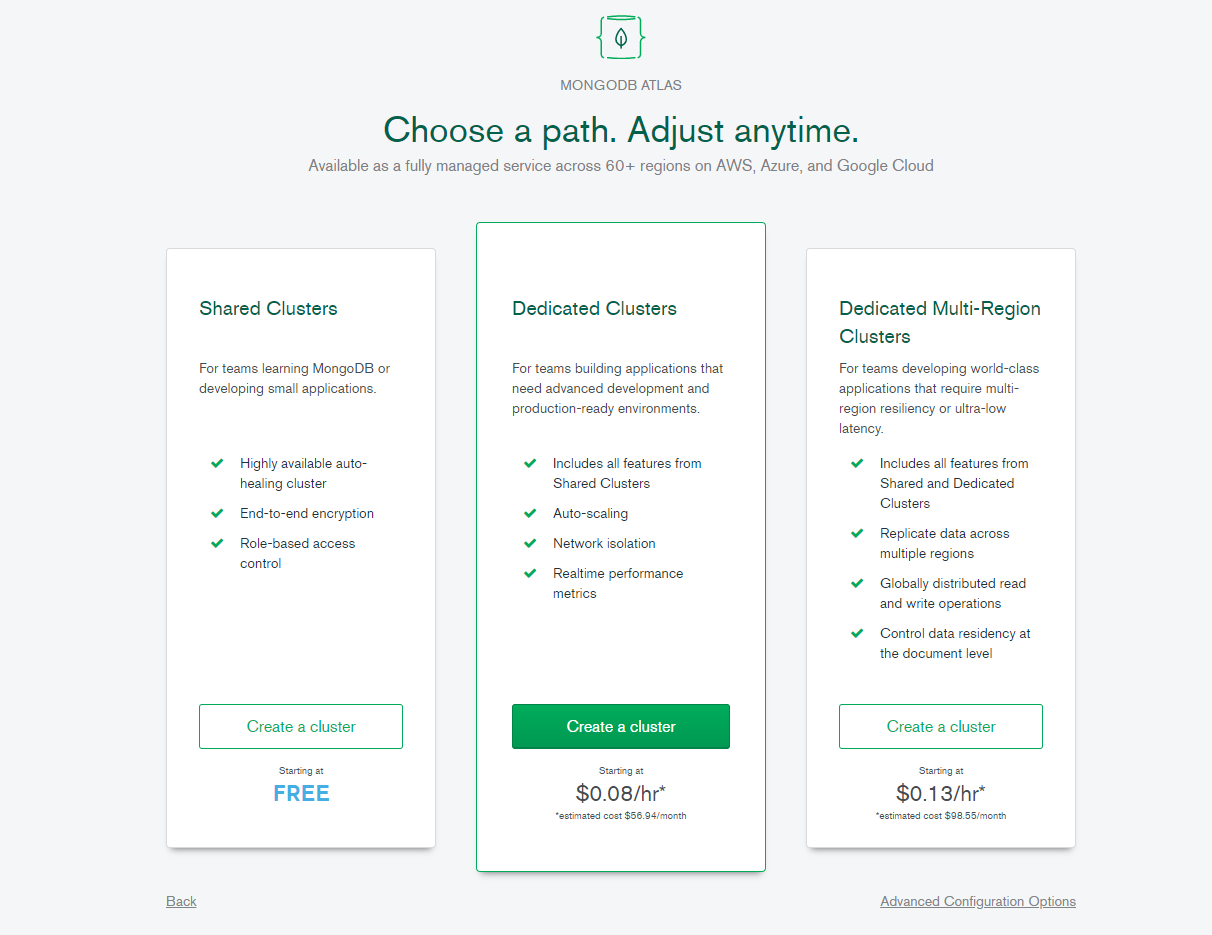
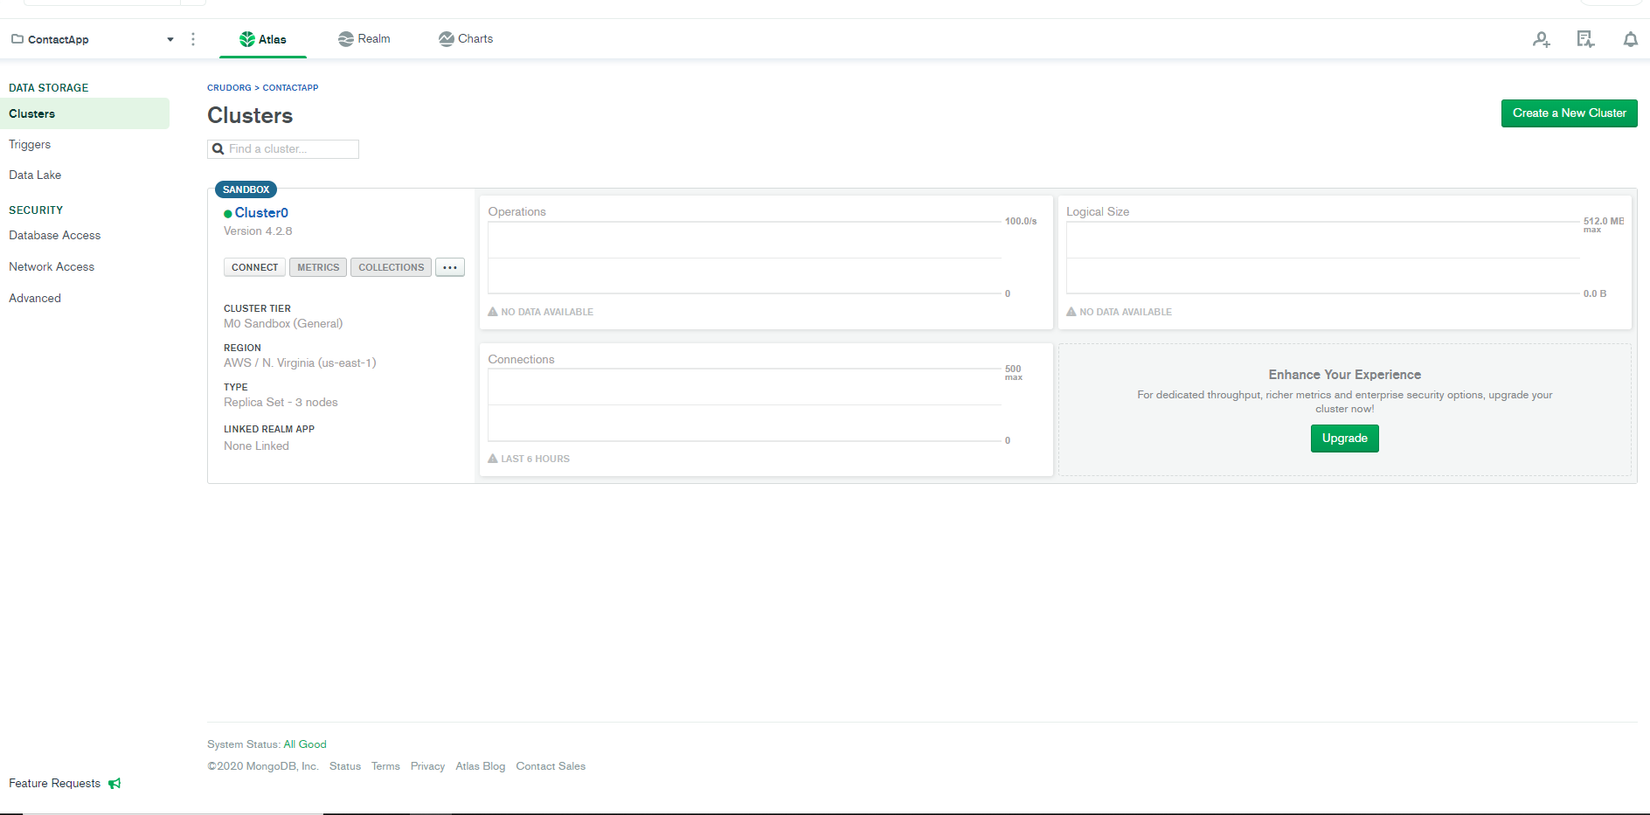
Ensure that the M0 Sandbox (Shared RAM, 512 MB Storage) Encrypted is selected then click Create Cluster. Wait few minutes for the cluster to be created. After that you should see the interface below. Click on connect to open the popup modal.
Then add your ip address by clicking on the Add your current IP Address button.
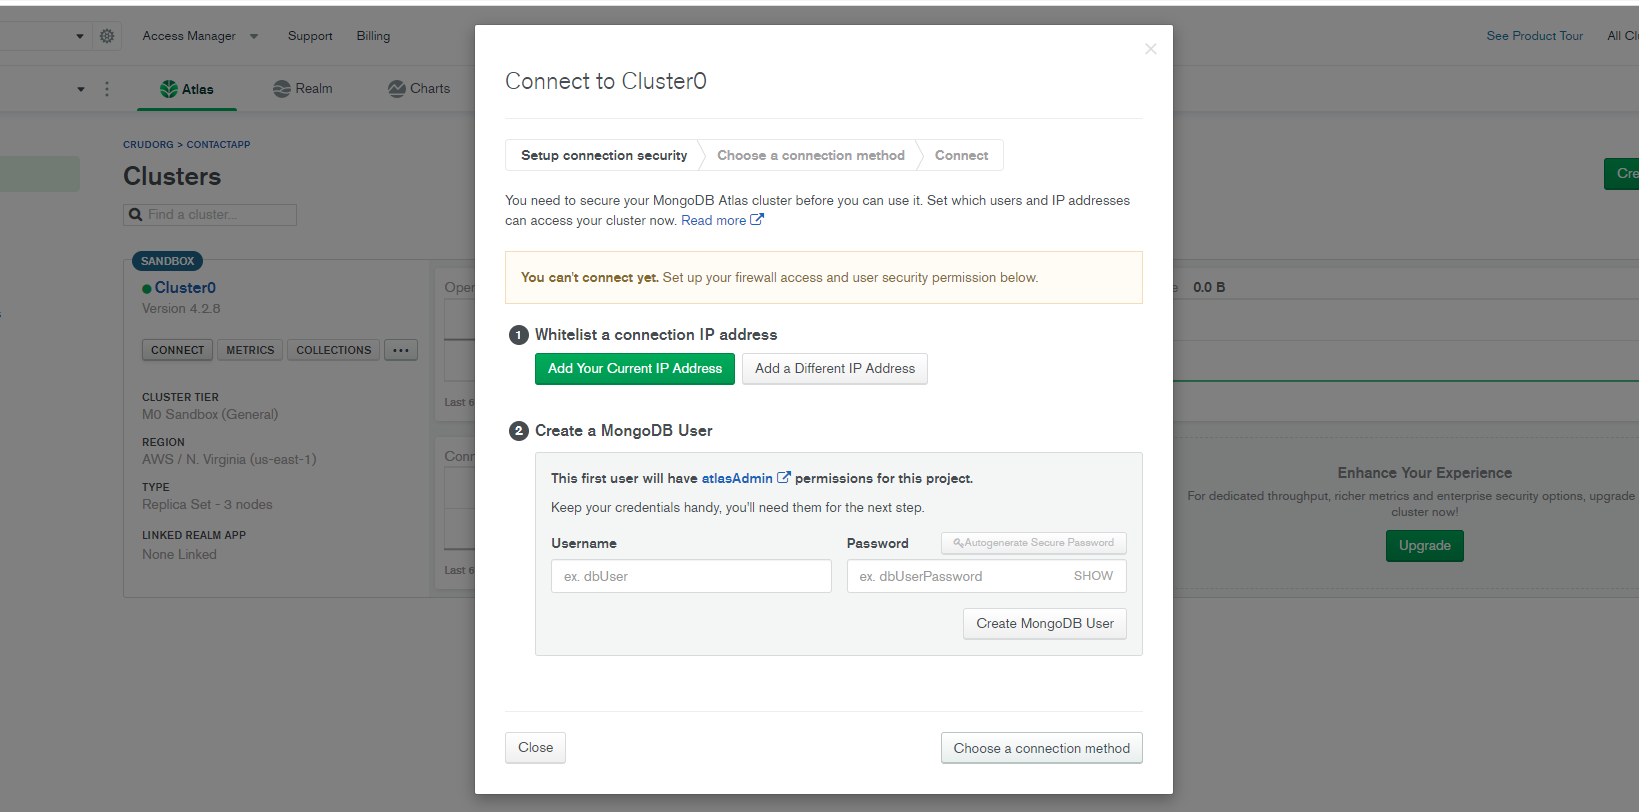
Next create the user name and password (Note: This credentials is different from your MongDB account credentials. this is used for accessing your database). Click Create MongoDB User then pick a connection method. In this case we will select "Connect to your application". Finally copy the connection string which should look something like this:
mongodb+srv://<username>:<password>@cluster0.nonv5.mongodb.net/<dbname>?retryWrites=true&w=majority
Where <username> is your username and
is password entered previously. Also you will need to replace the <dbname> with the database name we are trying to connect to.
Next we will add the MongoClient package to the app using:
npm install mongodb --save
After it is installed we will import it.
const MongoClient = require('mongodb').MongoClient
Next create a variable conncection string and pass it to the method that connects us to the db.
var connectionString = "mongodb+srv://<username>:<password>@cluster0.nonv5.mongodb.net/<dbname>?retryWrites=true&w=majority"
Now we can pass the connectionString to MongoClient to test our database connection.
MongoClient.connect(connectionString, {
  useUnifiedTopology: true
}, (err, client) => {
  if (err) return console.error(err)
  console.log('Successfully Connected to the Database')
})
You should see the message "Successfully Connected to the Database" if all goes right. If you wish to change the db name to something familiar you can create one by
const db = client.db('contactsdb')
where contactsdb is the name of the database to perform our request operations.
In MongoDB data are stored into collection so we will need to create a collection to store our saved contacts. Ill simply call this "contacts"
MongoClient.connect(connectionString, {
  useUnifiedTopology: true
}, (err, client) => {
  if (err) return console.error(err)
  console.log('Successfully Connected to the Database')
 const db = client.db('contactsdb')
 const quotesCollection = db.collection('contacts')
})
Next you can move the POST request into the mongo client.
MongoClient.connect(connectionString, {
  useUnifiedTopology: true
}, (err, client) => {
  if (err) return console.error(err)
  console.log('Successfully Connected to the Database')
 const db = client.db('contactsdb')
 const quotesCollection = db.collection('contacts')

 app.post('/contacts', (req, res) => {
  quotesCollection.insertOne(req.body)
    .then(result => {
      console.log(result)
      res.redirect('/')
    })
    .catch(error => console.error(error))
})
})
Now re run the server and enter a name and phone number the submit. You will see a bunch of messages which also include your saved contact like below:
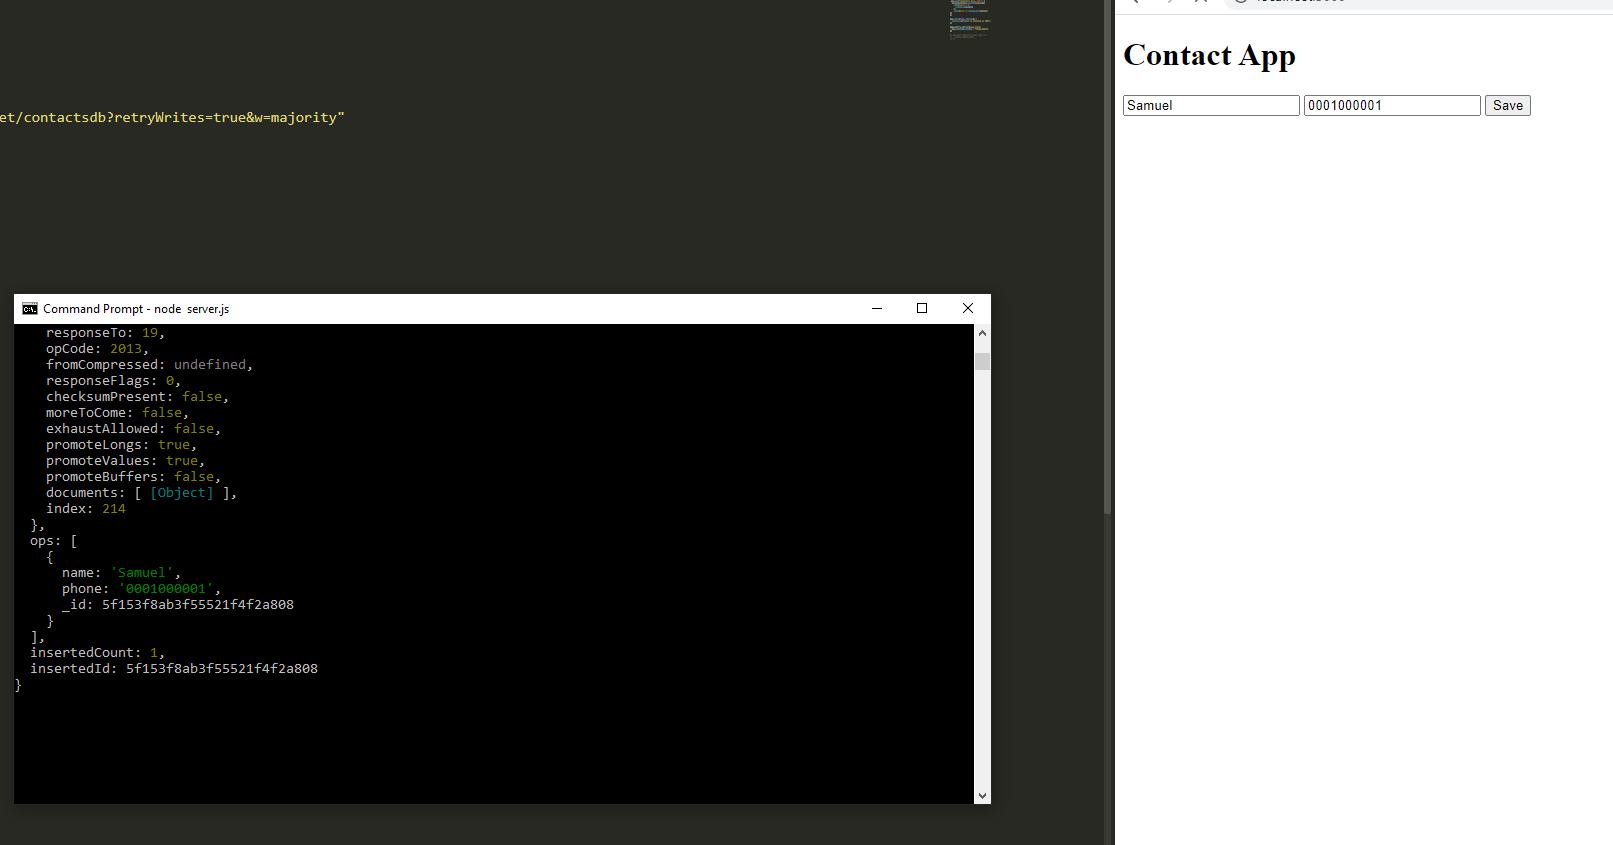
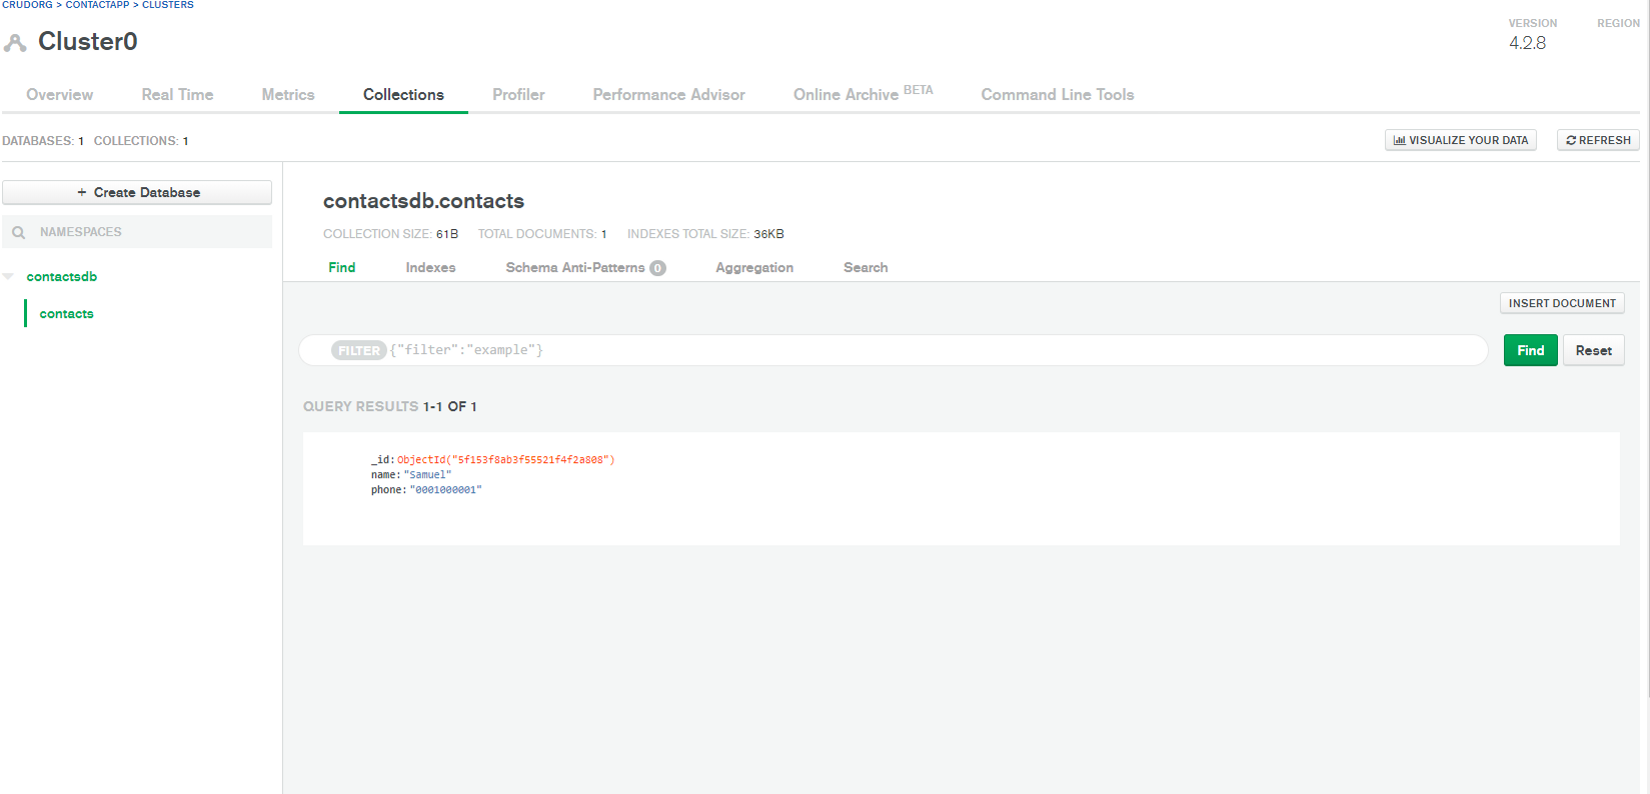
This means we have successfully added Samuel to the contacts db. You can head over to MongoDB to check this data. Click on collections and you should see the database (contactsdb) now has 1 collection (contacts) and an item (Samuel)
Now since we have a database we will need to update and fetch our data which will be displayed to user when the page is loaded. To do this we will use the find keyword to fetch our collection data from the db. Move the app.get into the MongoClient as below.
app.get('/', (req, res) => {
  db.collection('quotes').find().toArray()
    .then(results => {
      console.log(results)
    })
    .catch(error => console.error(error))
  // ...
})
Re run the server and reload. You should see the contents of the collection in form of an array like below.
Successfully Connected to the Database
[
  {
    _id: 5f153f8ab3f55521f4f2a808,
    name: 'Samuel',
    phone: '0001000001'
  },
  { _id: 5f1541ef3850f034e8282354, name: 'Pane', phone: '12345466' }
]
So now we have our contacts retrived whenever the page is open. Next step will be to display this data in a formated list or so. We can do this by generate a HTML that contains all the contacts. We will need a template engine to do this. As there are many engines available we will only use EJS (Embedded JavaScript) in this tutorial. To install EJS pacjage simply type
npm install ejs --save
Next we will specify to Express that we prefer to use EJS to display our html contents. Add this to the top above our mongoClient queries.
app.set('view engine', 'ejs')
Next we will create a new folder. This folder will contain our ejs files. Call it views. In views add a new file index.ejs.
index.ejs
<!DOCTYPE html>
<html lang="en">
<head>
  <meta charset="UTF-8">
  <title>CONTACT APP</title>
</head>
<body>
  <h1> Contact App </h1>

<form action="/contacts" method="POST">
  <input type="text" placeholder="Name" name="name">
  <input type="text" placeholder="Phone" name="phone">
  <button type="submit">Save</button>
</form>

</body>
</html>
Html is rendered using res.render in ejs. So lets do that by updating the app.get.
 app.get('/', (req, res) => {
  db.collection('contacts').find().toArray()
    .then(results => {
      res.render('index.ejs', {})
    })
    .catch(error => console.error(error))

})
Re-run the server and reload. You should have no problem and page should look the same. If you get any ejs error try adding the package manually by going into package.json file and adding "ejs": "^1.0.0" then run npm install from the command line. This should fix it.
To pass the results into the index.ejs we can do
app.get('/', (req, res) => {
db.collection('quotes').find().toArray()
.then(results => {
  res.render('index.ejs', { contacts: results })
})
.catch(/* ... */)
})
We pass the results to "contacts". This will pass the objects into contacts. To display it correctly we have to loop through the objects and convert them into presentable html formats.
Right after the closing form tag add this
My Contacts
<ul class="contacts">
  <!-- Loop through contacts -->
  <% for(var i = 0; i < contacts.length; i++) {%>
    <li class="contacts" style="font-family: sans-serif;">
      <!-- Output name from the iterated contact object -->
      <span><%= contacts[i].name %></span>:
      <!-- Output phone from the iterated contact object -->
      <span><%= contacts[i].phone %></span>
    </li>
  <% } %>
</ul>
This will loop through all the contacts and display them in order. We can also add few styles to make app look a little better.
index.ejs
<!DOCTYPE html>
<html lang="en">

<style>
input[type=text], select {
  font-family: sans-serif;
  padding: 12px 20px;
  margin: 8px 0;
  display: inline-block;
  border: 1px solid #ccc;
  border-radius: 4px;
  box-sizing: border-box;
}

input[type=submit] {
  background-color: #4CAF50;
  color: white;
  padding: 14px 20px;
  margin: 8px 0;
  border: none;
  border-radius: 4px;
  cursor: pointer;
}

input[type=submit]:hover {
  background-color: #45a049;
}

h1 {
  color: #4CAF50;
  font-family: sans-serif;
  font-weight: bold;
}

h2 {
  color: #4CAF50;
  font-family: sans-serif;
  font-weight: bold;
  text-decoration: underline;
}

</style>

<head>
  <meta charset="UTF-8">
  <title>CONTACT APP</title>
</head>
<body>
  <h1> Contact App </h1>

<form action="/contacts" method="POST">
  <input type="text" placeholder="Name" name="name">
  <input type="text" placeholder="Phone" name="phone">
  <input type="submit" value="Save">
</form>

<h2> My Contacts </h2>

<ul class="contacts">
  <!-- Loop through contacts -->
  <% for(var i = 0; i < contacts.length; i++) {%>
    <li class="contacts" style="font-family: sans-serif;">
      <!-- Output name from the iterated contact object -->
      <span><%= contacts[i].name %></span>:
      <!-- Output phone from the iterated contact object -->
      <span><%= contacts[i].phone %></span>
    </li>
  <% } %>
</ul>
</body>
</html>
Run again and your App should look like this:
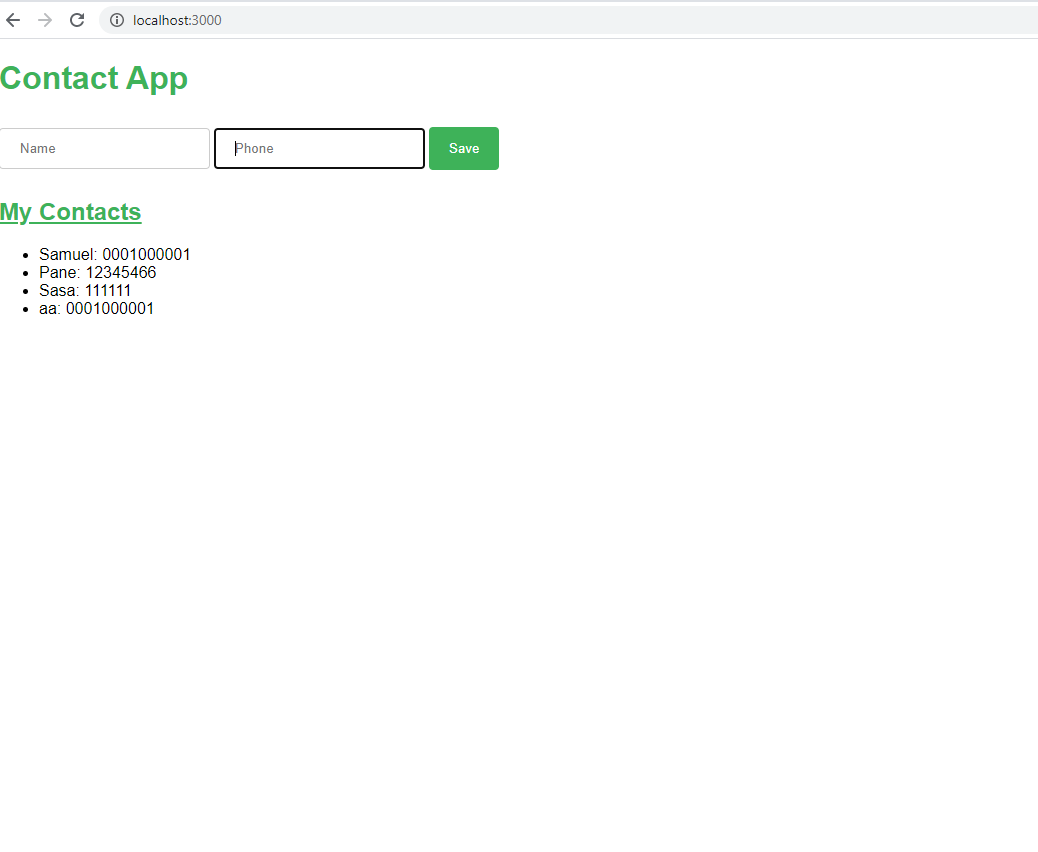
Once you understand how the mechanism works, you can easily manipulate the features and improve the Contact App. You can add update and delete contact feature simply by adding your calls to the MongoClient and reloading the page to verify changes. You can also make the interface more interactive and presentable as you wish. Happy coding!
All rights reserved
