Getting Started with Oculus Go and Unity
Bài đăng này đã không được cập nhật trong 7 năm
Introduction:
This article will provide you with the step by step process on how you can set up your Unity to develop applications for Oculus Go. Note that in the future some things may change from the time that this was posted but rest assured 80% of these steps are the same.
Assumptions:
- You already own a license for Unity.
- You already have Unity installed.
- You have familiarized the IDE of Unity.
Getting Started:
If you have already worked with Android applications before and have already setup the necessary environment for Android development, go ahead and skip this step. But for those who haven’t, to get started, you will need to install Unity’s Android module because Oculus Go is running on an Android operating system (Android 7) and so you will need to set Unity up for Android development. To do so, you will need to complete the following steps:
Step 1: Setting up Android development in Unity
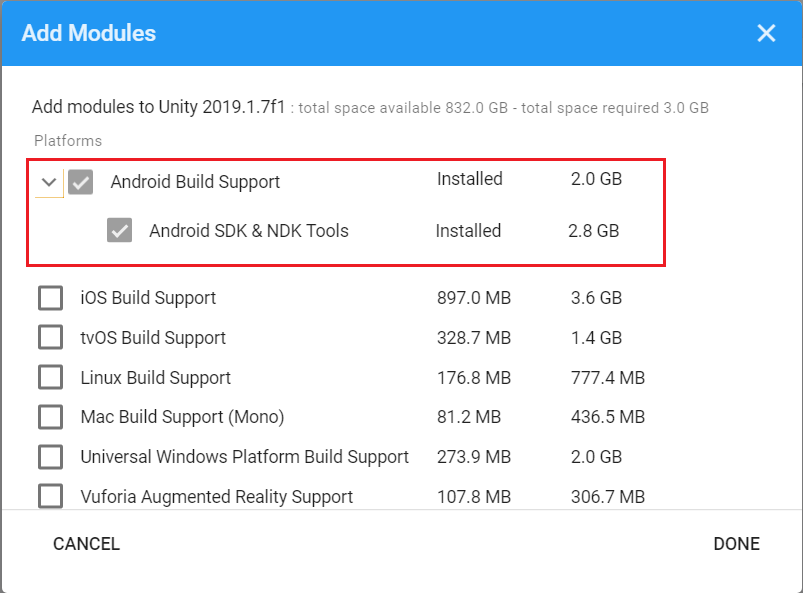
Android Build Support (SDK and NDK):
- Open your Unity Hub application.
- Go to
Installssection and you will see all your installed Unity versions. - Click the three dots of a version you want and click
Add Modules. - A window will pop up and make sure to check
Android build SupportandAndroid SDK & NDK Tools. - Click
Nextand your installation will begin.
Once the download and installation is finished, go ahead and create a 3D project with Unity. Now that you have downloaded the Android SDK and NDK tools. You will have to install the Android module for Unity so that you can set Unity to build your project as an Android application.
Android Module:
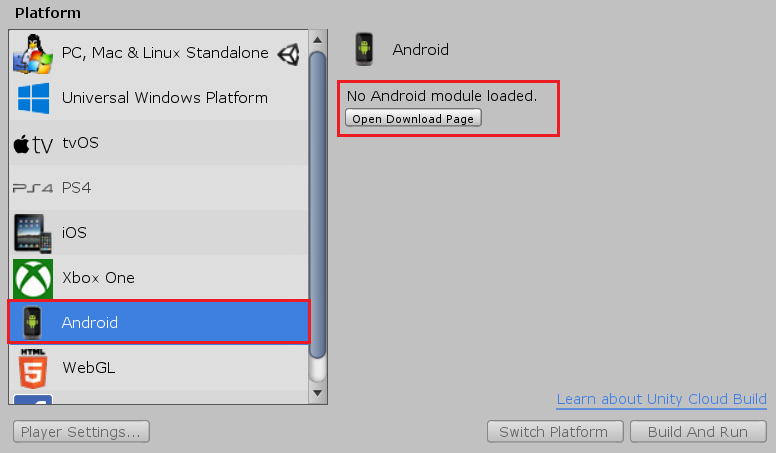
- Go to
File > Build Settingsand a window will appear. - Scroll and locate
Androidthen clickOpen download page. Once clicked, you will be redirected to your default browser and a file will be downloaded on your desktop.
- Now install that file. Note that you may need to close any Unity related applications for the installation to succeed.
- Once done, reopen your Unity project and visit
File > Build Settingsagain and you will notice that the Android section is now different. - Click on the
Switch platformbutton to change your build settings to Android application.
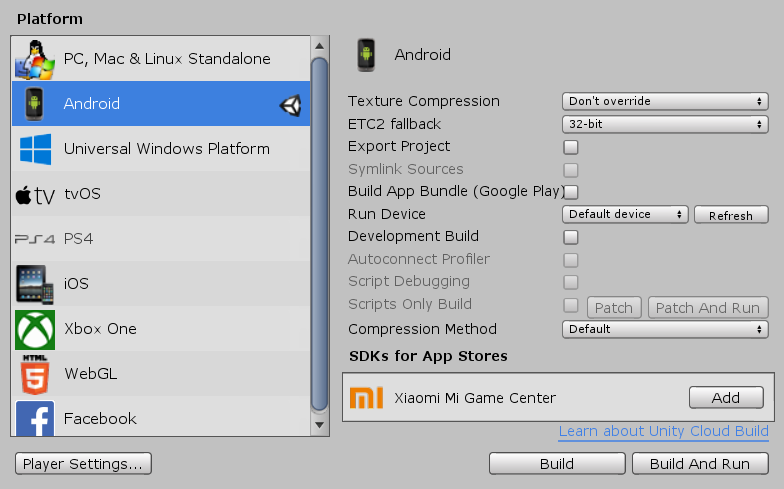
Now you have successfully downloaded the Android module for Unity. Unity is now ready to build your Android projects but your project is not yet ready to be built as an Android application. Notice, when you click the Build button you will come across a problem like this:
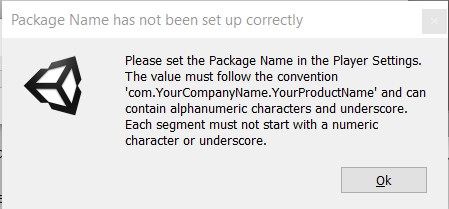
This error states that you haven’t set you application package yet and to fix such issue, you have to configure your project's player settings for Android.
Android Player Settings:
-
Click
Player settings(This can be found inFile > Build Settings) and a window will appear. -
In that window, fill in the following:
a.
Company Name. "Note: This can be anything so long as it is unique."b.
Product Name. The name of your application. -
Below that, in the Android tab, click
Other settingsand fill in the following:a.
Package Name. "Note: The format for this iscom.CompanyName.ProductName."
Save your application and you are now ready for Android development. But we aren’t interested in just Android development, we want to be able to create an application for Oculus Go. Your next step now is to setup your project to build for Oculus Go devices.
Step 2: Setting up Unity project for Oculus Go development.
Oculus Package:
- Go to
Window > Package Managerand a window will pop-up. - Click
Oculus(Android). - Click
Install. - Click
Oculus(Desktop). - Click
Install.
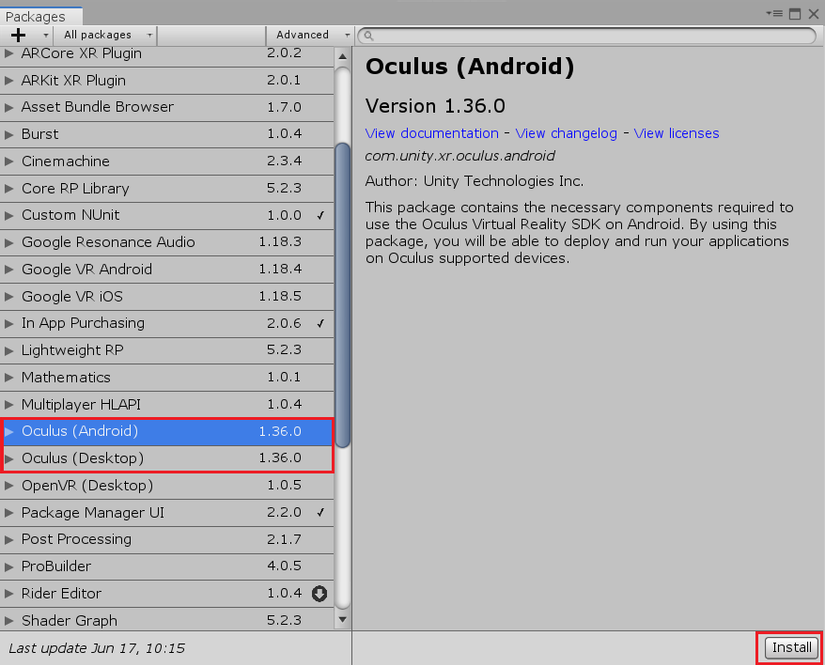
Once the installation is done, this package will automatically be added in your packages folder. Now you have to import the Oculus Integration asset from the asset store. This asset contains Oculus VR Utilities which you will need to create VR applications for Oculus.
Oculus VR Utilities:
- In Unity, you will find an
Asset storetab. Click it. - In the search bar, Search for
"Oculus Integration". There should only be one that has an Oculus logo in it.
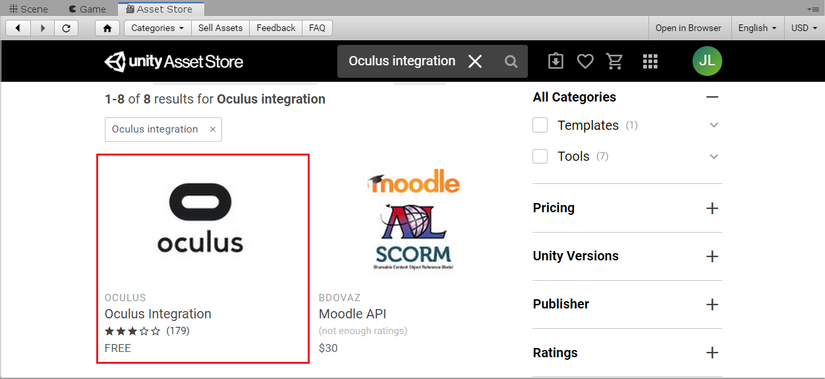
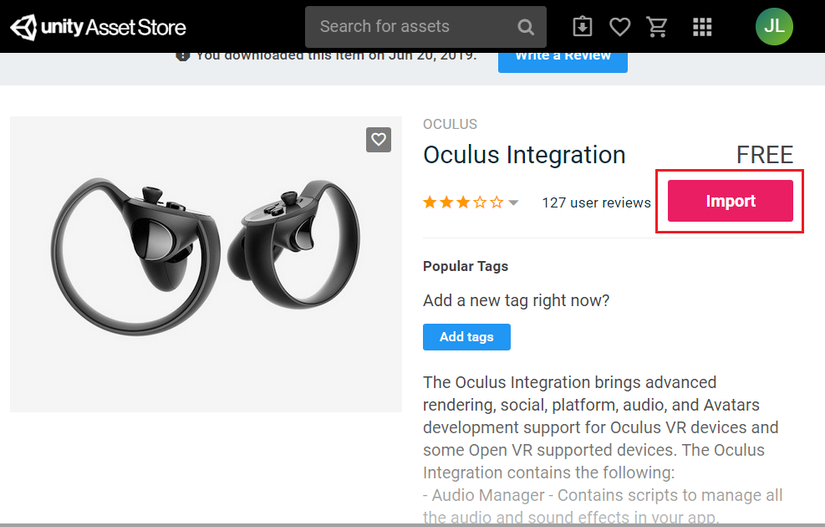
- Click
Download. - Once the download is finished, Click
Import.
- A window will pop-up. Make sure VR is checked. Click
Import.
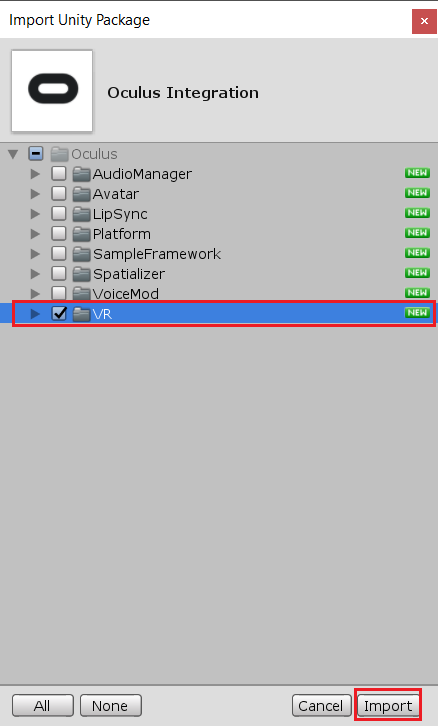
Once the import is done, you will notice in your project a folder Oculus. This folder contains the OVR assets you imported form the Oculus integration asset package. Now you have to setup your Player settings for Oculus build.
Oculus Player Settings:
-
Go to
File > Build Settings. -
Click
Player settings. -
Other Settings:a. Remove
VulkaninGrapics API’s.b. Set
Minimum level APIto21.c. Set
Scripting BackendtoIL2CPP. -
XR Settings:a. Check
Virtual Reality Supported.b. Add
OculusinVirtual Reality SKDs.
Done! You have now completed setting up Unity for VR development. Now we have to setup Oculus Go for development. Just like any other Android devices, you must turn on Developer mode in your Oculus device.
Oculus Developer mode:
- Download the mobile application Oculus.
- Open Oculus app.
- Login your credentials.
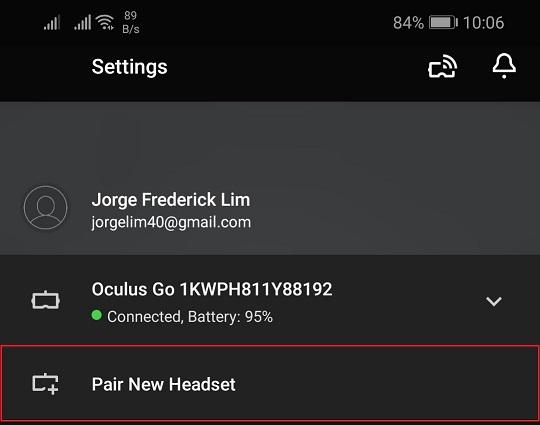
- Go to
Settings. - Click
Pair New Headset.
- Select your device (In our case, Oculus Go).
- Follow the instructions provided.
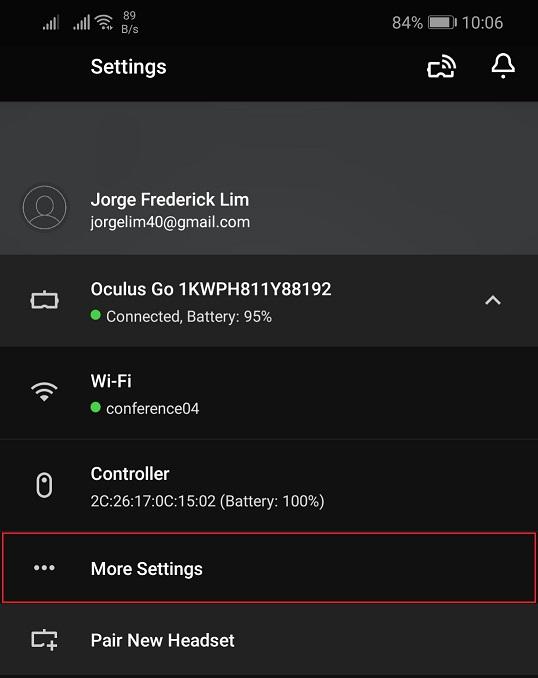
- Once paired, go back to
Settings. - Click on your Oculus device.
- Click
More settings.
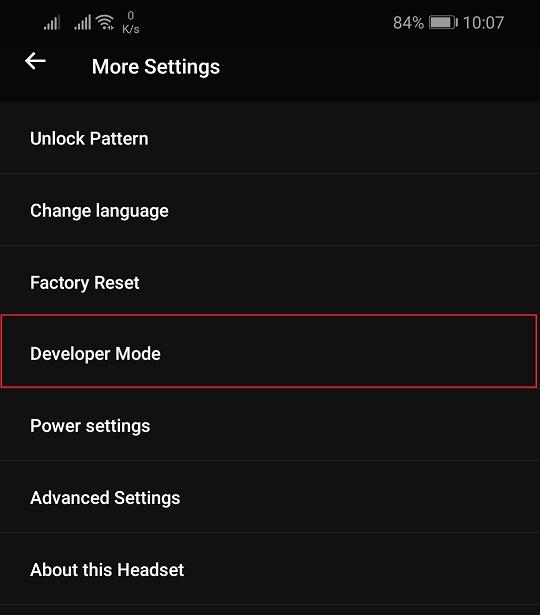
- Click
Developer mode.
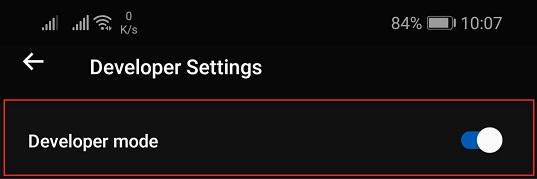
- Toggle
Developer modetoOn.
And done! Your Oculus device is now in developer mode and you can now build applications to your Oculus Go device. Now, to test that everything is working why don’t we build an application to your Oculus device. Go back to the Unity project we just setup and follow the next step.
Step 3: Building an Oculus application.
Making the application:
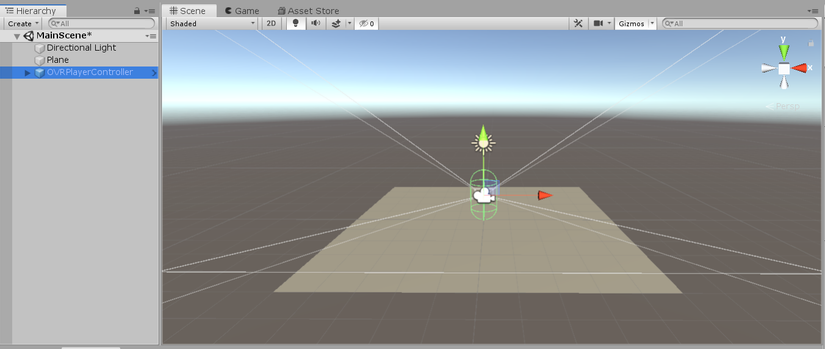
- In your project hierarchy make a scene.
Right click > Create > Scene. Let’s name itMainScene. - In the scene hierarchy, remove the
Main Camera. - Create a plane.
Game Object > 3D Object > Plane. - Set the plane position to
x: 0 y: 0 z: 0. - In your project hierarchy, go to
Oculus > VR > Prefabs. - Drag
OVRPlayerContollerto your scene hierarchy. - Set the
OVRPlayerContollerposition tox: 0 y: 1 z: 0.
This should be enough for now but if you want to add more to the environment please feel free to do so. When you're done, it’s time to build your application to your Oculus device.
Building the application:
- Plug in your Oculus device to your desktop via a USB to micro USB cord.
- Your Oculus device will be prompt for permission to access your Oculus device. Click
Allow. - In Unity, go to
File > Build Settings. - Click
Add Open Scenes. - Click
Build and Run. - Save your
.apkfile anywhere you like. I prefer to create abuildfolder in my project. - Wait until Unity builds your application.
- Once the build is done. Your application will automatically be opened in you Oculus device.
Note: You can also access your application installed in Oculus Go through
Library > Unknown Sources.
Congratulations, you have now made you first Oculus Go application with Unity! Now go and make great games!
All rights reserved
