Customview trong Android
Bài đăng này đã không được cập nhật trong 6 năm

Giới thiệu
Thỉnh thoảng trong Android bạn có một layout cần sử dụng ở một vài nơi khác nhau và chỉ có một số thay đổi nhỏ. Cho những trường hợp đó chúng ta nên tự tạo Custom View. Nó sẽ giúp chúng ta tiết kiệm thời gian. Về cơ bản chúng ta chỉ việc tạo custom view tại một chỗ rồi sau đó gọi ra khi gần. Đồng thời chỉnh sửa những arrtibute cần thiết.
Tại sao không sử dụng <include> ?
Vì đơn giản là khi chúng ta sử dụng include thì chúng ta không có khả năng truyền vào parameter. Như vậy, Include chỉ hữu ích trong trường hợp layout không có gì thay đổi ở những nơi khác nhau.
Let's code
Tiếp theo mình sẽ hướng dấn các bạn làm thế nào để inflate vào một layout mà bạn đã tạo trước đó. Và truyền vào 2 parameters để chỉnh sửa layout đó.
 Hình trên là layout mà chúng ta sẽ tiến hành custom. Mong muốn của chúng ta là sẽ có khả năng dùng lại view này ở nơi khác. Và có thể thay đổi hình ảnh và text thông qua attribute mà chúng ta tự định nghĩa.
Chúng ta cùng tạo một custom layout mong muốn, ở đây mình đặt tên là custom_view:
<?xml version="1.0" encoding="utf-8"?>
<LinearLayout xmlns:android="http://schemas.android.com/apk/res/android"
   xmlns:tools="http://schemas.android.com/tools"
   android:orientation="vertical"
   android:layout_width="134dp"
   android:layout_height="154dp"
   android:background="@drawable/grey_rounded_background"
   android:gravity="center"
   android:padding="16dp">

   <ImageView
       android:id="@+id/image"
       android:layout_width="80dp"
       android:layout_height="70dp"
       android:layout_marginBottom="8dp"
       tools:src="@color/colorPrimary" />

   <TextView
       android:id="@+id/caption"
       android:layout_width="match_parent"
       android:layout_height="wrap_content"
       tools:text="Caption of the Image"
       android:textAlignment="center"
       android:textColor="#666"
       android:textSize="12sp"/>
</LinearLayout>
Tiếp theo chúng trong thư mực values. Chúng ta tạo file gọi là attrs.xml. Nếu bạn tạo rồi thì có thể bỏ qua bước này.

Bên trong file này chúng ta tạo tag <declare-styleable...
<?xml version="1.0" encoding="utf-8"?>
<resources>

    <declare-styleable name="CustomView">
        <attr name="image" format="reference"/>
        <attr name="text" format="string"/>
    </declare-styleable>
</resources>
- Bạn nên đặt tên cho tag declare-styleable cùng tên với class bạn định thực hiện việc custom. Trong trường hợp này là CustomView
- Tạo attr tag cho custom parameter mà bạn muốn. Bây giờ chúng ta cùng tạo class CustomView:
    public class CustomView extends LinearLayout {

    public CustomView(Context context, @Nullable AttributeSet attrs) {
        super(context, attrs);
        ImageView imageView = findViewById(R.id.image);
        TextView textView = findViewById(R.id.caption);
        TypedArray attributes = context.obtainStyledAttributes(attrs, R.styleable.CustomView);
        imageView.setImageDrawable(attributes.getDrawable(R.styleable.CustomView_image));
        textView.setText(attributes.getString(R.styleable.CustomView_text));
        attributes.recycle();
    }
}
- Constructor sẽ nhận 2 tham số vào là Context và AttributeSet. Class của chúng ta sẽ thừa kế một view có sẵn, có thể là LinearLayout, RelativeLayout. Hoặc một view nào đó tùy ý của bạn.
- Chúng ta sẽ tham chiếu tới các view thông qua id.
- Chúng ta gán biến attributes tới styleable mà chúng ta đã tạo trong file atrrs.xml
- Chúng ta set giá trị cho image và text bởi những anotation: R.styleable.CustomView_image và R.styleable.CustomView_text.
- Cuối cùng là recycle lại attributes. Việc này cần thiết cho android quản lý bộ nhớ.
Đến đây thì chúng ta đã gần hoàn thành việc tạo customview. Bây giờ chúng ta có thể sử dụng customview của chúng ta như một View thông thường khác:
     <com.example.customviewandroid.CustomView
        android:layout_width="wrap_content"
        android:layout_height="wrap_content"
        app:image="@drawable/ic_cat"
        app:text="the first custom view" />
Chú ý khi sử dụng customview chúng ta phải thêm xmlns:app="http://schemas.android.com/apk/res-auto vào root layout để có thể gọi được các custom attributes mà chúng ta đã tạo.
Layout sau khi chúng ta thêm customview vừa tạo sẽ như sau:
<?xml version="1.0" encoding="utf-8"?>
<LinearLayout xmlns:android="http://schemas.android.com/apk/res/android"
    xmlns:app="http://schemas.android.com/apk/res-auto"
    xmlns:tools="http://schemas.android.com/tools"
    android:layout_width="134dp"
    android:layout_height="154dp"
    android:background="#32a852"
    android:gravity="center"
    android:orientation="vertical"
    android:padding="16dp">

    <com.example.customviewandroid.CustomView
        android:layout_width="wrap_content"
        android:layout_height="wrap_content"
        app:image="@drawable/ic_cat"
        app:text="the first custom view" />

</LinearLayout>
Chú ý rằng nếu layout không hiện lần đầu tiên thì chúng ta phải clean và rebuild lại project.
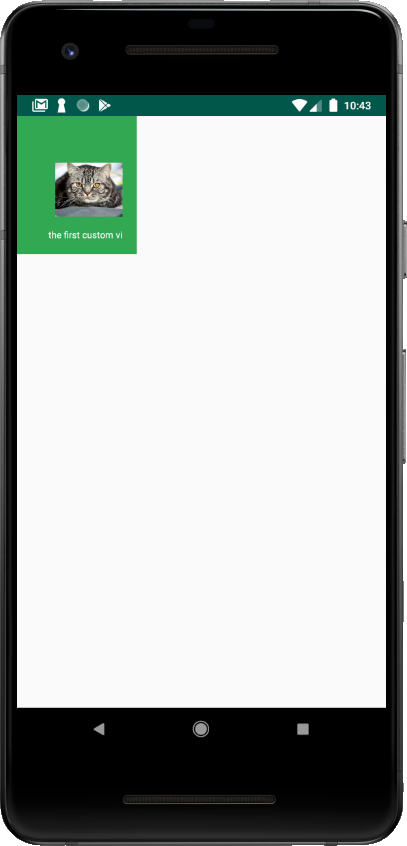
Và đây là thành quả của chúng ta sau khi chạy project trên emulator:

Chúc các bạn thành công! 
Bài viết có tham khảo tại: https://medium.com/@douglas.iacovelli/the-beauty-of-custom-views-and-how-to-do-it-79c7d78e2088
All rights reserved