[Backend] Deploy dự án Laravel bằng Deployer
Bài đăng này đã không được cập nhật trong 6 năm
Chào tất cả bà con, hôm nay mình lại quay lại đây, bài viết này mình sẽ hướng dẫn mọi người deploy dự án laravel lên 1 con server dùng Deployer nhé
Deployer sẽ giúp cho chúng ta triển khai 1 dự án lên bất cứ môi trường nào một cách nhanh nhất, đơn giản nhất, tiện lợi nhất chỉ bằng một vài command đơn giản.
Vấn để deploy nhiều người nghĩ chỉ đơn giản là lên server clone code về rồi cài đặt nginx cho nó lên hình là ok, lúc nào có code thì lại ssh lên server pull code về mà chạy.
Ok làm có vẻ mượt mà đấy nhưng nếu khi bạn đang deploy code trên production thì sao nhỉ, bạn đang cài đặt 1 thư viện bị lỗi, hay migrate thiếu bảng thì sao, lúc này người dùng đang dùng chắc chắn sẽ lỗi, thế cách deploy tay chân như thế kia còn giải quyết được không, mọi người đừng lo, thằng Deployer nó những tính năng để giảm thiểu được những vấn đề đấy
I. Các tính năng của Deployer
1. Triển khai nhanh
Deployer được đóng gói với các tính năng tiết kiệm thời gian và tối ưu, tốt nhất cho hiệu suất và việc phát triển.
2. Module
Tạo cho các bạn các script tích hợp dựa trên những khối module có sẵn được gọi là “recipes”
3. Clean code
Deployer có source code rõ ràng, ngắn gọn súc tích và được kiểm thử rất cẩn thận kỹ lưỡng. Mã nguồn được theo dõi bởi nhiều công cụ quản lý chất lượng. Mỗi pull request cũng được check bới các test tool
4. Khả năng rollback
Nếu có bất cứ lỗi nào trong quá trình deploy, thì chúng ta vẫn có thể rollback về release trước đó một cách đơn giản
5. Các task có thể chạy đồng thời
Deployer có thể chạy nhiều tasks đồng thời mà không cần bất cứ một thư viện nào khác
6. Tính nhất quán
Deployer giữ sự nhất quán giữa các máy chủ, ngay cả trong chế độ song song! Nếu một tác vụ không thành công, các tác vụ tiếp theo sẽ không được thực hiện trên tất cả các máy chủ.
Cài đặt và config deployer
Cài đặt
Mọi người làm theo hướng dẫn trong trang chủ của nó nhé, rất chi tiết rồi: https://deployer.org/download/
Config
Server
B1: Cài đặt những thư viện cần thiết
- Đầu tiên để deploy được bạn phải có 1 con server đúng không, bạn có thể đăng ký của bọn aws hoặc google tùy ý. Sau khi đã có server bạn phải cài đặt đầy đủ những thứ này cho mình nhé
B2: Tạo file authorized_keys để có thể ssh từ máy local
OK cài đặt ngon lành cành đào rồi chứ, bước tiếp theo là đảm bảo máy local của bạn có thể ssh được vào server vừa tạo nhé, nếu chưa biết làm như thế nào thì xem hướng dẫn tạo file authorized_kyes của mình nhé
	cd ~
	mkdir .ssh
	sudo chmod 700 .ssh
	touch ~/.ssh/authorized_keys
	sudo chmod 600 ~/.ssh/authorized_keys
sau khi đã có file authorized_kyes thì chỉ cần nhém cái ssh_key máy local của bạn vào file này trên server là được
cat ~/.ssh/id_rsa.pub
dùng nano or vim sửa file authorized_kyes nhém ssh_key của bạn vào nhé
B3: Tạo ssh_key trên server
Deployer nó cũng clone repo giúp bạn nên bạn cần phải tạo ssh_key rồi nhém vào phần setting ở tài khoản git của bạn là được
ssh-keygen -t rsa -C "newserver@gmail.com"
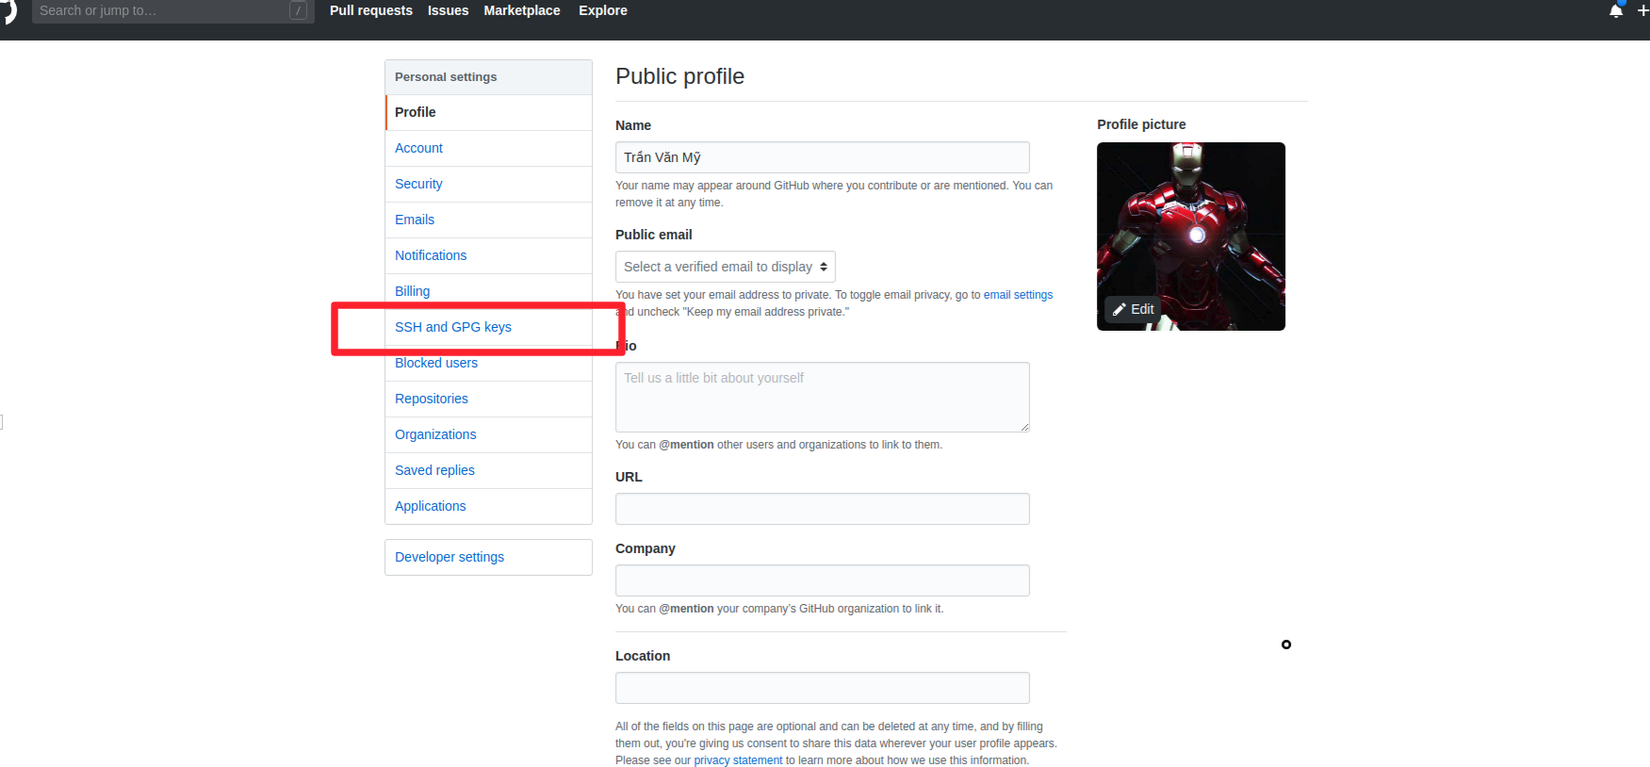
sau khi đã có ssh_key bạn copy nó vào SSH and GPG keys là được nhé
Local
B1: Init deployer for project
- Mở terminal của project lên nhé, sau đó chạy
dep init
SUN-ASTERISK\tran.van.my@b121146-pc:~/Desktop/Framgia/web/Mybot$ dep init

  Welcome to the Deployer config generator

 This utility will walk you through creating a deploy.php file.
 It only covers the most common items, and tries to guess sensible defaults.

 Press ^C at any time to quit.

 Please select your project type [Common]:
  [0 ] Common
  [1 ] Laravel
  [2 ] Symfony
  [3 ] Yii
  [4 ] Yii2 Basic App
  [5 ] Yii2 Advanced App
  [6 ] Zend Framework
  [7 ] CakePHP
  [8 ] CodeIgniter
  [9 ] Drupal
  [10] TYPO3
 > 1

 Repository [git@github.com:tranvanmy/Mybot.git]:
 > 	git@github.com:tranvanmy/Mybot.git

 Contribute to the Deployer Development

 In order to help development and improve the features in Deployer,
 Deployer has a setting for usage data collection. This function
 collects anonymous usage data and sends it to Deployer. The data is
 used in Deployer development to get reliable statistics on which
 features are used (or not used). The information is not traceable
 to any individual or organization. Participation is voluntary,
 and you can change your mind at any time.

 Anonymous usage data contains Deployer version, php version, os type,
 name of the command being executed and whether it was successful or not,
 exception class name, count of hosts and anonymized project hash.

 If you would like to allow us to gather this information and help
 us develop a better tool, please add the code below.

     set('allow_anonymous_stats', true);

 This function will not affect the performance of Deployer as
 the data is insignificant and transmitted in a separate process.

 Do you confirm? (yes/no) [yes]:
 > yes

Successfully created: /home/tran.van.my/Desktop/Framgia/web/Mybot/deploy.php
sau khi init xong thì nó sẽ tạo cho mọi người 1 file deploy.php ở soucre code dữ án của mn nhé
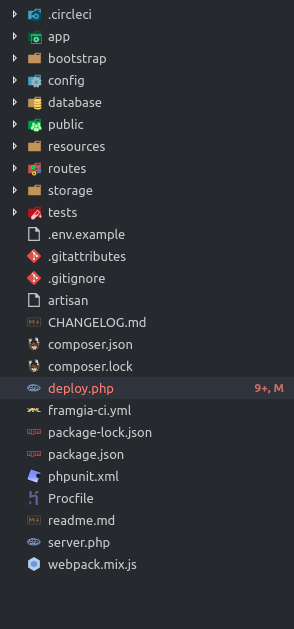
nội dung của file đấy sẽ như thế này
<?php
namespace Deployer;

require 'recipe/laravel.php';

// Project name
set('application', 'my_project');

// Project repository
set('repository', 'git@github.com:tranvanmy/Mybot.git');

// [Optional] Allocate tty for git clone. Default value is false.
set('git_tty', true);

// Shared files/dirs between deploys
add('shared_files', []);
add('shared_dirs', []);

// Writable dirs by web server
add('writable_dirs', []);

// Hosts

host('project.com')
    ->set('deploy_path', '~/{{application}}');

// Tasks

task('build', function () {
    run('cd {{release_path}} && build');
});

// [Optional] if deploy fails automatically unlock.
after('deploy:failed', 'deploy:unlock');

// Migrate database before symlink new release.

before('deploy:symlink', 'artisan:migrate');
Sau khi đã có file này thì mình chỉnh sửa lại theo ý muốn của mình thôi, cái quan trọng nhất là phần Host nhé, đây chính là thông tin IP server để mình deploy lên nhé, ví dụ như của mình
host('34.70.228.50')
    ->user('deploy')
    ->stage('development')
    ->set('deploy_path', '~/{{application}}')
    ->forwardAgent(false);
ở đây bạn có thể setup nhiều host khác nhau như môi trường staging và production nhé
host('11.111.111.11')
    ->user('deploy')
    ->stage('staging')
    ->set('deploy_path', '~/{{application}}')
    ->forwardAgent(false);
Và đây sẽ là 1 file đầy đủ mà mình config
<?php

namespace Deployer;

require 'recipe/laravel.php';

// Project name
set('application', 'Mybot');

// Project repository
set('repository', 'git@github.com:mytv01-1146/Mybot.git');

// [Optional] Allocate tty for git clone. Default value is false.
set('git_tty', false);

// Default branch
set('branch', 'develop');

// Shared files/dirs between deploys
add('shared_files', [
    '.env',
]);

add('shared_dirs', [
    'storage',
    'bootstrap/cache',
]);

// Writable dirs by web server
add('writable_dirs', [
    'bootstrap/cache',
    'storage',
    'storage/app',
    'storage/app/public',
    'storage/framework',
    'storage/framework/cache',
    'storage/framework/sessions',
    'storage/framework/views',
    'storage/logs',
]);

// Hosts

host('34.70.228.50')
    ->user('deploy')
    ->stage('development')
    ->set('deploy_path', '~/{{application}}')
    ->set('http_user', 'www-data')
    ->set('writable_mode', 'chmod')
    ->forwardAgent(false);

// Tasks

task('build-assets', function () {
    run('cd {{release_path}} && yarn');
    run('cd {{release_path}} && yarn run dev');
});

task('deploy', [
    // outputs the branch and IP address to the command line
    'deploy:info',
    // preps the environment for deploy, creating release and shared directories
    'deploy:prepare',
    // adds a .lock file to the file structure to prevent numerous deploys executing at once
    'deploy:lock',
    // removes outdated release directories and creates a new release directory for deploy
    'deploy:release',
    // clones the project Git repository
    'deploy:update_code',
    // loops around t he list of shared directories defined in the config file
    // and generates symlinks for each
    'deploy:shared',
    // loops around the list of writable directories defined in the config file
    // and changes the owner and permissions of each file or directory
    'deploy:writable',
    // Yarn install and build assets
    'build-assets',
    // if Composer is used on the site, the Composer install command is executed
    'deploy:vendors',
    // loops around release and removes unwanted directories and files
    'deploy:clear_paths',
    // links the deployed release to the "current" symlink
    'deploy:symlink',
    // deletes the unlock file, allowing further deploys to be executed
    'deploy:unlock',
    // loops around a list of release directories and removes any which are now outdated
    'cleanup',
    // can be used by the user to assign custom tasks to execute on successful deployments
    'success',
]);

// [Optional] if deploy fails automatically unlock.
after('deploy:failed', 'deploy:unlock');

// Migrate database before symlink new release.

before('deploy:symlink', 'artisan:migrate');

// Reload PHP-FPM

task('reload:php-fpm', function () {
    $stage = input()->hasArgument('stage') ? input()->getArgument('stage') : null;

    switch ($stage) {
        case 'staging':
            run('sudo systemctl reload php-fpm');
            break;

        default:
            run('sudo /etc/init.d/php7.3-fpm reload');
    }
})->desc('PHP7 FPM reloaded');

after('cleanup', 'reload:php-fpm');
Ok mọi người chịu khó đọc phần comment của mình nhé, mình đã giải thích rất rõ từng phần rồi đấy Sau khi đã config xong thì chỉ cần chạy
dep deploy development
ngồi nhâm nhi cốc cafe chờ deploy done thôi =))
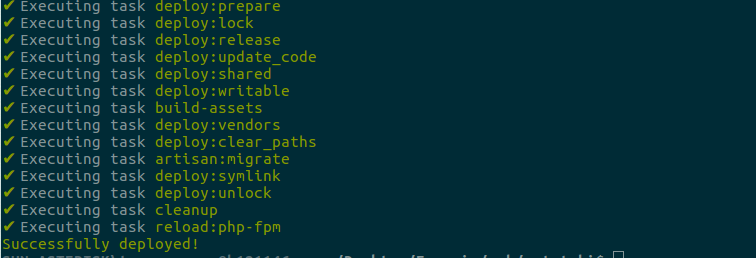
ok sau khi deploy thành công thì Deployer sẽ tạo những thư mục trên host
- releases chứa các bản release.
- shared chưa các files shared.
- current bản release hiện tại.
![]() Trong quá trình deploy mà có bất cứ một lỗi nào, bạn chỉ đơn giản sử dụng lệnh:
Trong quá trình deploy mà có bất cứ một lỗi nào, bạn chỉ đơn giản sử dụng lệnh:
dep rollback
để có thể quay trở lại bản releases trước
Các bạn cũng có thể cấu hình để chạy một số task trước/sau những task khác rất đơn giản
task('reload:php-fpm', function () {
    $stage = input()->hasArgument('stage') ? input()->getArgument('stage') : null;

    switch ($stage) {
        case 'staging':
            run('sudo systemctl reload php-fpm');
            break;

        default:
            run('sudo /etc/init.d/php7.3-fpm reload');
    }
})->desc('PHP7 FPM reloaded');
after('cleanup', 'reload:php-fpm');
Kết Luận
OK thế là ngon lành cành đào rồi đấy, sang bài sau mình sẽ hướng dẫn mn cách tích hợp nào vào FramgiaCI nhé, để mỗi khi merged là nó auto deploy luôn
All rights reserved
