
Viết Burp Extension để giải mã và chỉnh sửa traffic đã mã hóa của một ứng dụng
Bài đăng này đã không được cập nhật trong 2 năm
Intro

Trong bài viết lần trước Case study phân tích cách mã hóa traffic của một ứng dụng Android, sau khi nắm được cơ chế mã hóa giữa server và client thì ta có nhiều lựa chọn khác nhau:
- Sử dụng Hackvertor, viết một custom tag để có thể tùy ý chỉnh sửa dữ liệu đẩy lên trong Burp.
- Viết một extension với chức năng decrypt/encrypt traffic của ứng dụng.
Với phương án thứ 2 thì extension này sẽ như sau:
- Cơ bản thì chúng ta sẽ có thêm một tab mới trong phần xem request/response. Khi chuyển qua tab này chúng ta có thể xem được dữ liệu ở dạng đã giải mã.
- Chúng ta có thể chỉnh sửa dữ liệu. Và khi chuyển về tab ban đầu, dữ liệu sẽ được mã hóa lại.
Nghe khá là tiện lợi và ... cool đúng không. Thêm nữa, chúng ta sẽ xây dựng cấu trúc extension sao cho generic nhất có thể, để dễ dàng thay đổi cho các lần sử dụng sau. Let's go!
TLDR;

Source code và hướng dẫn sử dụng và cách customize đã có ở đây: https://github.com/vigov5/traffic_decryptor
Example
Để phục vụ cho việc xây dựng extension chúng ta sẽ sử dụng một server mô phỏng lại việc mã hóa traffic dựa trên thuật toán mã hóa AES với key và iv được chia sẻ sẵn cho client từ trước như sau: https://github.com/vigov5/traffic_decryptor/blob/main/example/encrypted_server.py
from flask import Flask, request, jsonify
from Crypto.Cipher import AES
from Crypto.Util.Padding import pad, unpad
import base64
import json

app = Flask(__name__)

# AES-128 requires a 16-byte (128-bit) key
AES_KEY = b"thisisakey123456"  # Default key (should be kept secret in production)
AES_IV = b"thisisaniv123456"   # Initialization Vector (IV), should also be 16 bytes

def encrypt_data(data):
    cipher = AES.new(AES_KEY, AES.MODE_CBC, AES_IV)
    padded_data = pad(data.encode('utf-8'), AES.block_size)
    encrypted_data = cipher.encrypt(padded_data)
    return base64.b64encode(encrypted_data).decode('utf-8')

def decrypt_data(encrypted_data):
    cipher = AES.new(AES_KEY, AES.MODE_CBC, AES_IV)
    decoded_encrypted_data = base64.b64decode(encrypted_data)
    decrypted_padded_data = cipher.decrypt(decoded_encrypted_data)
    decrypted_data = unpad(decrypted_padded_data, AES.block_size)
    return decrypted_data.decode('utf-8')

@app.route('/status', methods=['GET'])
def status():
    response_data = {
        "name": "Demo Encrypted Traffic Server",
        "version": "0.1"
    }
    json_response = jsonify(response_data).get_data(as_text=True)
    encrypted_data = encrypt_data(json_response)
    return jsonify({"error": 0, "data": encrypted_data})

@app.route('/hello', methods=['POST'])
def hello():
    try:
        request_data = request.get_json()
        encrypted_data = request_data.get('data')
        decrypted_json = decrypt_data(encrypted_data)
        decrypted_data = json.loads(decrypted_json)

        if 'name' in decrypted_data:
            name = decrypted_data['name']
            response_message = {"resp": f"Hello {name}!"}
            json_response = json.dumps(response_message)
            encrypted_response = encrypt_data(json_response)
            return jsonify({"error": 0, "data": encrypted_response})
        else:
            return jsonify({"error": 1, "message": "Key 'name' not found in decrypted data"}), 400
    except Exception as e:
        return jsonify({"error": 1, "message": str(e)}), 500

if __name__ == '__main__':
    app.run(debug=True)
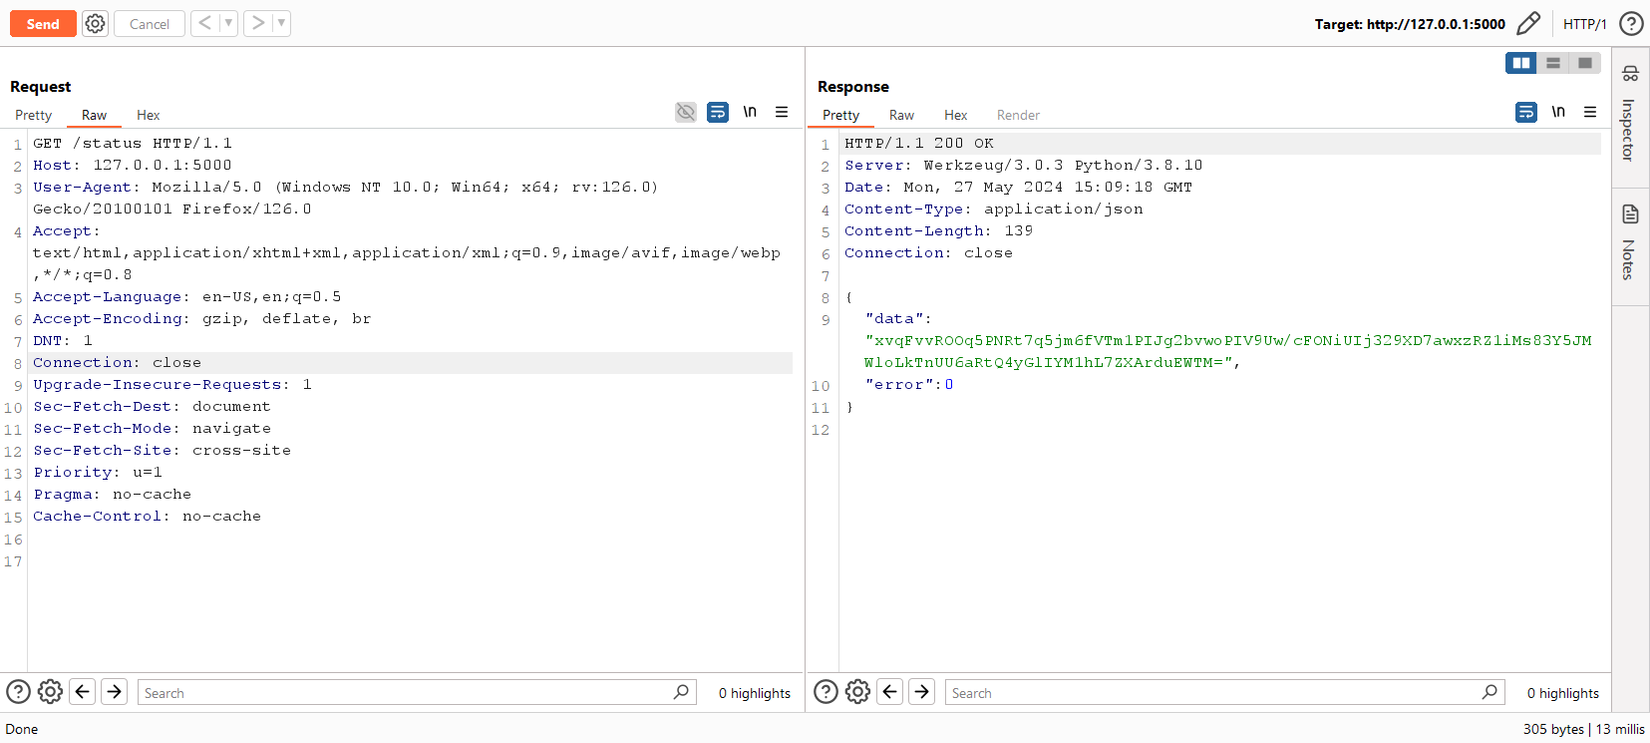
Server này có hai endpoint:
/statussẽ trả về thông tin của server
{
    "name": "Demo Encrypted Traffic Server",
    "version": "0.1"
}
/hellosẽ nhận dữ liệu JSON đã mã hóa của người dùng gửi lên có dạng{"data": <base64_encoded_data>}, giải mã rồi kiểm tra xem có key"name"hay không, nếu có thì response lại JSON{"resp": f"Hello {name}!"}
Tất nhiên, tất cả dữ liệu sẽ đều bị mã hóa:
The Extension
Giờ chúng ta sẽ đi vào từng thành phần của extension. Mình sẽ chỉ giải thích code vì hướng dẫn viết extension cho Burp đã có ở trên internet khá nhiều, hoặc đơn giản hơn bạn có thể đi hỏi người giúp thực hiện phần lớn coding của extension này: ChatGPT. Bạn không đọc nhầm đâu  . Phần lớn, code extension này (và cả code của server mẫu ở trên) được gen ra bởi ChatGPT. Đúng rồi đó, ChatGPT làm (gần) hết, mình làm phần còn lại
  .
.
Source code: https://github.com/vigov5/traffic_decryptor/blob/main/traffic_decryptor.py
Init
class BurpExtender(IBurpExtender, IMessageEditorTabFactory, ITab):
    def registerExtenderCallbacks(self, callbacks):
        # Set up extension
        self._callbacks = callbacks
        self._helpers = callbacks.getHelpers()
        self._callbacks.setExtensionName("Traffic Decryptor")

        # Create the UI
        self._createUI()

        # Add the custom tab to Burp's UI
        self._callbacks.addSuiteTab(self)

        # Register message editor tab factory
        callbacks.registerMessageEditorTabFactory(self)

        # Set up stdout
        self.stdout = PrintWriter(callbacks.getStdout(), True)
        self.stdout.println("Traffic Decryptor extension loaded")

    def getTabCaption(self):
        return "Traffic Decryptor"
Như bao extension khác, chúng ta cũng cần kế thừa interface IBurpExtender và ở đây cần kết thừa thêm IMessageEditorTabFactory để có thể tạo một tab mới trong phần Message Editor của Burp. Chúng ta còn tạo thêm một tab riêng trong danh sách các tab của Burp bằng việc kế thừa ITab và gọi đến self._callbacks.addSuiteTab(self), tab này sẽ có một nhiệm vụ đặc biệt ở sau đây:
Burp Tab
def getUiComponent(self):
        return self._panel

    def _createUI(self):
        # Create the main panel with BorderLayout
        self._panel = JPanel(BorderLayout())

        # Create a button
        self.btnReload = JButton("Reload", actionPerformed=self.btnReload_clicked)
        self.btnReload.setPreferredSize(Dimension(400, 200))  # Set button size

        # Create a panel with BoxLayout to center the button
        buttonPanel = JPanel()
        buttonPanel.setLayout(BoxLayout(buttonPanel, BoxLayout.Y_AXIS))

        # Create a horizontal box to center the button horizontally
        horizontalBox = JPanel()
        horizontalBox.setLayout(BoxLayout(horizontalBox, BoxLayout.X_AXIS))
        horizontalBox.add(Box.createHorizontalGlue())
        horizontalBox.add(self.btnReload)
        horizontalBox.add(Box.createHorizontalGlue())

        # Add the horizontal box to the button panel
        buttonPanel.add(Box.createVerticalGlue())
        buttonPanel.add(horizontalBox)
        buttonPanel.add(Box.createVerticalGlue())

        # Add the button panel to the main panel
        self._panel.add(buttonPanel, BorderLayout.CENTER)

    def btnReload_clicked(self, e=None):
        self.stdout.println("Reloading logic...")
        imp.reload(logic)
Phần code này sẽ có tác dụng tạo ra một tab với một nút "Reload" duy nhất.
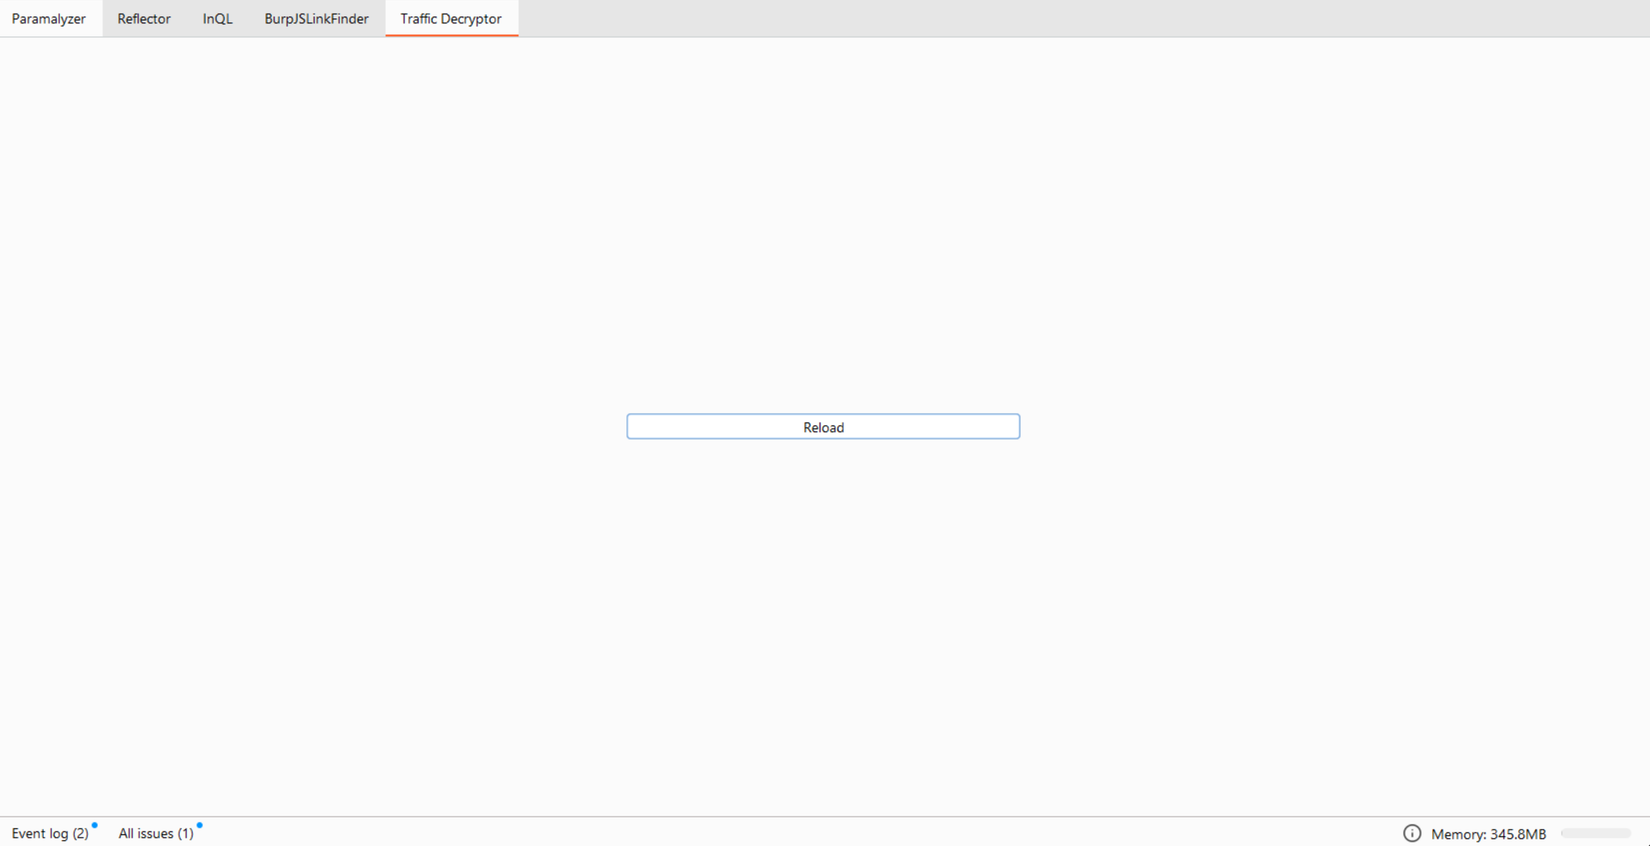
Và khi bấm nút này, chúng ta sẽ thực hiện reload lại module logic thông qua hàm reload của module imp (ở file logic.py cùng thư mục với file main của extension).
Reload a previously imported module. The argument must be a module object, so it must have been successfully imported before. This is useful if you have edited the module source file using an external editor and want to try out the new version without leaving the Python interpreter.
Lý do ở đây là sau khi chúng ta đã load extension và module vào Burp rồi thì mỗi khi chỉnh sửa lại extension, chúng ta sẽ cần remove và add lại extension vào Burp. Mỗi lần như vậy sẽ rất tốn thời gian. Sử dụng trick này, chúng ta sẽ đưa hết logic chính của extension vào file logic.py rồi mỗi lần chỉnh sửa code xong chúng ta chỉ cần bấm nút để load các logic mới ở file này vào tiếp tục test.
The Core
Với việc đưa hết logic vào module khác, phần code chính của extension sẽ chỉ đơn giản là gọi đến các hàm đã định nghĩa sẵn:
- hàm
setMessage(self, content, isRequest)có nhiệm vụ kiểm tra xem request hoặc response này có phải là đã được mã hóa không và sau đó gọi đến phần code đưa nội dung đã giải mã vào Message Editor
        try:
            if logic.is_encrypted(self, content, isRequest):
                if isRequest:
                    logic.set_request_text(self, content, isRequest)
                else:
                    logic.set_response_text(self, content, isRequest)
            else:
                logic.set_not_encrypted_text(self, content, isRequest)
        except Exception as e:
            logic.set_error_text(self, e)
            if logic.is_debug(self):
                traceback.print_exc(file=self._stdout)
- hàm
getMessage(self)sẽ kiểm tra xem Message Editor có bị chỉnh sửa không (tức là ta đã thay đổi dữ liệu hay chưa). Nếu có, sẽ gọi đến phần code thực hiện mã hóa lại dữ liệu:
    def getMessage(self):
        # If the custom tab was modified, re-encode the data field before returning the message
        if logic.is_text_modified(self):
            try:
                if self._isRequest:
                    message = logic.build_request(self)
                else:
                    message = logic.build_response(self)

                return message
            except Exception as e:
                self._stdout.println("Error re-encoding data: {}".format(e))
                if logic.is_debug(self):
                    traceback.print_exc(file=self._stdout)

        # Return the possibly modified message
        return self._currentMessage
Như ta đã thấy, toàn bộ logic đã được đưa hết sang module logic, tất cả code đều chủ yếu là boilerplate, do đó sẽ rất hiếm khi phải sửa file này.
Jython
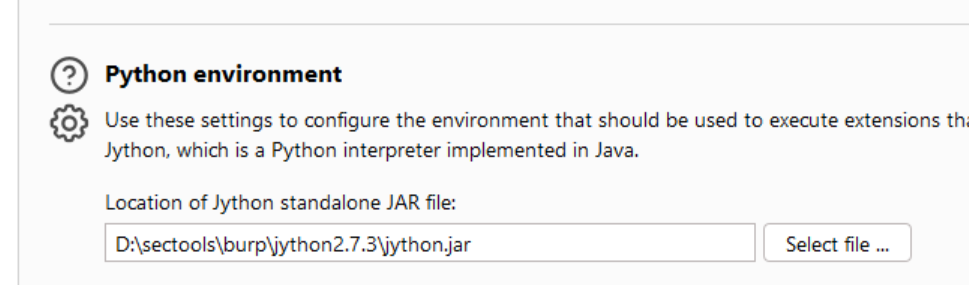
Để có thể nhanh chóng load và reload code nên mình đã sử dụng Python cho việc phát triển extension. Và để có thể chạy được các extension viết bằng python, bạn cần cài đặt Jython (phiên bản hiện tại là 2.7.3 - Python 2.7) bằng installer hoặc standalone. Sau khi thử cả hai phiên bản thì chỉ có bản installer mới có file jython.exe cần thiết cho việc cài đặt thêm thư viện crypto pyaes cần dùng để mã hóa và giải mã dữ liệu. Sau khi cài xong thì cần thiết lập môi trường chỉ đến file jython.jar
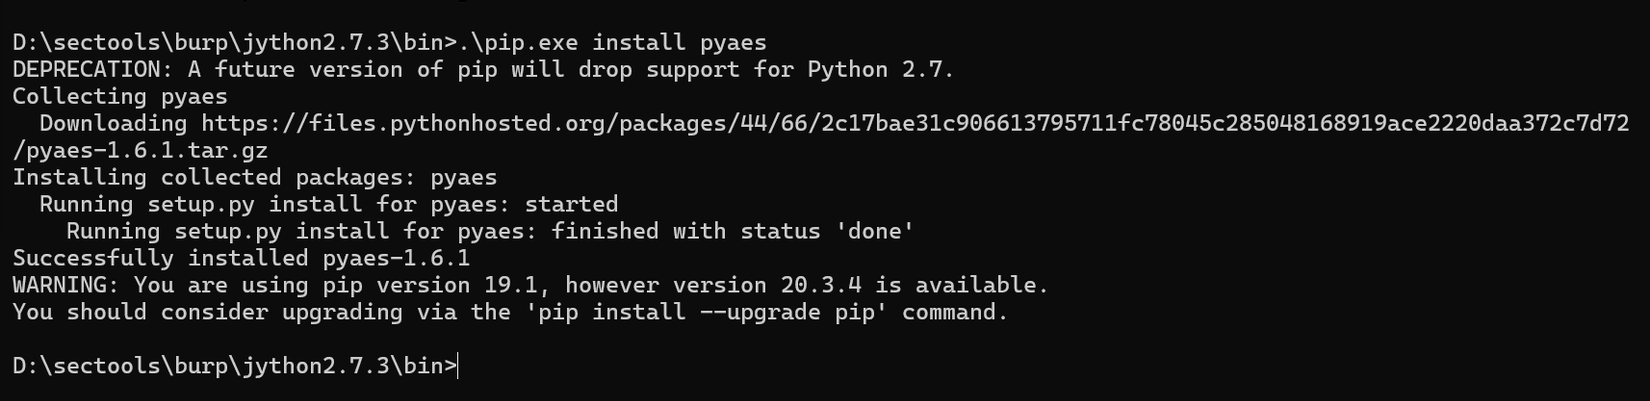
Để cài thêm thư viện thì chỉ cần chạy file bin\pip.exe rồi cài đặt như một thư viện thông thường.
Đến đây hẳn là sẽ có bạn thắc mắc là sao mình không sử dụng thư viện phổ biến hơn là pycryptodome, pycrypto hay là cryptography? Lý do là Jython không hỗ trợ các thư viện cần compile bằng CPython nên chúng ta chỉ có thể sử dụng các thư viện hoàn toàn viết bằng python.
Pure-Python implementation of AES block-cipher and common modes of operation.
Một giải pháp khác là viết code ra một file python khác rồi sau đó dùng module subprocess để gọi đến.
The Logic
Quay lại với phần logic chính. Ở file https://github.com/vigov5/traffic_decryptor/blob/main/example/logic.py dùng cho logic của server mẫu ở trên, chúng ta cần viết các hàm sau (các hàm khác có thể dùng mặc định):
is_encrypted(tab, content, isRequest)kiểm tra xem JSON body có chứa key"data"hay không, nếu có thì là request/response chúng ta cần quan tâm:
def is_encrypted(tab, content, isRequest):
    info, body = extract_info(tab, content, isRequest)
    body = content[info.getBodyOffset() :].tostring()
    json_data = json.loads(body)

    if is_debug(tab):
        tab._stdout.println("Is Encrypted?: {}".format("data" in json_data))
        tab._stdout.println("Original data: {}".format(body))

    return "data" in json_data
set_request_text(tab, content, isRequest)sẽ có nhiệm vụ lấy ra JSON body, đưa dữ liệu ở key"data"đi giải mã rồi gọi đếnsetTextđể hiển thị dữ liệu đã giải mã này ra editor:
# contain logic for decrypt request traffic, call setText with decrypted data
def set_request_text(tab, content, isRequest):
    info, body = extract_info(tab, content, isRequest)
    body = content[info.getBodyOffset() :].tostring()
    json_data = json.loads(body)

    decrypted = decrypt_data(json_data["data"])

    tab._txtInput.setText(decrypted.encode("utf-8"))
- hàm
decrypt_datavàencrypt_datathực hiện mã hóa và giải mã dữ liệu dựa trên key và iv đã biết:
def decrypt_data(encrypted_data):
    encrypted_data_bytes = base64.b64decode(encrypted_data)
    decrypter = pyaes.Decrypter(pyaes.AESModeOfOperationCBC(b"thisisakey123456", b"thisisaniv123456"))
    decrypted_data = decrypter.feed(encrypted_data_bytes) + decrypter.feed()

    return decrypted_data.decode('utf-8')

def encrypt_data(plaintext):
    encrypter = pyaes.Encrypter(pyaes.AESModeOfOperationCBC(b"thisisakey123456", b"thisisaniv123456"))
    ciphertext = encrypter.feed(plaintext.encode('utf-8')) + encrypter.feed()
    encrypted_data = base64.b64encode(ciphertext).decode('utf-8')

    return encrypted_data
- hàm
build_request(tab)có nhiệm vụ lấy ra JSON đã được chỉnh sửa từ editor, mã hóa lại rồi đưa vào key"data"của JSON, format lại dữ liệu theo đúng cấu trúc một request/respone mới trả về cho extension để hiển thị message đã được update.
def build_request(tab):
    # call this to get current text in editor
    text = tab._txtInput.getText()

    # process content
    json_data = json.loads(text.tostring())
    encoded_data = encrypt_data(json.dumps(json_data))

    if tab._isRequest:
        layout = REQUEST_LAYOUT
    else:
        layout = RESPONSE_LAYOUT

    new_body = copy.deepcopy(layout)
    layout["data"] = encoded_data
    new_body = json.dumps(new_body)

    if is_debug(tab):
        tab._stdout.println("Re-encoded data: {}".format(new_body))

    # build new message
    info, body = extract_info(tab, tab._originalMessage, tab._isRequest)
    headers = info.getHeaders()
    tab._currentMessage = tab._helpers.buildHttpMessage(headers, new_body)

    return tab._currentMessage
The Result
Sau khi ghép lại tất cả, cuối cùng chúng ta có kết quả như sau:
The End
Như vậy ta đã xây dựng xong extension và hoàn toàn có thể tái sử dụng extension cho các ứng dụng với các logic khác nhau. Happy ChatGPT-ing~
All rights reserved
