Tạo Single Page App giống Medium bằng Reactjs+Redux kết hợp với Nodejs
Bài đăng này đã không được cập nhật trong 8 năm
 Các công nghệ chính sử dụng trong project
- Redux
- Nodejs
- Cloudinary
- MongoDB
- Expressjs Ở project này ta sẽ sử dụng javascript để code cho cả client-side và server-side
Môi trường cài đăt
- Server setup
- Client setup
Ở đây backend của app sẽ sử dụng nodejs còn front end sẽ sử dụng react để render html.Và chắc chắn bạn phải cài Nodejs và Mongodb Ở đây mình sử dụng npm create-react-app để khởi tạo react thay vì code từ đầu đến cuối :v.

Sau khi cài đặt thành công thì đây là thành quả =))) Tiếp theo mình sẽ setup server, toàn bộ code server mình sẽ code hết ở trong folder server

Cài đặt Sever
- mongoose
- cloudinary(package để base64 ảnh cho ông nào lười làm chức năng upload ảnh)
- helmet
- express
- cors
- connect-multiparty
- body-parser
- compression
Đây là một đống bùi nhùi dependencies của nó. Và cài đặt thì sẽ one hit với 1 câu lệnh thôi ko có gì cao siêu cả
npm i mongoose cloudinary helmet express cors connect-multiparty body-parser compression
Với backend thì mình sẽ build theo mô hình MVC cũ rích thôi. Thì trong folder server mình create thêm 3 thư mục là controller,route,models

- Route sẽ chứa tất cả cái đường link(trả api, CRUD user, articel)
Tạo Model(là chỗ ăn trộm data từ database)
Ở phần này bạn nhớ chạy mongodb , ở đây để call data từ DB thì mình import mongoose Ở dưới là model của article. thì có bao nhiêu chức năng cho article thì có bấy nhiêu function thôi.Mình phát hiện ra cái view code của kialog nó hơi khó nhìn thì ở cuối bài mình sẽ gửi link github project để các bạn view cho dễ ~~
// server/models/Article.js
const mongoose = require('mongoose')
let ArticleSchema = new mongoose.Schema(
    {
        text: String,
        title: String,
        description: String,
        feature_img: String,
        claps: Number,
        author: {
            type: mongoose.Schema.Types.ObjectId,
            ref: 'User'
        },
        comments: [
            {
                author: {
                    type: mongoose.Schema.Types.ObjectId,
                    ref: 'User'
                },
                text: String
            }
        ]
    }
);
ArticleSchema.methods.clap = function() {
    this.claps++
    return this.save()
}
ArticleSchema.methods.comment = function(c) {
    this.comments.push(c)
    return this.save()
}
ArticleSchema.methods.addAuthor = function (author_id) {
    this.author = author_id
    return this.save()
}
ArticleSchema.methods.getUserArticle = function (_id) {
    Article.find({'author': _id}).then((article) => {
        return article
    	})
}
module.exports = mongoose.model('Article', ArticleSchema)
Và tương tự cho model article thì ta cũng có code của model user. model user sẽ có các function thực hiện các chức năng như call data từ DB, add follow. follow user(như medium ấy mà ~~). Để trách dài bài viết mình sẽ ko paste code lên đây :v
Tạo Controller(Nó giống như trùm. Sẽ lợi dụng thằng model để lấy dữ liệu ~~)
/** server/controllers/article.ctrl.js*/
const Article = require('./../models/Article')
const User = require('./../models/User')
const fs = require('fs')
const cloudinary = require('cloudinary')
module.exports = {
    addArticle: (req, res, next) => {
        let { text, title, claps, description } = req.body
        if (req.files.image) {
            cloudinary.uploader.upload(req.files.image.path, (result) => {
                let obj = { text, title, claps, description, feature_img: result.url != null ? result.url : '' }
                saveArticle(obj)
            },{
                resource_type: 'image',
                eager: [
                    {effect: 'sepia'}
                ]
            })
        }else {
            saveArticle({ text, title, claps, description, feature_img: '' })
        }
        function saveArticle(obj) {
            new Article(obj).save((err, article) => {
                if (err)
                    res.send(err)
                else if (!article)
                    res.send(400)
                else {
                    return article.addAuthor(req.body.author_id).then((_article) => {
                        return res.send(_article)
                    })
                }
                next()
            })
        }
    },
    getAll: (req, res, next) => {
        Article.find(req.params.id)
        .populate('author')
        .populate('comments.author').exec((err, article)=> {
            if (err)
                res.send(err)
            else if (!article)
                res.send(404)
            else
                res.send(article)
            next()
        })
    },
    /**
     * article_id
     */
    clapArticle: (req, res, next) => {
        Article.findById(req.body.article_id).then((article)=> {
            return article.clap().then(()=>{
                return res.json({msg: "Done"})
            })
        }).catch(next)
    },
    /**
     * comment, author_id, article_id
     */
    commentArticle: (req, res, next) => {
        Article.findById(req.body.article_id).then((article)=> {
            return article.comment({
                author: req.body.author_id,
                text: req.body.comment
            }).then(() => {
                return res.json({msg: "Done"})
            })
        }).catch(next)
    },
    /**
     * article_id
     */
    getArticle: (req, res, next) => {
        Article.findById(req.params.id)
        .populate('author')
        .populate('comments.author').exec((err, article)=> {
            if (err)
                res.send(err)
            else if (!article)
                res.send(404)
            else
                res.send(article)
            next()
        })
    }
}
Trong đoạn code này thì mình sẽ export các một object . Trong object đó có các method như addArticle,getAll,clapArticle,commentArticle,getArticle . Mỗi method là một chức năng của bài viết.Nói chung vẫn quanh quẩn lại cái CRUD :v.Tương tự thế Ta cũng sẽ code cho User Controller ....
Tạo Route
Ở Route thì mình sẽ sử dụng restful api.Vẫn theo rìa CRUD mà code thôi. delete,update thì post còn add, hoặc get thì request get.Vào folder route create 3 file là article.js, user.js và index.js. Mình thêm file index.js để tí nữa mình sẽ import code của cả 2 file article,user.js vào rồi export một lúc cho nó tiện :v.

code file article.js(trong folder routes nha : ))))
// server/routes/article.js
const articlecontroller = require('./../controllers/article.ctrl')
const multipart = require('connect-multiparty')
const multipartWare = multipart()
module.exports = (router) => {
    /**
     * get all articles
     */
    router
        .route('/articles')
        .get(articlecontroller.getAll)
    /**
     * add an article
     */
    router
        .route('/article')
        .post(multipartWare, articlecontroller.addArticle)
    /**
     * comment on an article
     */
    router
        .route('/article/comment')
        .post(articlecontroller.commentArticle)
    /**
     * get a particlular article to view
     */
    router
        .route('/article/:id')
        .get(articlecontroller.getArticle)
}
Ở dưới là code file index.js. Thì như mình bảo ở trên là nó sẽ import code cả 2 thằng article.js và user.js. À Bạn để ý thì trong arow function thấy có một đối số router . Thì thực ra tí nữa mình sẽ đẩy cái objecr route của package route express.Mục đích viết thế cho code nó sáng thôi
// server/routes/index.js
const user = require('./user')
const article = require('./article')
module.exports = (router) => {
    user(router)
    article(router)
}
Tạo server
// server/app.js
require dependencies
const express = require("express")
const routes = require('./routes/')
const mongoose = require('mongoose')
const cors = require('cors')
const bodyParser = require('body-parser')
const helmet = require('helmet')
const cloudinary = require('cloudinary')
const app = express()
const router = express.Router()
// đoạn củ chuối này là connect đến database thôi
const url = process.env.MONGODB_URI || "mongodb://localhost:27017/medium"
/** configure cloudinary */
cloudinary.config({
    cloud_name: 'YOUR_CLOUDINARY_NAME_HERE',
    api_key: 'YOUR_CLOUDINARY_API_KEY_HERE',
    api_secret: 'YOUR_CLOUDINARY_API_SECRET_HERE'
})
/** connect to MongoDB datastore */
try {
    mongoose.connect(url, {
        //useMongoClient: true
    })
} catch (error) {
    }
let port = 5000 || process.env.PORT
/** set up routes {API Endpoints} */
// đẩy object route vào này :v
routes(router)
/** set up middlewares */
app.use(cors())
app.use(bodyParser.json())
app.use(helmet())
//app.use('/static',express.static(path.join(__dirname,'static')))
app.use('/api', router)
/** start server */
app.listen(port, () => {
    console.log(`Server started at port: ${port}`);
});
Đến đoạn này đã xong phần backend . Ai muốn test mình có thể gợi ý sử dụng trình duyệt để get api .vd như: http:localhost::5000/api/articles. hoặc bạn có thể sử dụng postman thì nó sẽ trả về như thế này thì đã ok rồi : ))))
 Với những gì mình hiểu thì web mình đang xây dựng thì backend h nó chỉ có nhận request và trả về api, Còn thằng front end nó sẽ vipro hơn trước là sẽ đảm nhiệm việc fetch api , login, authcation, .... Và Mình sẽ chuyển sang phần code front end ngay bây giờ @@
Client Setup(Code phần front đó ~~)
Phần backend coi như xong, đến front end. Ở đây ta sẽ sử dụng reactjs để ren html.Phần front cũng sẽ phải view ăn khớp với các chức năng của backend nên sẽ có các list view như sau
- View articles
- Write article
- View article
- Social sign in
- Clap article
- Follow user
- View user
Ở đây bạn nào chưa học react nên vào link học react đi đã .Nhìn vào list view ở trên thì ta sẽ có một list các compoment sau.
- Feed component *Editor component
- ArticleView component
- SignInWith component
- FollowButton component
- Profile component
- AsideFeed component
- Header component
- EditorHeader component
install các dependencies cần thiết cho front end
Nãy ta đã install một đống dependencies của backend ,h đến front(nhiều vl )
- axios(fetch api )
- history(packge bắt buộc của redux =))) )
- prop-types(vadidate state của reactjs)
- react-google-login(login bằng bên thứ 3. Cụ thể bằng accout google :v )
- react-redux
- react-router
- react-router-dom
- react-router-redux
- react-scripts
- redux
- redux-devtools-extension
- redux-logger(log result để test dữ liệu)
- redux-thunk(là middware của redux. ai tìm hiểu redux rồi sẽ rõ @@)
- medium-editor(Cho phép viết bài như medium.Kiểu cho phép viết in hoa , in nghiêng ấy mà)
- marked( đọc doc của nó link)
Ở trên mình chỉ giải thích vài package lạ thôi. còn lại là khá quen thuộc .H install nó one hit bằng command !!!!!!
npm i axios history prop-types react-google-login react-redux react-router react-router-dom react-router-redux react-scripts redux redux-devtools-extension redux-logger redux-thunk -S
Add State Management (Redux)
Mình sẽ nói qua về redux. Redux là một state management giúp mình quản lý state. dispatch các action.Những ai học rồi thì không phải quan tâm.
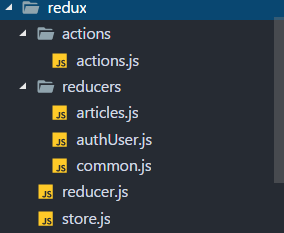
Mình sẽ create folder src Trong src sẽ có các folder như sau

Trong folder Asset sẽ chứa file css . Cái này ta sẽ ko focus vào ^^.Tiếp theo là folder compoments và reducer. Ở đây Chứa tất cả file code compoment trong project

Ở đây sẽ chứa code action và reducers.Ai đã học redux sẽ rõ ko cần phải nói nhiều ở đây
Giải thích cách hoạt động của reducers
Ở reducers thì đơn giản nó là nhận các state cũ rồi tạo ra state mới. quá trình tạo ra đó cần action.Và để action được thực thi thì ta sử dụng hàm dispatch do reudux cung cấp.
// src/redux/reducers/articles.js
const initialState = {
    articles: [],
    article: {}
}
export default (state=initialState, action) => {
    switch (action.type) {
        case 'LOAD_ARTICLES' :
        return {
            ...state,
            articles: action.articles
        }
        case 'VIEW_ARTICLE':
        return {
            ...state,
            article: action.article
        }
        case 'CLAP_ARTICLE':
        let article = Object.assign({}, state.article)
        article.claps++
        console.log(article)
        return {
            ...state,
            article: article
        }
        default:
            return state
    }
}
Code ở trên như bạn có thể thấy .Đầu tiên ta có một initialState , và một function gồm 2 đối số là state init và action. reducer sẽ check type action từ đó nó trả về state mới.
mỗi case ta thấy nó trả về như thế này
return { ...state, article: action.article }
redux hoạt động theo kiểu Immutable .Đoạn Code trên nó sẽ trộn 2 object thành 1 object và trả về clone của nó và state ko bị thay đổi. Trong một project nó rất nhiều reducer,Để trách việc bài viết quá dài nên mình sẽ ko giải thích hết các reducer ở đây. các bạn có thể xem source code và hiểu,chúng gần như tương tự nhau ^^ .Các Reducer nó sẽ đc combine lại ở file reducer.js
//.......... .................code file reducer..............................
import { combineReducers } from 'redux';
import articles from './reducers/articles';
import authUser from './reducers/authUser';
import common from './reducers/common';
import { routerReducer } from 'react-router-redux';

export default combineReducers({
  articles,
  authUser,
  common,
  router: routerReducer
});
//..........................code file store ...............................

import { applyMiddleware, createStore } from 'redux';
//import { createLogger } from 'redux-logger'
import { composeWithDevTools } from 'redux-devtools-extension/developmentOnly';
import reducer from './reducer';
import thunk from 'redux-thunk'

import createHistory from 'history/createBrowserHistory';

export const history = createHistory();

// Build the middleware for intercepting and dispatching navigation actions
//const myRouterMiddleware = routerMiddleware(history);

export const store = createStore(
  reducer, composeWithDevTools(applyMiddleware(thunk)));
Action in redux
Giải thích một chút về function dispatch.
Vd:dispatch({type: 'TOGGLE_MODAL', modalMode: true}) ;
xem lại code của reducer ứng với action này
case 'TOGGLE_MODAL': return { ...defaultState, modalMode: action.modalMode }
Khi Reducer thay đổi state. view tự động sẽ thay đổi.
xem cmt trong code để hiểu chi tiết hơn
// src/redux/actions/actions.js
/** */
import axios from 'axios'
//const url = "http://localhost:5000/api/"
const url = process.env.NODE_ENV === 'production' ? "/api/" : "http://localhost:5000/api/"
export function loadArticles () {
    return (dispatch) => {
        axios.get(`${url}articles`)
        .then((res) => {
            let articles = res.data
            dispatch({type:'LOAD_ARTICLES', articles})
        }).catch((err) => {
            console.log(err)
        })
    }
}
// get api và distpatch. get api để gửi request về server. còn dispatch để thay đổi giao diện
export function getUser (_id) {
    return axios.get(`${url}user/${_id}`).then((res)=>{
        return res.data
    }).catch(err=>console.log(err))
}
export function getUserProfile (_id) {
    return (dispatch) => {
        axios.get(`${url}user/profile/${_id}`).then((res)=>{
            let profile = res.data
            dispatch({type: 'SET_PROFILE', profile})
        }).catch(err=>console.log(err))
    }
}
export function getArticle (article_id) {
    return (dispatch) => {
        axios.get(`${url}article/${article_id}`)
        .then((res) => {
            let article = res.data
            dispatch({type: 'VIEW_ARTICLE', article})
        }).catch((err) => console.log(err))
    }
}
// article_id, author_id, comment
export function comment () {
    return (dispatch) => {
    }
}
//req.body.article_id
export function clap (article_id) {
    return (dispatch) => {
        axios.post(`${url}article/clap`,{ article_id }).then((res) => {
            dispatch({type:'CLAP_ARTICLE'})
        }).catch((err)=>console.log(err))
    }
}
//id, user_id
export function follow (id, user_id) {
    return (dispatch) => {
        axios.post(`${url}user/follow`,{ id, user_id }).then((res) => {
            dispatch({type:'FOLLOW_USER', user_id})
        }).catch((err)=>console.log(err))
    }
}
export function SignInUser (user_data) {
    return (dispatch) => {
        axios.post(`${url}user`,user_data).then((res)=>{
            let user = res.data
            localStorage.setItem('Auth', JSON.stringify(user))
            dispatch({type: 'SET_USER', user})
        }).catch((err)=>console.log(err))
    }
}
export function toggleClose() {
    return (dispatch) => {
        dispatch({type: 'TOGGLE_MODAL', modalMode: false})
    }
}
export function toggleOpen() {
    return (dispatch) => {
        dispatch({type: 'TOGGLE_MODAL', modalMode: true})
    }
}
Vậy bây h redux của chúng ta đã có action, reducer, store. để connect redux và react thì ta sẽ connect trong file index.js(ở ngoài cùng)
import React from 'react';
import ReactDOM from 'react-dom';
import './assets/medium.css';
import { Provider } from 'react-redux';

import { Switch, Route } from 'react-router-dom';
import { ConnectedRouter } from 'react-router-redux';

import App from './App.js';
import registerServiceWorker from './registerServiceWorker';

import { store, history } from './redux/store';

import { getUser } from './redux/actions/actions'
// xác thức phần đăng nhập
if(localStorage.Auth) {
   console.log('first dispatch')
   //console.log(localStorage.Auth)
   // update localstorage
   store.dispatch({type: 'SET_USER', user: JSON.parse(localStorage.Auth)})

   var _id = JSON.parse(localStorage.Auth)._id
   getUser(_id).then((res)=>{
       //console.log(JSON.parse(res))
       store.dispatch({type: 'SET_USER', user: res})
   })
}

ReactDOM.render((
   <Provider store={store}>
       <ConnectedRouter history={history}>
           <Switch>
               <Route path="/" component={App} />
           </Switch>
       </ConnectedRouter>
   </Provider>
), document.getElementById('root'));
registerServiceWorker();
Ở đây nó sẽ import các file như css, store, action, và các thư viện react và redux như react-dom, react-redux,react-route,..... .Ta để ý thấy có import compoment App và đây là code của App.
import React, { Component } from 'react';
import Header from './components/Header';
import { Switch, Route } from 'react-router-dom'

import Feed from './components/Feed'
import Profile from './components/Profile'
import ArticleView from './components/ArticleView'
import Editor from './components/Editor'
import requireAuthentication from './utils/requireAuth'
import SignInWith from './components/SignInWith'
//import  from './components'

class App extends Component {
    render() {
        const pathname = window.location.pathname
        return (
            <div>
            { !pathname.includes('editor') ? <Header /> : '' }
            <SignInWith />
                <Switch>

                    <Route exact path="/" component={Feed} />

                    <Route path="/profile/:id" component={Profile} />
                    <Route path="/articleview/:id" component={ArticleView} />
                    <Route path="/editor" component={requireAuthentication(Editor)} />
                    <Route path="**" component={Feed} />
                </Switch>
            </div>
        );
    }
}

export default App;
Ở đây file app.js ta sẽ setup các route
// import các compoment
import React, { Component } from 'react';
import { Switch, Route } from 'react-router-dom'
import Header from './components/Header';
import Feed from './components/Feed'
import Profile from './components/Profile'
import ArticleView from './components/ArticleView'
import Editor from './components/Editor'
import SignInWith from './components/SignInWith'
class App extends Component {
    render() {
        const pathname = window.location.pathname
        return (
            <div>
            { !pathname.includes('editor') ? <Header /> : '' }
            <SignInWith />
                <Switch>
                    <Route exact path="/" component={Feed} />
                    <Route path="/profile/:id" component={Profile} />
                    <Route path="/articleview/:id" component={ArticleView} />
                    <Route path="/editor" component={Editor} />
                    <Route path="**" component={Feed} />
                </Switch>
            </div>
        );
    }
}
export default App;
Authenticate routes
Tiếp theo ta sẽ secure cho app . tạo file src/utils/requireAuth.js.
import React, {Component} from 'react'
import PropTypes from 'prop-types'
import { connect } from 'react-redux'
export default function (Conmponent) {
    class Authenticate extends Component {
         componentWillMount() {
            if (!this.props.isAuth) {
                this.context.router.history.push('/')
            }
        }
        render () {
            return(
            <Conmponent {...this.props} />
            )
        }
    }
    Authenticate.contextTypes = {
        router: PropTypes.object.isRequired
    }
    const mapStateToProps = state => {
        return {
            isAuth: state.authUser.isAuth
        }
    }
    return connect(mapStateToProps)(Authenticate)
}
Các phần code compoment ArticleView,Edit,Header,SignInWith,... mình sẽ ko demo. Các phần code của compoment đó thì chỉ cần xử lý bussines logic tốt, biết cách fetch api ,dispatch action ,..Bạn Có thể tham khảo source ở dưới .Có những thắc mắc thì ib qua facebook của mình
Conclusion
Bài viết là bài đầu tiên mình viết về kĩ thuật.Chắc chắn không thể trách được sai sót, hoặc khó hiểu.Các bạn hãy góp ý ở phần comment phía dưới
- Nguồn :https://codeburst.io/build-simple-medium-com-on-node-js-and-react-js-a278c5192f47
- repo:https://github.com/ducga1998/medium-clone-on-node
- github của mình: https://github.com/ducga1998/
Cảm ơn mọi người đã dành thời gian đọc đến tận dưới này @@
All rights reserved
