Một vài thư viện javascript hữu ích (phần 2)
Bài đăng này đã không được cập nhật trong 7 năm
1 Promosis
Promosis là một tiện ích đơn giản hỗ trợ quá trình upload file trên website của bạn trở nên thân thiện mà dễ sữ dụng hơn, giúp người dùng có thể xem trước các file được tải lên.
Cài đặt
# npm
npm i file-upload-with-preview

# yarn
yarn add file-upload-with-preview
hoặc các bạn có thể sử dụng link cdn <script src="https://unpkg.com/file-upload-with-preview@4.0.2/dist/file-upload-with-preview.min.js"></script>
Sử dụng
Import js Khi bạn cài đặt bằng npm hoặc yarn.
// using require
const FileUploadWithPreview = require('file-upload-with-preview')

// using import
import FileUploadWithPreview from 'file-upload-with-preview'

// initialize a new FileUploadWithPreview object
const upload = new FileUploadWithPreview('myUniqueUploadId')
Trong trường hợp sử dụng thông qua trình duyệt
<script>
    var upload = new FileUploadWithPreview('myUniqueUploadId')
</script>
Import css
// JavaScript
import 'file-upload-with-preview/dist/file-upload-with-preview.min.css'

hoặc

<link rel="stylesheet" type="text/css" href="https://unpkg.com/file-upload-with-preview@4.0.2/dist/file-upload-with-preview.min.css">
Import html
<div class="custom-file-container" data-upload-id="myUniqueUploadId">
<label>Upload File <a href="javascript:void(0)" class="custom-file-container__image-clear" title="Clear Image">×</a></label>
<label class="custom-file-container__custom-file" >
<input type="file" class="custom-file-container__custom-file__custom-file-input" accept="*" multiple aria-label="Choose File">
<input type="hidden" name="MAX_FILE_SIZE" value="10485760" />
<span class="custom-file-container__custom-file__custom-file-control"></span>
</label>
<div class="custom-file-container__image-preview"></div>
</div>
Events
upload.cachedFileArray: Lấy thông tin của các file.upload.emulateInputSelection(): Mở trình chọn ảnh.upload.clearPreviewPanel(): Xóa tất cả image đã chọn.- sự kiện khi hình ảnh được chọn
window.addEventListener('fileUploadWithPreview:imagesAdded', function(e) {
    // e.detail.uploadId
    // e.detail.cachedFileArray
    // e.detail.addedFilesCount
    // Use e.detail.uploadId to match up to your specific input
    if (e.detail.uploadId === 'mySecondImage') {
        console.log(e.detail.cachedFileArray)
        console.log(e.detail.addedFilesCount)
    }
})
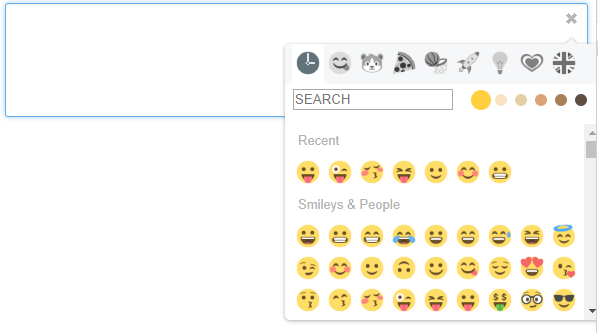
2 EmojiOne Area
EmojiOne Area là 1 plugin jquery thông minh cho phép bạn chuyển các unicode character thành các icon emoji
Cài đặt
bower install emojionearea#^3.2.8
# or
npm install emojionearea@^3.2.8
# or
composer require mervick/emojionearea ^3.2.8
Quick Start
Để sử dụng emojionearea thì cần phải import thư viện jquery và sau đó import 2 file emojionearea.min.js và emojionearea.min.css.
Example:
<!DOCTYPE html>
<html>
<head>
    <title>Ví dụ</title>
    <link rel="stylesheet" href="https://cdnjs.cloudflare.com/ajax/libs/emojionearea/3.2.8/emojionearea.min.css" />
    <script src="https://ajax.googleapis.com/ajax/libs/jquery/3.3.1/jquery.min.js"></script>
    <script src="https://cdnjs.cloudflare.com/ajax/libs/emojionearea/3.2.8/emojionearea.min.js"></script>
</head>
<body>
    <textarea class="emoji-test">
    </textarea>
    <script type="text/javascript">
        $(document).ready(function() {
            $(".emoji-test").emojioneArea();
        });
    </script>
</body>
</html>
Kết quả sau khi chạy.
Một số tùy chọn
search
Dùng để tùy chọn bật hoặc tắt chức năng search icon.
- Kiểu dữ liệu: boolean
- Giá trị mặc định: true
Example
$(".emoji-test").emojioneArea({
    search: false
});
searchPlaceholder
Hiển thị placehoder trên thẻ input search icon.
- Kiểu dữ liệu: string.
- Giá trị mặc định: 'SEARCH'.
Example:
$(".emoji-test").emojioneArea({
    searchPlaceholder: "Search"
});
useInternalCDN
Tùy chọn load icon từ CDN.
- Kiểu dữ liệu: boolean.
- Giá trị mặc định: true.
Example:
$(".emoji-test").emojioneArea({
    useInternalCDN: true
});
recentEmojis
Bật tắt chức năng hiển thị các icon đã chọn gần đây.
- Kiểu dữ liệu: boolean.
- Giá trị mặc định: true.
Example:
$(".emoji-test").emojioneArea({
    recentEmojis: false
});
pickerPosition
Chọn vị trí hiển thị picker trên editor.
- Kiểu dữ liệu: string.
- Giá trị mặc định: 'top'.
- Giá trị cho phép: 'top' | 'right' | 'bottom'.
Example:
$(".emoji-test").emojioneArea({
    pickerPosition: "bottom"
});
Events
Có 2 cách để gọi sự kiện:
- Trong options.
$("selector").emojioneArea({
  events: {
    /**
     * @param {jQuery} editor EmojioneArea input
     * @param {Event} event jQuery Event object
     */
    focus: function (editor, event) {
      console.log('event:focus');
    },
    /**
     * @param {jQuery} editor EmojioneArea input
     * @param {Event} event jQuery Event object
     */
    blur: function (editor, event) {
      console.log('event:blur');
    },
    /**
     * @param {jQuery} editor EmojioneArea input
     * @param {Event} event jQuery Event object
     */
    mousedown: function (editor, event) {
      console.log('event:mousedown');
    },
    /**
     * @param {jQuery} editor EmojioneArea input
     * @param {Event} event jQuery Event object
     */
    mouseup: function (editor, event) {
      console.log('event:mouseup');
    },
    /**
     * @param {jQuery} editor EmojioneArea input
     * @param {Event} event jQuery Event object
     */
    click: function (editor, event) {
      console.log('event:click');
    },
    /**
     * @param {jQuery} editor EmojioneArea input
     * @param {Event} event jQuery Event object
     */
    keyup: function (editor, event) {
      console.log('event:keyup');
    },
    /**
     * @param {jQuery} editor EmojioneArea input
     * @param {Event} event jQuery Event object
     */
    keydown: function (editor, event) {
      console.log('event:keydown');
    },
    /**
     * @param {jQuery} editor EmojioneArea input
     * @param {Event} event jQuery Event object
     */
    keypress: function (editor, event) {
      console.log('event:keypress');
    },
    /**
     * @param {jQuery} editor EmojioneArea input
     * @param {Event} event jQuery Event object
     */
    paste: function (editor, event) {
      console.log('event:paste');
    },
    /**
     * @param {jQuery} editor EmojioneArea input
     * @param {Event} event jQuery Event object
     */
    change: function (editor, event) {
      console.log('event:change');
    },
    /**
     * @param {jQuery} filter EmojioneArea filter
     * @param {Event} event jQuery Event object
     */
    filter_click: function (filter, event) {
      console.log('event:filter.click, filter=' + filter.data("filter"));
    },
    /**
     * @param {jQuery} button EmojioneArea emoji button
     * @param {Event} event jQuery Event object
     */
    emojibtn_click: function (button, event) {
      console.log('event:emojibtn.click, emoji=' + button.children().data("name"));
    },
    /**
     * @param {jQuery} button EmojioneArea left arrow button
     * @param {Event} event jQuery Event object
     */
    arrowLeft_click: function (button, event) {
      console.log('event:arrowLeft.click');
    },
    /**
     * @param {jQuery} button EmojioneArea right arrow button
     * @param {Event} event jQuery Event object
     */
    arrowRight_click: function (button, event) {
      console.log('event:arrowRight.click');
    }
  }
});
- Sử dụng hàm
.on()và.off().
var el = $("selector").emojioneArea();

  // attach event handler
  el[0].emojioneArea.on("emojibtn.click", function(button, event) {
    console.log('event:emojibtn.click, emoji=' + button.children().data("name"));
  });
  // unset all handlers attached to event
  el[0].emojioneArea.off("emojibtn.click");

  // like in jQuery you can specify few events separated by space
  el[0].emojioneArea.off("focus blur");

  // set & unset custom handler
  var eventHandler1 = function(button, event) {
    console.log('event1');
  };
  var eventHandler2 = function(button, event) {
    console.log('event2');
  };
  // attach event handlers
  el[0].emojioneArea.on("click", eventHandler1);
  el[0].emojioneArea.on("click", eventHandler2);
  // unset eventHandler1
  el[0].emojioneArea.off("click", eventHandler1);
3 Select2
Select2 cung cấp cho bạn công cụ để có thể tùy chỉnh các thẻ input select, hổ trợ thêm các chức năng như tìm kiếm và nhiều tùy chỉnh khác.
Cài đặt
Sử dụng từ CDN
<link href="https://cdnjs.cloudflare.com/ajax/libs/select2/4.0.6-rc.0/css/select2.min.css" rel="stylesheet" />
<script src="https://cdnjs.cloudflare.com/ajax/libs/select2/4.0.6-rc.0/js/select2.min.js"></script>
Cài đặt thông quá Bower
bower install select2
hoăc NPM
npm i select2
Sử dụng
Single select boxes
Select2 được thiết kế để thay thế cho hộp <select> tiêu chuẩn được trình duyệt hiển thị. Theo mặc định, nó hỗ trợ tất cả các tùy chọn và chức năng có sẵn trong select box, nhưng tính linh hơn.
Example:
<select class="select-test" name="state">
  <option value="option1">option1</option>
  <option value="option2">option2</option>
  <option value="option3">option3</option>
</select>
$(document).ready(function() {
    $('.select-test').select2();
});
xem demo.
Multi-select boxes
Example:
<select class="select-test" name="state[]" multiple="multiple">
  <option value="option1">option1</option>
  <option value="option2">option2</option>
  <option value="option3">option3</option>
  <option value="option4">option4</option>
  <option value="option5">option5</option>
</select>
$(document).ready(function() {
    $('.select-test').select2();
});
xem demo.
All rights reserved
