Lưu và gửi Notification real time trong laravel
Bài đăng này đã không được cập nhật trong 7 năm
Notifications
Ngoài việc hỗ trợ gửi email, Laravel cũng hỗ trợ gửi thông báo trên nhiều channels khác, bao gồm mail, SMS và Slack. Thông báo cũng có thể được lưu trữ trong cơ sở dữ liệu để chúng có thể được hiển thị trong giao diện website của bạn.
Bài nay mình sẽ hướng dẩn bạn sử dụng database để lưu và hiển thi thông báo khi người dùng thực hiện 1 thao tác nào đó.
Đầu tiên bạn tạo 1 project laravel
composer create-project --prefer-dist laravel/laravel NotificationRealTime
Tạo 1 database rồi connect tới project của bạn
DB_CONNECTION=mysql
DB_HOST=127.0.0.1
DB_PORT=3306
DB_DATABASE=test_notification
DB_USERNAME=root
DB_PASSWORD=
Tạo bảng notification để lưu thông báo
php artisan notifications:table

php artisan migrate
Tiếp theo bạn dùng cấu lệnh artisan để tạo môt file TestNotification
php artisan make:notification TestNotification
file vừa được tạo nằm ở thư mục \app\Notifications\TestNotification.php.
Tại function via các bạn hãy sử dụng return database để dữ liệu được lưu lại trong db.
public function via($notifiable)
{
    return ['database'];
}
Sử dụng function toArray để event trả ra một data lưu vào bảng notifications.
 public function toArray($notifiable)
    {
        return [
                'invoice_id' => $this->invoice->id,
                'amount' => $this->invoice->amount,
        ];
    }
Chúng ta sẻ sửa lại file đó như sau.
<?php

namespace App\Notifications;

use Illuminate\Bus\Queueable;
use Illuminate\Notifications\Notification;
use Illuminate\Contracts\Queue\ShouldQueue;
use Illuminate\Notifications\Messages\MailMessage;

class TestNotification extends Notification
{
    use Queueable;

    protected $data;
    /**
     * Create a new notification instance.
     *
     * @return void
     */
    public function __construct($data)
    {
        $this->data = $data;
    }

    /**
     * Get the notification's delivery channels.
     *
     * @param  mixed  $notifiable
     * @return array
     */
    public function via($notifiable)
    {
        return ['database'];
    }

    /**
     * Get the mail representation of the notification.
     *
     * @param  mixed  $notifiable
     * @return \Illuminate\Notifications\Messages\MailMessage
     */
    public function toMail($notifiable)
    {
        return (new MailMessage)
                    ->line('The introduction to the notification.')
                    ->action('Notification Action', url('/'))
                    ->line('Thank you for using our application!');
    }

    /**
     * Get the array representation of the notification.
     *
     * @param  mixed  $notifiable
     * @return array
     */
    public function toArray($notifiable)
    {
        return $this->data;
    }
}
Tiếp đến chúng ta sẻ tạo màn hình đăng nhập đăng kí để tạo user sẻ nhận được thông báo.
chạy lênh php artisan make:auth và vào địa chỉ http://127.0.0.1:8000/register để đăng kí 1 user.
Tạo giao diện fake thông báo
Vào folder view trong thư mục resources để tạo ra file notificaton.blade.php
@extends('layouts.app')

@section('content')
<div class="container">
    <form action="{{ route('notification.store') }}" method="post">
        @csrf
        <div class="form-group">
            <label>Title</label>
            <input name="title" type="text" class="form-control">
        </div>
        <div class="form-group">
            <label>Content</label>
            <input name="content" type="text" class="form-control">
        </div>
        <button type="submit" class="btn btn-primary">Submit</button>
    </form>
</div>
@endsection
Tạo controller để gửi thông báo
Tạo controller bàng câu lệnh
php artisan make:controller SendNotification
Và sửa code lại như sau
<?php

namespace App\Http\Controllers;

use Illuminate\Http\Request;
use App\Notifications\TestNotification;
use App\User;

class SendNotification extends Controller
{
    public function create()
    {
        return view('notification');
    }

    public function store(Request $request)
    {
        $user = User::find(1); // id của user mình đã đăng kí ở trên, user này sẻ nhận được thông báo
        $data = $request->only([
            'title',
            'content',
        ]);
        $user->notify(new TestNotification($data));

        return view('notification');
    }
}
Thêm route trong file routes\web.php
Route::get('notification', 'SendNotification@create')->name('notification.create');
Route::post('notification', 'SendNotification@store')->name('notification.store');
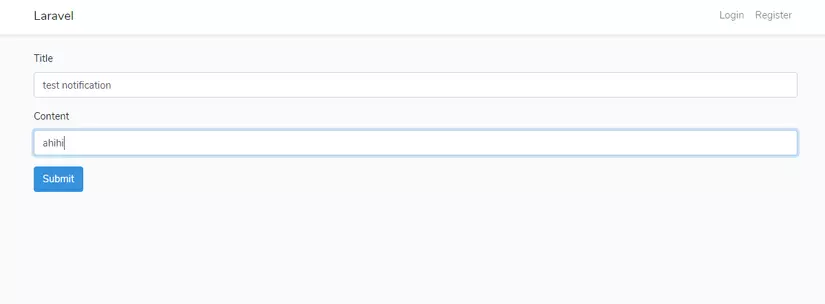
Truy cập vào địa chỉ http://127.0.0.1:8000/notification ta sẻ thấy 1 form để fake thông báo.
sau khi submit thì khi vào bảng notification bạn sẻ thấy thông báo được lưu lại

Hiển thị thông báo
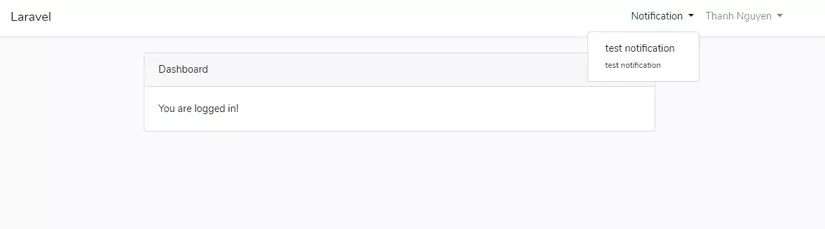
Vào file resources\views\layouts\app.blade.php và thêm đoạn code sau trên đoạn code hiển thị thông tin user để hiển thị notification.
<li class="nav-item dropdown dropdown-notifications">
    <a id="navbarDropdown" class="nav-link dropdown-toggle" href="#" role="button" data-toggle="dropdown" aria-haspopup="true" aria-expanded="false" v-pre>
        Notification<span class="caret"></span>
    </a>
    <div class="dropdown-menu dropdown-menu-right menu-notification" aria-labelledby="navbarDropdown">
        @foreach (Auth::user()->notifications as $notification)
            <a class="dropdown-item" href="#">
                <span>{{ $notification->data['title'] }}</span><br>
                <small>{{ $notification->data['title'] }}</small>
            </a>
        @endforeach
    </div>
</li>
Trong bảng notification có 1 trường read_at để hiển thị thời gian bạn đã đọc thông báo. Chúng ta có thể sử dụng hàm $notification->markAsRead(); để đánh dấu là đã đọc.
Sử dụng pusher để thông báo realtime
Pusher là một dịch vụ cung cấp cho người dùng một serve ảo làm trung gian xử lý các dữ liệu với thời gian thực. Để dùng được pusher, chúng ta sẽ sử dụng package pusher/pusher-php-server, chạy lệnh sau để cài đặt
composer require pusher/pusher-php-server
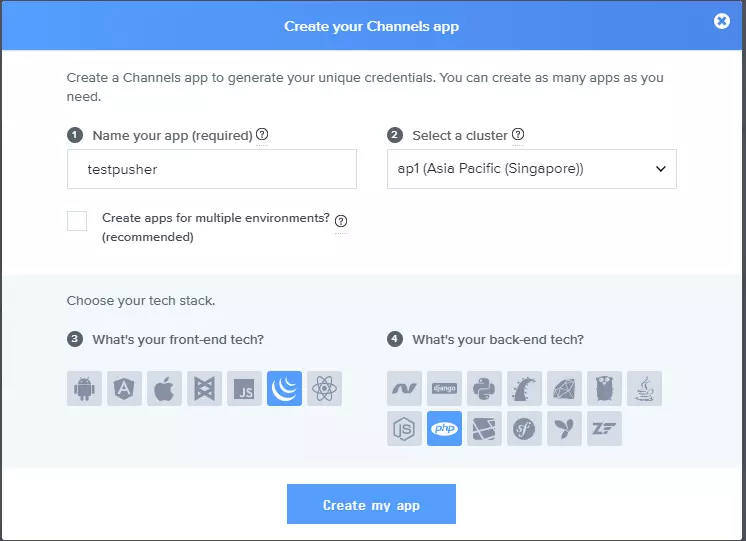
Đăng kí tài khoản và tạo app trên pusher.com
Các bạn truy cập vào web https://pusher.com/ đăng ký tài khoản sau đó đăng nhập và tạo app:
các bạn vào .env và sửa lại những dòng sau với các key xem trong phần detail của app mới tạo
BROADCAST_DRIVER=pusher

PUSHER_APP_ID=xxxxx
PUSHER_APP_KEY=xxxxxxxxxxxxxxxxxxxxx
PUSHER_APP_SECRET=xxxxxxxxxxxxxxxxxxxxx
PUSHER_APP_CLUSTER=ap1
vào config/app.php Loại bỏ comment ở dòng
App\Providers\BroadcastServiceProvider::class
Tạo event gửi notification bằng câu lệnh
php artisan make:event NotificationEvent
và sửa lại nội dung như sau
<?php

namespace App\Events;

use Illuminate\Broadcasting\Channel;
use Illuminate\Queue\SerializesModels;
use Illuminate\Broadcasting\PrivateChannel;
use Illuminate\Broadcasting\PresenceChannel;
use Illuminate\Foundation\Events\Dispatchable;
use Illuminate\Broadcasting\InteractsWithSockets;
use Illuminate\Contracts\Broadcasting\ShouldBroadcast;

class NotificationEvent
{
    use Dispatchable, InteractsWithSockets, SerializesModels;

    protected $data;
    /**
     * Create a new event instance.
     *
     * @return void
     */
    public function __construct($data)
    {
        $this->data = $data;
    }

    /**
     * Get the channels the event should broadcast on.
     *
     * @return \Illuminate\Broadcasting\Channel|array
     */
    public function broadcastOn()
    {
        return new PrivateChannel('send-message');
    }
}
Tiếp theo vào file controller lúc trước và sửa lại như sau
//use pusher
use Pusher\Pusher;
và thêm đoạn sử lý này vào
        $options = array(
            'cluster' => 'ap1',
            'encrypted' => true
        );

        $pusher = new Pusher(
            env('PUSHER_APP_KEY'),
            env('PUSHER_APP_SECRET'),
            env('PUSHER_APP_ID'),
            $options
        );

        $pusher->trigger('NotificationEvent', 'send-message', $data);
Thêm đoạn script sau vào file resources\views\layouts\app.blade.php để bắt sự kiện notification và hiển thị real time
<script src="//cdnjs.cloudflare.com/ajax/libs/jquery/2.1.4/jquery.min.js"></script>
<script src="https://js.pusher.com/4.4/pusher.min.js"></script>
<script src="//maxcdn.bootstrapcdn.com/bootstrap/3.3.7/js/bootstrap.min.js"></script>

<script type="text/javascript">
    var pusher = new Pusher('{{ env('PUSHER_APP_KEY') }}', {
        encrypted: true,
        cluster: "ap1"
    });
    var channel = pusher.subscribe('NotificationEvent');
    channel.bind('send-message', function(data) {
        var newNotificationHtml = `
        <a class="dropdown-item" href="#">
            <span>${data.title}</span><br>
            <small>${data.content}</small>
        </a>
        `;

        $('.menu-notification').prepend(newNotificationHtml);
    });
</script>
All rights reserved
