Installing Apache PHP MySQL on Ubuntu 18.04
Bài đăng này đã không được cập nhật trong 5 năm
Installing Apache PHP MySQL on Ubuntu 18.04
In this article, we are going to see how to create a LAMP stack environment on Ubuntu 18.04. Note: In order to run commands to install Lamp stack you need root access of server.
Step 1: Update your package manager
sudo apt-get update
Step2: Install Apache Web server
Install Apache: Run below command to Install Apache.
sudo apt install apache2
Start the Apache server: Run below command to start your server
sudo service apache2 start
Verify your installation You can verify your Apache installation by accessing your server IP on your web browsers.
To obtain your server IP run below command:
hostname -I
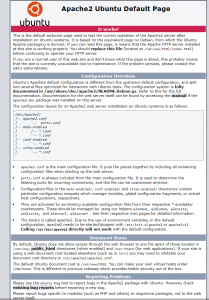
If you are seeing below page on your Url, then congrats you can successfully installed Apache web server on your Ubuntu server.

Also Read: Best Ubuntu Interview Questions
Step3: Installing Mysql
Install Mysql server: Run below command to Install Mysql server on Ubuntu 18.04.
sudo apt install mysql-server
Securing your MySQL server: Secure your MySQL server by running below command and adding a password
sudo mysql_secure_installation
Testing your MySQL installation: Run below command to check MySQL is successfully configured
sudo mysql -u root -p
then enter the MySQL root password that you have set in above step.
Step4: Installing PHP
Installing PHP: To install the latest version of PHP run below command on your terminal
sudo apt install php libapache2-mod-php php-mysql
Install common PHP modules like bcmath,bz2,intl,gd,mbstring,zip. Run following commands to installsudo apt-get install php7.2-bcmath
sudo apt-get install php7.2-bz2
sudo apt-get install php7.2-intl
sudo apt-get install php7.2-gd
sudo apt-get install php7.2-mbstring
sudo apt-get install php7.2-zip
Step5: Schedule Start Mysql and Apache to start on system restart or boot.
		sudo systemctl enable apache2.service
		sudo systemctl enable mysql.service
That’s It. Thanks for reading
All rights reserved