(EzyPlatform) Cách lấy dữ liệu từ backend để hiển thị lên giao diện với thymeleaf
Trong bài viết trước, chúng ta đã tìm hiểu về cách tạo một ứng dụng web đơn giản với EzyPlatform (https://viblo.asia/p/cac-buoc-xay-dung-du-an-tren-nen-tang-ezyplatform-018J2KvwLYK).
Hôm nay, chúng ta sẽ đi sâu hơn vào một khía cạnh quan trọng của phát triển web: cách lấy dữ liệu từ backend và hiển thị lên giao diện người dùng sử dụng Thymeleaf trong EzyPlatform. Bài viết này là phần tiếp theo của dự án xây dựng trang khóa học CourseZone . Nếu bạn chưa đọc bài trước, tôi khuyên bạn nên xem qua để có nền tảng vững chắc trước khi tiếp tục.
Yêu cầu:
- Cài đặt và cấu hình EzyPlatform theo hướng dẫn trong bài trước.
- Có kiến thức cơ bản về Java, Spring Boot và Thymeleaf.
1. Hiểu thêm về các plugin của EzyPlatform
1.1 Giới thiệu về hệ thống Plugin trong EzyPlatform
EzyPlatform cung cấp một hệ thống plugin linh hoạt, cho phép mở rộng chức năng của nền tảng một cách dễ dàng. Plugin trong EzyPlatform là các module độc lập có thể được thêm vào hoặc gỡ bỏ mà không ảnh hưởng đến core của hệ thống.
1.2 Lợi ích chính của việc sử dụng plugin
- Tính mô-đun hóa cao
- Dễ dàng mở rộng chức năng
- Tùy chỉnh theo nhu cầu cụ thể
- Cải thiện khả năng bảo trì và nâng cấp
1.3 Cấu trúc của một Plugin trong EzyPlatform
Một plugin trong EzyPlatform thường bao gồm các thành phần sau:
- Lớp chính của plugin (implements EzyPlugin interface)
- Các file cấu hình (config.yml)
- Các lớp xử lý logic
- Resources (nếu cần)
Cấu trúc thư mục điển hình của một plugin:
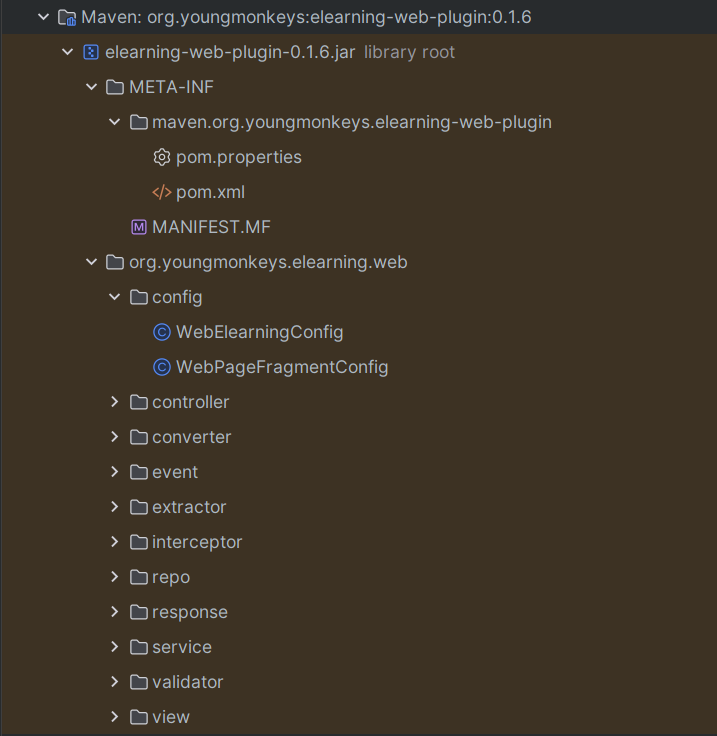
Trong phần này ta sẽ sử dụng các plugin của E-learning.
1.4 Giao diện admin để quản lý dữ liệu của các plugin
Trong phần này ta sẽ sử dụng phần admin có sẵn của EzyPlatform để thêm dữ liệu và các thông tin cần thiết cho dự án CourseZone. Ở đây ta sẽ không chạy lệch cmd để mở admin ở URL http://localhost:9090/ nữa.
Để mở admin và trang mặc định của CourseZone để bắt đầu dự án, ta làm như sau:
- Mở Intellij, Trỏ đến thư mục dự án CourseZone, trỏ tiếp đến folder coursezone-theme và coursezone-admin-plugin
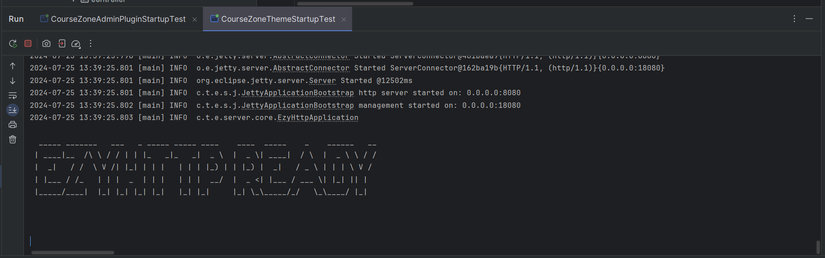
- Chạy cùng lúc 2 chương trình ở 2 folder đó trong thư mục test -> java...
- Sau khi cả 2 hiển thị như hình dưới nghĩa là đã thành công, bạn có thể truy cập 2 URL http://localhost:9090/ (admin) và http://localhost:8080 (trang coursezone mà bạn sẽ viết)
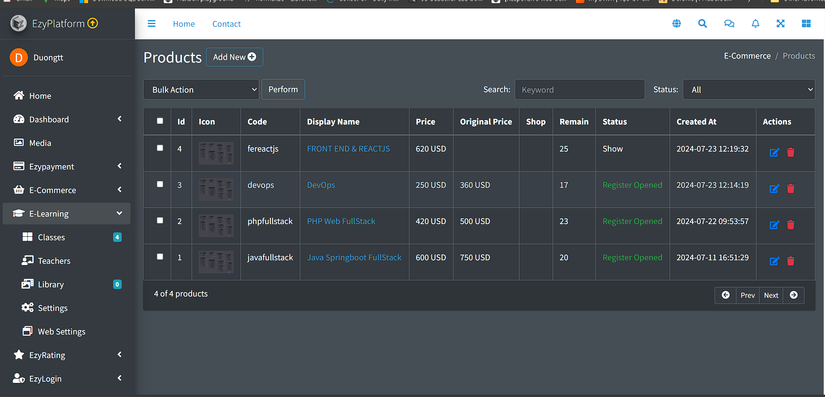
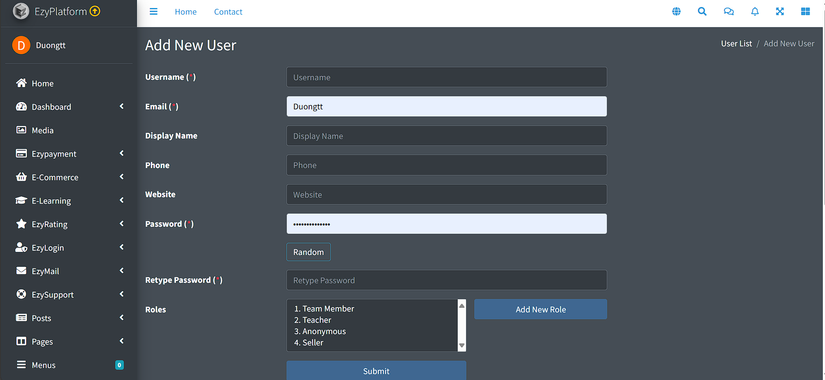
Đây là giao diện trang Admin của EzyPlatform để thao tác.
2. Lấy dữ liệu từ controller để đổ dữ liệu lên frontend
2.1 Tạo các controller và các file HTML, CSS cần thiết cho dự án
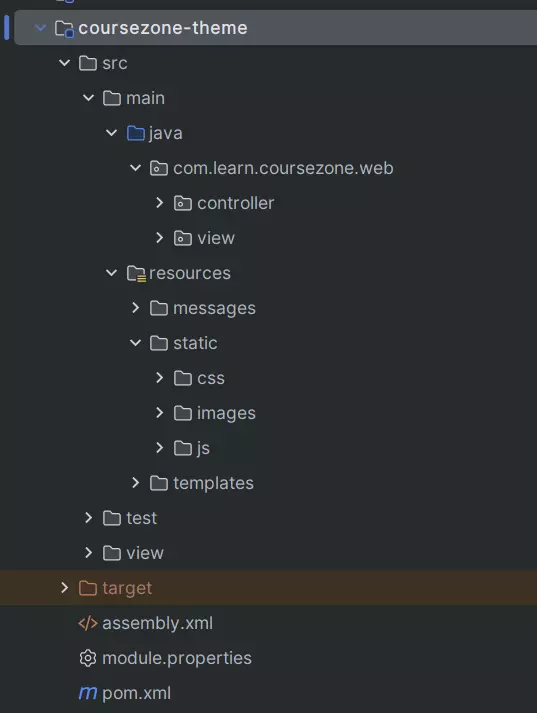
Ở đây ta sẽ tập trung viết code trong coursezone-theme.
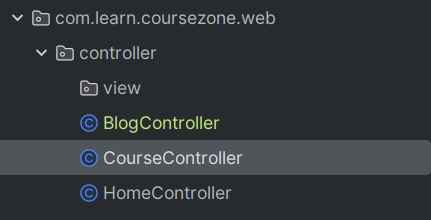
Đây là cấu trúc thư mục của coursezone-theme sau khi thêm folder controller.
Trong phần template của resource ta tạo thêm các class HTML, ví dụ:
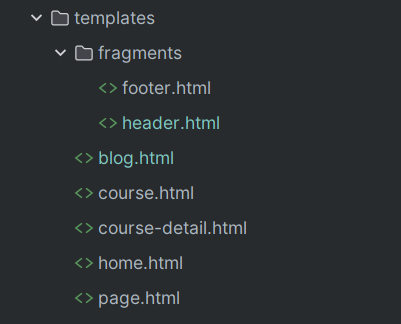
ở đây ta sẽ tập trung vào phần course.html để lấy ra dữ liệu của các khóa học.
2.2 Viết code để lấy dữ liệu từ backend trong controller
Trong folder controller tạo thêm class CourseController.java:
Trong CourseController, khai báo các class service có sẵn trong plugin để sử dụng các phương thức lấy dữ liệu.
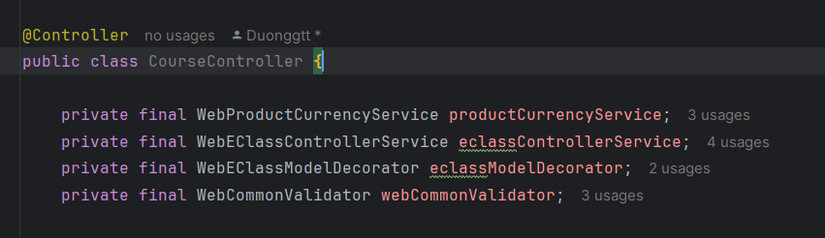
Tạo thêm phần constructor cho class CourseController:
public CourseController( WebProductCurrencyService productCurrencyService,  WebEClassControllerService eclassControllerService, WebEClassModelDecorator eclassModelDecorator, WebCommonValidator webCommonValidator) {
        this.productCurrencyService = productCurrencyService;
        this.eclassControllerService = eclassControllerService;
        this.eclassModelDecorator = eclassModelDecorator;
        this.webCommonValidator = webCommonValidator;
    }
Ta sẽ tập chung vào 2 phần chính đó là lấy ra danh sách khóa học và chi tiết của một khóa học.
2.2.1 Tạo dữ liệu để lưu vào database thông tin các khóa học
Mở trang admin với URL: http://localhost:9090/
Đầu tiên ta sẽ tạo thông tin cho Giảng viên trước:
- Trỏ đến phần User -> list -> Add new
- Thêm các thông tin chi tiết của giảng viên với role là teacher
Sau khi tạo xong ta sẽ tạo thông tin cho các khóa học:
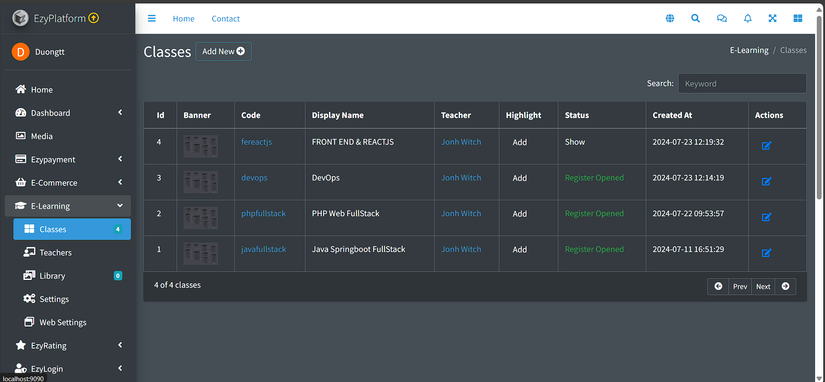
- Trỏ đến E-learning -> Classes -> Add new
- Thêm các thông tin chi tiết của khóa học, Nhập tên của giảng viên vừa tạo
- Nhấn lưu -> sau đó quay lại ra phần danh sách Classes , nếu như hiển thị thông tin các khóa học nghĩa là ta đã lưu thành công vào trong database.
2.2.2 Lấy ra danh sách các khóa học Đầu tiên với phần lấy ra danh sách khóa học, ta sẽ tạo thêm phương thức classesGet:
@DoGet("/courses")
public View classesGet(HttpServletRequest request, @UserId Long userId, @RequestParam("keyword") String keyword, @RequestParam("nextPageToken") String nextPageToken, @RequestParam("prevPageToken") String prevPageToken, @RequestParam("lastPage") boolean lastPage, @RequestParam(value = "limit",defaultValue = "12") int limit) {
this.webCommonValidator.validatePageSize(limit);
this.webCommonValidator.validateSearchKeyword(keyword);
SimpleProductCurrencyModel defaultCurrency = this.productCurrencyService.getSimpleDefaultCurrency();
PaginationModel<WebEClassResponse> pagination = this.eclassControllerService.getPublicClasses(userId, keyword, nextPageToken, prevPageToken, lastPage, limit, defaultCurrency.getId(), defaultCurrency.getFormat());
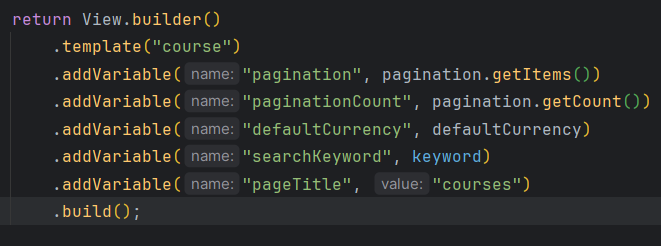
return View.builder()
.template("course")
.addVariable("pagination", pagination.getItems())
.addVariable("paginationCount", pagination.getCount())
.addVariable("defaultCurrency", defaultCurrency)
.addVariable("searchKeyword", keyword)
.addVariable("pageTitle", "courses")
.build();
}
Giải thích:
Với View.builder().template("course") ta sẽ trả dữ liệu ra trang giao diện có tên là course.html.
Các tham số truyền vào sẽ là các tham số cần thiết cho các phương thức có sẵn trong plugin, đây là phương thức getPublicClasses được viết sẵn trong WebEClassControllerService.
Ta sẽ không cần viết thêm phương thức để lấy ra danh sách mà chỉ cần sử dụng cái có sẵn trong các plugin .
Phương thức này sẽ lấy ra danh sách các khóa học được public.
public PaginationModel<WebEClassResponse> getPublicClasses(Long userId, String keyword, String nextPageToken, String prevPageToken, boolean lastPage, int limit, long currencyId, String currencyFormat) {
        EClassFilter filter = DefaultEClassFilter.builder().statuses(Arrays.asList(EClassStatus.SHOW, EClassStatus.REGISTER_OPENED, EClassStatus.VIDEO_OPENED)).keywords(Keywords.toKeywords(keyword, true)).build();
        return this.getClasses(userId, filter, nextPageToken, prevPageToken, lastPage, limit, currencyId, currencyFormat);
    }
Sau khi lấy ra được danh sách các khóa học với tên biến là pagination, ta sẽ tạo 1 biến với tên tương tự để có thể sử dụng trên html với thymeleaf:
Vậy ta sẽ lấy dữ liệu đó lên html như nào?
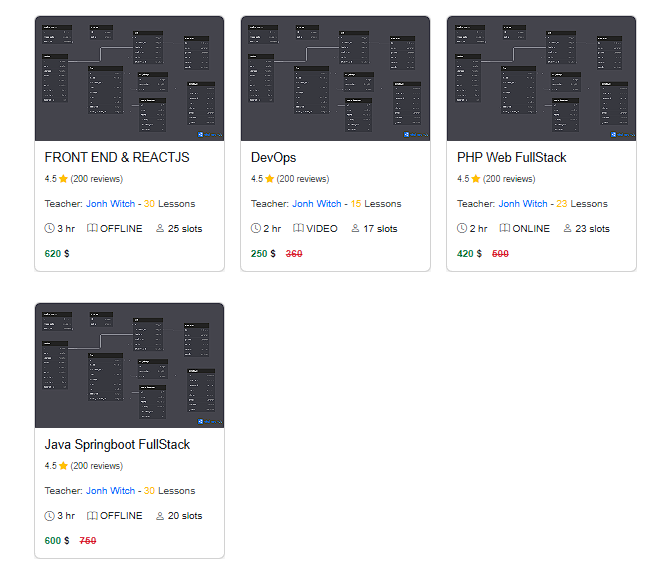
Đây là phần code của danh sách các khóa học trong file course.html sau khi đổ dữ liệu lên:
<div id="course-container" class="row row-cols-1 row-cols-md-3 g-4 animate">
                    <!-- Khóa học (lặp lại cho mỗi khóa học) -->
                    <div th:each="course : ${pagination}" class="col mb-4 course-item">
                        <div class="card-wrapper" style="overflow: hidden;">
                            <div class="card h-100 course-card">
                                <div class="card-img-container">
                                    <img th:src="${course.bannerImage.getUrlOrNull()}" class="card-img-top" alt="Python course">
                                    <div class="hover-overlay">
                                        <a th:attr="href='/courses/detail/' + ${course.code}" class="btn btn-warning">Read more</a>
                                    </div>
                                </div>
                                <div class="card-body">
                                    <h5 th:text="${course.displayName}" class="card-title"></h5>
                                    <p class="card-text"><small class="text-muted">4.5 <i class="bi bi-star-fill text-warning"></i> (200 reviews)</small></p>
                                    <p class="card-text">Teacher: <span class="text-primary" th:text="${course.teacher.displayName}"></span> - <span class="text-warning" th:text="${course.lessons}"></span> Lessons</p>
                                    <ul class="list-inline">
                                        <li class="list-inline-item"><i class="bi bi-clock"></i> <span th:text="${course.lessonDuration}"></span> hr</li>
                                        <li class="list-inline-item"><i class="bi bi-book"></i> <span th:text="${course.classType}"></span></li>
                                        <li class="list-inline-item"><i class="bi bi-person"></i> <span th:text="${course.totalSlots}"></span> slots</li>
                                    </ul>
                                    <div class="d-flex align-items-center">
                                        <p class="card-text mb-0">
                                            <strong>
                                                <span class="text-success" th:text="${#numbers.formatDecimal(course.price, 1, 'POINT', 0, 'COMMA')}"></span> $
                                            </strong>
                                        </p>
                                        <p class="card-text mb-0 ms-3" th:if="${course.originalPrice != course.price}">
                                            <strong>
                                                <span class="text-danger text-decoration-line-through" th:text="${#numbers.formatDecimal(course.originalPrice, 1, 'POINT', 0, 'COMMA')}"></span>
                                            </strong>
                                        </p>
                                    </div>
                                </div>
                            </div>
                        </div>
                    </div>
                </div>
Giải thích:
Ta sẽ lấy ra biến pagination mà đã tạo ở phần return trong controller và sử dụng th:each="course: ${pagination}" để lặp qua từng phần tử của pagination và gán từng đối tượng vào trong course
<div th:each="course : ${pagination}" class="col mb-4 course-item">
Tương ứng có bao nhiêu course sẽ có bấy nhiêu thẻ html chứa thông tin khóa học.
Tiếp theo ta sẽ dùng course để có thể lấy ra các thuộc tính cần thiết trong Đối tượng đó. Để nắm rõ trong course bao gồm những gì ta có thể sử dụng tổ hợp phím Ctrl + chuột trái vào WebEClassResponse để xem được thông tin các thuộc tính Class đó có:
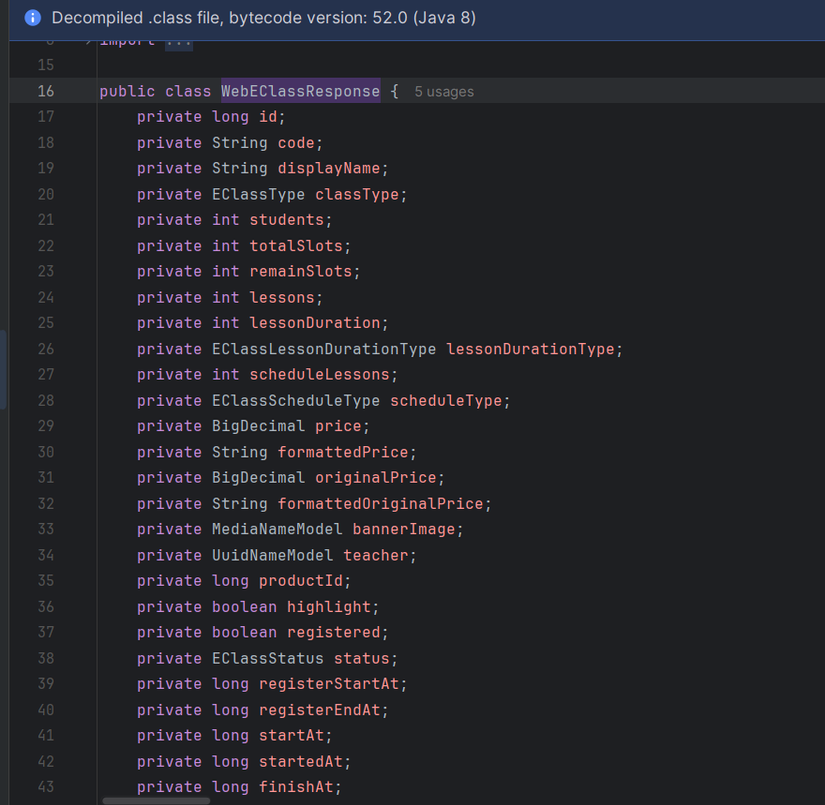
Từ đó lấy ra các thông tin cần thiết lên trên giao diện html.
2.2.3 Lấy ra thông tin chi tiết của từng khóa học
Tương tự các bước như phần lấy ra danh sách, ta sẽ tạo thêm phương thức getDetailCourse để lấy ra chi tiết của từng khóa học theo id của nó.
@DoGet("/courses/detail/{code}")
    public View getDetailCourse(HttpServletRequest request, @UserId Long userId, @PathVariable String code,@RequestParam("keyword") String keyword, @RequestParam("nextPageToken") String nextPageToken, @RequestParam("prevPageToken") String prevPageToken, @RequestParam("lastPage") boolean lastPage, @RequestParam(value = "limit",defaultValue = "8") int limit) {
        EClassModel model = this.eclassControllerService.getClassModelByCodeOrThrow(code);
        SimpleProductCurrencyModel defaultCurrency = this.productCurrencyService.getSimpleDefaultCurrency();
        WebEClassWithDescriptionResponse course = this.eclassModelDecorator.decorate(model, HttpRequests.getLanguage(request), defaultCurrency.getId(), defaultCurrency.getFormat());
        long courseId = course.getId();
        return View.builder()
            .template("course-detail")
            .addVariable("courseId", courseId)
            .addVariable("course", course)
            .addVariable("defaultCurrency", defaultCurrency)
            .addVariable("pageTitle", course.getDisplayName())
            .build();
    }
Trong đoạn code trên ta sẽ lấy ra detail của khóa học thông qua phương thức decorate có sẵn trong WebEClassModelDecorator
public WebEClassWithDescriptionResponse decorate(EClassModel model, String language, long currencyId, String currencyFormat) {
        return (WebEClassWithDescriptionResponse)this.decorateBegin(model, language, currencyId).register("teacher", () -> {
            return model.getTeacherId() <= 0L ? null : this.userService.getUserUuidNameById(model.getTeacherId());
        }).mapBegin((map) -> {
            return this.modelToResponseConverter.toClassResponseWithDescription(model, (UuidNameModel)map.get("teacher"), (MediaNameModel)map.get("bannerImage"), (BigInteger)map.get("remainSlots"), (Boolean)map.get("highlight"), (String)map.get("description"), (List)map.get("schedules"), (ProductPriceModel)map.get("price", ProductPriceModel.ZERO), currencyFormat);
        }).blockingGet();
    }
Tương tự phần lấy ra danh sách, ta sẽ tạo biến course chứa thông tin của course lấy từ phương thức decorate để đổ dữ liệu lên tempalte course-detail.html
return View.builder()
            .template("course-detail")
            .addVariable("courseId", courseId)
            .addVariable("course", course)
            .addVariable("defaultCurrency", defaultCurrency)
            .addVariable("pageTitle", course.getDisplayName())
            .build();
Vậy làm sao để nhấn vào thẻ html của khóa học nào trong danh sách hiển thị bên trên thì nó sẽ mở đúng đến trang chi tiết của khóa học đó?
Trong phần code danh sách các khóa học của trang course.html ta sẽ thêm đoạn code sau cho nút xem chi tiết:
<a th:attr="href='/courses/detail/' + ${course.code}" class="btn btn-warning">Read more</a>
Khi nhấn vào nút Read more nó sẽ gọi đến đường dẫn "http://localhost:8080/courses/detail/<mã của khóa học đó>".
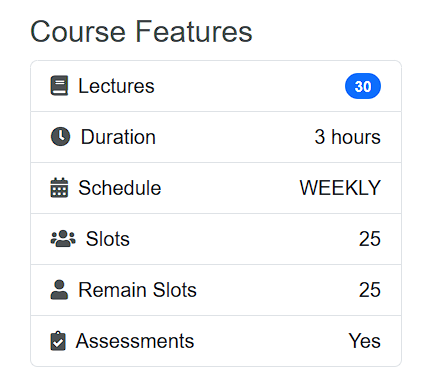
Đây là một đoạn code hiển thị một vài chi tiết cho khóa học :
<div class="row mt-4">
                                    <div class="col-md-8">
                                        <h4 class="mb-3">Course Description</h4>
                                        <div class="course-description" th:utext="${#strings.replace(#strings.replace(course.description, '<p>', ''), '</p>', '<br><br>')}"></div>
                                    </div>
                                    <div class="col-md-4">
                                        <h4>Course Features</h4>
                                        <ul class="list-group">
                                            <li class="list-group-item d-flex justify-content-between align-items-center">
                                                <span><i class="fas fa-book me-2"></i>Lectures</span>
                                                <span class="badge bg-primary rounded-pill" th:text="${course.lessons}"></span>
                                            </li>
                                            <li class="list-group-item d-flex justify-content-between align-items-center">
                                                <span><i class="fas fa-clock me-2"></i>Duration</span>
                                                <span><span th:text="${course.lessonDuration}"></span> hours</span>
                                            </li>
                                            <li class="list-group-item d-flex justify-content-between align-items-center">
                                                <span><i class="fas fa-calendar me-2"></i>Schedule</span>
                                                <span th:text="${course.scheduleType}"></span>
                                            </li>
                                            <li class="list-group-item d-flex justify-content-between align-items-center">
                                                <span><i class="fas fa-users me-2"></i>Slots</span>
                                                <span th:text="${course.totalSlots}"></span>
                                            </li>
                                            <li class="list-group-item d-flex justify-content-between align-items-center">
                                                <span><i class="fas fa-user me-2"></i>Remain Slots</span>
                                                <span th:text="${course.remainSlots}"></span>
                                            </li>
                                            <li class="list-group-item d-flex justify-content-between align-items-center">
                                                <span><i class="fas fa-clipboard-check me-2"></i>Assessments</span>
                                                <span>Yes</span>
                                            </li>
                                        </ul>
                                    </div>
                                </div>
Tương tự như phần giao diện của danh sách khóa học, ở đây ta sẽ không cần lặp qua biến nữa mà sẽ lấy thẳng biến course từ controller ra để get ra các thuộc tính hiển thị dữ liệu lên giao diện luôn.
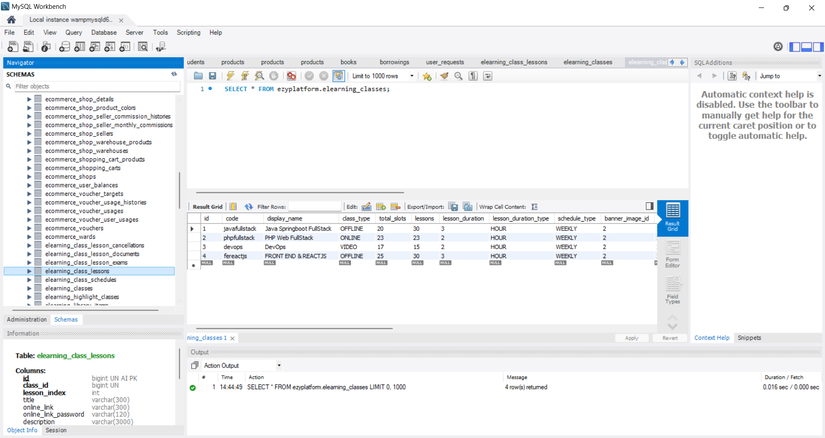
Vậy dữ liệu đó được lưu ở đâu nếu ta dùng các plugin có sẵn đó?
Trong SQL Workbench sẽ có 1 schema có tên là ezyplatform với table tên là elearning_class_lessons, bạn có thể xem trực tiếp dữ liệu trong database nếu không muốn xem trên trang admin.
Kết Luận: Vậy là ta đã hoàn thành xong việc lấy dữ liệu từ backend lên frontend bằng thymeleaf và các phương thức và class có sẵn của plugin trong ezyplatform.
All rights reserved
