Cách làm Bottom Navigation theo chuẩn Material Design
Bài đăng này đã không được cập nhật trong 8 năm
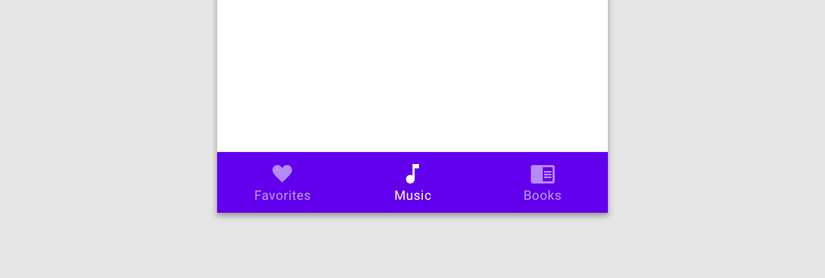
BottomNavigation là một thanh điều hướng gồm nhiều tác vụ chính của ứng dụng mà người dùng sẽ thường xuyên sử dụng nhất, nó được nằm ở màn hình chính (khi app được launch). Hình ảnh tham khảo material.io
Trước đây với yêu cầu phải có thanh điều hướng này thông thường chúng ta sẽ dùng custom layout là: LinearLayout hoặc RelaytiveLayout để đáp ứng yêu cầu.
Mới đây BottomNavigationView được Google thêm vào thư viện suport.design từ bản 26.1.0 từ tháng 9/2017, nhưng có 1 yêu cầu trong spec theo chuẩn Material design :
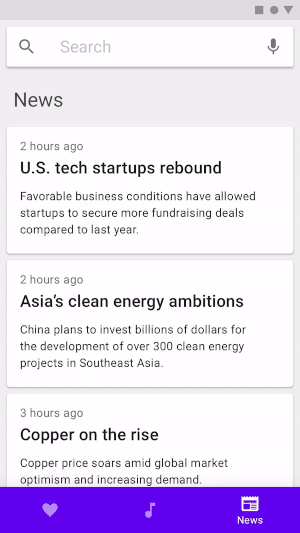
Upon scroll, the bottom navigation bar can appear or disappear:
Scrolling downward hides the bar
Scrolling upward reveals it
Video :
Google chưa cung cấp 1 keyword nào liên quan đến việc triển khai được yêu cầu như trên, mình sẽ cung cấp 1 cách làm đơn giản để giải quyết yêu cầu trên thông qua 1 demo nhỏ. 
1. Giải thích chức năng
Ứng dụng có 3 chức năng chính:
-
Home: Danh sách các ảnh hiển thị theo Grid. Khi scoll lên sẽ ẩn toolbar và bottom navigation. Ngược lại lúc scroll xuống thì hiển thị như lúc ban đầu vào app.
-
Dashboard : Hiển thị thống kê,... (các bạn có thể tự bổ xung và phát triển thêm)
-
Notifications: Thông báo từ Admin,...(các bạn viết thêm nhé)
Hình mô tả:
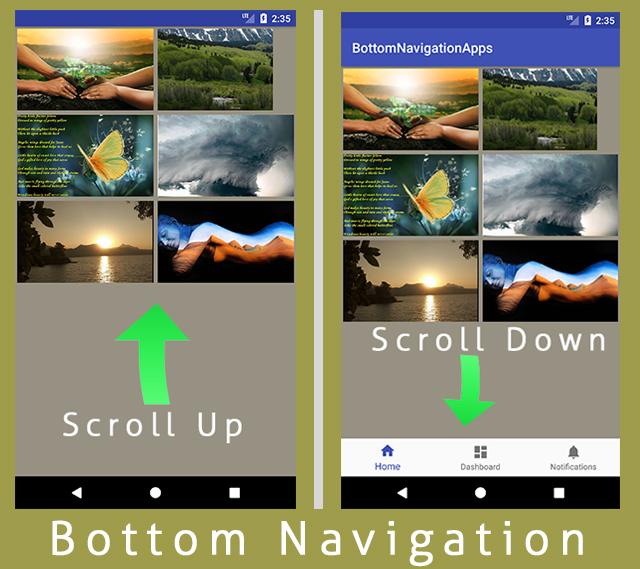
Mình tạm thời xây dựng chức năng cho màn Home và 2 phần còn lại sẽ làm tương tự, các bạn tự triển khai thêm theo yêu cầu riêng của mình nhé!
2. Custom behavior BottomNavigationView
Thực hiện việc implement CoordinatorLayout.Behavior để lắng nghe sự tương tác vào childView trong CoordinatorLayout, đây là 1 plugin nhỏ được Google support trong trường hợp muốn thay đổi kích chiều cao, vị trí của childView một cách dễ dàng. Khi implement có 2 method quan trọng nhất là:
override fun onStartNestedScroll(
      coordinatorLayout: CoordinatorLayout, child: V, directTargetChild: View, target: View,
      axes: Int, type: Int
  ): Boolean {
    return axes == ViewCompat.SCROLL_AXIS_VERTICAL
  }
=> Xác định hướng scroll , ở đây mình có scroll up - down nên chọn theo chiều dọc
override fun onNestedPreScroll(
      coordinatorLayout: CoordinatorLayout, child: V, target: View, dx: Int, dy: Int,
      consumed: IntArray, type: Int
  ) {
    super.onNestedPreScroll(coordinatorLayout, child, target, dx, dy, consumed, type)
    child.translationY = max(0f, min(child.height.toFloat(), child.translationY + dy))
  }
=> Thay đổi vị trí của childView khi scroll. Và mong muốn rằng vị trí nó sẽ nằm giữa trong khoảng 0 - chiều cao của childView.
Lưu ý: Công việc thực hiện như trên đã đảm bảo yêu cầu rồi. Nhưng nếu có dùng thêm SnackBar thì nó sẽ bị che bởi NavigationView , tránh bị như vậy ta làm như sau:
private fun updateSnackbar(child: View, snackbarLayout: Snackbar.SnackbarLayout) {
    if (snackbarLayout.layoutParams is CoordinatorLayout.LayoutParams) {
      val params = snackbarLayout.layoutParams as CoordinatorLayout.LayoutParams

      params.anchorId = child.id
      params.anchorGravity = Gravity.TOP
      params.gravity = Gravity.TOP
      snackbarLayout.layoutParams = params
    }
  }
Tập hợp những điều trên trong class: BottomNavigationBehavior
BottomNavigationBehavior.kt
class BottomNavigationBehavior<V : View>(context: Context, attrs: AttributeSet) :
    CoordinatorLayout.Behavior<V>(context, attrs) {

  override fun layoutDependsOn(parent: CoordinatorLayout?, child: V, dependency: View?): Boolean {
    if (dependency is Snackbar.SnackbarLayout) {
      updateSnackbar(child, dependency)
    }
    return super.layoutDependsOn(parent, child, dependency)
  }

  override fun onStartNestedScroll(
      coordinatorLayout: CoordinatorLayout, child: V, directTargetChild: View, target: View,
      axes: Int, type: Int
  ): Boolean {
    return axes == ViewCompat.SCROLL_AXIS_VERTICAL
  }

  override fun onNestedPreScroll(
      coordinatorLayout: CoordinatorLayout, child: V, target: View, dx: Int, dy: Int,
      consumed: IntArray, type: Int
  ) {
    super.onNestedPreScroll(coordinatorLayout, child, target, dx, dy, consumed, type)
    child.translationY = max(0f, min(child.height.toFloat(), child.translationY + dy))
  }

  private fun updateSnackbar(child: View, snackbarLayout: Snackbar.SnackbarLayout) {
    if (snackbarLayout.layoutParams is CoordinatorLayout.LayoutParams) {
      val params = snackbarLayout.layoutParams as CoordinatorLayout.LayoutParams

      params.anchorId = child.id
      params.anchorGravity = Gravity.TOP
      params.gravity = Gravity.TOP
      snackbarLayout.layoutParams = params
    }
  }
}

// Apply to FAB anchored to BottomNavigationView
class BottomNavigationFABBehavior(context: Context?,
    attrs: AttributeSet?) : CoordinatorLayout.Behavior<View>(context, attrs) {

  override fun layoutDependsOn(parent: CoordinatorLayout?, child: View, dependency: View): Boolean {
    return dependency is Snackbar.SnackbarLayout
  }

  override fun onDependentViewRemoved(parent: CoordinatorLayout, child: View, dependency: View) {
    child.translationY = 0f
  }

  override fun onDependentViewChanged(parent: CoordinatorLayout, child: View,
      dependency: View): Boolean {
    return updateButton(child, dependency)
  }

  private fun updateButton(child: View, dependency: View): Boolean {
    if (dependency is Snackbar.SnackbarLayout) {
      val oldTranslation = child.translationY
      val height = dependency.height.toFloat()
      val newTranslation = dependency.translationY - height
      child.translationY = newTranslation

      return oldTranslation != newTranslation
    }
    return false
  }
}
3. Apply custom behavior và Hoàn thiện sản phẩm
Việc apply khá đơn giản, tương tự như khi bạn kết hợp AppBarLayout với CoordinatorLayout
activity_main.xml
<android.support.design.widget.BottomNavigationView
        android:id="@+id/navigation"
        android:layout_width="match_parent"
        android:layout_height="wrap_content"
        android:layout_gravity="bottom"
        android:layout_marginEnd="0dp"
        android:layout_marginStart="0dp"
        android:background="?android:attr/windowBackground"
        app:layout_behavior="com.thanhviet.bottomnavigationapps.BottomNavigationBehavior"
        app:menu="@menu/navigation"
        />
Để mình giải thích hơn nhé, các bạn thấy hình ảnh ở trên chính là ứng dụng chúng ta mong muốn. Mình có 3 destinations (follow đúng chuẩn của material design) đó nha  , mình sử dụng ViewPager cho 3 fragments tương ứng: HomeFragment, DashboardFragment, NotificationsFragment.
a. ImageAdapter cho HomeFragment
ImageAdapter.kt
class ImageAdapter(
    val imageList: MutableList<Int>) : RecyclerView.Adapter<ImageAdapter.ImageViewHolder>() {
  override fun onCreateViewHolder(parent: ViewGroup?, viewType: Int): ImageViewHolder {
    val v = LayoutInflater.from(parent?.context).inflate(R.layout.item_image, parent, false)
    return ImageViewHolder(v);
  }

  override fun getItemCount(): Int {
    return imageList.size
  }

  override fun onBindViewHolder(holder: ImageViewHolder?, position: Int) {
    holder?.bindData(imageList.get(position))
  }


  class ImageViewHolder(itemView: View) : RecyclerView.ViewHolder(itemView) {
    private val image: ImageView = itemView.findViewById(R.id.img)
    fun bindData(idImg: Int) {
      image.setImageResource(idImg)
    }
  }
}
HomeFragment.kt
class HomeFragment : Fragment() {
  companion object {

    fun newInstance(): HomeFragment {
      return HomeFragment()
    }
  }

  override fun onCreateView(inflater: LayoutInflater?, container: ViewGroup?,
      savedInstanceState: Bundle?): View? {
    return inflater?.inflate(R.layout.fragment_home, container, false)
  }

  override fun onViewCreated(view: View?, savedInstanceState: Bundle?) {
    super.onViewCreated(view, savedInstanceState)
    recyler.apply {
      layoutManager = GridLayoutManager(context, 2)
      adapter = ImageAdapter(getListImage)
    }
  }

  private val getListImage = mutableListOf<Int>(
      R.mipmap.tree,
      R.mipmap.beautiful_mountain,
      R.mipmap.butterfly_beautiful,
      R.mipmap.inland_storms,
      R.mipmap.lake,
      R.mipmap.lie
  )
}
Hai fragments còn lại đơn giản chỉ tạo view thôi, mình ví dụ luôn DashboardFragment này:
DashboardFragment.kt
class DashboardFragment : Fragment() {
  companion object {

    fun newInstance(): DashboardFragment {
      return DashboardFragment()
    }
  }

  override fun onCreateView(inflater: LayoutInflater?, container: ViewGroup?,
      savedInstanceState: Bundle?): View? {
    return inflater?.inflate(R.layout.fragment_dashboard, container, false)
  }
}
Tích hợp các fragments vào view của MainActivity :
fun setupViewPager(viewpager: ViewPager) {
    var viewpagerAdapter = ViewPagerAdapter(supportFragmentManager)
    viewpagerAdapter.addFragment(HomeFragment.newInstance())
    viewpagerAdapter.addFragment(DashboardFragment.newInstance())
    viewpagerAdapter.addFragment(NotificationdFragment.newInstance())
    viewpager.apply {
      adapter = viewpagerAdapter
    }
  }
Sau đó các bạn hãy run và kiểm tra kết quả nhé ! 
4. Tổng Kết
Mình vừa chia sẻ Cách làm Bottom Navigation theo chuẩn Material Design, với một ứng dụng đơn giản như 1 khung ban đầu để tạo lên ứng dụng thực tế. Hy vọng rằng ai đó sẽ tìm thấy sự hữu ích từ trong bài viết của mình. Trong quá trình thực hiện nếu gặp khó khăn các bạn hãy comment để mình giải đáp, source code hoàn chỉnh mình đã up lên Github rồi đó.
All rights reserved
