Build Face ID for Web with Keras
Bài đăng này đã không được cập nhật trong 4 năm
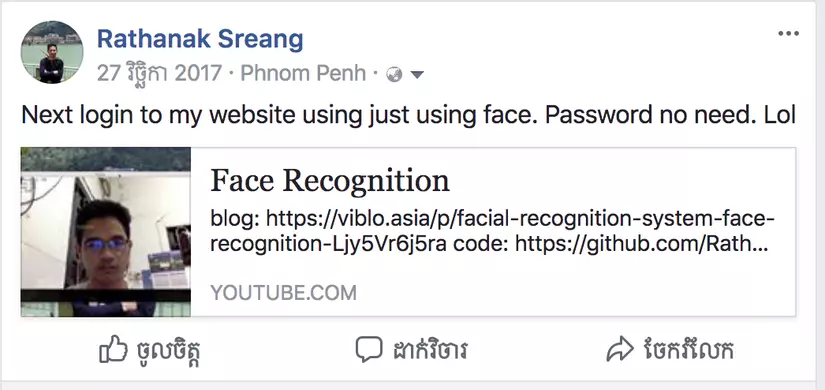
When IPhone X got introduce in 2017, there are many cool features in it. However, one feature which I interested most is "Face ID", it consists of a sensor with two modules; one projects a grid of more than 30,000 infrared dots onto a user's face, then using machine learning algorithm(deep learning) for recognizing the face and authentication. I really impressed by its algorithm very much which it inspires me to research on deep learning, then I wrote a post about building Facial Recognition System. Then, I wrote on my FB profile that I will implement into a website as well, and here the FB post I wrote last year.
Now, let's make it happen.
Let's get start
We are going to build a simple Face Auth for web where allow only Rathanak(me) able to login and mark someone else as Unknown. so, we need:
- Web Client: where get video from webcam, display the preview, and send it to server to verify.
- Web Server: recieve image face from client then:
- can detect face from each image
- can recognize and identify my face and not my face.
We use twos pages for display the information. home page where show user login or not. login page where allow use login to the system.
Client side
we link to some frameworks for styling and socket.io for sending/recieving user image realtime to server.
<script src="/js/socket.io.js"></script>
<script src="/js/jquery-2.2.1.min.js"></script>
<script src="/js/jquery-3.1.1.slim.min.js"></script>
<script src="/js/tether.min.js"></script>
<script src="/js/bootstrap.min.js"></script>
<link rel="stylesheet" type="text/css" href="/css/bootstrap.min.css">
<link rel="stylesheet" type="text/css" href="/css/custom.css">
In home page, it show only link to login page. If user already loging, it display welcome and user name.
div class="row justify-content-md-center">
  <div class="jumbotron home" style="width: 25rem;">
    {% if not current_user.id %}
    <div class="text-center">
      <a href="/login" class="btn btn-primary">Please Login</a>
    </div>
    {% else %}
      <h1 class="display-3 text-center">Hello, world!</h1>
      <h3>Welcome {{current_user.name}}</h3>
      <div class="mt-5">
        <a href="/logout">Logout</a>
      </div>
    {% endif %}
  </div>
</div>
In login page, it let user stream their face from webcam to login.
In this function, we init, get video from webcam, and convert it to Base64 string, then send to server using socket.io. We use setInterval for sending image use server every second, and stop within limit time.
function stream() {
  var canv = document.getElementById("prev"),
  context = canv.getContext("2d"),
  video = document.getElementById("video"),
  localstream = null;
  freq = 10;

  canv.width = 200;//window.innerWidth ;//  800;
  canv.height = 200;//window.innerHeight;// 400;

  context.width = canv.width;
  context.height = canv.height;

  function loadCam(stream) {
    localstream = stream;
    video.src = window.URL.createObjectURL(stream);
    logger("Camera loaded [OKAY]");
  }

  function loadFail(stream) {
    logger("Failed loading camera");
  }

  function viewVideo(video, context) {
    context.drawImage(video, 0, 0, context.width, context.height);
    socket.emit("stream", canv.toDataURL("image/webp"));
  }

  $(function() {
    navigator.getUserMedia = navigator.getUserMedia ||
                       navigator.webkitGetUserMedia ||
                       navigator.mozGetUserMedia;

    if(navigator.getUserMedia) {
      navigator.getUserMedia({video: true}, loadCam, loadFail);
    }

    var duration = 60 * 0.2;//
    var timer = duration, minutes, seconds;

    var faceStream = setInterval(function() {
      viewVideo(video, context);

      minutes = parseInt(timer / 60, 10)
      seconds = parseInt(timer % 60, 10);

      minutes = minutes < 10 ? "0" + minutes : minutes;
      seconds = seconds < 10 ? "0" + seconds : seconds;
      if (--timer < 0) {
        clearInterval(faceStream);
        document.getElementById("face-login").style.display = 'inline-block';
        video.pause();
        video.src = "";
        localstream.getTracks()[0].stop();
        timer = duration;
        socket.emit("stream-end", '');
      }
      logger("Recognizing in: " + minutes + ":" + seconds);
    }, freq*10);
  });
}
This function call stream function to stream webcam to server then it listen event stream, stream-end, verify-user, broadcasting by server. Then it display user image and draw rect around their face. Finally, it will redirect to home page user login successfully.
function view() {
      document.getElementById("face-login").style.display = 'none';

      stream();
      logger("Wait...");

      socket.on("stream", function (data) {
        var img = document.getElementById("img");
        img.style.display = 'block';
        img.src = data['img'];

        var devRect = document.getElementById("face-detect");
        var rect = data['rectFace'];
        if(Object.keys(rect).length !== 0) {
          devRect.style.display = 'block';
          devRect.style.top = rect.y + 'px';
          devRect.style.left = rect.x + 'px';
          devRect.style.width = rect.w + 'px';
          devRect.style.height = rect.h + 'px';

        } else {
          devRect.style.display = 'none';
        }
      });

      socket.on("stream-end", function (data) {
        document.getElementById("face-login").style.display = 'none';
        // document.getElementById("img").style.display = 'none';
        document.getElementById("face-detect").style.display = 'none';
        logger("Verifying user...");
        socket.emit("verify-user", '');
      });

      socket.on("verify-user", function (data) {
        document.getElementById("face-detect").style.display = 'none';
        logger("verified, " + data['name']);
        console.log(data)
      });
    }
Server side
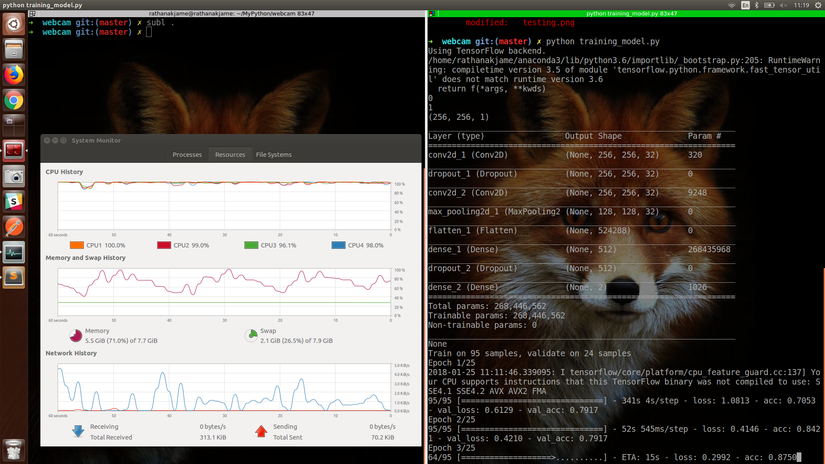
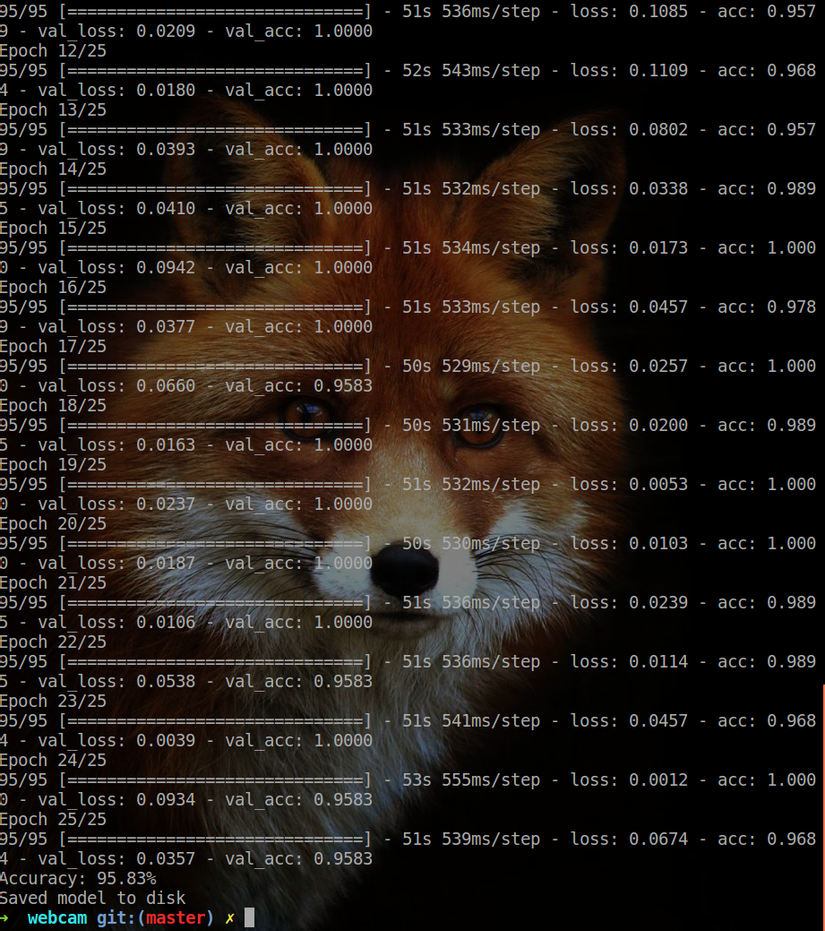
I am not going to talk about how to run train/test on model. I already about it on my previous article Face Recognition, Face Alignment, Let's Build Facial Recognition System.
Or you can read it from source code here: training_model.py, test_model.py .
So, let's set up web server.
First, we import necessary modules such flask, flask_socketio, flask_login, flask_session for rendering, handle session, and realtime event. cv2, imutils for image minipulation. dlib for face detection.
from flask import Flask, render_template, redirect, url_for, session
from flask_socketio import SocketIO, emit
from flask_login import LoginManager, UserMixin, current_user, login_user, \
                        login_required, logout_user
from flask_session import Session

import base64_2_image
import recognize_face

import cv2
import numpy as np
import dlib
from imutils import face_utils
import imutils
Then, we init and load data into our app.
print("[INFO] loading facial landmark predictor...")
detector = dlib.get_frontal_face_detector()

print("[INFO] loading facial landmark predictor...")
detector = dlib.get_frontal_face_detector()

app = Flask(__name__, static_url_path='', static_folder='static')
app.config['SECRET_KEY'] = 'secret!'
app.config['SESSION_TYPE'] = 'filesystem'
login = LoginManager(app)
Session(app)
socketio = SocketIO(app)
recognizer = recognize_face.RecognizeFace()

class User(UserMixin, object):
    def __init__(self, id=None, name=''):
        self.id = id
        self.name = name

@login.user_loader
def load_user(id):
    try:
      name = session['user_' + id]
      return User(id, name)
    except:
      return None
Next, we define web request handler.
@app.route('/')
def index():
    return render_template('index.html', user_name = current_user)

@app.route('/login')
def login():
    if current_user.is_authenticated:
        return redirect(url_for('index'))

    return render_template('login.html')

@app.route('/logout')
@login_required
def logout():
    print('Logging out')
    logout_user()
    return redirect(url_for('index'))
1. Face detection.
For face detection, we listen socketio event stream broadcasted by client where it contain image data in Base64 string format. Then, we parse it into image file using method base64_2_image, next we use dlib detector function to find face in image. We broadcast cast event stream and pass position of face in image to client if it found. We also save founded face into recognizer which is object of class RecognizeFace.
# real time streaming
@socketio.on('stream')
def send_image(img):
    image = base64_2_image.data_uri_to_cv2_img(img)
    image = imutils.resize(image, width=200)
    gray = cv2.cvtColor(image, cv2.COLOR_BGR2GRAY)

    rects = detector(gray, 0)
    rectFace = {}
    if len(rects) > 0:
        recognizer.AddImage(faceImage=image, gray=gray, rect=rects[0])
        (x,y,w,h) = face_utils.rect_to_bb(rects[0])
        rectFace['x'] = x
        rectFace['y'] = y
        rectFace['w'] = w
        rectFace['h'] = h

    emit('stream', {'img': img, 'rectFace': rectFace}, broadcast=True)
2. Face Recognition
When use, emit event verify-user, method Recognize() of ojbect recognizer is claaed. Where it'll make a prediction on stored face images then it can generalize whether people is allow to access system or not. For our system, it will return [1, 'Rathanak', accouracy_value] if face is belong to authorized user else it will return [None, 'Unknown', accouracy_value]. If faceis authenicated, we will broadcast verify-user to client along with data[id, name, auth_key, accouracy].
@socketio.on('verify-user')
def verifyt_user(img):
  id, name, accouracy = recognizer.Recognize()
  auth_key = ''
  if id is not None:
      auth_key = '1234567890'
  emit('verify-user', {'id': id, 'name': name, 'auth_key': auth_key,'accouracy': accouracy}, broadcast=True)
Now, it done. :slight_smile: Let's check the result.
Result

Resources
- source code
- http://flask.pocoo.org/
- https://github.com/miguelgrinberg/Flask-SocketIO
- https://viblo.asia/p/facial-recognition-system-face-recognition-Ljy5Vr6j5ra
- https://mdewo.com/en/node-socketio-webcam/
- https://www.pyimagesearch.com/2017/12/11/image-classification-with-keras-and-deep-learning/
- https://www.youtube.com/watch?v=ACmydtFDTGs
What We have learn
In this post, We learned how to get image from webcam then stream(emit) webcam image to server using socket.io. we build a python web server using flask framwork and flask_socketio for realtime app. We use Keras to train the model, and load the trained model into app. Then use it to recognize face where our app currenlty can recognize only Rathanak or not Rathanak. :slight_smile:
Now, it's up to you to improve our current app.
All rights reserved
