+1

Triển khai aws load balancer controller cho EKS

Thuộc series Cùng nhau học EKS nào

Giới thiệu

Sau khi đã triển khai cụm EKS và deploy các workload lên cụm, bạn sẽ có nhu cầu expose workload này ra public internet hoặc internal network, với kubernetes chúng ta sẽ sử dụng Service để expose workload trong cụm, tìm hiểu về các loại Service sẽ không nằm trong phạm vi bài viết này, trong giới hạn bài hôm nay mình sẽ hướng dẫn các bạn setup aws-load-balancer-controller để sử dụng serviceType: LoadBalancer.

Thực ra việc setup aws load balancer controller là không bắt buộc, theo doc network-load-balancing.html thì sẽ có một legacy controller mặc định cấp Classic Load Balancers cho bạn với các tính năng cơ bản của một load balancer để balance traffic vào các vm ở port nhất định, như vậy là bạn đã có thể dùng được serviceType: LoadBalancer và chạy như bình thường rùi. Nhưng cũng theo doc đó, aws sẽ chỉ fix bug cho controller đó nữa thôi.

This controller is only receiving critical bug fixes in the future.

Thay vào đó aws khuyến khích chúng ta cài đặt aws-load-balancer-controller phiên bản mới hơn (ở thời điểm bài blog này được viết >=2.7.2) với nhiều tính năng hơn, hấp dẫn hơn legacy, đương nhiên rồi =))

Dài dòng lịch sử xong rồi, thì đại loại mình sẽ thử cả 2 legacy load balancer và new load balancer trong bài này và xem chúng khác nhau ở chỗ nào nhé.

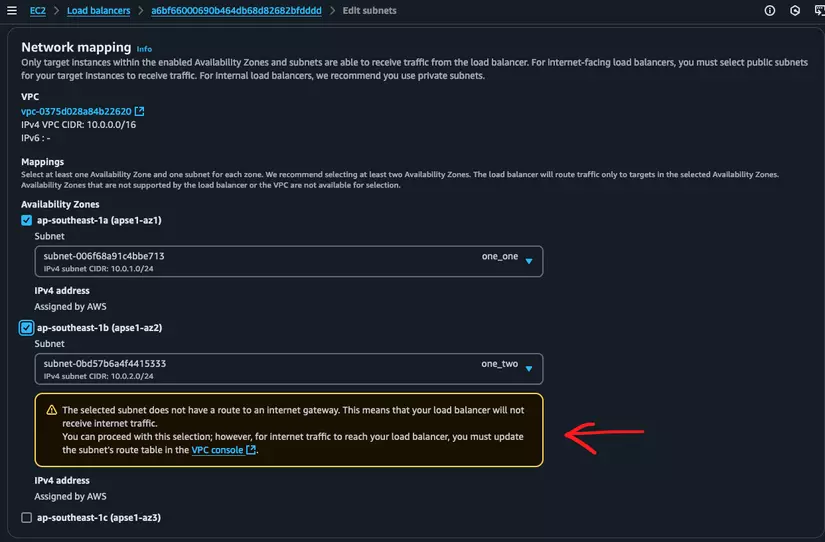
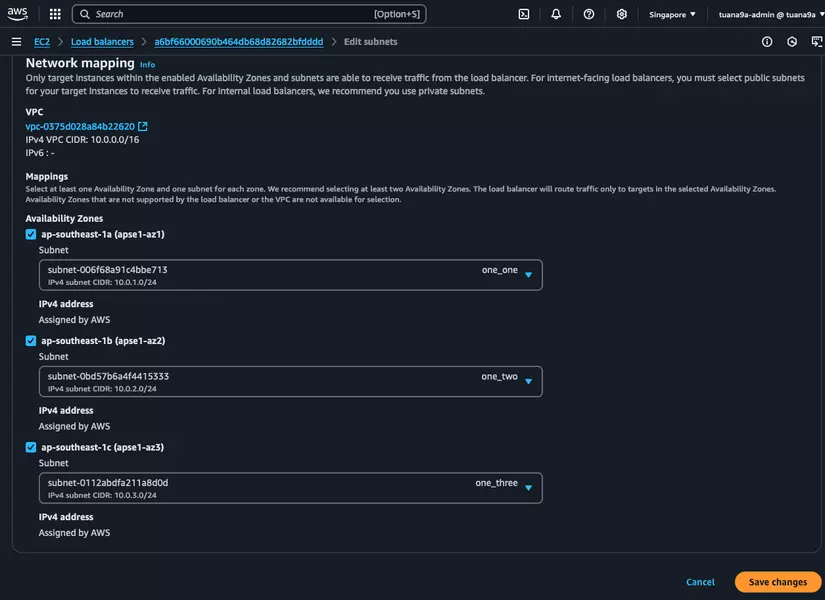
Ý tưởng xây dựng dựng cụm EKS như sau: Sẽ có public private subnet, worker nằm trong private subnet, load balancer nằm ở public subnet và forward vào worker nằm trong private subnet

image.png

  1. Dựng cụm EKS (network, control plane, worker node group): (*) phần network setup có lưu ý quan trọng các bạn để ý phần setup network nhé
  2. Dùng legacy controller và Classic Load Balancer
  3. Triển khai NEW aws load balancer controller cho cụm EKS và test new load balancer (oidc, iam, service account, aws-load-balancer-controller)
  4. Tổng kết
  5. Bonus

Link GitHub cho bài này nè aws-eks-example/two

1. Dựng cụm EKS (here we go again)

Về ý tưởng dựng cụm thì mình bê nguyên ý tưởng từ bài trước Triển khai private worker cho EKS tuy nhiên chỉnh sửa một chút liên quan tới network để load balancer hoạt động được (*)

Khởi tạo project

terraform.tf

terraform {
  required_providers {
    aws = {
      source  = "hashicorp/aws"
      version = "5.24"
    }
  }

  required_version = ">= 1.2.0"
}
provider "aws" {
  region                   = "us-east-1"
  shared_credentials_files = ["~/.aws/credentials"]
  profile                  = "default"
}

Sau đó khởi tạo provider bằng lệnh

terraform init

Setup network (*).

Network cho cụm EKS lần này sẽ trông như sau (Link tham khảo https://docs.aws.amazon.com/eks/latest/userguide/creating-a-vpc.html):

  • 1 vpc có dải ip là 10.0.0.0/16 có tên là two
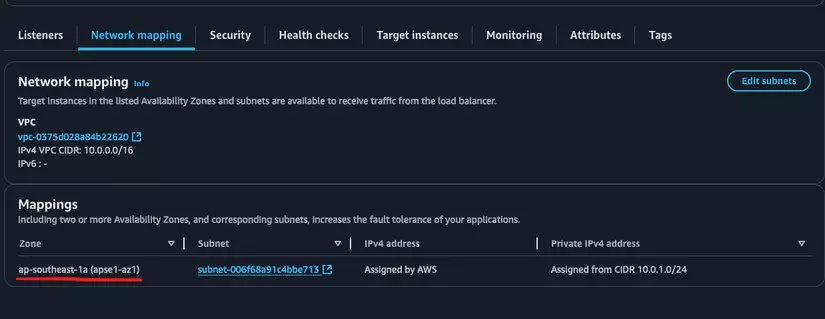
  • 4 subnet với 4 dải ip khác nhau, nằm trên 2 availability zone, mỗi availability zone chứa 2 subnet: 1 public, 1 private (*) (lưu ý: cái này quan trọng):
    • 2 public subnet: two1, two2 sẽ gán ip public cho bất kỳ ec2 instance bằng thuộc tính map_public_ip_on_launch = true
    • 2 private subnet: two3, two4, map_public_ip_on_launch = false các ec2 instance trong subnet này sẽ ko được gán ip public và không thể truy cập các ec2 instance này từ internet

image.png

  • 1 internet gateway để cho phép truy cập internet từ trong ra ngoài và từ ngoài vào trong.
  • 1 nat gateway: nat để cho phép các ec2 instance trong private subnet truy cập được internet và control plane.
    • nat gateway cần một ip public (nat) để có thể thực hiện NAT
  • cuối cùng là 2 route table để setup network theo ý định của bài viết
    • 1 route table public: public cho public subnet public two1, two2
    • 1 route table nat: nat dùng chung cho 2 private subnet two3, two4
    • setup route rule cho 2 route table trên

Toàn bộ source code cho network mình sẽ để ở file network.tf link GitHub nè https://github.com/tuana9a/aws-eks-example/blob/main/two/network.tf

network.tf

vpc

resource "aws_vpc" "two" {
  cidr_block = "10.0.0.0/16"
  tags = {
    Name = "two"
  }
}

4 subnets: các bạn để ý availability zone của từng subnets:

  • ap-southeast-1a: two1, two3
  • ap-southeast-1b: two2, two4
resource "aws_subnet" "two1" {
  vpc_id            = aws_vpc.two.id
  cidr_block        = "10.0.1.0/24"
  availability_zone = "ap-southeast-1a"

  map_public_ip_on_launch = true

  tags = {
    Name = "two1"
  }
}
resource "aws_subnet" "two2" {
  vpc_id            = aws_vpc.two.id
  cidr_block        = "10.0.2.0/24"
  availability_zone = "ap-southeast-1b"

  map_public_ip_on_launch = true

  tags = {
    Name = "two2"
}
resource "aws_subnet" "two3" {
  vpc_id            = aws_vpc.two.id
  cidr_block        = "10.0.3.0/24"
  availability_zone = "ap-southeast-1a"

  map_public_ip_on_launch = false

  tags = {
    Name = "two3"
  }
}
resource "aws_subnet" "two4" {
  vpc_id            = aws_vpc.two.id
  cidr_block        = "10.0.4.0/24"
  availability_zone = "ap-southeast-1b"

  map_public_ip_on_launch = false

  tags = {
    Name = "two4"
  }
}

Setup cửa thông ra ngoài public internet

internet gateway để thông với public internet

resource "aws_internet_gateway" "public" {
  vpc_id = aws_vpc.two.id
  tags = {
    Name = "public"
  }
}

route table để route traffic vào internet gateway và ra ngoài internet

resource "aws_route_table" "public" {
  vpc_id = aws_vpc.two.id
  tags = {
    Name = "public"
  }
}
resource "aws_route" "public" {
  route_table_id         = aws_route_table.public.id
  destination_cidr_block = "0.0.0.0/0"
  gateway_id             = aws_internet_gateway.public.id
}

sau đó add route table này vào 2 public subnets: two1, two2 tương ứng

resource "aws_route_table_association" "two1" {
  route_table_id = aws_route_table.public.id
  subnet_id      = aws_subnet.two1.id
}
resource "aws_route_table_association" "two2" {
  route_table_id = aws_route_table.public.id
  subnet_id      = aws_subnet.two2.id
}

Setup nat cho private subnet truy cập public internet

Tạo nat gateway

resource "aws_eip" "nat" {
  domain = "vpc"
  tags = {
    Name = "nat"
  }
}
resource "aws_nat_gateway" "nat" {
  allocation_id = aws_eip.nat.allocation_id
  subnet_id     = aws_subnet.two1.id

  tags = {
    Name = "nat"
  }
}

setup route

resource "aws_route_table" "nat" {
  vpc_id = aws_vpc.two.id
  tags = {
    Name = "nat"
  }
}

mặc định route traffic qua nat gateway instance

resource "aws_route" "nat" {
  route_table_id         = aws_route_table.nat.id
  destination_cidr_block = "0.0.0.0/0"
  nat_gateway_id         = aws_nat_gateway.nat.id
}

gắn vào 2 private subnets: two3, two4

resource "aws_route_table_association" "two3" {
  route_table_id = aws_route_table.nat.id
  subnet_id      = aws_subnet.two3.id
}
resource "aws_route_table_association" "two4" {
  route_table_id = aws_route_table.nat.id
  subnet_id      = aws_subnet.two4.id
}

Khởi tạo EKS cluster

quyền cho control plane eks-cluster-iam.tf

resource "aws_iam_role" "eks_cluster_role" {
  name = "EKSClusterRole"
  assume_role_policy = jsonencode({
    Version = "2012-10-17"
    Statement = [
      {
        Action = "sts:AssumeRole"
        Effect = "Allow"
        Sid    = ""
        Principal = {
          Service = "eks.amazonaws.com"
        }
      },
    ]
  })
  managed_policy_arns = [
    "arn:aws:iam::aws:policy/AmazonEKSClusterPolicy"
  ]
}

quyền cho worker eks-node-iam.tf

resource "aws_iam_role" "eks_node_role" {
  name = "EKSNodeRole"
  assume_role_policy = jsonencode({
    Version = "2012-10-17"
    Statement = [
      {
        Action = "sts:AssumeRole"
        Effect = "Allow"
        Sid    = ""
        Principal = {
          Service = "ec2.amazonaws.com"
        }
      },
    ]
  })
  managed_policy_arns = [
    "arn:aws:iam::aws:policy/AmazonEKSWorkerNodePolicy",
    "arn:aws:iam::aws:policy/AmazonEC2ContainerRegistryReadOnly",
    "arn:aws:iam::aws:policy/AmazonEKS_CNI_Policy"
  ]
}

tạo cụm eks-cluster.tf nằm trong 2 public subnets two1, two2

resource "aws_eks_cluster" "two" {
  name     = "two"
  role_arn = aws_iam_role.eks_cluster_role.arn
  version  = "1.30"

  vpc_config {
    # Error: creating EKS Cluster (two): InvalidParameterException: Subnets specified must be in at least two different AZs
    subnet_ids = [
      aws_subnet.two1.id,
      aws_subnet.two2.id,
    ]
  }

  # Ensure that IAM Role permissions are created before and deleted after EKS Cluster handling.
  # Otherwise, EKS will not be able to properly delete EKS managed EC2 infrastructure such as Security Groups.
  depends_on = [
    aws_iam_role.eks_cluster_role,
  ]
}

tạo node group (worker nodes) eks-node-group.tf nằm trong 2 private subnets two3, two4

# WARN: apply AFTER vpc-cni, kube-proxy
# WARN: apply BEFORE coredns
resource "aws_eks_node_group" "two" {
  cluster_name    = aws_eks_cluster.two.name
  node_group_name = "two"
  node_role_arn   = aws_iam_role.eks_node_role.arn
  capacity_type   = "SPOT"

  subnet_ids = [
    aws_subnet.two3.id,
    aws_subnet.two4.id,
  ]

  instance_types = [
    "t3.medium",
  ]

  scaling_config {
    desired_size = 2
    max_size     = 3
    min_size     = 1
  }

  update_config {
    max_unavailable = 1
  }

  # Ensure that IAM Role permissions are created before and deleted after EKS Node Group handling.
  # Otherwise, EKS will not be able to properly delete EC2 Instances and Elastic Network Interfaces.
  depends_on = [
    aws_iam_role.eks_node_role,
    aws_eks_addon.two_vpccni,
    aws_eks_addon.two_kubeproxy,
  ]
}

tạo addon eks-addon.tf

# WARN: apply BEFORE node_group
resource "aws_eks_addon" "two_vpccni" {
  cluster_name  = aws_eks_cluster.two.name
  addon_name    = "vpc-cni"
  addon_version = "v1.18.1-eksbuild.3"
}
# WARN: apply BEFORE node_group
resource "aws_eks_addon" "two_kubeproxy" {
  cluster_name  = aws_eks_cluster.two.name
  addon_name    = "kube-proxy"
  addon_version = "v1.30.0-eksbuild.3"
}
# WARN: apply AFTER node_group
resource "aws_eks_addon" "two_coredns" {
  cluster_name  = aws_eks_cluster.two.name
  addon_name    = "coredns"
  addon_version = "v1.11.1-eksbuild.8"

  depends_on = [aws_eks_node_group.two]
}

giờ thì terraform apply nào, lâu phết, có thể ngồi xem hết 1 tóm tắt phim trên youtube được đấy

terraform apply # yes

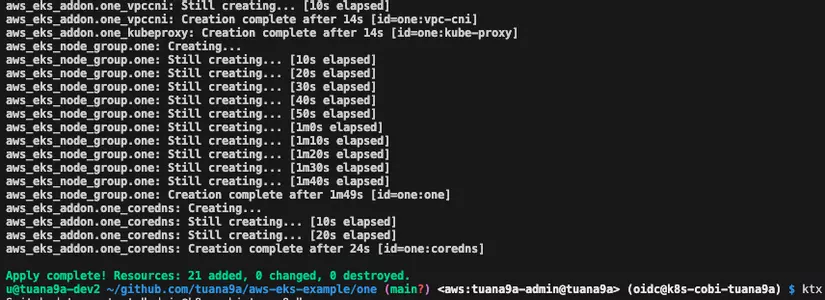
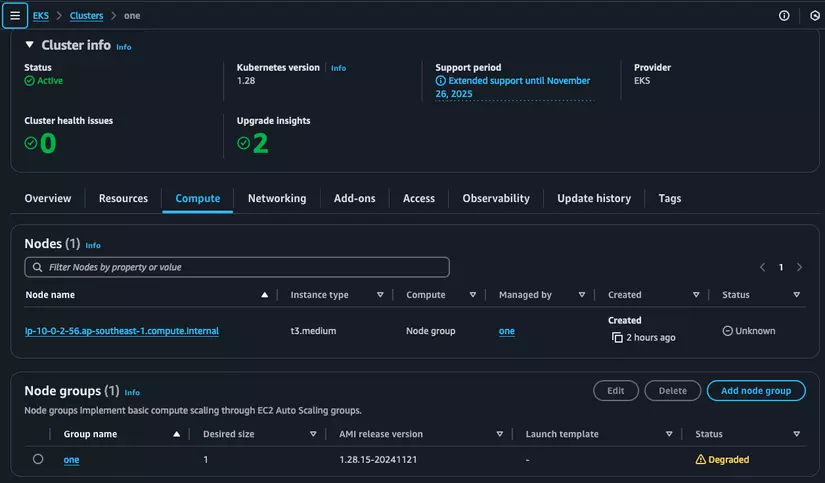
Kết quả sẽ thành công như sau, còn nếu không thành công thì bạn check code trên github hoặc làm check lại từng bước hoặc xem phần tổng hợp lỗi ở bài Tôi bắt đầu học EKS#Tổng hợp lỗi

image.png

sau đó các bạn kéo kubeconfig về bằng lệnh

aws eks update-kubeconfig --name two

Thử thao tác với cụm

image.png

vậy là đã thành công dựng cụm EKS, đến bước tiếp theo là setup aws load balancer để expose workload ra ngoài internet

2. Dùng legacy controller và Classic Load Balancer

Cùng apply thử nginx deployment và tạo serviceType: LoadBalancer cho nginx xem sao, mình tạo một file mới test-classic-lb.yaml

apiVersion: apps/v1
kind: Deployment
metadata:
  name: nginx-classic
  namespace: default
spec:
  replicas: 1 # Lưu ý mình chỉ set 1 pod ở đây
  selector:
    matchLabels:
      app: nginx-classic
  template:
    metadata:
      labels:
        app: nginx-classic
    spec:
      containers:
        - name: nginx
          image: nginx
          ports:
            - containerPort: 80
---
apiVersion: v1
kind: Service
metadata:
  name: nginx-classic
  namespace: default
spec:
  type: LoadBalancer
  ports:
    - port: 80
      targetPort: 80
      protocol: TCP
  selector:
    app: nginx
kubectl apply -f test-classic-lb.yaml

Sau đó chạy lệnh để xem thông tin của service

kubectl -n default get svc nginx-classic
coder@coder-tuana9a-terraform-aws-example-0 ~/github.com/tuana9a/aws-eks-example (main*?) $ kubectl -n default get svc nginx-classic
NAME            TYPE           CLUSTER-IP      EXTERNAL-IP                                                                    PORT(S)        AGE
nginx-classic   LoadBalancer   172.20.247.13   a04bb179e2cd6497595edd32700440ab-2007751285.ap-southeast-1.elb.amazonaws.com   80:31088/TCP   10s

OK vậy là đã có EXTERNAL-IP nhưng mà nó lại là dns, hmm, ko sao thử dùng cái đó để truy cập từ trình duyệt, hoặc mình dùng curl trong terminal xem sao

984C71B6-1BEA-4B2B-9FA5-A737CA850C0B_1_201_a.jpeg

Trong một vài lần đầu curl lỗi, nguyên nhân có thể load balancer chưa lên, ... sau đó thì trang web quen thuộc đã hiện ra: Welcome to nginx!

image.png

Như vậy là bạn đã expose service trong cụm k8s ra public internet thành công, thực ra nếu nhu cầu bạn đến đây thì có thể dừng lại bài viết ở đây rồi. Còn bạn nào quan tâm có thể xem tiếp nhé.

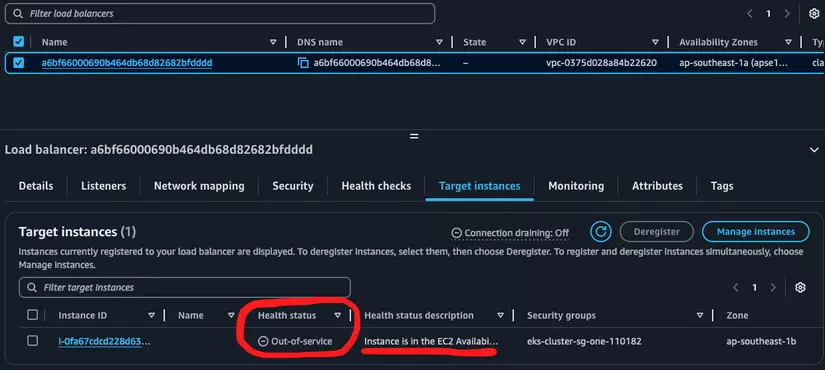
Hãy cùng xem chi tiết thông tin của load balancer này sau đó so sánh nó trước và sau khi cài đặt aws load balancer controller. Giờ các bạn vào giao diện aws console chọn dịch vụ EC2 > Load balancers ta có thể thấy ngay type của load balancer là classic

image.png

Click vào xem chi tiết xem sao. Ở tab Listeners ta có thể thấy load balancer lắng nghe ở port TCP:80 và forward tới TCP:31088 của cái gì thì cần xem tiếp các thông tin khác.

image.png

Xem tiếp Target instances để xem load balancer forward traffic tới đâu, thì ta thấy 2 instances của chúng ta

image.png

Chạy thử lệnh kubectl get nodes cho chắc

coder@coder-tuana9a-terraform-aws-example-0 ~/github.com/tuana9a/aws-eks-example (main*?) $ kubectl get nodes        
NAME                                            STATUS   ROLES    AGE   VERSION
ip-10-0-3-198.ap-southeast-1.compute.internal   Ready    <none>   66m   v1.30.4-eks-a737599
ip-10-0-4-202.ap-southeast-1.compute.internal   Ready    <none>   66m   v1.30.4-eks-a737599

Ờm thông tin cũng ko rõ lắm, mình có xem chi tiết vào từng node thì có một trường .spec.providerID get thử trường đó thì được thông tin sau

coder@coder-tuana9a-terraform-aws-example-0 ~/github.com/tuana9a/aws-eks-example (main*?) $ kubectl get nodes -o jsonpath='{range .items[*]}{.spec.providerID} {"\n"}{end}'
aws:///ap-southeast-1a/i-03deb0f8f9f8aca28 
aws:///ap-southeast-1b/i-09d95e3015cffb85f

Chính là 2 instance với id là i-03deb0f8f9f8aca28, i-09d95e3015cffb85f OK vậy load balancer forward tới port TCP:31088 của 2 instances này. Một điểm các bạn nếu để ý sẽ thấy mặc dù deployment của mình chỉ có 1 pod nginx

coder@coder-tuana9a-terraform-aws-example-0 ~/github.com/tuana9a/aws-eks-example (main*?) $ kubectl -n default get pod -o wide 
NAME                             READY   STATUS    RESTARTS   AGE   IP          NODE                                            NOMINATED NODE   READINESS GATES
nginx-classic-6cfb64b7c5-hmsx5   1/1     Running   0          22s   10.0.4.99   ip-10-0-4-202.ap-southeast-1.compute.internal   <none>           <none>

Và pod này chỉ nằm trên một trong 2 node, tuy nhiên load balancer vẫn forward đến cả 2. Nếu các bạn tìm hiểu về kubernetes service thì đây chính là NodePort của service. Đại loại nó sẽ pick một port bất kì trên toàn bộ các worker node và lắng nghe ở port này, và khi load balancer forward traffic tới bất kì node nào ở port đó thì đều sẽ tới được service nginx-classic và từ đó traffic vào được trong cụm.

Các bạn có thể node lại cơ chế này với load balancer classic: với load balancer classic thì load balancer chỉ forward request tới worker node và hết, load balancer không quan tâm những gì bên trong cụm k8s ra sao, service, pod, ... nó cứ forward tới node và để node tự xử lý traffic internal (trong) cụm k8s, các bạn ghi nhớ cơ chế này khi tới bước sau mình sử dụng load balancer mới hơn nhé.

Tiện thì mình cùng test thử khả năng load balancer xem có đúng là load balance được không nhé, để test thì cần sửa nginx deployment "một xíu" =0

test-classic-lb-v2.yaml

apiVersion: apps/v1
kind: Deployment
metadata:
  name: nginx-classic
  namespace: default
spec:
  replicas: 2
  selector:
    matchLabels:
      app: nginx-classic
  template:
    metadata:
      labels:
        app: nginx-classic
    spec:
      volumes:
        - name: uid
          emptyDir: {}
      initContainers:
        - name: alpine
          image: alpine
          env:
            # Lấy pod name vào env variable
            - name: POD_NAME
              valueFrom:
                fieldRef:
                  fieldPath: metadata.name
          volumeMounts:
            - name: uid
              mountPath: /usr/share/nginx/html
          command:
            # Ghi pod name vào file html mặc định của nginx
            - sh
            - -c
            - |
              echo "Pod: $POD_NAME" > /usr/share/nginx/html/index.html
      containers:
        - name: nginx
          image: nginx
          ports:
            - containerPort: 80
          volumeMounts:
            - name: uid
              mountPath: /usr/share/nginx/html
---
apiVersion: v1
kind: Service
metadata:
  name: nginx-classic
  namespace: default
spec:
  type: LoadBalancer
  ports:
    - port: 80
      targetPort: 80
      protocol: TCP
  selector:
    app: nginx-classic
kubectl apply -f test-classic-lb-v2.yaml

Giờ test thử gửi hàng loạt request tới địa chỉ của load balancer xem sao

Tip lấy ip, hostname của load balancer bằng cli

coder@coder-tuana9a-terraform-aws-example-0 ~/github.com/tuana9a/aws-eks-example (main*?) $ kubectl -n default get svc nginx-classic -o jsonpath='{.status.loadBalancer.ingress[0].hostname}'
a04bb179e2cd6497595edd32700440ab-2007751285.ap-southeast-1.elb.amazonaws.com

Giờ thì while true rồi bắn tỉa load balancer nào

coder@coder-tuana9a-terraform-aws-example-0 ~/github.com/tuana9a/aws-eks-example (main*?) $ while true; do curl $(kubectl -n default get svc nginx-classic -o jsonpath='{.status.loadBalancer.ingress[0].hostname}'); sleep 1; done
Pod: nginx-classic-685d479c9f-gzg4r
Pod: nginx-classic-685d479c9f-rpm2j
Pod: nginx-classic-685d479c9f-gzg4r
Pod: nginx-classic-685d479c9f-rpm2j
Pod: nginx-classic-685d479c9f-gzg4r
Pod: nginx-classic-685d479c9f-rpm2j
Pod: nginx-classic-685d479c9f-gzg4r
.... (mình cắt bớt rùi)
^C%                                                                                                                                                                                                                                                                                                                   
coder@coder-tuana9a-terraform-aws-example-0 ~/github.com/tuana9a/aws-eks-example (main*?) $

Ok vậy là load balancer đã hoạt động đúng. Vậy thử triển khai aws load balancer để dùng load balancer mới hơn xem có gì khác biệt nhé

3. Triển khai NEW aws load balancer controller

Cuối cùng thì cũng đến phần quan trọng nhất, triển khai aws load balancer. Theo https://docs.aws.amazon.com/eks/latest/userguide/aws-load-balancer-controller.html thì ý tưởng khi cài aws load balancer vào trong cụm như sau

lbc-overview.png

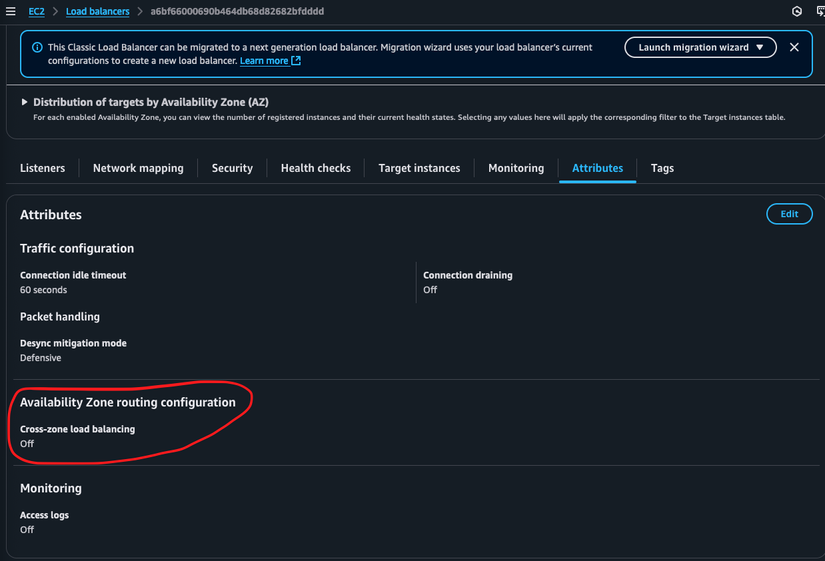
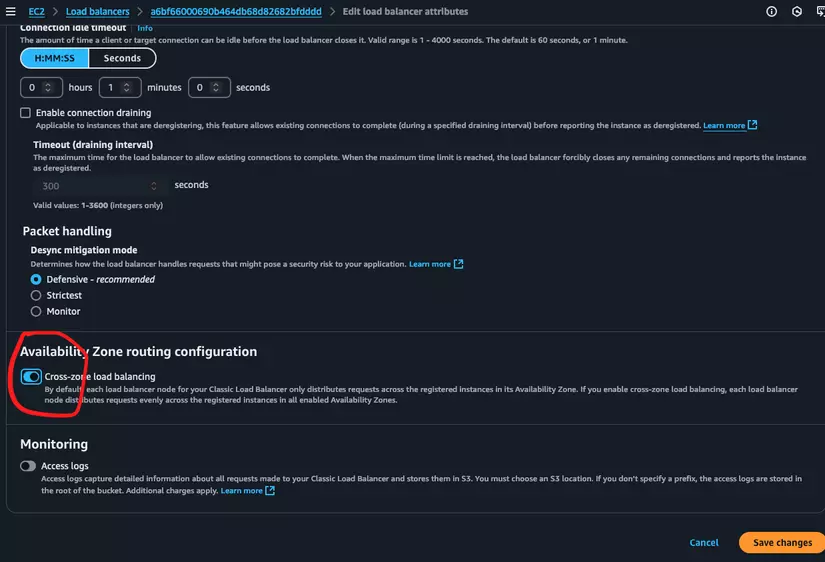
Các bạn để ý trong hình thì aws load balancer "trỏ thẳng" vào pod, nếu như classic mình nêu ở trên thì load balancer không có thông tin của pod và chỉ có thể forward tới toàn bộ worker node. Đây là điểm khác biệt đầu tiên, có thể so sánh ngay: nếu sau này cụm của mình có 100 nodes, 100 nodes này nằm trên các zone khác nhau, và work load của mình chỉ nằm trong 1 vài node, nếu dùng classic load balancer thì traffic sẽ được load balance trên toàn bộ các node dẫn tới nếu traffic khi bị điều hướng không đi được trực tiếp tới node chứa workload thì sẽ đi vào worker node khác và từ worker node này sẽ được điều hướng tới worker node chứa workload đó, như vậy là đi đường "hơi" vòng, về độ trễ chắc chắn sẽ không bằng khi đi trực tiếp rùi.

Nghe cũng xịn sò hơn load balancer classic, giờ thì bắt tay vào triển. Để cài đặt aws-load-balancer-controller vào trong cụm ta cần các bước sau (mình làm theo doc này nhé https://docs.aws.amazon.com/eks/latest/userguide/lbc-helm.html)

  1. Tích hợp oidc của cụm EKS làm iam identity provider (bước này cũng loằng ngoằng và yêu cầu các bạn phải có kiến thức về oidc trước đó, mình sẽ giải thích thêm phía dưới)
  2. Cài đặt aws-load-balancer-controller với helm
  3. Test load balancer mới

3.1. Tích hợp oidc của cụm EKS làm iam identity provider

Đây là bước có lẽ phức tạp nhất nếu mọi người chưa từng nghe về oidc. Mặc dù mình đã hiểu cơ chế hoạt động và luồng logic nhưng lâu lâu nghĩ lại vẫn thấy lú. Các bạn có thể tự tìm hiểu thêm, hoặc nếu có nhiều bạn yêu cầu có lẽ mình sẽ viết một bài chi tiết về luồng và ý tưởng của oidc, và cách áp dụng chúng trong EKS chẳng hạn.

Còn trong bài này thì bạn hiểu cơ bản là oidc giải quyết câu hỏi sau: Giờ cài aws-load-balancer-controller vào trong cụm EKS rồi thì làm sao để pod của aws-load-balancer-controller trong cụm có thể authenticate tự động (không sử dụng static secret) với aws và tạo, sửa, xoá load balancer ngoài cụm EKS?

Ý tưởng là setup aws trust workload (serviceAccount) trong cụm EKS của mình, khi serviceAccount trong cụm EKS gửi yêu cầu tạo load balancer tới aws, serviceAccount đó sẽ chứng minh nó thuộc cụm EKS bằng một thông tin giấy tờ nào đó được ký bởi EKS, khi tới aws do mình đã báo trước aws là tin workload trong cụm EKS bằng setup identity provider rồi nên aws tin serviceAccount trong cụm. AWS sau đó check trong đống rule của mình thấy thằng serviceAccount được map với 1 hoặc nhiều iam roles, aws check role đó có quyền tạo load balancer hay không, nếu có cho qua, nếu không có thì chặn.

Đấy vậy là thằng serviceAccount chỉ cần giới thiệu bản thân và giấy tờ công khai được ký bởi EKS thôi, nó không cần lưu mật khẩu và cũng không cần nói thầm mật khẩu với aws, ...

Cơ bản như vậy giờ setup nhé, aws có viết doc cho vụ này ở đây https://docs.aws.amazon.com/eks/latest/userguide/enable-iam-roles-for-service-accounts.html và mình đã chuyển hoá nó thành code terraform phía dưới, các bạn nếu chưa hiểu có thể tự viết và nghiên cứu thêm, còn mình có thể sẽ hẹn bạn ở bài chi tiết về oidc và tích hợp vào cụm EKS nhé. Giờ các bạn tạo thư mục con oidc trong thư mục EKS kiểu như này

project/
 |--- oidc-provider/ (NEW)
 |      |--- terraform.tf
 |      |--- ...
 |--- terraform.tf
 |--- ...

Tạo file oidc-provider/terraform.tf như sau

terraform {
  required_providers {
    aws = {
      source  = "hashicorp/aws"
      version = "5.24"
    }
    external = {
      source  = "hashicorp/external"
      version = "2.3.4"
    }
  }

  required_version = ">= 1.2.0"
}
provider "aws" {
  region                   = "ap-southeast-1"
  shared_credentials_files = ["~/.aws/credentials"]
  profile                  = "default"
}
provider "external" {
}

Giờ tạo identity provider oidc-provider/oidc-provider.tf, chi tiết giải thích mình sẽ hẹn ở một bài khác nếu nhiều bạn yêu cầu nhé :V

data "external" "eks_thumbprint" {
  program = ["bash", "./scripts/get_eks_thumbprint.sh", data.aws_region.current.name]
}

resource "aws_iam_openid_connect_provider" "eks_two" {
  url = data.aws_eks_cluster.two.identity[0].oidc[0].issuer
  client_id_list = [
    "sts.amazonaws.com",
  ]
  thumbprint_list = [data.external.eks_thumbprint.result.thumbprint]
}

Tạo file oidc-provider/scripts/get_eks_thumbprint.sh với nội dung như sau

#!/bin/bash

# https://github.com/hashicorp/terraform-provider-aws/issues/10104#issuecomment-534466094

aws_region=$1
thumbprint=$(echo | openssl s_client -connect oidc.eks.$aws_region.amazonaws.com:443 2>&- | openssl x509 -fingerprint -noout | sed 's/://g' | awk -F= '{print tolower($2)}')
echo "{\"thumbprint\":\"$thumbprint\"}"

Tạo file oidc-provider/region_current.data.tf file này lấy thông tin region hiện tại

data "aws_region" "current" {
}

Xong rồi thì terraform apply

terraform apply # yes

image.png

Kiểm tra trên aws console

image.png

Lên rồi nè, vậy là đã thành công nhé, giờ có thể cài đặt load balancer controller được rùi

3.2. Cài đặt aws-load-balancer controller

Các bạn lại tạo một thư mục con tương tự oidc-provider như này nhé

project/
 |--- oidc-provider/
 |      |--- terraform.tf
 |      |--- ...
 |--- aws-lb-controller/ (NEW)
 |      |--- terraform.tf
 |      |--- ...
 |--- terraform.tf
 |--- ...

Lại khởi tạo terraform nào aws-lb-controller/terraform.tf

terraform {
  required_providers {
    aws = {
      source  = "hashicorp/aws"
      version = "5.24"
    }
  }
  required_version = ">= 1.2.0"
}
provider "aws" {
  region                   = "ap-southeast-1"
  shared_credentials_files = ["~/.aws/credentials"]
  profile                  = "default"
}

Chuẩn bị namespace cho việc cài đặt EKS như sau

resource "kubernetes_namespace" "aws_lb_controller" {
  metadata {
    name = "aws-lb-controller"
  }
}

À quên, để tạo được namespace cho cụm bằng terraform thì cần setup provider kubernetes và kết nối tới cluster two, các bạn bổ sung aws-lb-controller/terraform.tf như sau

terraform {
  required_providers {
    aws = {
      source  = "hashicorp/aws"
      version = "5.24"
    }
    kubernetes = { # NEW
      source  = "hashicorp/kubernetes"
      version = "2.32.0"
    }
  }
  required_version = ">= 1.2.0"
}

provider "kubernetes" {
  host                   = data.aws_eks_cluster.two.endpoint
  cluster_ca_certificate = base64decode(data.aws_eks_cluster.two.certificate_authority[0].data)
  token                  = data.aws_eks_cluster_auth.two.token
}

trong đó thông tin authen với cụm EKS two sẽ được để trong file aws-lb-controller/eks-cluster_two.data.tf với nội dung như này

data "aws_eks_cluster" "two" {
  name = "two"
}

data "aws_eks_cluster_auth" "two" {
  name = "two"
}

Ok giờ cài đặt aws load balancer controller bằng helm terraform được rồi

aws-lb-controller/aws-lb-controller.tf

resource "helm_release" "aws_lb_controller" {
  name       = "aws-load-balancer-controller"
  namespace  = kubernetes_namespace.aws_lb_controller.metadata[0].name
  chart      = "aws-load-balancer-controller"
  repository = "https://aws.github.io/eks-charts"
  version    = "1.8.4"

  set {
    name  = "region"
    value = data.aws_region.current.name
  }
  set {
    name  = "vpcId"
    value = data.aws_vpc.two.id
  }
  set {
    name  = "clusterName"
    value = data.aws_eks_cluster.two.name
  }
  set {
    name  = "serviceAccount.create"
    value = "false"
  }
  set {
    name  = "serviceAccount.name"
    value = kubernetes_service_account.aws_lb_controller.metadata[0].name
  }
}

Đấy lại một đống thứ cần phải giải thích: Mình tạo terraform resource helm_release để cài aws-load-balancer-controller vào cụm eks two:

  • các thông tin chart name, repository và version là bê từ doc của aws ra nhé
  • helm_releasenamespace lấy từ kubernetes_namespace.aws_lb_controller đã setup trước đó thông qua trường metadata: .metadata[0].name
  • helm_release set value region = region hiện tại = data.aws_region.current.name, cái này chưa có
  • helm_release set value vpcId = vpc two = data.aws_vpc.two.id, cái này chưa có
  • helm_release set value clusterName = tên cụm EKS two của mình thông qua data.aws_eks_cluster.two.name, cái này setup rồi
  • helm_release set value serviceAccount.create = false vì mình sẽ tự tạo k8s service account và gắn quyền phía dưới
  • helm_release set value serviceAccount.name = kubernetes_service_account.aws_lb_controller.metadata[0].name, chưa có, mình sẽ tạo service account phía dưới, tương tự tạo namespace phía trên

Vậy chúng ta còn thiếu:

  • helm provider để dùng helm_release
  • data.aws_region.current
  • data.aws_vpc.two
  • kubernetes_service_account.aws_lb_controller và setup quyền cho service account

Với setup helm provider chúng ta lại bổ sung vào aws-lb-controller/terraform.tf như sau

terraform {
  required_providers {
    aws = {
      source  = "hashicorp/aws"
      version = "5.24"
    }
    kubernetes = {
      source  = "hashicorp/kubernetes"
      version = "2.32.0"
    }
    helm = { # NEW
      source  = "hashicorp/helm"
      version = "2.15.0"
    }
  }
  required_version = ">= 1.2.0"
}

sau đó add provider helm như sau, helm cần authen vào cụm eks two, do vậy cũng tương tự provider kubernetes

provider "helm" {
  kubernetes {
    host                   = data.aws_eks_cluster.two.endpoint
    cluster_ca_certificate = base64decode(data.aws_eks_cluster.two.certificate_authority[0].data)
    token                  = data.aws_eks_cluster_auth.two.token
  }
}

tiếp đến data.aws_region.current, tạo file mới aws-lb-controller/region_current.data.tf với nội dung sau

data "aws_region" "current" {
}

tiếp data.aws_vpc.two, tạo file mới aws-lb-controller/vpc_two.data.tf với nội dung

data "aws_vpc" "two" {
  tags = { Name = "two" }
}

lại đến phần phức tạp kubernetes_service_account.aws_lb_controller và setup quyền cho nó, tạo một file riêng aws-lb-controller/service-account.tf

resource "kubernetes_service_account" "aws_lb_controller" {
  metadata {
    name      = "aws-lb-controller"
    namespace = kubernetes_namespace.aws_lb_controller.metadata[0].name
    annotations = {
      "eks.amazonaws.com/role-arn" = aws_iam_role.aws_lb_controller.arn
    }
  }
}

service account này

đây này giờ phức tạp, giờ phải đi setup iam role với iam policy để load balancer controller có thể claim được role đó nè. tạo file mới aws-lb-controller/iam.tf

đầu tiên là policy cho aws load balancer controller, cái này định nghĩa toàn bộ quyền để tạo, sửa, xoá load balancer.

resource "aws_iam_policy" "aws_lb_controller" {
  name = "AWSLoadBalancerControllerIAMPolicy"

  policy = file("./templates/iam-policy.json")
}

về nội dung của ./templates/iam-policy.json mình bê y nguyên từ github của aws load balancer controller https://raw.githubusercontent.com/kubernetes-sigs/aws-load-balancer-controller/v2.9.0/docs/install/iam_policy.json

các bạn tạo file ở đường dẫn này aws-lb-controller/templates/iam-policy.json rồi paste nội dung vào file này, kiểu

curl https://raw.githubusercontent.com/kubernetes-sigs/aws-load-balancer-controller/v2.9.0/docs/install/iam_policy.json -o ./templates/iam-policy.json

mình về lại file aws-lb-controller/iam.tf để bổ sung iam role

resource "aws_iam_role" "aws_lb_controller" {
  name                = "AmazonEKSLoadBalancerControllerRole"
  managed_policy_arns = [aws_iam_policy.aws_lb_controller.arn]

  assume_role_policy = templatefile("./templates/iam-trust-policy.json", {
    account_id      = data.aws_caller_identity.current.account_id
    namespace       = kubernetes_namespace.aws_lb_controller.metadata[0].name
    service_account = "aws-lb-controller"
    oidc_provider   = replace(data.aws_eks_cluster.two.identity[0].oidc[0].issuer, "https://", "")
  })
}

iam role gắn với policy thông qua trường managed_policy_arns với giá trị là mảng arns chứa [aws_iam_policy.aws_lb_controller.arn] ở trên

lại đến phần phức tạp assume_role_policy cấu hình "rule" để cho phép service account aws-lb-controller claim được iam role AmazonEKSLoadBalancerControllerRole ở đây mình cũng tạo một file template ./templates/iam-trust-policy.json với nội dung như sau

{
  "Version": "2012-10-17",
  "Statement": [
    {
      "Effect": "Allow",
      "Principal": {
        "Federated": "arn:aws:iam::${account_id}:oidc-provider/${oidc_provider}"
      },
      "Action": "sts:AssumeRoleWithWebIdentity",
      "Condition": {
        "StringEquals": {
          "${oidc_provider}:aud": "sts.amazonaws.com",
          "${oidc_provider}:sub": "system:serviceaccount:${namespace}:${service_account}"
        }
      }
    }
  ]
}

Mình lười giải thích quá, chắc để bài chi tiết oidc + eks hẹn từ đầu phần này tới giờ nhé, có một vài giá trị như oidc_provider, namespace, service_account là các bạn biết đuổi hình bắt chữ rồi nhé :V

  assume_role_policy = templatefile("./templates/iam-trust-policy.json", {
    account_id      = data.aws_caller_identity.current.account_id
    namespace       = kubernetes_namespace.aws_lb_controller.metadata[0].name
    service_account = "aws-lb-controller"
    oidc_provider   = replace(data.aws_eks_cluster.two.identity[0].oidc[0].issuer, "https://", "")
  })

Còn một cái cuối cho setup quyền thôi data.aws_caller_identity.current thì đây

account_current.data.tf

data "aws_caller_identity" "current" {
}

xong, giờ thì apply được rồi

terraform apply # yes

Chờ một lúc

image.png

Ok thành công luôn nè, tét thử vài đường với kubectl

coder@coder-tuana9a-terraform-aws-example-0 ~/github.com/tuana9a/aws-eks-example/two/aws-lb-controller (main*?) $ kubectl get ns                                                                                              
NAME                STATUS   AGE
aws-lb-controller   Active   23m
default             Active   36h
kube-node-lease     Active   36h
kube-public         Active   36h
kube-system         Active   36h
coder@coder-tuana9a-terraform-aws-example-0 ~/github.com/tuana9a/aws-eks-example/two/aws-lb-controller (main*?) $ kubectl -n aws-lb-controller get pods              
NAME                                            READY   STATUS    RESTARTS   AGE
aws-load-balancer-controller-787b9774fc-6865m   1/1     Running   0          23m
aws-load-balancer-controller-787b9774fc-d4j8k   1/1     Running   0          23m
coder@coder-tuana9a-terraform-aws-example-0 ~/github.com/tuana9a/aws-eks-example/two/aws-lb-controller (main*?) $

Ổn, các bạn nghỉ ngơi một chút, chúng ta vừa đi qua phần khó nhất của bài này rồi.

Nghỉ xong thì ta lại tiếp tục nhé, giờ tạo lại load balancer xem có gì hot ko

test-new-lb.yaml

apiVersion: apps/v1
kind: Deployment
metadata:
  name: nginx-new
  namespace: default
spec:
  replicas: 1
  selector:
    matchLabels:
      app: nginx-new
  template:
    metadata:
      labels:
        app: nginx-new
    spec:
      containers:
        - name: nginx
          image: nginx
          ports:
            - containerPort: 80
---
apiVersion: v1
kind: Service
metadata:
  name: nginx-new
  namespace: default
spec:
  type: LoadBalancer
  ports:
    - port: 80
      targetPort: 80
      protocol: TCP
  selector:
    app: nginx-new
kubectl apply -f test-new-lb.yaml

Chờ một lúc, sau đó get service xem sao kubectl -n default get svc

coder@coder-tuana9a-terraform-aws-example-0 ~/github.com/tuana9a/aws-eks-example (main*?) $ kubectl -n default get svc
NAME            TYPE           CLUSTER-IP      EXTERNAL-IP                                                                    PORT(S)        AGE
kubernetes      ClusterIP      172.20.0.1      <none>                                                                         443/TCP        37h
nginx-classic   LoadBalancer   172.20.247.13   a04bb179e2cd6497595edd32700440ab-2007751285.ap-southeast-1.elb.amazonaws.com   80:31088/TCP   36h
nginx-new       LoadBalancer   172.20.82.98    <pending>                                                                      80:32155/TCP   98s
coder@coder-tuana9a-terraform-aws-example-0 ~/github.com/tuana9a/aws-eks-example (main*?) $ kubectl -n default get svc
NAME            TYPE           CLUSTER-IP      EXTERNAL-IP                                                                    PORT(S)        AGE
kubernetes      ClusterIP      172.20.0.1      <none>                                                                         443/TCP        37h
nginx-classic   LoadBalancer   172.20.247.13   a04bb179e2cd6497595edd32700440ab-2007751285.ap-southeast-1.elb.amazonaws.com   80:31088/TCP   36h
nginx-new       LoadBalancer   172.20.82.98    <pending>                                                                      80:32155/TCP   112s
coder@coder-tuana9a-terraform-aws-example-0 ~/github.com/tuana9a/aws-eks-example (main*?) $ kubectl -n default get svc
NAME            TYPE           CLUSTER-IP      EXTERNAL-IP                                                                    PORT(S)        AGE
kubernetes      ClusterIP      172.20.0.1      <none>                                                                         443/TCP        37h
nginx-classic   LoadBalancer   172.20.247.13   a04bb179e2cd6497595edd32700440ab-2007751285.ap-southeast-1.elb.amazonaws.com   80:31088/TCP   36h
nginx-new       LoadBalancer   172.20.82.98    <pending>                                                                      80:32155/TCP   114s
coder@coder-tuana9a-terraform-aws-example-0 ~/github.com/tuana9a/aws-eks-example (main*?) $ kubectl -n default get svc
NAME            TYPE           CLUSTER-IP      EXTERNAL-IP                                                                    PORT(S)        AGE
kubernetes      ClusterIP      172.20.0.1      <none>                                                                         443/TCP        37h
nginx-classic   LoadBalancer   172.20.247.13   a04bb179e2cd6497595edd32700440ab-2007751285.ap-southeast-1.elb.amazonaws.com   80:31088/TCP   36h
nginx-new       LoadBalancer   172.20.82.98    <pending>                                                                      80:32155/TCP   117s
coder@coder-tuana9a-terraform-aws-example-0 ~/github.com/tuana9a/aws-eks-example (main*?) $

kỳ lạ là sau một hồi mình get service vẫn bị pending, thử describe service xem sao

coder@coder-tuana9a-terraform-aws-example-0 ~/github.com/tuana9a/aws-eks-example (main*?) $ kubectl -n default describe svc nginx-new          
Name:                     nginx-new
Namespace:                default
Labels:                   <none>
Annotations:              <none>
Selector:                 app=nginx
Type:                     LoadBalancer
IP Family Policy:         SingleStack
IP Families:              IPv4
IP:                       172.20.82.98
IPs:                      172.20.82.98
Port:                     <unset>  80/TCP
TargetPort:               80/TCP
NodePort:                 <unset>  32155/TCP
Endpoints:                10.0.3.167:80,10.0.3.76:80,10.0.4.241:80
Session Affinity:         None
External Traffic Policy:  Cluster
Events:
  Type     Reason            Age    From     Message
  ----     ------            ----   ----     -------
  Warning  FailedBuildModel  3m41s  service  Failed build model due to unable to resolve at least one subnet (0 match VPC and tags: [kubernetes.io/role/internal-elb])

Ồ lỗi: Failed build model due to unable to resolve at least one subnet (0 match VPC and tags: [kubernetes.io/role/internal-elb]), mình tìm được link này Prerequisites, đại loại thì cần chỉ định subnetId bằng annotation vào kube service ở trên, hoặc có thể để aws lb controller tự động detect subnets thì cần đánh tag cho subnet với syntax sau, (chi tiết hơn các bạn đọc ở link đó nhé)

  • public subnet: "kubernetes.io/role/elb" = "1"
  • private subet: "kubernetes.io/role/internal-elb" = "1"

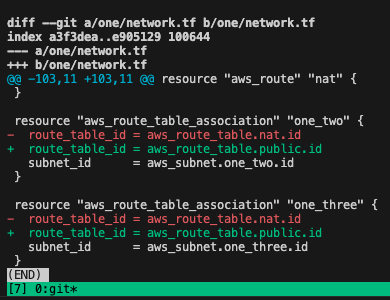
Giờ lại sửa network.tf phần subnet nào

public subnet two1 thêm tag "kubernetes.io/role/elb" = "1"

resource "aws_subnet" "two1" {
  vpc_id            = aws_vpc.two.id
  cidr_block        = "10.0.1.0/24"
  availability_zone = "ap-southeast-1a"

  map_public_ip_on_launch = true

  tags = {
    Name = "two1"

    "kubernetes.io/role/elb" = "1" # NEW
  }
}

public subnet two2 thêm tag "kubernetes.io/role/elb" = "1"

resource "aws_subnet" "two2" {
  vpc_id            = aws_vpc.two.id
  cidr_block        = "10.0.2.0/24"
  availability_zone = "ap-southeast-1b"

  map_public_ip_on_launch = true

  tags = {
    Name = "two2"

    "kubernetes.io/role/elb" = "1" # NEW
  }
}

private subnet two3 thêm tag "kubernetes.io/role/internal-elb" = "1"

resource "aws_subnet" "two3" {
  vpc_id            = aws_vpc.two.id
  cidr_block        = "10.0.3.0/24"
  availability_zone = "ap-southeast-1a"

  map_public_ip_on_launch = false

  tags = {
    Name = "two3"

    "kubernetes.io/role/internal-elb" = "1" # NEW
  }
}

private subnet two4 thêm tag "kubernetes.io/role/internal-elb" = "1"

resource "aws_subnet" "two4" {
  vpc_id            = aws_vpc.two.id
  cidr_block        = "10.0.4.0/24"
  availability_zone = "ap-southeast-1b"

  map_public_ip_on_launch = false

  tags = {
    Name = "two4"

    "kubernetes.io/role/internal-elb" = "1" # NEW
  }
}
terraform apply # yes

Các bạn có thể chờ để aws-lb-controller reconcile service, mỗi interval là 15p, để cho nhanh các bạn có thể xoá kubectl delete -f test-new-lb.yaml rồi apply lại kubectl apply -f test-new-lb.yaml

Test lại

coder@coder-tuana9a-terraform-aws-example-0 ~/github.com/tuana9a/aws-eks-example (main*?) $ kubectl -n default describe svc nginx-new
Name:                     nginx-new
Namespace:                default
Labels:                   <none>
Annotations:              <none>
Selector:                 app=nginx
Type:                     LoadBalancer
IP Family Policy:         SingleStack
IP Families:              IPv4
IP:                       172.20.82.98
IPs:                      172.20.82.98
LoadBalancer Ingress:     k8s-default-nginxnew-8cde4917a0-0d3a9f4953b05ff6.elb.ap-southeast-1.amazonaws.com
Port:                     <unset>  80/TCP
TargetPort:               80/TCP
NodePort:                 <unset>  32155/TCP
Endpoints:                10.0.3.167:80,10.0.3.76:80,10.0.4.241:80
Session Affinity:         None
External Traffic Policy:  Cluster
Events:
  Type     Reason                  Age                From     Message
  ----     ------                  ----               ----     -------
  Warning  FailedBuildModel        17m (x2 over 31m)  service  Failed build model due to unable to resolve at least one subnet (0 match VPC and tags: [kubernetes.io/role/internal-elb])
  Normal   SuccessfullyReconciled  28s                service  Successfully reconciled
coder@coder-tuana9a-terraform-aws-example-0 ~/github.com/tuana9a/aws-eks-example (main*?) $ kubectl -n default get svc nginx-new                                                             
NAME        TYPE           CLUSTER-IP     EXTERNAL-IP                                                                         PORT(S)        AGE
nginx-new   LoadBalancer   172.20.82.98   k8s-default-nginxnew-8cde4917a0-0d3a9f4953b05ff6.elb.ap-southeast-1.amazonaws.com   80:32155/TCP   32m

UP ⬆️ thử truy cập xem nào

curl k8s-default-nginxnew-8cde4917a0-0d3a9f4953b05ff6.elb.ap-southeast-1.amazonaws.com

Lâu vãi chưởng, thử vài lần vẫn không được

image.png

Nguyên nhân thì do đây là internal lb

image.png

bảo sao lúc chưa tag subnet thì thằng aws lb controller kêu tìm tag internal-elb (0 match VPC and tags: [kubernetes.io/role/internal-elb]

Hoá ra mình cần thêm một vài annotation cho kube service của mình, các annotation hỗ trợ ở đây https://kubernetes-sigs.github.io/aws-load-balancer-controller/v2.8/guide/service/annotations/

Giờ thì thêm annotation service.beta.kubernetes.io/aws-load-balancer-scheme: "internet-facing" tại mặc định giá trị của nó là "internal"

test-new-lb-v2.yaml

apiVersion: apps/v1
kind: Deployment
metadata:
  name: nginx-new
  namespace: default
spec:
  replicas: 1
  selector:
    matchLabels:
      app: nginx-new
  template:
    metadata:
      labels:
        app: nginx-new
    spec:
      containers:
        - name: nginx
          image: nginx
          ports:
            - containerPort: 80
---
apiVersion: v1
kind: Service
metadata:
  name: nginx-new
  namespace: default
  annotations:
    service.beta.kubernetes.io/aws-load-balancer-scheme: "internet-facing" # NEW
spec:
  type: LoadBalancer
  ports:
    - port: 80
      targetPort: 80
      protocol: TCP
  selector:
    app: nginx-new

Giờ apply lại xem sao

kubectl apply -f test-new-lb-v2.yaml
coder@coder-tuana9a-terraform-aws-example-0 ~/github.com/tuana9a/aws-eks-example (main*?) $ curl $(kubectl -n default get svc nginx-new -o jsonpath='{.status.loadBalancer.ingress[0].hostname}')
<!DOCTYPE html>
<html>
<head>
<title>Welcome to nginx!</title>
<style>
html { color-scheme: light dark; }
body { width: 35em; margin: 0 auto;
font-family: Tahoma, Verdana, Arial, sans-serif; }
</style>
</head>
<body>
<h1>Welcome to nginx!</h1>
<p>If you see this page, the nginx web server is successfully installed and
working. Further configuration is required.</p>

<p>For online documentation and support please refer to
<a href="http://nginx.org/">nginx.org</a>.<br/>
Commercial support is available at
<a href="http://nginx.com/">nginx.com</a>.</p>

<p><em>Thank you for using nginx.</em></p>
</body>
</html>

được rồi nè, giờ xem chi tiết load balancer xem sao

image.png

Thấy có thêm target group, không khác classic lắm, à cái tab Resource map - new giờ visualize được traffic đi như nào, nhìn cũng tiện.

image.png

Cơ mà load balancer này vẫn forward tới instance ở NodePort chả khác gì cái classic, hmm, thiếu gì ta?

... (An hour later)

Tìm được rồi https://kubernetes-sigs.github.io/aws-load-balancer-controller/v2.8/guide/service/annotations/#nlb-target-type

service.beta.kubernetes.io/aws-load-balancer-nlb-target-type

instance mode will route traffic to all EC2 instances within cluster on the NodePort opened for your service. The kube-proxy on the individual worker nodes sets up the forwarding of the traffic from the NodePort to the pods behind the service.

ip mode will route traffic directly to the pod IP. In this mode, AWS NLB sends traffic directly to the Kubernetes pods behind the service, eliminating the need for an extra network hop through the worker nodes in the Kubernetes cluster.

và mặc định

If you configure spec.loadBalancerClass, the controller defaults to instance target type

Lại thêm annotation nào

test-new-lb-v3.yaml

apiVersion: apps/v1
kind: Deployment
metadata:
  name: nginx-new
  namespace: default
spec:
  replicas: 1
  selector:
    matchLabels:
      app: nginx-new
  template:
    metadata:
      labels:
        app: nginx-new
    spec:
      containers:
        - name: nginx
          image: nginx
          ports:
            - containerPort: 80
---
apiVersion: v1
kind: Service
metadata:
  name: nginx-new
  namespace: default
  annotations:
    service.beta.kubernetes.io/aws-load-balancer-scheme: "internet-facing"
    service.beta.kubernetes.io/aws-load-balancer-nlb-target-type: "ip" # NEW
spec:
  type: LoadBalancer
  ports:
    - port: 80
      targetPort: 80
      protocol: TCP
  selector:
    app: nginx-new
kubectl apply -f test-new-lb-v3.yaml

Ngon r nè

image.png

Giờ trỏ thằng vào pod luôn, không còn 2 instance như trước nữa

Đúng ip của pod luôn

image.png

4. Tổng kết

Xong rồi, xong thật rồi, các bạn vừa setup aws load balancer controller thành công và tận dụng được các công nghệ xịn mới nhất về load balanacer vào cụm EKS của mình. Từ cái này các bạn có thể setup ingress cho cụm và ...

Bài thì dài, chuẩn bị thì siêu tốn công, mình thì khi nào rảnh mới viết được, cảm ơn các bạn đã đọc tới dòng này, mình sẽ cố gắng viết bài tiếp theo là triển khai autoscaling cho cụm EKS nhé.

5. Bonus: challenge

Các bạn còn nhớ mình có lưu ý việc setup network ở đầu bài viết ko

4 subnet với 4 dải ip khác nhau, nằm trên 2 availability zone, mỗi availability zone chứa 2 subnet: 1 public, 1 private

Câu 1: Mỗi availability zone phải cần 1 public subnet và 1 private subnet để triển khai load balancer có đúng không?

Câu 2: Để load balancer forward trực tiếp traffic vào pod có yêu cầu thêm gì không?

Câu 3: Sau khi đã cài aws lb controller rồi nhưng vẫn muốn dùng legacy (classic) load balancer có được không?

Mong nhận được câu trả lời phía dưới của mọi người =)) nếu không ai trả lời được thì ...


All rights reserved

Viblo
Hãy đăng ký một tài khoản Viblo để nhận được nhiều bài viết thú vị hơn.
Đăng kí