Tạo animation bằng ContraintLayout và ContraintSet
Bài đăng này đã không được cập nhật trong 7 năm
Việc sử dụng các animations độc đáo vào trong ứng dụng luôn mang lại cho ta cảm giác thích thú nhưng đôi khi việc tạo ra được chúng lại khá phức tạp và khiến bạn phải nản lòng. Hôm nay, mình sẽ chia sẽ với các bạn cách tạo ra một animation rất tuyệt nhưng chỉ với vài dòng code đơn giản bằng cách sử dụng ContraintLayout và ContraintSet
Ý tưởng
Cách làm ở đây là chúng ta sẽ tạo ra 2 file layouts, một file cho giao diện mặc định bằng đầu và một file cho việc thực hiện aniamtion. Hãy xem animation thực hiện như thế nào: Khi chúng ta click vào màn hình với layout mặc định thì nó sẽ tự chuyển sang layout chứa thông tin chi tiết với hiệu ứng động và liền mạch.
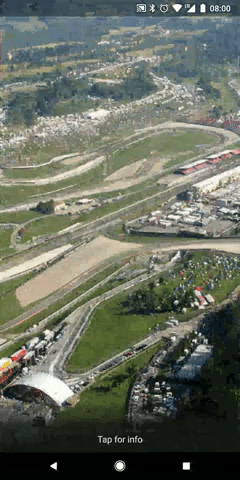
Animation ở đây được tạo ra bởi hay file layouts: circuit.xml và circuit_detail.xml
Thực hiện
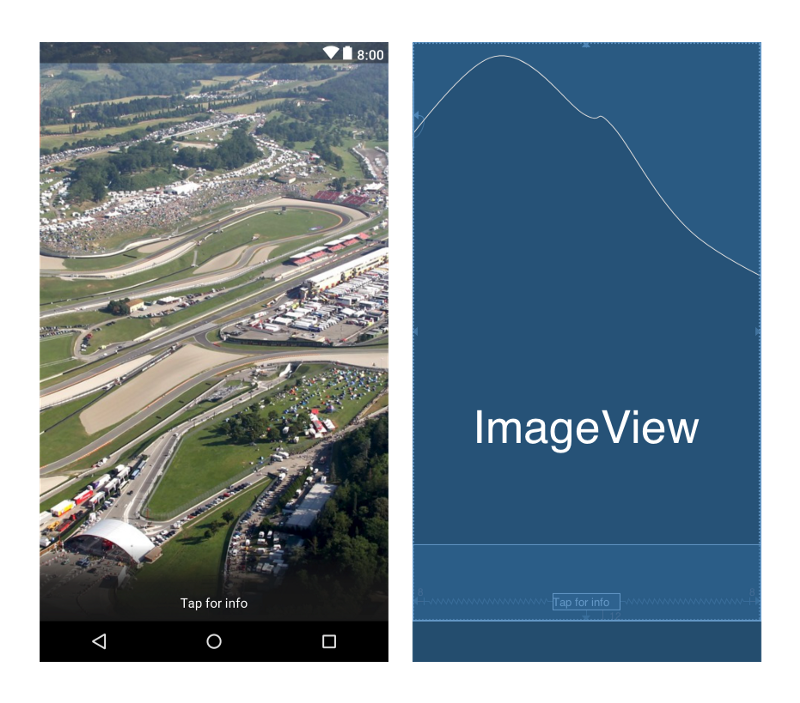
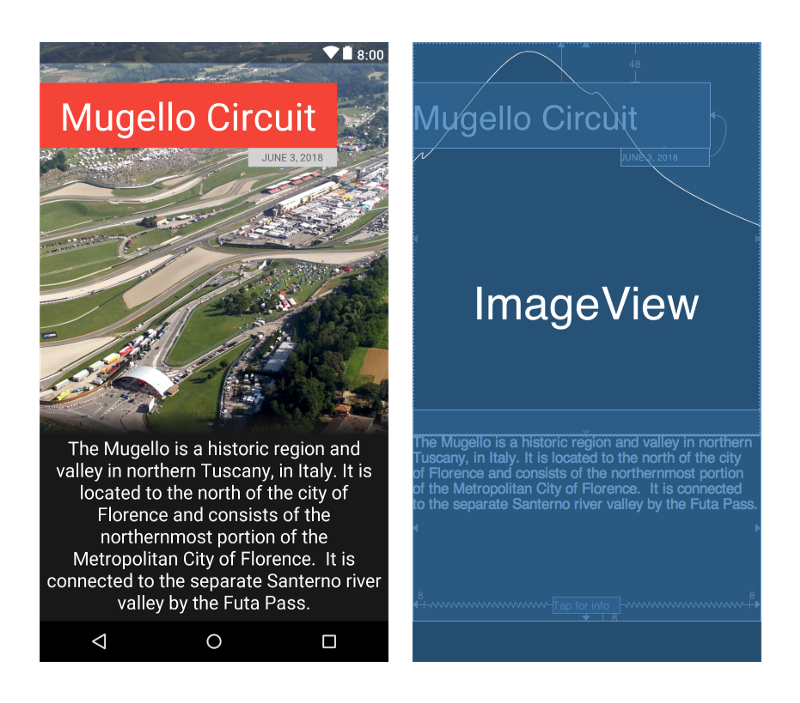
Như bạn thấy thì 2 layout khá tương đồng, điểm khác biệt là cả hai màn hình có cùng các view nhưng vị trí các view lại được bố trí khác nhau. Ở layout đầu tiên, các view thông tin được đặt ra khỏi màn hình và khi chuyển sang màn hình thứ hai thì các view này sẽ di chuyển vào vị trí mà nó được bố trí.
Layout 1: circuit.xml
Code XML:
<?xml version="1.0" encoding="utf-8"?>
<android.support.constraint.ConstraintLayout
    android:id="@+id/constraint"
    xmlns:android="http://schemas.android.com/apk/res/android"
    xmlns:app="http://schemas.android.com/apk/res-auto"
    xmlns:tools="http://schemas.android.com/tools"
    android:layout_width="match_parent"
    android:layout_height="match_parent"
    android:background="#181818"
    tools:context=".MainActivity">

    <ImageView
        android:id="@+id/backgroundImage"
        android:layout_width="0dp"
        android:layout_height="0dp"
        android:src="@drawable/mugello"
        android:scaleType="centerCrop"
        app:layout_constraintBottom_toBottomOf="parent"
        app:layout_constraintLeft_toLeftOf="parent"
        app:layout_constraintRight_toRightOf="parent"
        app:layout_constraintTop_toTopOf="parent"/>

    <TextView
        android:layout_width="wrap_content"
        android:layout_height="wrap_content"
        android:text="JUNE 3, 2018"
        app:layout_constraintRight_toRightOf="@+id/title"
        app:layout_constraintBottom_toBottomOf="@+id/title"
        android:textSize="12sp"
        android:background="#d3d3d3"
        android:paddingStart="16dp"
        android:paddingEnd="16dp"
        android:paddingTop="3dp"
        android:paddingBottom="3dp"/>

    <TextView
        android:id="@+id/title"
        android:layout_width="wrap_content"
        android:layout_height="wrap_content"
        android:layout_marginTop="48dp"
        android:background="#F44336"
        android:paddingBottom="8dp"
        android:paddingEnd="24dp"
        android:paddingStart="24dp"
        android:paddingTop="8dp"
        android:text="Mugello Circuit"
        android:textColor="#FFFF"
        android:textSize="45sp"
        app:layout_constraintRight_toLeftOf="@+id/backgroundImage"
        app:layout_constraintTop_toTopOf="parent" />

    <View
        android:id="@+id/fadeBackgroudView"
        android:layout_width="wrap_content"
        android:layout_height="90dp"
        android:foreground="@drawable/gradient_variant"
        app:layout_constraintBottom_toTopOf="@+id/description" />

    <TextView
        android:id="@+id/tap"
        android:layout_width="wrap_content"
        android:layout_height="wrap_content"
        android:layout_marginBottom="12dp"
        android:layout_marginEnd="8dp"
        android:layout_marginStart="8dp"
        android:text="Tap for info"
        android:textSize="15sp"
        android:textColor="#ffffff"
        app:layout_constraintBottom_toBottomOf="parent"
        app:layout_constraintEnd_toEndOf="parent"
        app:layout_constraintStart_toStartOf="parent" />

    <TextView
        android:id="@+id/description"
        android:layout_width="wrap_content"
        android:layout_height="wrap_content"
        android:text="The Mugello is a historic region and valley in northern Tuscany, in Italy. It is located to the north of the city of Florence and consists of the northernmost portion of the Metropolitan City of Florence.  It is connected to the separate Santerno river valley by the Futa Pass."
        android:textSize="22sp"
        android:textColor="#FFFF"
        android:background="#181818"
        android:gravity="center"
        android:paddingStart="8dp"
        android:paddingEnd="8dp"
        android:paddingBottom="8dp"
        app:layout_constraintTop_toBottomOf="@+id/backgroundImage"
        app:layout_constraintLeft_toLeftOf="parent"
        app:layout_constraintRight_toRightOf="parent"/>

</android.support.constraint.ConstraintLayout>
Layout 2: circuit_detail.xml
Code XML:
<?xml version="1.0" encoding="utf-8"?>
<android.support.constraint.ConstraintLayout xmlns:android="http://schemas.android.com/apk/res/android"
    xmlns:app="http://schemas.android.com/apk/res-auto"
    xmlns:tools="http://schemas.android.com/tools"
    android:layout_width="match_parent"
    android:layout_height="match_parent"
    tools:context=".MainActivity">

    <ImageView
        android:id="@+id/backgroundImage"
        android:layout_width="0dp"
        android:layout_height="0dp"
        android:scaleType="centerCrop"
        android:src="@drawable/mugello"
        app:layout_constraintBottom_toTopOf="@+id/description"
        app:layout_constraintLeft_toLeftOf="parent"
        app:layout_constraintRight_toRightOf="parent"
        app:layout_constraintTop_toTopOf="parent" />

    <TextView
        android:id="@+id/title"
        android:layout_width="wrap_content"
        android:layout_height="wrap_content"
        android:layout_marginTop="48dp"
        android:background="#F44336"
        android:paddingBottom="8dp"
        android:paddingEnd="24dp"
        android:paddingStart="24dp"
        android:paddingTop="8dp"
        android:text="Mugello Circuit"
        android:textColor="#FFFF"
        android:textSize="45sp"
        app:layout_constraintLeft_toLeftOf="parent"
        app:layout_constraintTop_toTopOf="parent" />

    <TextView
        android:layout_width="wrap_content"
        android:layout_height="wrap_content"
        android:text="JUNE 3, 2018"
        app:layout_constraintRight_toRightOf="@+id/title"
        app:layout_constraintTop_toBottomOf="@+id/title"
        android:textSize="12sp"
        android:background="#d3d3d3"
        android:paddingStart="16dp"
        android:paddingEnd="16dp"
        android:paddingTop="3dp"
        android:paddingBottom="3dp"/>

    <View
        android:id="@+id/fadeBackgroudView"
        android:layout_width="wrap_content"
        android:layout_height="30dp"
        android:foreground="@drawable/gradient"
        app:layout_constraintBottom_toTopOf="@+id/description" />

    <TextView
        android:id="@+id/tap"
        android:layout_width="wrap_content"
        android:layout_height="wrap_content"
        android:layout_marginBottom="8dp"
        android:layout_marginEnd="8dp"
        android:layout_marginStart="8dp"
        android:text="Tap for info"
        android:textSize="15sp"
        android:textColor="#ffffff"
        app:layout_constraintBottom_toBottomOf="parent"
        app:layout_constraintEnd_toEndOf="parent"
        app:layout_constraintStart_toStartOf="parent" />
    <TextView
        android:id="@+id/description"
        android:layout_width="wrap_content"
        android:layout_height="wrap_content"
        android:text="The Mugello is a historic region and valley in northern Tuscany, in Italy. It is located to the north of the city of Florence and consists of the northernmost portion of the Metropolitan City of Florence.  It is connected to the separate Santerno river valley by the Futa Pass."
        android:textSize="22sp"
        android:textColor="#FFFF"
        android:gravity="center"
        android:background="#181818"
        android:paddingStart="8dp"
        android:paddingEnd="8dp"
        android:paddingBottom="8dp"
        app:layout_constraintBottom_toBottomOf="parent"
        app:layout_constraintLeft_toLeftOf="parent"
        app:layout_constraintRight_toRightOf="parent"/>
</android.support.constraint.ConstraintLayout>
Sau khi đã có hai file layout, bây giờ chúng ta sẽ tạo animation giữa hai layout này bằng ContraintSet.
Đầu tiên, chúng ta cần phải tạo một instance của ContraintSet để chúng ta có thể clone các constraints của layout thứ hai (circuit_detail.xml) bằng cách gọi phương thức clone().
ConstraintSet constraintSet = new ConstraintSet();
constraintSet.clone(this, R.layout.circuit_detail);
Vậy, ConstraintSet là gì? class này sẽ cho phép chúng ta định nghĩa một tập các constraints được sử dụng với ConstraintLayout và lưu trữ trạng thái của chúng để apply vào một ConstraintLayout khác.
TIếp theo, chúng ta sẽ tạo một transition object:
Transition transition = new ChangeBound();
transition.setInterpolator(new AnticipateOvershootInterpolator(1.0f));
transition.setDuration(1000);
Và cuối cùng là sử dụng TransitionManager để chạy animation:
TransitionManager.beginDelayedTransition(constraintLayout, transition);
constraintSet.applyTo(constraintLayout);
MainActivity.java:
public class MainActivity extends AppCompatActivity {
    private boolean show;
    private ImageView backgroundImage;
    private ConstraintLayout constraintLayout;

    @Override
    public void onCreate(Bundle savedInstanceState) {
        super.onCreate(savedInstanceState);
        setContentView(R.layout.activity_main);

        constraintLayout = findViewById(R.id.constraint);
        backgroundImage = findViewById(R.id.backgroundImage);
        ConstraintSet constraintSet = new ConstraintSet();
        backgroundImage.setOnClickListener(new View.OnClickListener() {
            @Override
            public void onClick(View view) {
                if(show)
                    hideComponents(); // if the animation is shown, we hide back the views
                else
                    showComponents() ;// if the animation is NOT shown, we animate the views
            }

        });

    }

    private void showComponents(){
        show = true;
        constraintSet.clone(this, R.layout.activity_main_detail);
        Transition transition = new ChangeBounds();
        transition.setInterpolator(new AnticipateOvershootInterpolator(1.0f));
        transition.setDuration(1000);
        TransitionManager.beginDelayedTransition(constraintLayout, transition);
        constraintSet.applyTo(constraintLayout);
    }

    private void hideComponents(){
        show = false;
        constraintSet.clone(this, R.layout.activity_main);
        Transition transition = new ChangeBounds();
        transition.setInterpolator(new AnticipateOvershootInterpolator(1.0f));
        transition.setDuration(1000);
        TransitionManager.beginDelayedTransition(constraintLayout, transition);
        constraintSet.applyTo(constraintLayout);
    }
}
All rights reserved
