Scan QR/Barcode với ZXing Android Embedded (journeyapps/zxing-android-embedded) trong Android
Bài đăng này đã không được cập nhật trong 4 năm
ZXing Android Embedded là một thư viện được phát triển dựa trên Zxing. Chi tiết về cách sử dụng thì bạn có thể xem tại đây.
Đặc điểm:
- Có thể được khởi tạo thông qua Intents => đơn giản sử dụng.
- Có thể được nhúng vào 1 Activity, thuận tiện cho việc custom lại UI và logic.
- Chế độ scan có thể thay đổi theo chiều ngang/dọc
- Camera được quản lý trong background thread, thời gian khởi động nhanh.
Mặc định, yêu cầu Andoird SDK 24+ bởi vì zxing:core 3.4.0. Tuy nhiên, nếu muốn sử dụng với SDK 14+ thì chúng ta cần hạ phiên bản của zxing:core xuống 3.3.0 và thêm đoạn mã sau vào AndroidManifest.xml
<uses-sdk tools:overrideLibrary="com.google.zxing.client.android" />
I. Cài đặt
Từ version 4.0.0, chỉ có Andoroid SDK 24+ support và yêu cầu androidx. Thêm đoạn mã sau vào file build.gradle:
repositories {
    jcenter()
}

dependencies {
    implementation 'com.journeyapps:zxing-android-embedded:4.0.0'
    implementation 'androidx.appcompat:appcompat:1.0.2'
}

android {
    buildToolsVersion '28.0.3' // Older versions may give compile errors
}
Với Android SDK 14+, hạ version zxing:core xuống 3.3.0 hoặc thấp hơn:
repositories {
    jcenter()
}

dependencies {
    implementation('com.journeyapps:zxing-android-embedded:3.6.0') { transitive = false }
    implementation 'androidx.appcompat:appcompat:1.0.2'
    implementation 'com.google.zxing:core:3.3.0'
}

android {
    buildToolsVersion '28.0.3'
}
II. Sử dụng
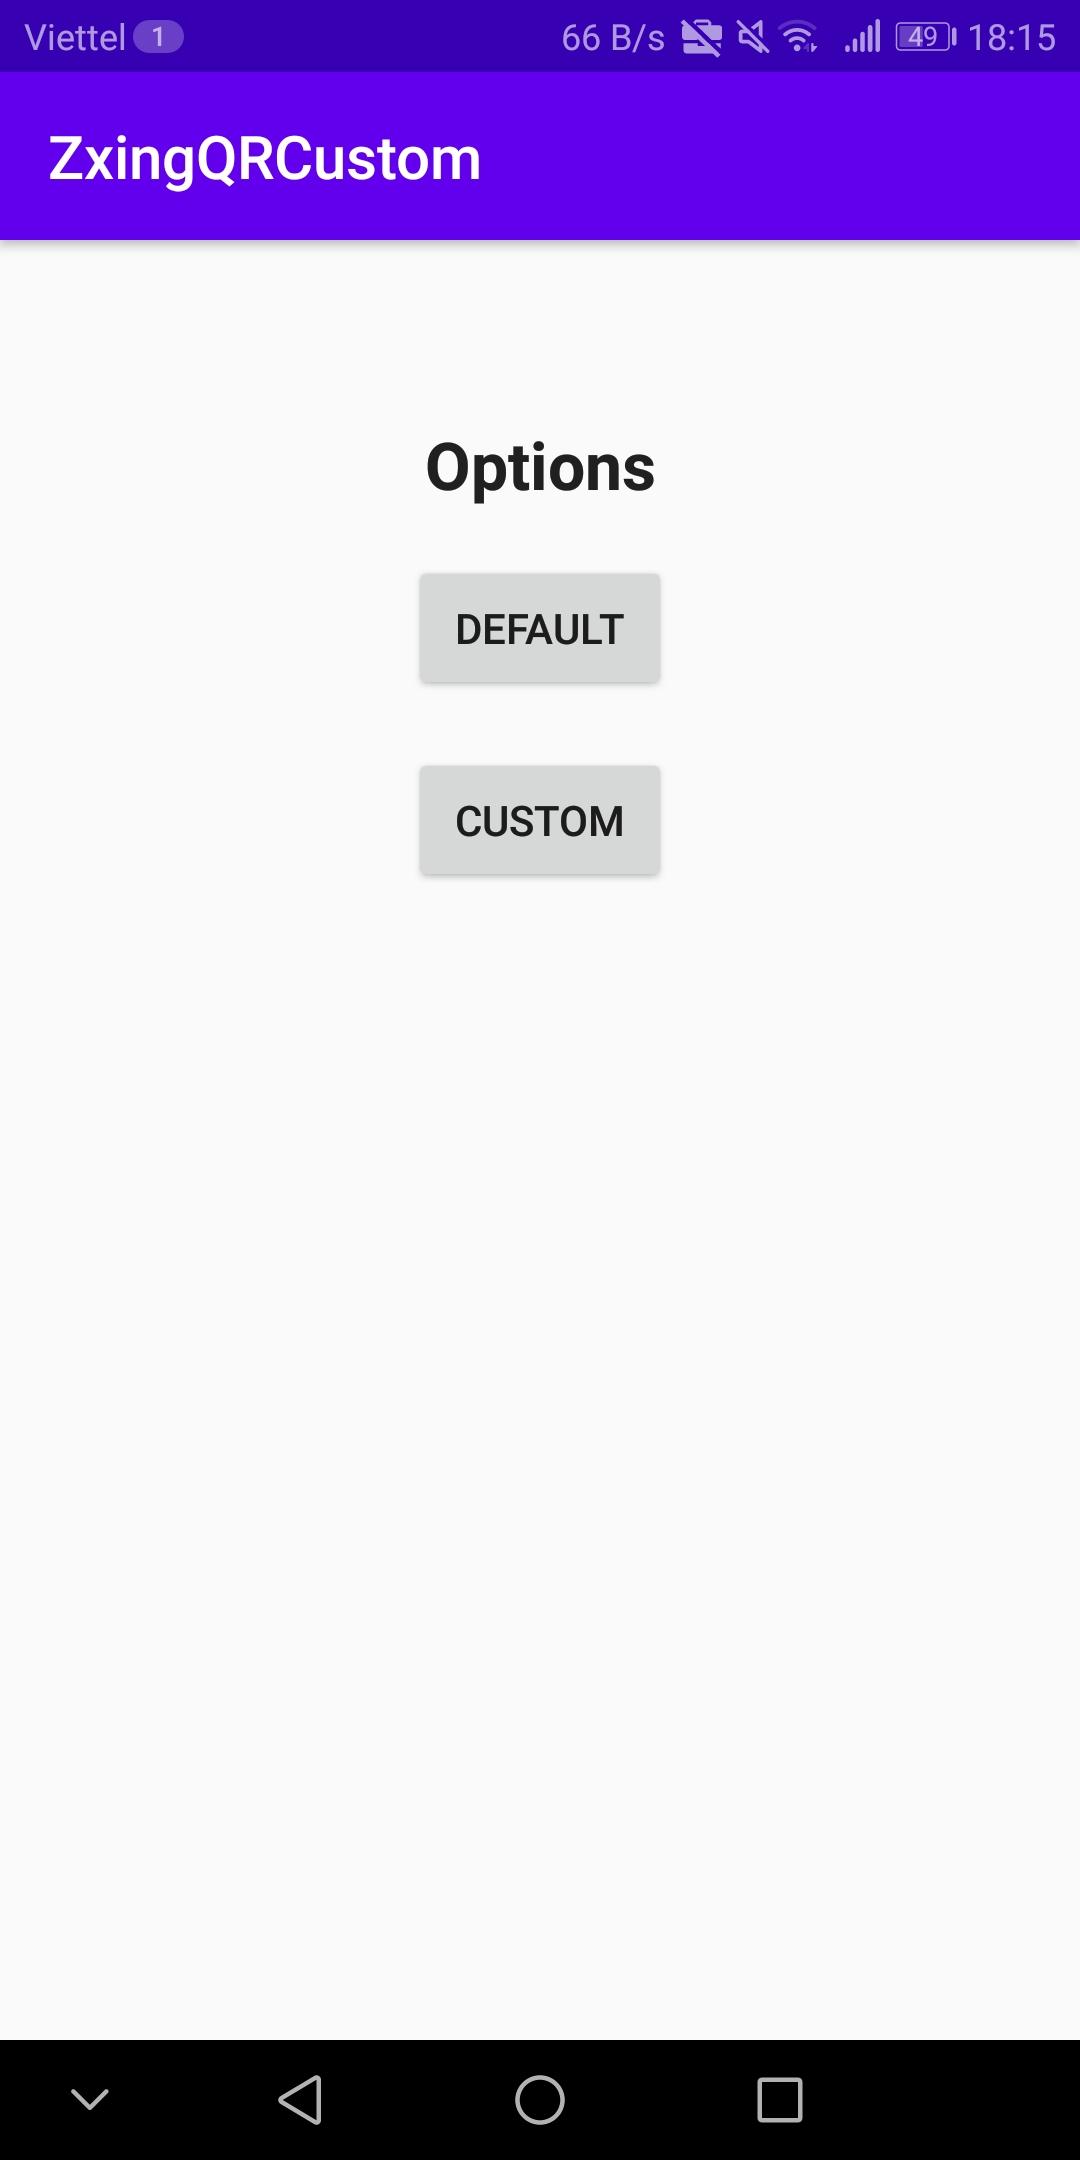
Để dễ theo dõi nội dung bài viết hơn thì bạn xem source code tại đây. Mình sẽ demo 2 options: Default ScanView và Custom ScanView. Mình code trên Android Studio 4.0 nên nếu bạn nào dùng phiên bản thấp hơn thì copy source sang mới chạy được nhé.

Content: "Scan demo"
1. Default ScanView
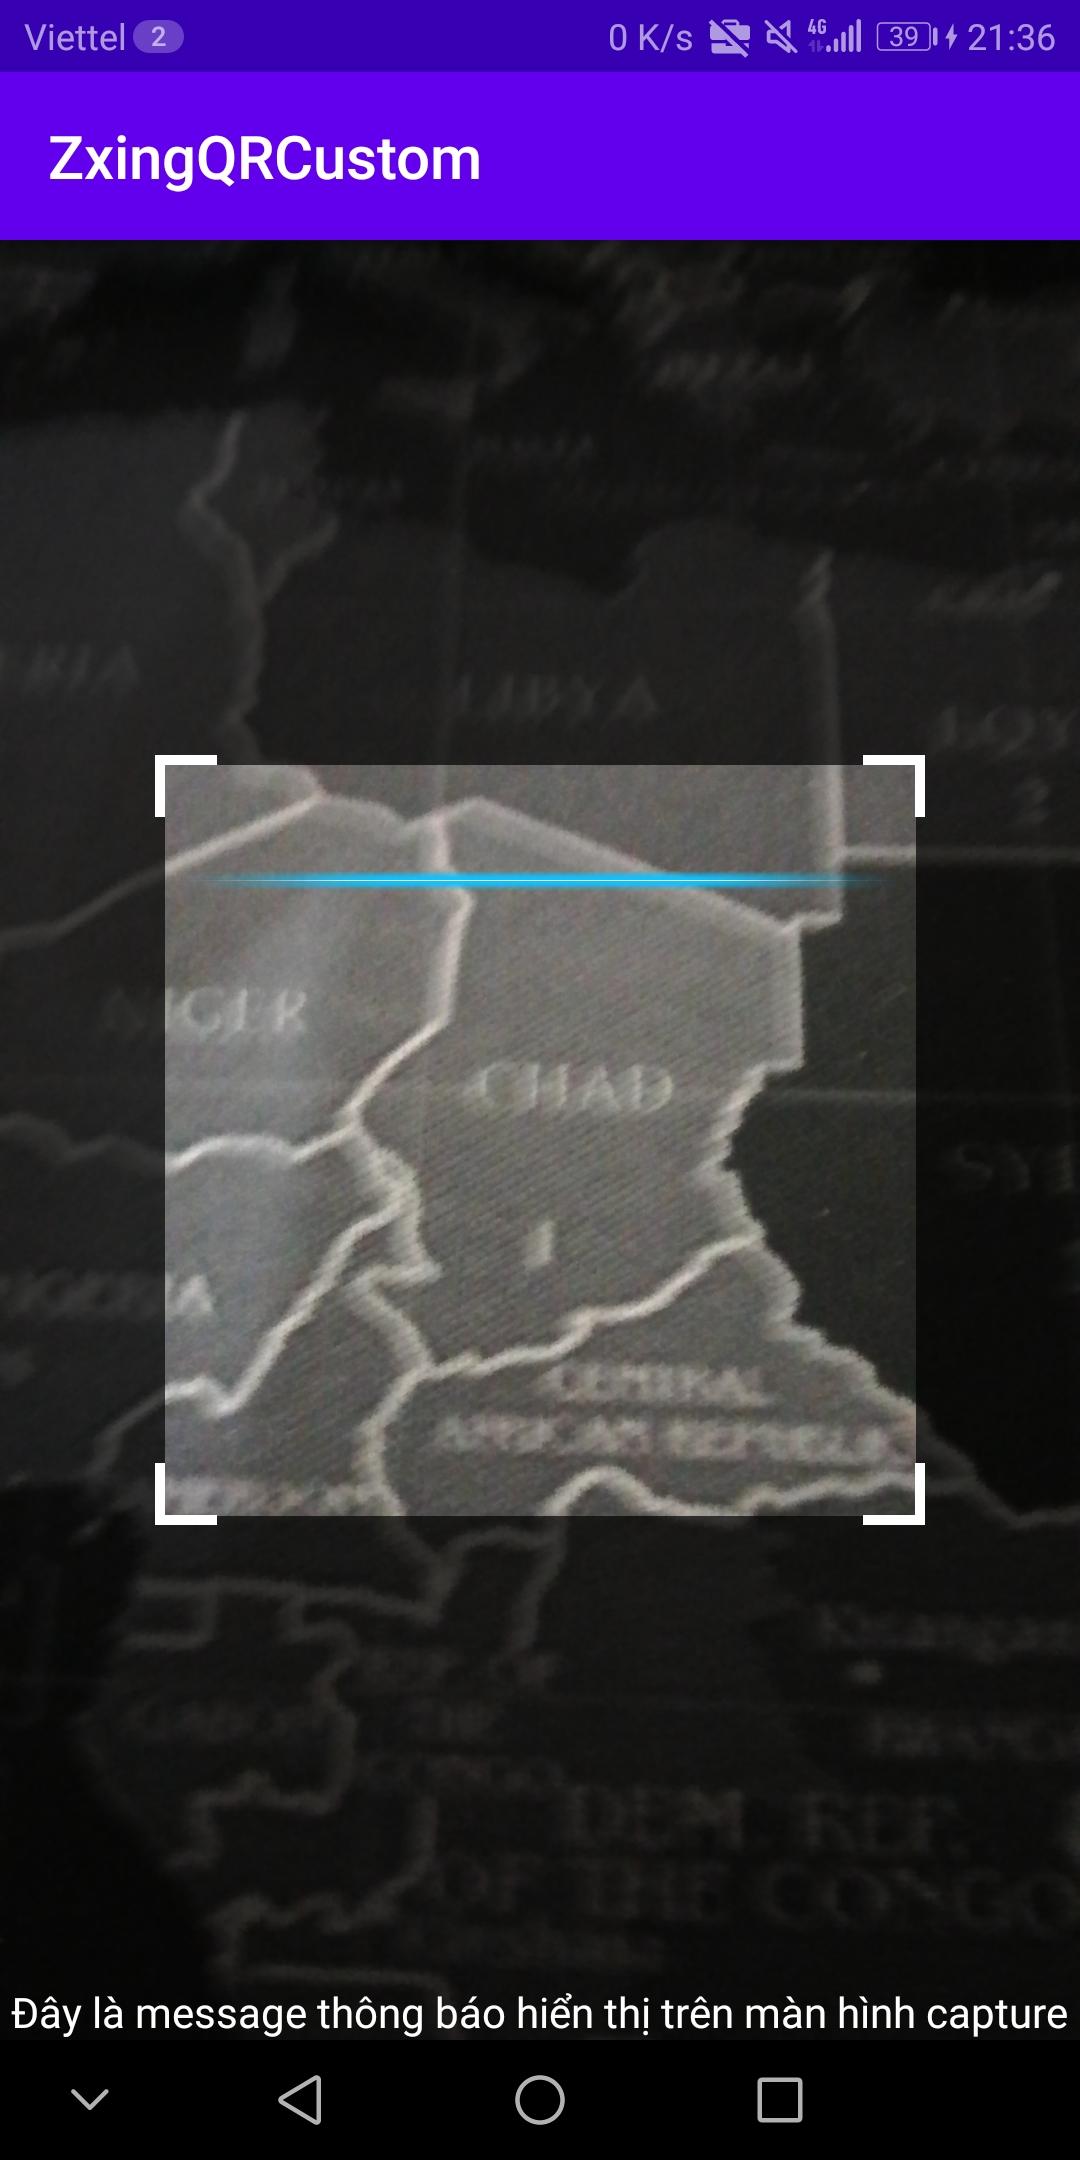
Với việc sử dụng default ScanView, chúng ta có thể start thông qua IntentIntegrator:
        btnDefault.setOnClickListener {
            IntentIntegrator(this).apply {
                setDesiredBarcodeFormats(IntentIntegrator.QR_CODE) //Chọn type của BarCode
                setPrompt("Đây là message thông báo hiển thị trên màn hình capture")
                setCameraId(0) //Id của camera sử dụng để thực hiện scan
                setBeepEnabled(false) //Âm thanh khi thực hiện scan
                setOrientationLocked(false) //cố đinh chiều của camera
                //vân vân và mây mây
                initiateScan() //bắt đầu scan
            }
        }
và để nhận kết quả từ scanner thì chúng ta sử IntentIntegrator trong onActivityResult để parse data:
    override fun onActivityResult(requestCode: Int, resultCode: Int, data: Intent?) {
        super.onActivityResult(requestCode, resultCode, data)
        val result = IntentIntegrator.parseActivityResult(requestCode, resultCode, data)
        result?.let {
            Toast.makeText(this, result.contents, Toast.LENGTH_LONG).show() // result.contents là nội dung scan được
        }
    }
Rất đơn giản đúng không ạ? Kết quả:
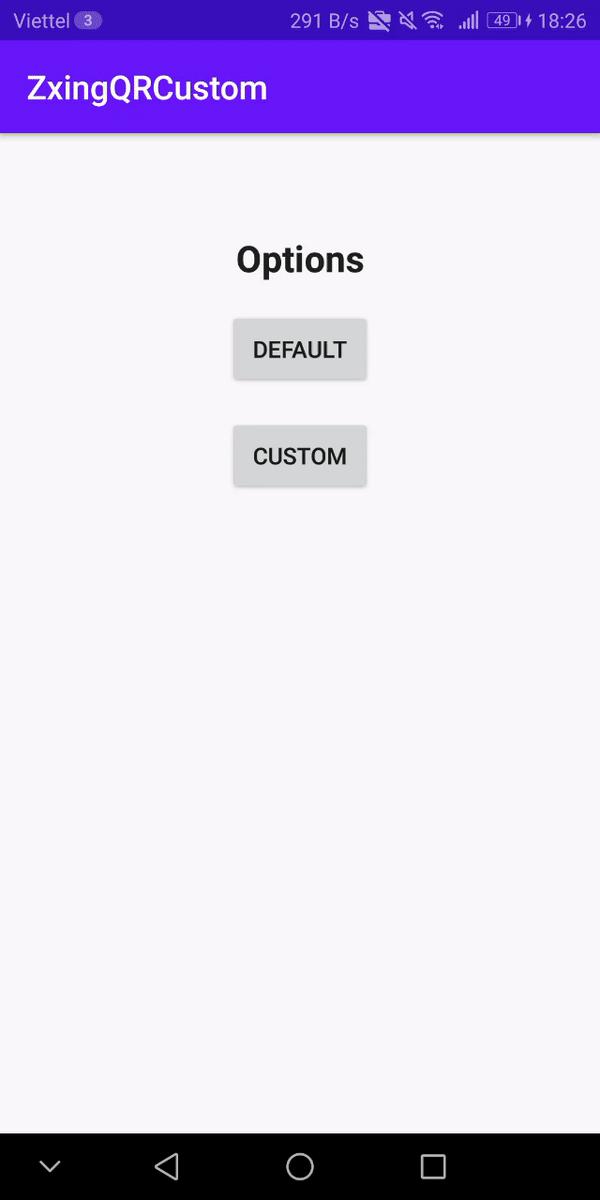
2. Custom ScanView
Ở phần này chúng ta sẽ thực hiện custom scan view giống như hình bên dưới:
Và cùng phân tích:
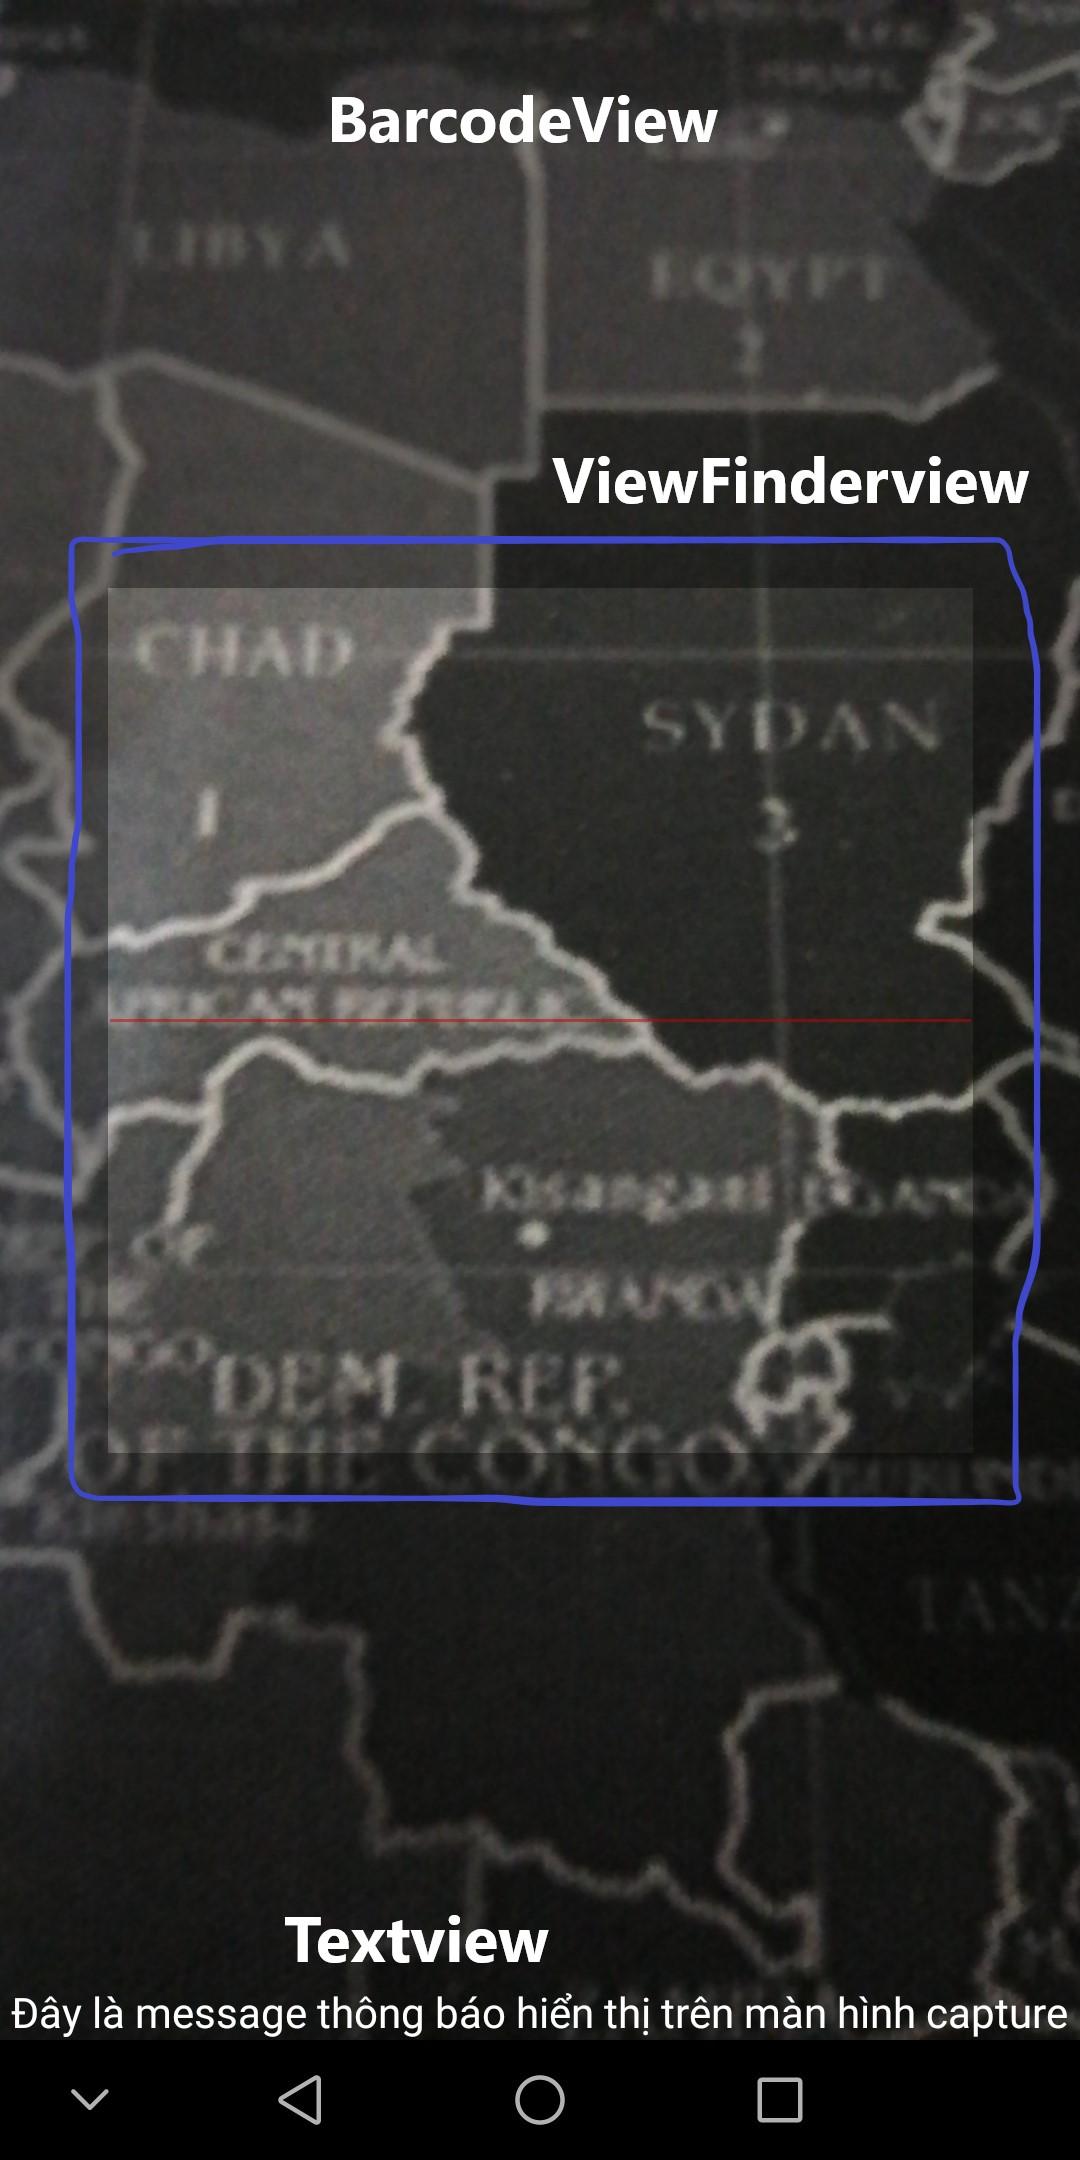
Như vậy thì ở phần này chúng ta sẽ custom lại ViewfinderView
Chúng ta cần tạo ra 1 class impl lại ViewfinderView của zxing. Do phần source code cũng tương đối dài nhưng thôi chịu khó tí nhé.
Ở đây mình chỉ custom lại phần scanline và border của Viewfinderview nên mấy chỗ còn lại thì cứ nhái nhái lại ViewfinderView của zxing thôi 
class CustomViewfinderView(context: Context?, attrs: AttributeSet?) :
    ViewfinderView(context, attrs) {
 private var scanLineTop = 0
 private var scanLightHeight = 30

    override fun onDraw(canvas: Canvas?) {

        refreshSizes()
        if (framingRect == null || previewFramingRect == null) {
            return
        }

        paint.color = if (paint != null) resultColor else maskColor

        val frame = framingRect
        val previewFrame = previewFramingRect

        val frameTop = frame.top.toFloat()
        val frameBottom = frame.bottom.toFloat()
        val frameLeft = frame.left.toFloat()
        val frameRight = frame.right.toFloat()

        val width = width.toFloat()
        val height = height.toFloat()

        canvas?.apply {
            drawRect(0f, 0f, width, frameTop, paint)
            drawRect(0f, frameTop, frameLeft, frameBottom + 1, paint)
            drawRect(frameRight + 1, frameTop, width, frameBottom + 1, paint)
            drawRect(0f, frameBottom + 1, width, height, paint)
        }

        canvas?.let { canvas ->
            if (resultBitmap != null) {
                paint.alpha = CURRENT_POINT_OPACITY
                canvas.drawBitmap(resultBitmap, null, frame, paint)
            } else {
                //Vẽ viền
                drawFrameBounds(canvas, frame)
                //vẽ đường scan
                drawScanLight(canvas, frame)

                val scaleX = frame.width() / previewFrame.width()
                val scaleY = frame.height() / previewFrame.height()

                val currentPossible = possibleResultPoints
                val currentLast = lastPossibleResultPoints

                if (currentPossible.isEmpty()) {
                    lastPossibleResultPoints = null
                } else {
                    possibleResultPoints = ArrayList<ResultPoint>(5)
                    lastPossibleResultPoints = currentPossible

                    paint.apply {
                        alpha = CURRENT_POINT_OPACITY
                        color = resultPointColor
                    }
                    currentPossible.forEach { point ->
                        canvas.drawCircle(
                            frameLeft + (point.x * scaleX),
                            frameTop + (point.y * scaleY),
                            POINT_SIZE.toFloat(), paint
                        )
                    }
                }

                currentLast?.let {
                    paint.apply {
                        alpha = CURRENT_POINT_OPACITY / 2
                        color = resultPointColor
                    }

                    val radius = POINT_SIZE / 2.0f

                    currentLast.forEach { point ->
                        canvas.drawCircle(
                            frameLeft + (point.x * scaleX),
                            frameTop + (point.y * scaleY),
                            radius, paint
                        )
                    }
                }

                //vẽ lại scanline
                postInvalidateDelayed(
                    ANIMATION_DELAY,
                    frameLeft.toInt() - POINT_SIZE,
                    frameTop.toInt() - POINT_SIZE,
                    frameRight.toInt() + POINT_SIZE,
                    frameBottom.toInt() + POINT_SIZE
                )
            }
        }
    }
    }
Vẽ các góc của ViewfinderView
   /**
     * Vẽ đường viền khung - 4 góc của khung quét
     *
     * @param canvas
     * @param frame
     */
    private fun drawFrameBounds(canvas: Canvas, frame: Rect) {

        val frameTop = frame.top.toFloat()
        val frameBottom = frame.bottom.toFloat()
        val frameLeft = frame.left.toFloat()
        val frameRight = frame.right.toFloat()

        paint.color = Color.parseColor("#ffffff")
        paint.style = Paint.Style.FILL
        paint.strokeWidth = 1f
        //chiều dài/rộng của các góc
        val width: Int = frame.width()
        val corLength = (width * 0.07).toInt()
        var corWidth = (corLength * 0.2).toInt()
        corWidth = if (corWidth > 15) 15 else corWidth

        canvas.apply {
            //trên - trái
            drawRect(frameLeft - corWidth, frameTop, frameLeft, frameTop + corLength, paint)
            drawRect(
                frameLeft - corWidth,
                frameTop - corWidth,
                frameLeft + corLength,
                frameTop,
                paint
            )
            // trên - phải
            drawRect(frameRight, frameTop, frameRight + corWidth, frameTop + corLength, paint)
            drawRect(
                frameRight - corLength,
                frameTop - corWidth,
                frameRight + corWidth,
                frameTop,
                paint
            )
            // dưới - trái
            drawRect(frameLeft - corWidth, frameBottom - corLength, frameLeft, frameBottom, paint)
            drawRect(
                frameLeft - corWidth,
                frameBottom,
                frameLeft + corLength,
                frameBottom + corWidth,
                paint
            )
            // dưới - phải
            drawRect(frameRight, frameBottom - corLength, frameRight + corWidth, frameBottom, paint)
            drawRect(
                frameRight - corLength,
                frameBottom,
                frameRight + corWidth,
                frameBottom + corWidth,
                paint
            )
        }
    }
Vẽ scan line trông cho nó xịn xò
/**
     * Vẽ đường quét
     *
     * @param canvas
     * @param frame
     */
     val SCAN_VELOCITY = 10 // tốc độ của của scan line
    private fun drawScanLight(canvas: Canvas, frame: Rect) {
        paint.color = laserColor
        paint.alpha = 250
        if (scanLineTop == 0 || scanLineTop + SCAN_VELOCITY >= frame.bottom) {
            scanLineTop = frame.top
        } else {
            scanLineTop += SCAN_VELOCITY // thay đổi vị trí của scan line
        }
        val scanRect = Rect(
            frame.left, scanLineTop, frame.right,
            scanLineTop + scanLightHeight
        )
        val scanLight: Bitmap = BitmapFactory.decodeResource(resources, R.drawable.scan_line)
        canvas.drawBitmap(scanLight, null, scanRect, paint)
    }
Tiếp theo, chúng ta sẽ tạo custom_barcode_scanner.xml & activity_custom.xml để chứa phần custom view của chúng ta:
custom_barcode_scanner.xml
<merge xmlns:android="http://schemas.android.com/apk/res/android"
    xmlns:app="http://schemas.android.com/apk/res-auto">

    <com.journeyapps.barcodescanner.BarcodeView
        android:layout_width="match_parent"
        android:layout_height="match_parent"
        android:id="@+id/zxing_barcode_surface"
        app:zxing_framing_rect_width="250dp"
        app:zxing_framing_rect_height="250dp"/>

    <com.canh.zxingqrcustom.CustomViewfinderView
        android:layout_width="match_parent"
        android:layout_height="match_parent"
        android:id="@+id/zxing_viewfinder_view"
        app:zxing_possible_result_points="@color/zxing_custom_possible_result_points"
        app:zxing_result_view="@color/zxing_custom_result_view"
        app:zxing_viewfinder_laser="@color/zxing_custom_viewfinder_laser"
        app:zxing_viewfinder_mask="@color/zxing_custom_viewfinder_mask"/>

    <TextView
        android:id="@+id/zxing_status_view"
        android:layout_width="wrap_content"
        android:layout_height="wrap_content"
        android:layout_gravity="bottom|center_horizontal"
        android:background="@color/zxing_transparent"
        android:text="@string/zxing_msg_default_status"
        android:textColor="@color/zxing_status_text"/>

</merge>
activity_custom.xml
<?xml version="1.0" encoding="utf-8"?>
<LinearLayout xmlns:android="http://schemas.android.com/apk/res/android"
    xmlns:app="http://schemas.android.com/apk/res-auto"
    android:layout_width="match_parent"
    android:layout_height="match_parent"
    android:gravity="center_horizontal"
    android:orientation="vertical">

    <com.journeyapps.barcodescanner.DecoratedBarcodeView
        android:id="@+id/bcScanner"
        android:layout_width="match_parent"
        android:layout_height="match_parent"
        app:zxing_scanner_layout="@layout/custom_barcode_scanner" />
</LinearLayout>
CustomActivity.class
import android.os.Bundle
import android.view.KeyEvent
import androidx.appcompat.app.AppCompatActivity
import com.journeyapps.barcodescanner.CaptureManager
import com.journeyapps.barcodescanner.DecoratedBarcodeView
import kotlinx.android.synthetic.main.activity_custom.*

class CustomActivity : AppCompatActivity() {
    private lateinit var capture: CaptureManager

    override fun onCreate(savedInstanceState: Bundle?) {
        super.onCreate(savedInstanceState)
        setContentView(R.layout.activity_custom)
        capture = CaptureManager(this, bcScanner )
        capture.apply {
            initializeFromIntent(intent, savedInstanceState)
            decode()
        }
    }

    override fun onResume() {
        super.onResume()
        capture.onResume()
    }

    override fun onPause() {
        super.onPause()
        capture.onPause()
    }

    override fun onDestroy() {
        capture.onDestroy()
        super.onDestroy()
    }

    override fun onSaveInstanceState(outState: Bundle) {
        super.onSaveInstanceState(outState)
        capture.onSaveInstanceState(outState)
    }

    override fun onRequestPermissionsResult(
        requestCode: Int,
        permissions: Array<out String>,
        grantResults: IntArray
    ) {
        capture.onRequestPermissionsResult(requestCode, permissions, grantResults)
    }

    override fun onKeyDown(keyCode: Int, event: KeyEvent?): Boolean {
        return bcScanner.onKeyDown(keyCode, event) || super.onKeyDown(keyCode, event)
    }
}
Cuối cùng cũng xong. Bước cuối cùng là start nó thôi.
        btnCustom.setOnClickListener {
            IntentIntegrator(this).apply {
                captureActivity = CustomActivity::class.java // activity custom để thực hiện scan.
                setDesiredBarcodeFormats(IntentIntegrator.QR_CODE)
                setPrompt("Đây là message thông báo hiển thị trên màn hình capture")
                setCameraId(0)
                setBeepEnabled(false)
                setOrientationLocked(false)
                initiateScan()
            }
        }
Sau khi đưa cả project vào bài viết. Thì mình xin kết thúc bài viết của mình ở đây. Trên kia chỉ là 2 ví dụ nhỏ mà chúng ta có thể áp dụng nhờ sử dụng lib zxing. Ngoài ra còn có thể tạo ra nhiều custom view khác, cũng như generate mã QR, barcode chứ không chỉ đọc.
Cảm ơn các bạn đã dành thời gian đọc bài viết (bow)
All rights reserved
